


High Quality (and Safe) Copper Plating


I'm an Electrical Engineer who dabbles in just about everything. By trade, I'm a controls engineer and design machines for the largest manufacturing plants in the world. At home, I make a lot of embedded systems projects and tinker with my CNC machine and 3D printer.
There are a few copper electroplating methods on here, but they are either dangerous, provide very low quality results, or cost an arm and a leg. Your plated object should be a brilliant, shiny red, not blackened, and your pocket book shouldn't be hit hard by chemical costs or hospital bills.
The method I am writing about here is the copper acetate method. Rather than buying copper acetate pre-made, we will make it ourselves.
I wanted this instructable to be as easy as possible, safe as possible, and as cheap as possible.
Copper plating has a variety of uses. Aesthetically, it can be used to create a steampunk look on otherwise ill-fitting metals. Anodizing the object after plating can create brilliant, multicolored objects. Electrically, it creates a highly conductive surface for soldering or use in AC circuits (for the skin effect). It is also frequently used to prepare stubborn materials for other platings such as nickel and silver down the road.
If you like this instructable, but want a silvery finish instead of a copper finish, check out my nickel plating instructable!
https://www.instructables.com/id/High-Quality-and-safe-Nickel-Plating/
On another note, I LOVE your questions! I have noticed that a few folks are asking the same questions, so I've added a "Common Questions" step/slide/section/whatchamacallit at the end of this instructable. Take a look there to get quick answers to most of the questions you might have. If you have a new one, comment below and I'll be happy to answer it and add it to my step/slide/section/whatchamacallit :D
A quick disclaimer - copper acetate, the chemical we will be making, is poisonous. The title "High Quality (and Safe) Copper Plating" is referring more to the fact that you don't need to play with insanely powerful acids that will burn your skin or ask you to open batteries. In the concentrations we will be working with, the process is fairly safe. However, do NOT drink the solution and be sure to wash your hands after plating and properly wipe down any surfaces that come near or into contact with your plating solution. Always supervise kids. That said, enjoy!
Step 1: Materials

You will need a few things, all of which you can get at your local supermarket or find around the house:
Distilled White Vinegar (5% acidity or higher, grocery)
Hydrogen Peroxide (3% or higher, pharmacy)
Cameo Aluminum and Stainless Steel Cleaner (cleaning supplies)
100% Copper scoring pad (cleaning supplies)
Alligator Leads (electrical)
*6V Lantern Battery (camping)
1 pint, wide mouth mason jar (canning supplies)
Paper towels (paper supplies)
Nitrile gloves (cleaning, pharmacy, or DIY)
Note: If you plan on electroplating very large things, you will need to buy a lot of vinegar, hydrogen peroxide, copper, and larger containers. Conversely, you can cover a copper electrode in cotton batting, dip it in the electrolyte solution, and then "paint" the copper on.
You can substitute the copper scoring pads for scrap copper pipe or wire. The one (huge) benefit to using the scoring pads is that they have a very high surface area which will be useful in later steps.
*See my note in the last "step" about the 6V lantern battery. You can replace it with a 1.5V battery or a couple AA's if you'd like or it would save you some money.
Step 2: Creating Your Electrolyte 1/2

The first thing we need to do is create our electrolyte, copper acetate. This chemical solution has positive copper ions that will be attracted to our negative cathodes when we do our electroplating. Please note that copper acetate IS poisonous. Please dedicate a container to it that will never be used for food and thoroughly wash your hands after coming into contact with it.
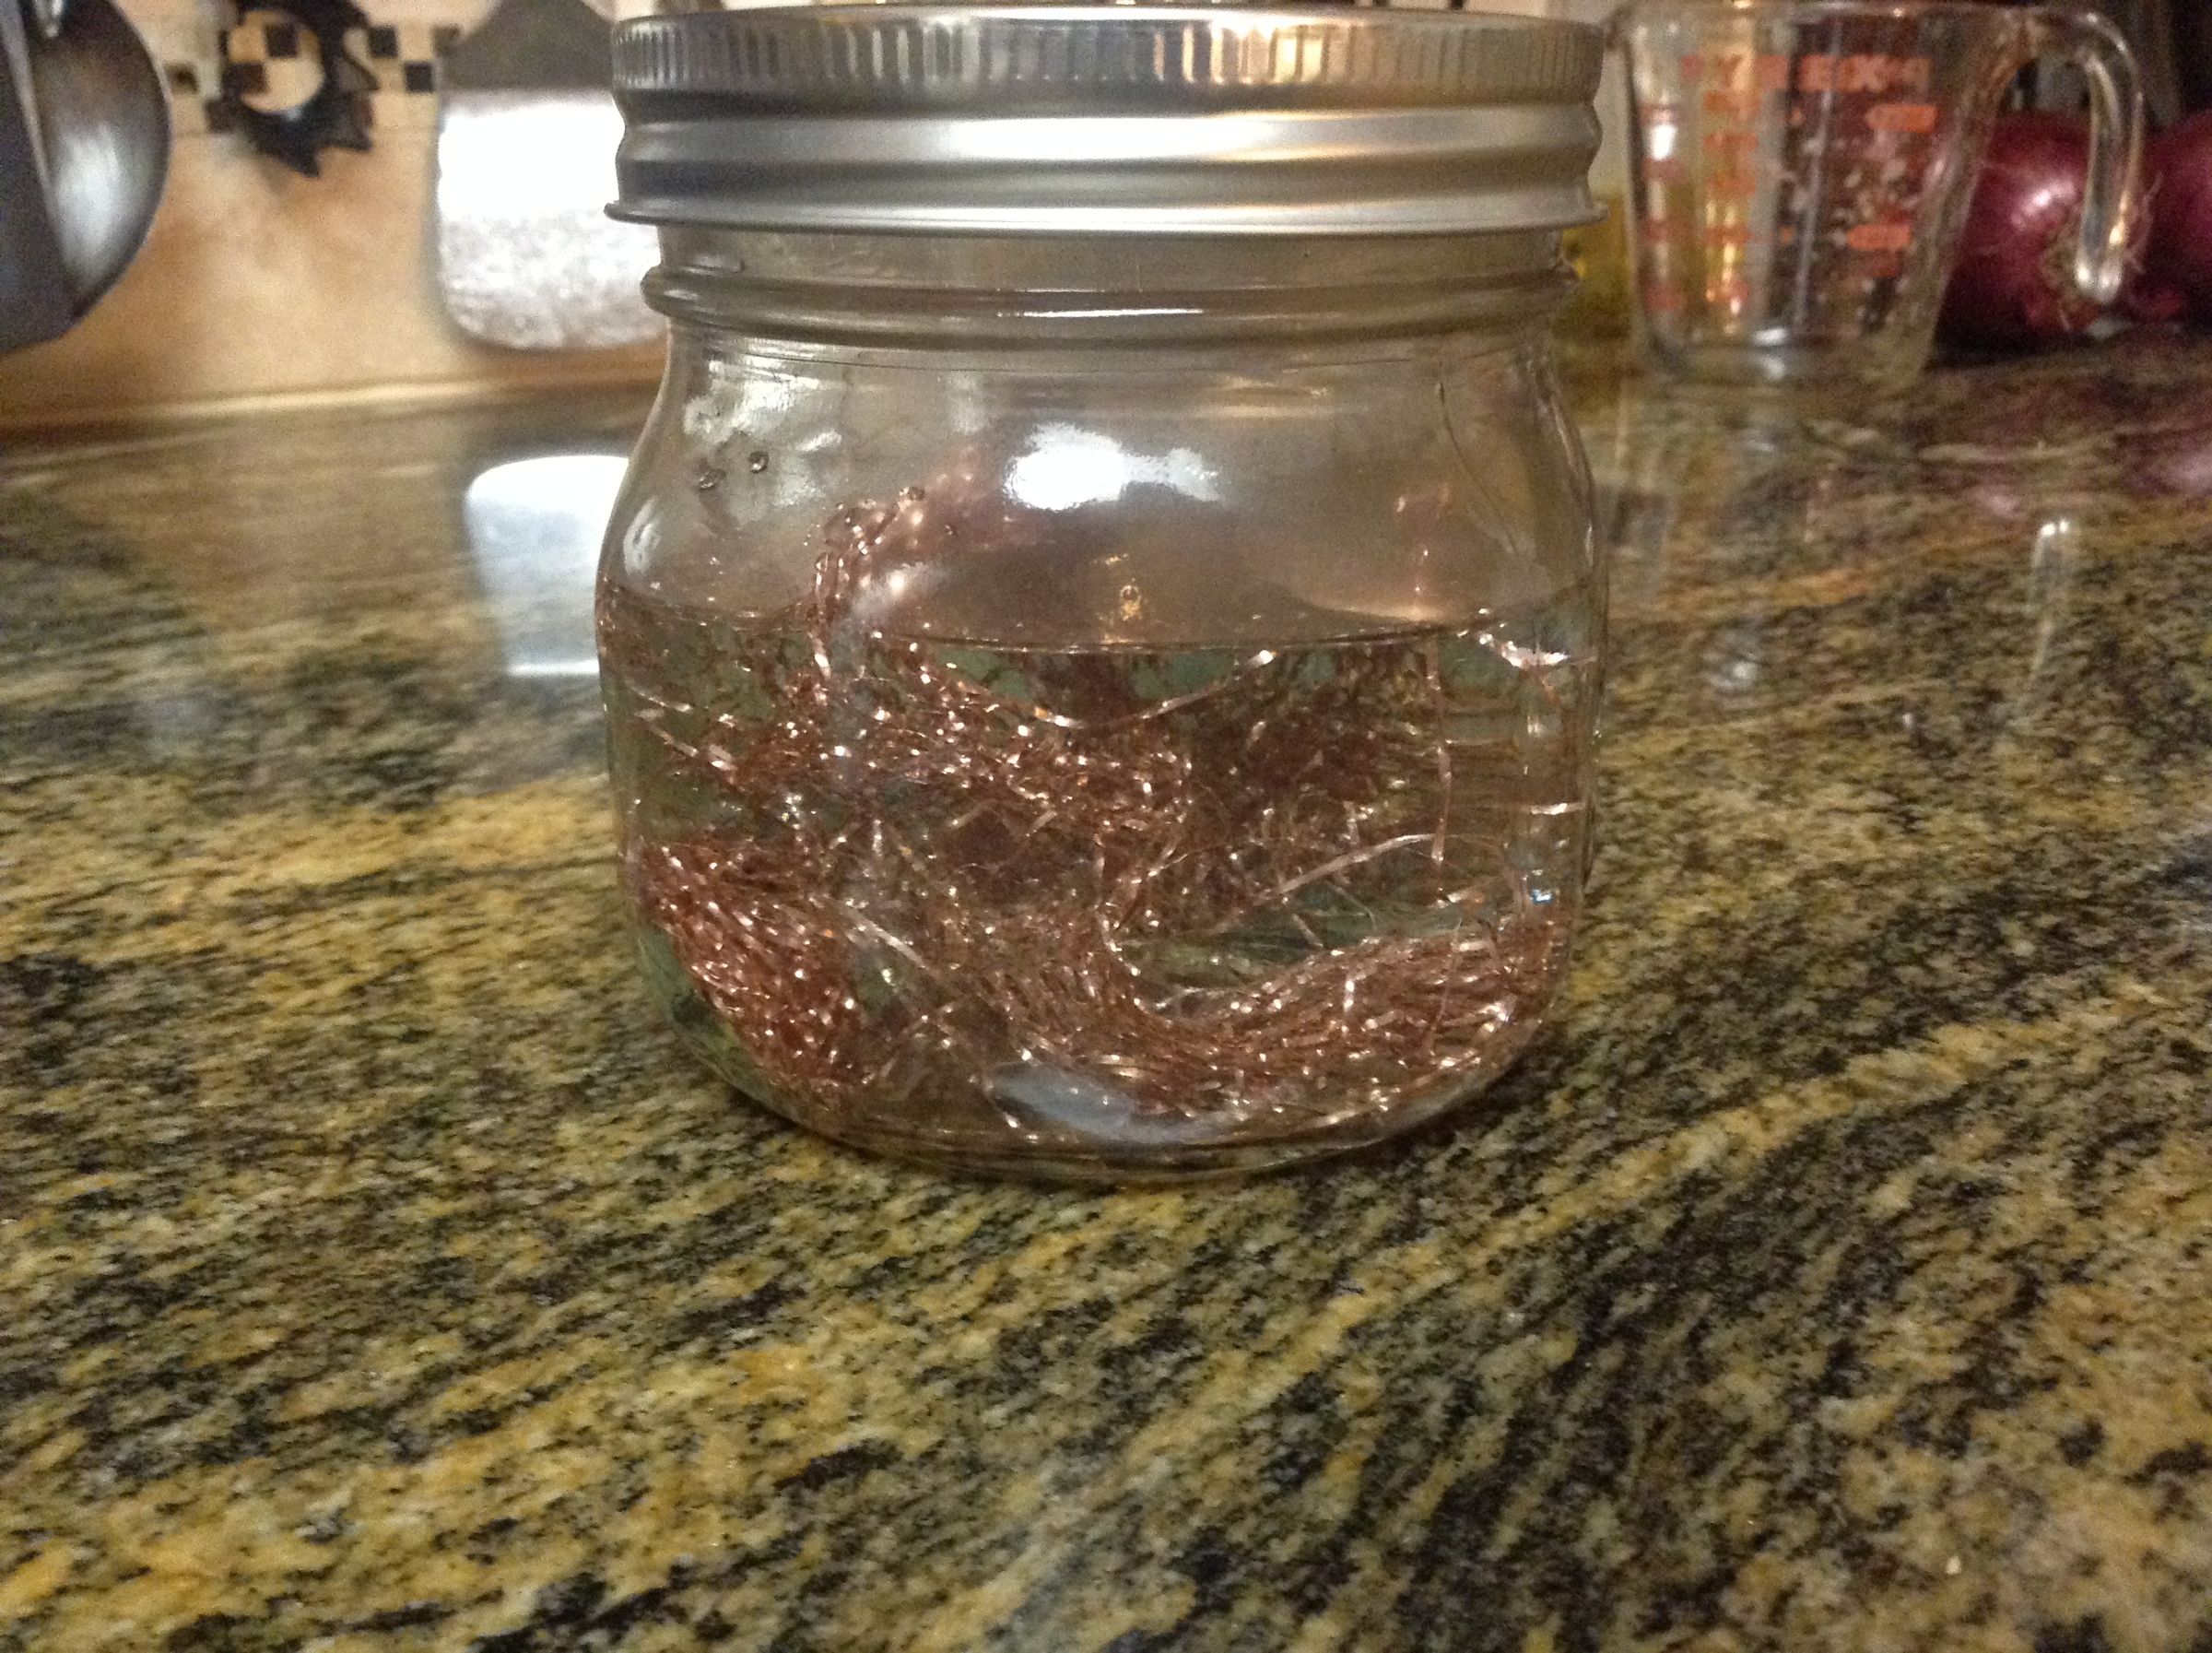
Start off by adding equal parts of distilled vinegar and hydrogen peroxide into your mason jar (ie "half and half"). The ratio does not need to be exact, so feel free to eye the amounts. The hydrogen peroxide will cause the copper to oxidize quickly which then allows the copper to react with the acetic acid rapidly.
Heat the mixture in the microwave until it steams gently. This took about 1 minute, 45 seconds for me. You can also heat your mixture over low heat in a glass (not metal) container. Heating up the mixture will speed up the chemical reaction in the next step.
Step 3: Creating Your Electrolyte 2/2

Before continuing, wash your hands well to remove any oils form your skin. Oils will prevent our vinegar and peroxide mixture from reacting with the copper. Any contaminants on your hands may also soil the solution and give you a poor finish in the plating process.
Stretch out the copper scouring pad and break it into two pieces. We will be using one piece to dissolve into the vinegar and peroxide mixture and the other as an electrode later. The copper "scrubby" material can be quite sharp - you may want to put on a pair of gloves to do this.
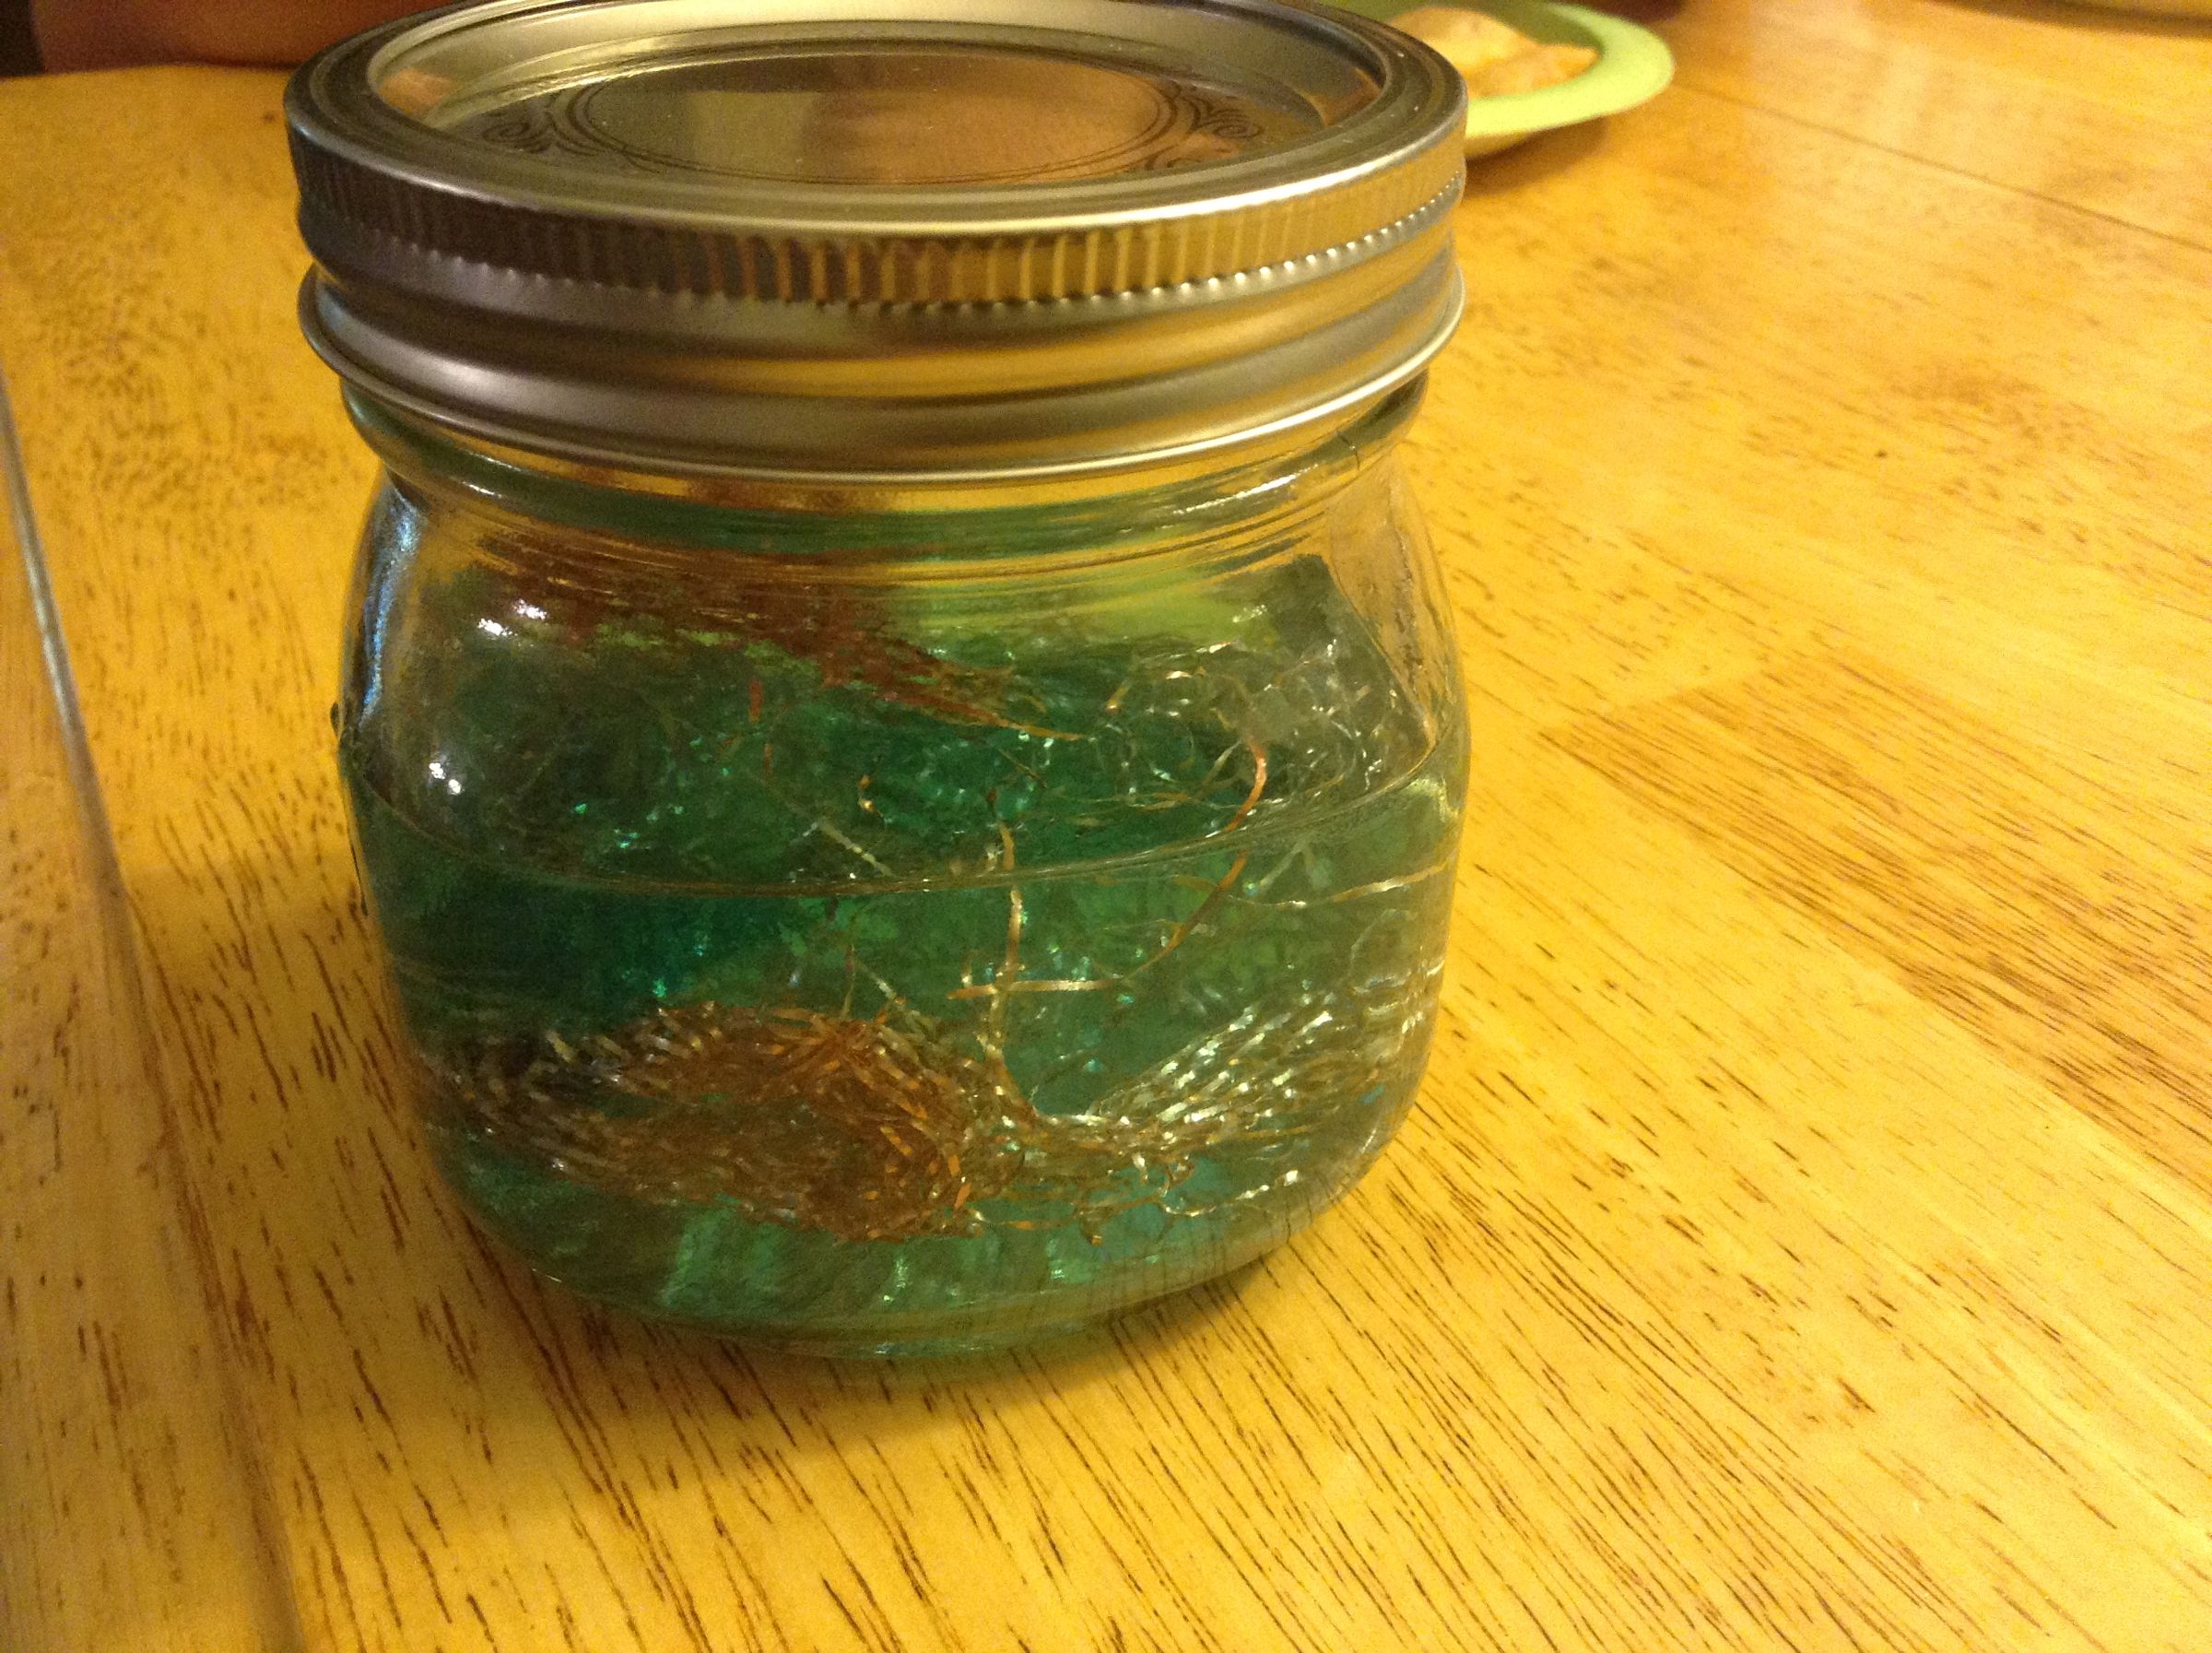
Now place the copper into the warm vinegar/peroxide mixture. Screw on the lid and gently swirl the liquid and copper in the jar. As time passes, the mixture will become more and more blue. The blue color comes from the copper ion in the copper acetate. The longer you leave the copper in the mixture, the more saturated and the more blue the solution will become.
A quick tip her: You do NOT want to have an overly saturated copper acetate solution. In fact, it is far better to have a weaker solution than a stronger one. When we start electroplating, we want the copper atoms to create very thin, even layers on our object. If the copper builds up too fast, it will not adhere well and you will get "burn" spots.
Step 4: Making the Copper Electrode

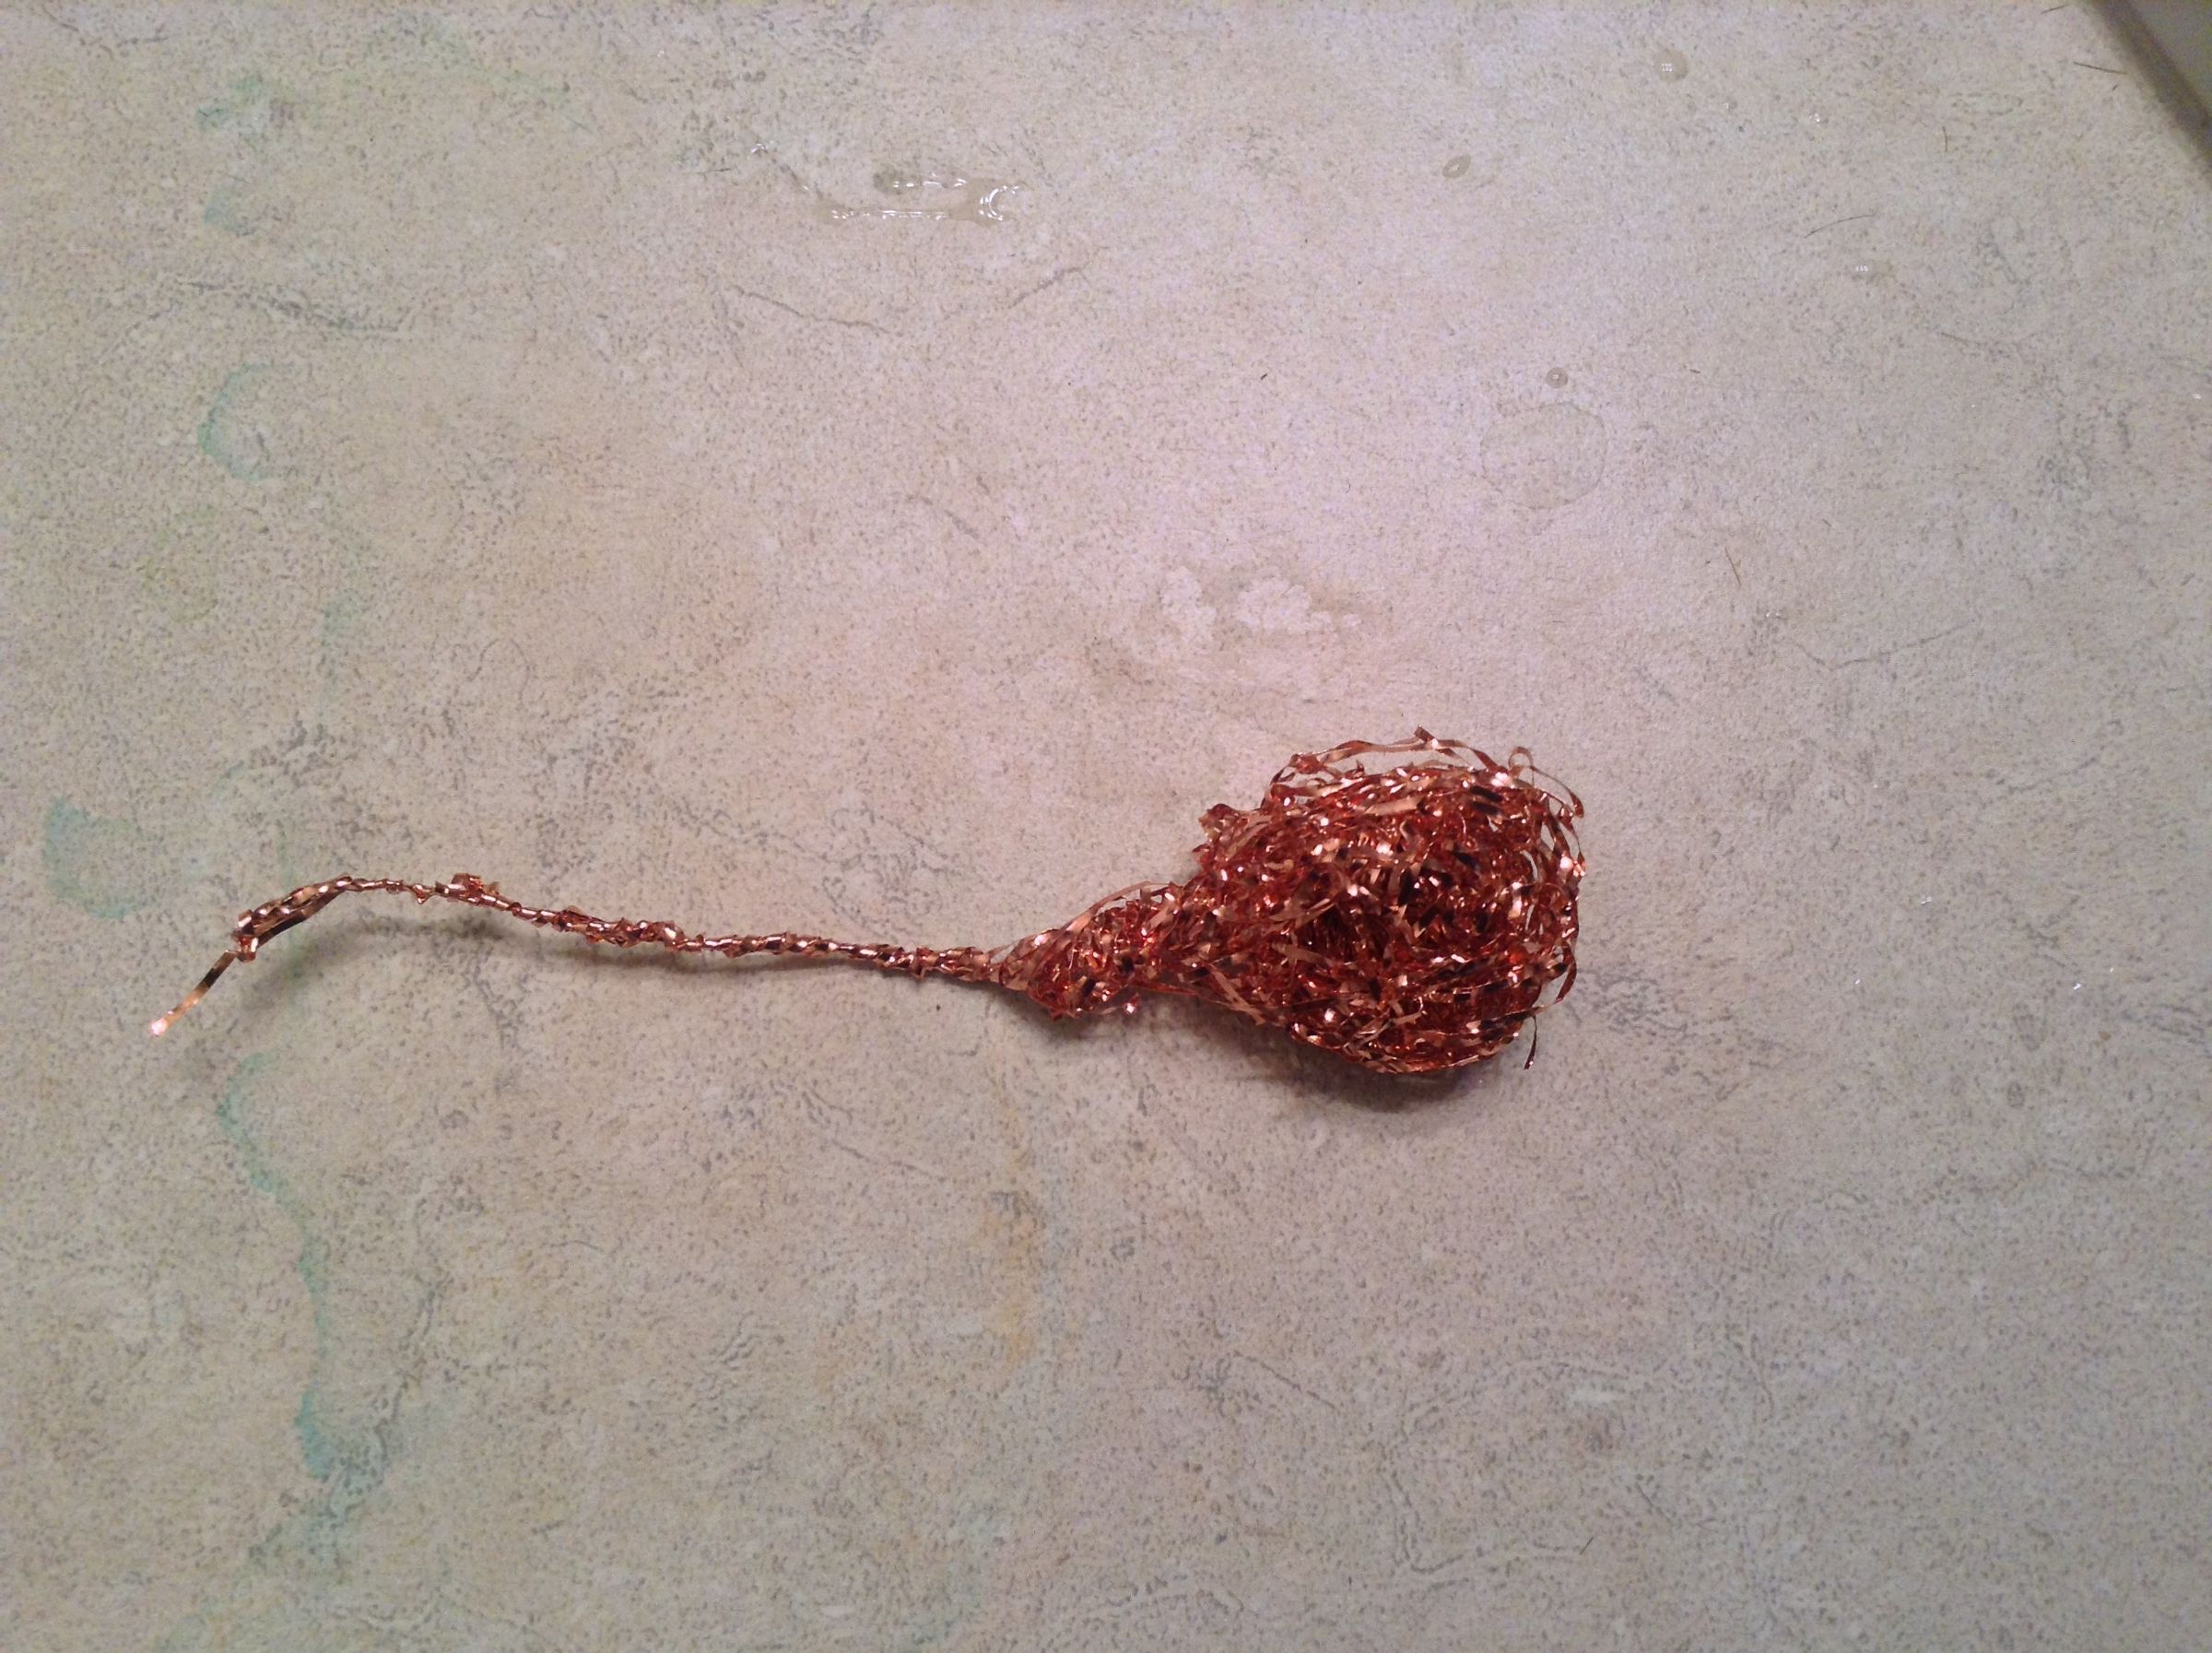
Take a fourth of the copper scoring pad (half of what is left of the one you pulled apart) and create a "teardrop" shape. You want the fatter end to be very tightly packed so that it doesn't float; the electroplating process creates bubbles which can get trapped in your wire mesh. On the thinner end of your copper teardrop, take several strands and twist them into a wire that can stick up and out of your acetate solution. When we start plating, we want to avoid placing the alligator clips into the acetate solution on the anode side. Any metal on the anode side will leech into the electrolyte, contaminate it, and create a very poor end finish.
Take the first alligator lead and clip one end to your newly made copper electrode. Take the other end of the first alligator lead and connect it to the positive terminal on your battery. This is now your "anode". Place your anode into your copper acetate solution as far to one side of the jar as possible.
Step 5: Preparing Your Metal Object for Electroplating

In order to get a good finish, it is VERY important to prep your surfaces. If you don't prep the surface, you will have a splotchy, dark, and uneven finish with dirt marks and even finger prints....not good. You may also get poor adhesion of the plating to the base metal which would allow the plating to flake and rub off if the base metal is not clean.
To prep my surfaces, I like to use Cameo Aluminum and Stainless cleaner. It costs only a couple dollars and works wonders.
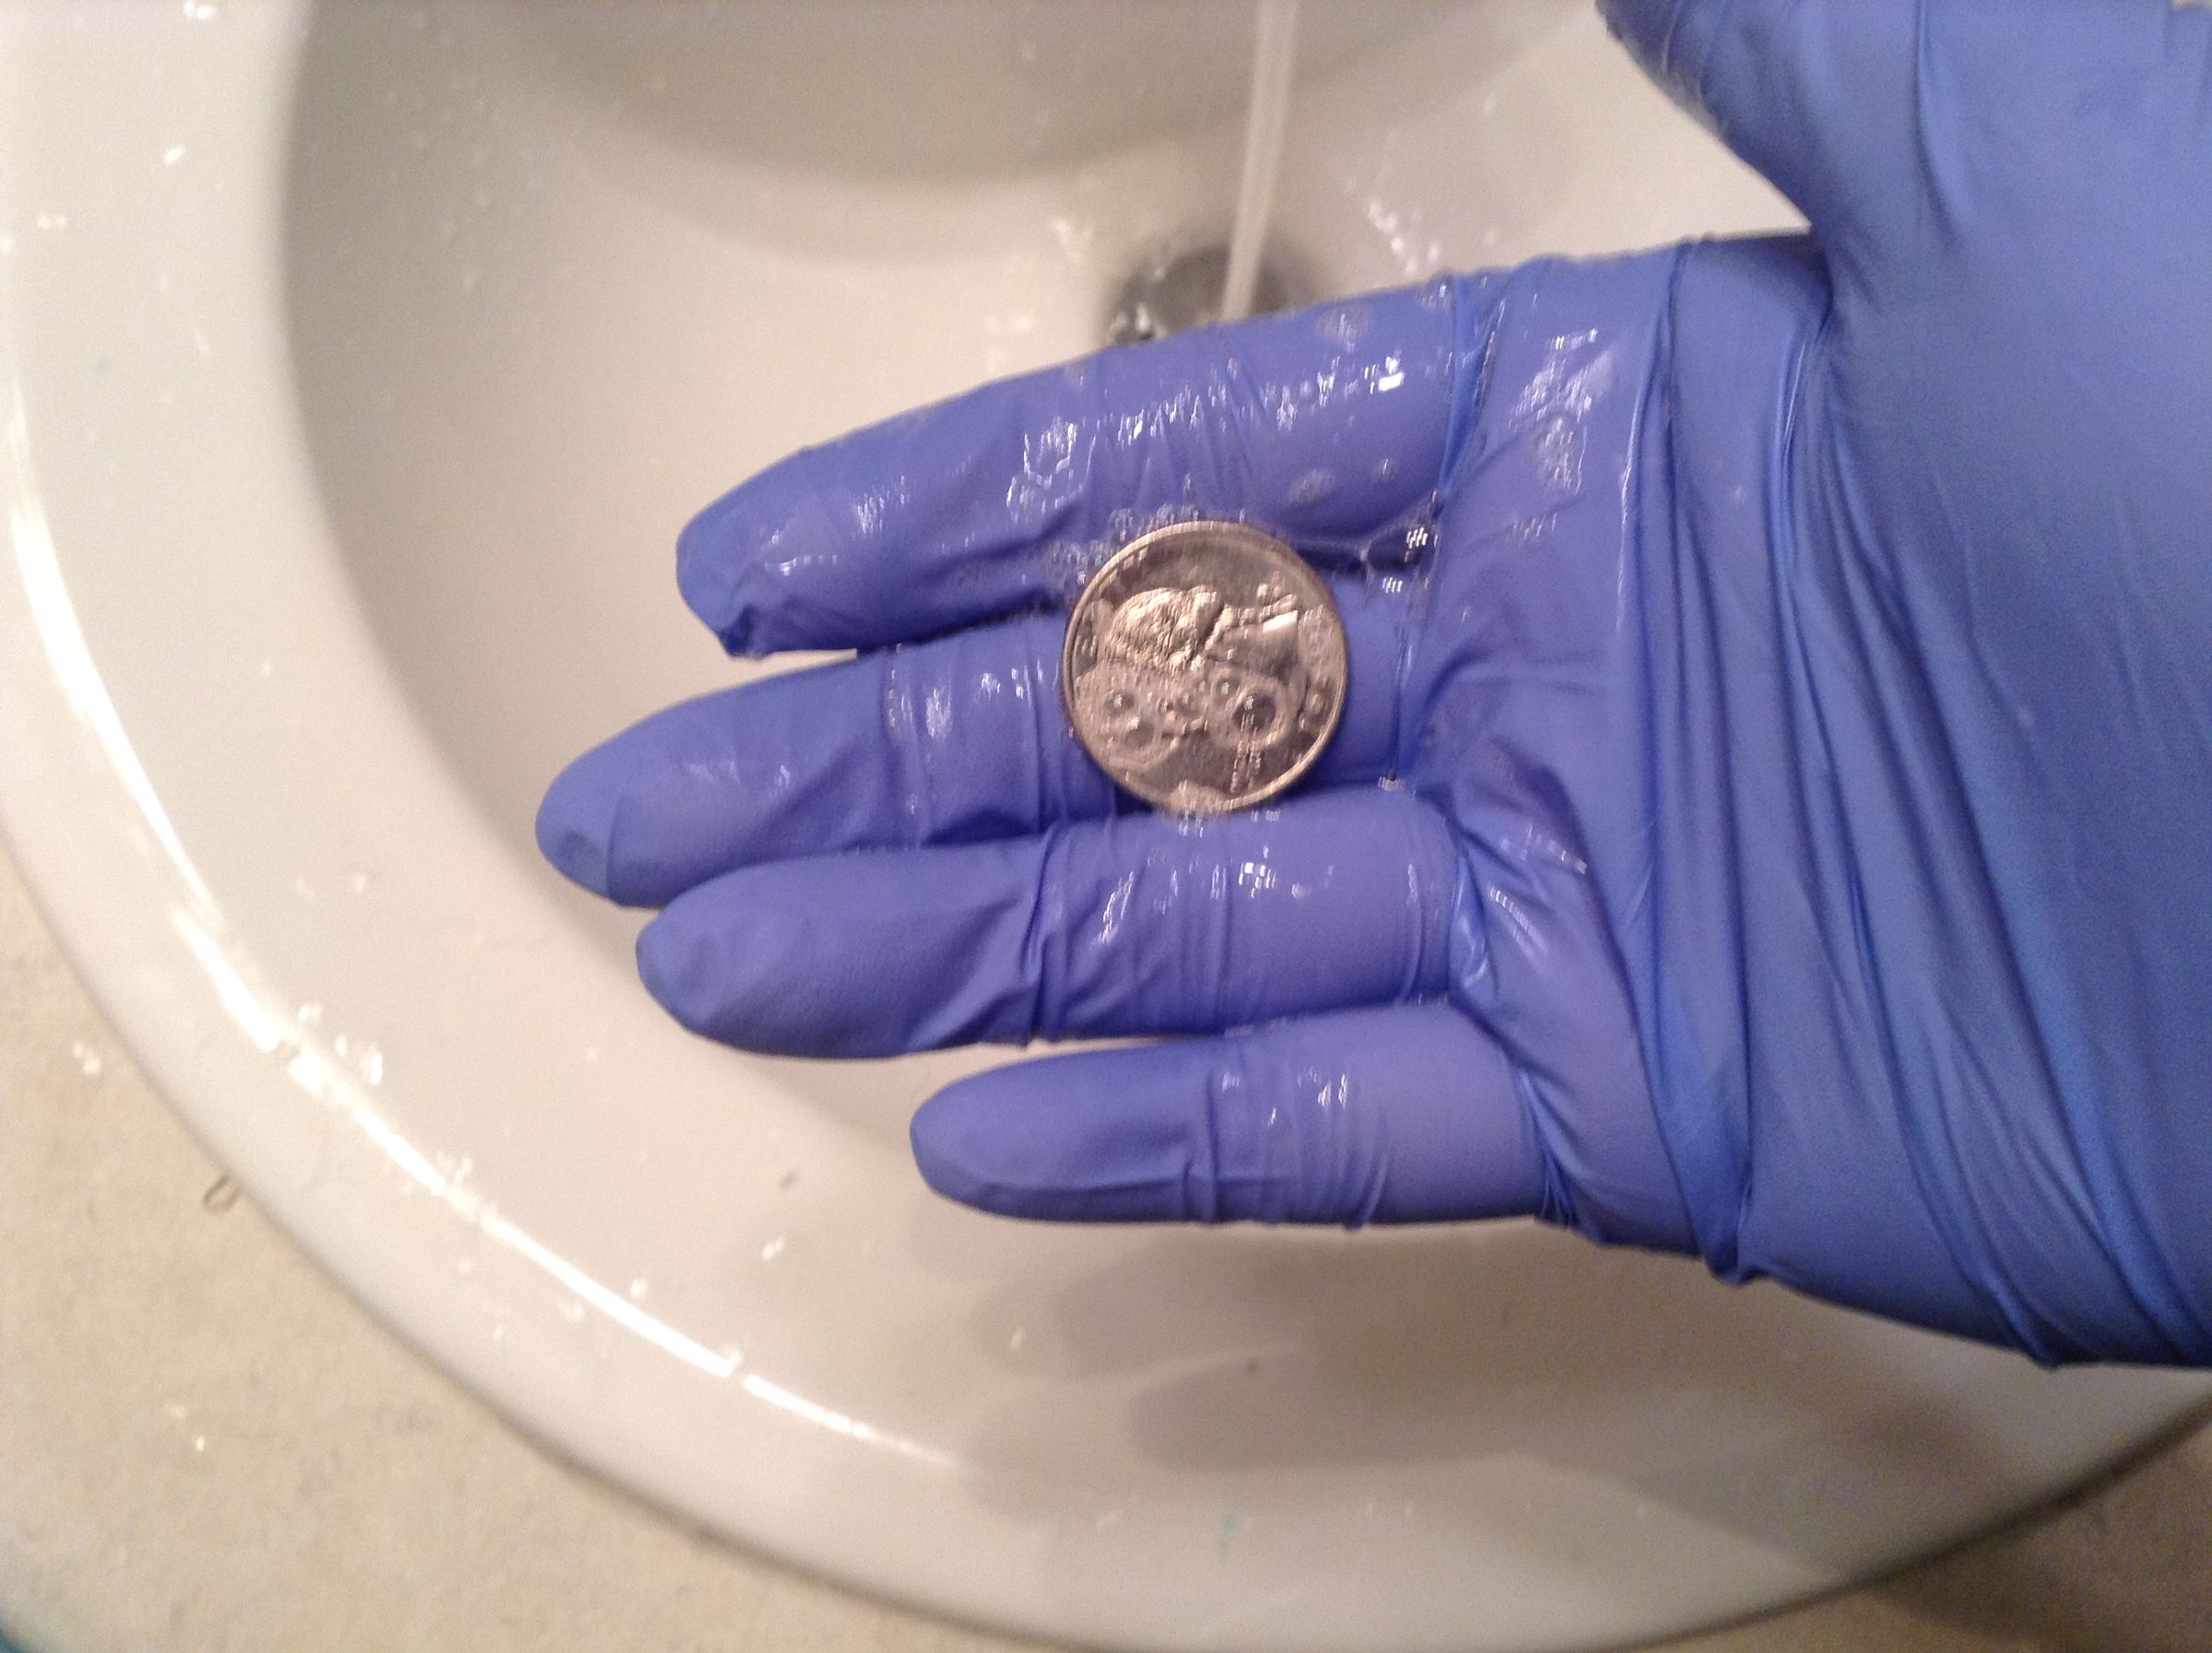
Don your nitrile gloves and grab your object. Apply a small dab of liquid dish soap, scrub, then rinse your object (gloves too). This will remove most of the grease, dirt, and grime from your object. We're not quite done though! We still need to remove oxidation or any tough-stuck gunk from our object.
Combine a small amount of Cameo with a couple drops of water to make a paste. Smear this paste and scrub your object again. Over a minute or two, the acid and abrasives in the Cameo will remove the metal oxides and hard gunk. It is VERY important that this is done well and completely. You can tell that you are done when the entire surface is an even, dull gray (for grey metals at least).
Rinse your object thoroughly and pat dry with a paper towel.
Now, attach the second alligator lead to your object. If possible, try to attach it to an inconspicuous place that is normally out of site. If you can't find a convenient place (for example, a coin doesn't have any hidden portions), you will simply need to move the clip frequently during plating.
Step 6: Electroplating


Make sure the copper ball is attached to the positive terminal of the battery and that your object is connected to the negative terminal of your battery. If this is done backwards, the electroplating will not work and you will contaminate your electrolyte.
Fully submerge your object in the electrolyte with one, smooth motion. Holding the wire, gently move your object back and forth in the solution while slowly rotating it. After a few seconds, you should notice the base metal starting to turn yellow. Rejoice! You are on the right track! Keep swirling and rotating your object to get a deeper red color and a thicker copper plate.
IMPORTANT: You must keep your object moving while it is being electroplating. Failure to do so will give you "burn spots" where the copper accumulated too quickly. While these spots can be buffed out, the copper will not have adhered well to the base metal and will flake/rub off easily.
IMPORTANT: Keep your object at least an inch or more away from your copper electrode. Again, you will get burn spots for the reasons stated in the above.
Step 7: Post Prep

Your shiny, newly copper plated object will quickly patina as it is exposed to air, water, salt, skin, and more. This oxidation can be removed from an unprotected surface with a very light polish. If you decide to polish your plated object, use gentle pressure and mild cleaners to avoid polishing off the copper layer. If you really want to get fancy, you can also do reverse electroplating to remove patina - just do a quick dip in your electrolyte with the electrode voltages swapped. If you want the red copper color without the patina, a quick spray with a decent clear coat or a proper metal polishing oil/wax can protect the surface.
The cool thing about copper plated items is that the copper plating allows you to plate it with other, trickier metals. For example, nickel doesn't like to adhere to some steels without some coaxing. So, you can apply a light copper plating before applying a nickel coat.
On another note, you can save your left over copper acetate solution for later plating uses as well. Just place the lid on the jar and seal tight. Make sure to label it "POISON - COPPER ACETATE" and store it away from the tiny hands of kids. Rinse everything that comes into contact with the solution well and store in a safe place.
Step 8: Common Questions
Can I plate [insert your metal here] with copper?
It depends. Certain metals play nice together, others do not. The ones that do not are called "dissimilar metals". In the picture, you'll find a table I borrowed from RFI. The table is designed to let you know when a galvanic reaction might occur causing corrosion. For our purposes, it also tells us which metals are compatible and which are not. The lower the magnitude of the number (aka the absolute value), the more compatible (ie similar) the metals will be. If you are trying to plate a metal that is not compatible, you may need to plate with nickel or another metal first. Aluminum, for example, should be plated with nickel before it can be plated with copper. You can find my nickel plating instructable here: https://www.instructables.com/id/High-Quality-and-safe-Nickel-Plating/
How do I plate non-conductive objects?
First, you need to make them conductive. You can do this with conductive paints, conductive glues, and even metal leaf (think gold leaf) as long as whatever you are coating your surface with is not water soluble. I haven't experimented much with this myself which means you will have to. Send me a message with your results and I'll post them here for others to reference.
How much voltage/current do I need?
As little as possible. The lower the voltage and current, the better results you will get. You need a minimum of 0.5V DC to plate with copper. A C or D cell battery will give you pretty decent results. If you don't have access to lower voltages, you can put the electrolyte into a big container and move your electrodes as far away from another as you can - the increase in distance will also increase the resistance of the circuit and decrease the current.
Can I use copper chloride or another electrolyte instead of making it with vinegar and such?
Yes, you can. I just like the idea of making my own chemicals. You can get root kill (which are green crystals if I recall) at your local hardware store for relatively cheap.
Can I use other acids other than acetic acid (vinegar)?
Yes.....but be careful... This instructable was written for average Joes and Jolenes, not chemists. Other acids can be significantly more dangerous as well as release some very nasty, very toxic chemicals into the air. Unless you are an experience chemist (ie you have an actual degree, not just AP Chem in high school or Chem 111 in college), I would not recommend playing with other chemicals.
Is plating coins illegal?
The first thing I want to point out is that I'm only using coins because they are everywhere and cheap by definition. The copper and nickel content make them ideal for small experiments. This isn't a "how to plate coins" instructable, coins are simply handy and recognizable. For those of you who took high school chem lab, you probably used quarters, dimes, and pennies for a couple different classroom experiments.
As far as the legality of plating coins, to my understanding, it is legal as long as you 1) Aren't removing metal from the coins with intent to sell that metal, 2) Are not trying to pass them as something they are not (ie a copper plated dime is worth 10 cents, nothing more), and 3) Aren't defacing the coins for malicious intent. As a personal disclaimer, this is MY understanding - take it with a grain of salt. If this is incorrect, I would welcome a friendly email or message from the US Treasury or other qualified persons.
Why are you using a 6V lantern battery when you say that lower voltages are better?
-The difference in plating quality between low voltages (0.5VDC is the lowest you can go) and 6VDC is not much. BUT, the time it takes to plate using 6VDC is a lot less.
-If you want lower voltages, you can do so by moving your anode and cathode farther apart. This is because your electrolyte acts as a variable resistor and the square resistance of your anode and cathode create two more resistors of a fixed resistance. The further your anode and cathode are from each other, the greater the resistance of the electrolyte, the greater the voltage drop across the electrolyte, the lower the voltage between the cathode and the electrolyte directly touching it. Without taking an electronics class, this can be a little difficult to understand, so if you don't, you will just need to trust me.
-Good lantern batteries will last a very long time. They have many, many AA batteries in parallel which gives you more available juice and higher current if you want it.
-Lantern batteries are easy to clip alligator clips to and don't need battery holders.
-As the battery drains, its internal resistance will not raise significantly and its voltage will not drop much due to the highly parallel internal battery connections. This gives you more consistent results.
Can I plate Aluminum?
I would avoid it. Aluminum is just one of those metals that don't plate well. If you are looking for a corrosion-resistant finish, you can anodize the aluminum to create a clear oxide layer that is extremely corrosion resistant. If you are looking for a colored finish, you can get dyes that absorb into the oxide layer and stain it whatever color you want (this is actually what Apple and other companies do to make different colored iPods).
Can I use copper plating to keep steel parts from rusting?
No. Absolutely not. This is for a couple different reasons.
- Copper patinas (ie rusts) and can eventually flake off over time exposing microscopic and macroscopic holes through to your base metal. As salt, water, and oxygen reach the base metal, it will rust underneath your plating causing more plating to flake off and ....you get the idea.
- Copper will create a galvanic reaction (which is how most batteries work) with the iron in the steel when your object is placed in water. This will cause your steel parts to rust EVEN FASTER. If you want to test this, place a piece of copper in salty water with a piece of steel touching it. It will start rusting like crazy in a couple hours or faster.


You must be logged in to post a comment or add an I Made It.
Log In332 Comments
Hey, I have a couple containers of old etchant that turned blue from use. Could I just use those to electroplate? This is the etchant.
Thanks, this is awesome! I'm hoping to do this with some aluminum foil so I can solder to it.
Flag
13 replies
I wouldn't imagine that the used etchant would make a good electrolyte. The most common etchant used by hobbyists is Ferric Chloride. By using it as an etchant, you may end up contaminating your surface with iron deposits and you may end up creating a lot of chlorine gas. It doesn't hurt to try - just make sure you do this outside a few times and stand up-breeze.
As far as soldering to aluminum foil, you should try using silver solder. It usually has around 6% silver in it which allows it to adhere to just about any metal. I use it frequently when I need to solder a lead to stainless steel.
Flag
SOLVED
So I'm not sure if it IS copper acetate but I'm pretty sure that it serves the purpose for electroplating!
I moved a decent amount of copper from a coil of wire to some aluminum foil with 15VDC.
The only problem is is that it's not sticking. I'll clean it better next time.
Flag
There are other electrolytes besides copper acetate that work well. Super kudos for experimenting. To get the copper to stick to the aluminum foil might be a bit tricky. They are very dissimilar metals and don't play nicely. HOWEVER, nickel plays nicely with aluminum and copper plays nicely with nickel. SO, if you nickel plate first, you may be able to get a nice copper plating. Nickel also plays nicely with lead which will allow for easy soldering.
Take a look at this link. Any potentials above +- 0.3V will not play nicely.
Flag
Wow, thanks for the information!
I haven't taken chemistry in school yet, so I still have much to learn.
I will try coating the aluminum with nickel then coating it with copper.
And since you say that nickel plays nicely with lead, does that mean that a copper coating will not be necessary for my purposes?
Thanks
Flag
If you can get a good nickel plating, you should be able to solder to it with no problem. You will likely need to add a bit of flux (besides the rosin in rosin-core), but it should solder pretty easily.
(I still stick to using silver solder for tough metals though. It is a lot easier and more predictable than putting on a plated coating just for soldering. It is a little pricey, but a little goes a long way and there is no mess like with electroplating.)
Flag
Hi,
I contacted Kinsten to ask them about the etchant I was using.
"EB-750 etchant is Sodium Persulphate, and it reacts with copper to become Copper Sulphate."
So that verifies that you can use other electrolytes.
I'm going to continue trying this so that I can make PCBs from aluminum foil.
I'm probably going to have to etch aluminum with another chemical first, then electroplate it with nickel or copper (or use silver solder).
Thank you so much for this information!
Flag
hi, instead of etching, try using conductive pen this can ease your task unless you really want to make complex pcb.
http://www.bareconductive.com/bare-paint-pen
Flag
Thanks, subodh1368
My budget isn't that flexible, though... thanks for the input.
Flag
Just as a follow up...
I tried this and it failed for my purposes, but maybe it might work for someone else's purposes. Check out the documentation!
http://tsjwang.blogspot.com/2013/12/aluminum-pcb-attempt-1.html
Flag
you can purchase copper foil. :D
Flag
They said in the main instructable that aluminum won't plate well
Flag
Making pcbs with aluminum foil (and fiberglass and epoxy) is exactly what I wanted to do!!!! You stole my idea... :)
Flag
This was a lot of fun experiment with, I certainly have the plating technique down and I'm incredibly amazed about the quality of plating it produces!
Had a hell of a good time working on this project with my Mother.
Flag
I DID A PLATING EXPERIMENT IN SCHOOL AND TOOK 3 PLACE IN THE SCIENCE FAIR FOR OUR SCHOOL. GREAT INSTRUCTABLE ! THANKS FOR THE MEMORIES ALMOST 40 YEARS AGO.
Flag
1 reply
This is my favorite comment so far :) I'm glad I could help bring back happy memories.
Flag
Love this Instructable (my brain is churning with the idea of copper plated Leatherman tools :D ) Thanks for the information and I really appreciate that you made it accessible for everyone via your materials. you have my vote ;)
Flag
FOR SCIENCE!!!
do not use for food or cleaning!!! ;)
love it!
Flag
1 reply
I love this too.
Flag
Great job! I've tried several ways to DIY copper plate and this one is the best so far. Thanks!
Flag
yeah, found the pads i bought (just said copper) had a steel core. test with a strong magnet first!
Flag
Could this be done electrically without the hydrogen peroxide just in vinegar with salt like in your nickel acetate one?
Flag
Surly Hydrogen Peroxide will neutralise the vinegar will it not?
Flag
If I suspect that my electrolyte is too rich can I use distilled water to dilute the mixture?
Flag
1 reply
Yes, but be sure not to dilute it too much.
Flag
Do not heat up the vinegar/hydrogen peroxide mixture, it can result in respiratory damage. Vinegar and hydrogen peroxide react to make peracetic acid which is irritant to the skin, eyes, and respiratory tract. Additionally, the reaction with the copper is exothermic, meaning that if you start with warm peracetic acid, it could boil, creating dangerous fumes.
To perform this reaction safely you should wear gloves and eye protection. You should also use room temperature peracetic acid. Ideally, the reaction should be done inside a fume hood, but doing it outside will work too.
Flag
Nice!!! Do you have a diy for making a gold electroplating solution?
Flag
Rather than moving the plated object around in the solution, could we move the electrode around? For example if I wanted to plate a larger heavy object, it would be much easier to have the electrode rotate around the object rather than move the object around.
Flag
Hi, Two questions please: we have
stainless steel, 201, mirror finish. We
want to copper and/or bronze plate this material.
first as this is the best material to “stick”.
Is this correct?
material?
Thanks in advance
Best regards
Lennart
Flag
"...do NOT drink the solution..." Is this kind of instruction really necessary here? Is anybody about to drink this? Including this makes the instructor look a little, well, odd. Have YOU ever drunk it? How did it go?
Flag
I was (attempting to) plate a 3/8" x 5" steel rod and it just grew a dark brown "fuzz".
20oz of 30% vinegar solution, nicely blue/green. 5vdc, 500ma. Fuzz was 1/8" thick within 5 minutes. Rod was dull and brown and not very "copperish" after cleaning. Only thing I can think of is that it's too acidic? Any and all help is appreciated.
Flag
hello, I am trying to use your method, but am having problems. I got the 100% copper scrubs and the cleaner you recommended.
Created the solution, which went well. Cleaned the metal cap that I was going to plate. I then put it in a solution of vinagar and salt and reversed the polarity to make sure it was completely clean.
The copper plate went on great, but I could wipe it off with a paper towel.
I recreated the solution (was pretty hot, when I dipped the part) and tried it again.It went on incredibly splotchy. The solution turned dark brown. It eventually plated the whole cap, but that also just wiped off.
This thing is as clean as I can get it. Any ideas? thx.
Flag
1 reply
Is that stainless steel? Staining this type of steel was very hard and every type I tried plating it, only the edges were plated and the rest could be scrubbed off easily
Flag
Is it possible to use a plastic container instead of glass?
Flag
Excellent layout! Thank you... LOL. "...or Chem 111." Says the electrical engineer! LOL. Love it!
Is there an calculation to determine how much material vs surface area of time under electrolysis vs thickness achieved? I mean, I know there is... I just don't want to dig up all that data when a crude educated prediction will do. Or if you already have the formula on hand to save me time... Says the ME who aced Chem 112! LOL.
Has anybody used other copper sources? I'm thinking old water pipes and random scraps as you find them. Ideally I would deform the copper,(dice, shavings, powder!), to increase surface area to dissolve it faster. Also trying to cut costs where it's practical, and for knowledge of options.
Any success of platting to lead alloys as well? I'm entertaining the idea of what it would take to copper plate my cast bullets for reloading ammunition. I know it's done by bullet manufacturers because there are several in my area. As a standard when shooting bare lead-alloy bullets, the bullet diameter is 0.001" over the given diameter for that caliber in a copper jacketed bullet, which are swaged. So I'm contemplating minimum Cu plate thickness needed to be effective. i.e.; Keeping the barrel from leading while eliminating the need to lube bullets.(depending on the bullet design, the lubing processes can be tedious and messy.) Plus a harder material absorbing; the forces from high pressures, heat, and friction, will reduce bullet deformation and allow for higher speeds. Having a bullet traveling +1000pfs slower than the rifle & cartridge were designed for can have a handful of undesired effects like; having diminished effectiveness/range, inaccurate/inconsistent flight path from altered drag effects, or being potentially dangerous from excessively low/high pressures. At 3000kg, the strongest lead-alloy obtainable has a BH of ~22, where Cu is roughly double that. And the very hardest lead-alloy possible may be detrimental to other factors as well. So I'll need to know what to size to trim the bullets to. A, +0.001" dia. for cast lead or non-jacketed bullets is desirable. And this is what my molds produce. If I didn't trim and ended up with a Cu plated bullet that's now, +0.002" dia. that could be big trouble. If I trim 0.001" but add that back in plating, I'm still, +0.001" from specs. This has less potential for danger due to low relative thickness of Cu when compared to jacketed bullets, But still I think I'll shoot for better. Or trim, 0.002" off bullet, but plating is <0.0005", and the dia. is ~0.001" below what a coated bullet should be. And that's not much better.)
I'm also wanting to nickel plate my brass cases if it's feasible. Ni platted brass is typically reserved for "top-shelf" ammunition because the cartridges feed into breach smoother and, more importantly in my opinion,(especially with revolvers), the spent cases eject more freely and tend to "stick" less after expanding from being fired. Plus, they can still be resized and reused. However I don't think the tolerances in this area are quite as small, but they're not huge either. And I'm concerned about Ni rubbing off in large amounts and getting into mechanical components, chamber, barrel, etc. which at best would unnecessarily increase the frequency that I'd need to brake down and clean the firearm. Not to mention the cost and time of Ni platting would lose it's trade off. This is potentially a game changer though. Or an expensive pointless endeavor, and I've used up my limit of those.
I realize this is an old post so won't be disappointed if I don't get feed back. Just though I'd try for some free info. I'm very appreciative of the help and guidance you've already provided. Thanks again!
Flag
Can copper plates be used instead of a copper sponge?
Flag
hi there,
very nice tuto. a question : I obtained the same blue lagoon colour in just two minutes of soaking the copper pad in the mixture. I thought it was supposed to last one hour or two... Will it work ?
Flag
Hi there! I am having problems with adhesion, and wanted to get your thoughts. The copper I plate (plating copper onto nickel object) simply rubs off after electroplating, and I've tried just about everything to troubleshoot the issue. I have experimented with everything between 8volts to 1.5 volts. There is no issue with throwing power, there is plenty of copper congregating onto the object. The solution is a light blue, not too saturated. I'm trying to plate over nickel, but I've also tried other metals with the same results. I have a fairly large Jar, so there is no issues with burning; plenty of space between the part and the copper anode. The part can be left in for over 30min, eventually shining a beautiful dark golden brown, and still easily come off with a cloth. The solution is simple, vinegar salt and copper. The part is cleaned really well: with strong acids, soap, and sometimes on the buffing wheel. I've tried a clean scratchy finish and a clean smooth (steel wool) finish (and following your cleaning directions). The copper for the solution is from piano bass strings, which are pure copper, and I cleaned them prior to putting them into the solution. There are no foreign objects floating around in the solution. I'm at a loss as to what's the problem, any help would be greatly appreciated, thanks so much!
Flag
I have a model steam engine with a worn brass piston. Would it be possible to copper plate this and then lap it in to produce a good seal?
Flag
2 questions:
1) My copper acetate solution has a white precipitate in the bottom. What is it and will it hurt the plating process?
2) Can you use the acetate solution right after you make it or do you have to wait for the hydrogen peroxide to decompose?
(OK, that was kind f three questions...)
Flag
my solution started to turn blue but quickly turned brown/black after a few minutes of putting the copper scrub in, did not feel this was useable what did i do wrong? half and half vinegar and peroxide heated up a minute added half a copper scrub thing, went to check this article to see if it specified how long exactly but the brown color quickly appeared and it seemed to get thicker, like less viscous i guess
Flag
2 replies
same with me on my first time. the mixture even looks black but with lots of copper in the bottom.
Flag
Someone else mentioned that they had the same issue because the copper scrubber they used was actually steel wool plated with copper. I would assume that your electrolyte turned black because the copper scrub pad wasn't 100% copper. : /
Flag
My goal is to refinish brass outside light fixtures with a green patina color. I'm having trouble getting the green finish I want on the brass. Several of the brass parts are turning a rosy red color, which I don't want. I'm cleaning the brass part by blasting them with a glass blasting medium and they seem to be cleaning up very well. The brass parts after blasting are a dull brass color. I've purchases several produced from JAX Chemical Supply and Steel F/X Patinas; they both claim they will turn brass to a green patina finish, but the outside surface is inconsistent while the inside of the parts turn the color I want. I'm thinking about trying copper plating the fixtures, then trying to get the copper to turn green patina. Do you think this will work?
Thanks,
Chris
Flag
1 reply
This is going to sound weird, but horse urine was sprayed on copper plating to achieve the verdigris (green patina) on newly constructed buildings with copper roofs or cupola's. You could copper plate a similar object and try using urine on a cotton swab. I'm not sure if they used horse urine because of the amount of pee you get from a horse, or if it has the correct amount of acidity but human urine is obviously much easier to obtain. LOL
Flag
I have a set of brass handles from the 1950's that are brass with copper plating. The copper has worn away. The handles have a black piece of either plastic or bakelite inserted, see image. Can I copper plate the handles with the black plastic attached?
Flag
I wish to copper plate bolts for a project. Is there a way to do this in a bulk process or does it have to be done 1 at a time?
Flag
Hello, I have an antique steamer trunk I am in the process of refurbishing it to the original look. The trunk has an alligator pattern embossed on tin. The tin has been painted, but the original finish looks to be copper plated, on the side showing. The back side has a tin look. The front sheet is 18" X 32", Other sheets range from 6" X 18", 6" X 24" and 6" X 32". Several sheets of each size. My question, using this method, can I electroplate this old tin, (1880s), and if so, how do I determine the amount of materials needed to complete this task? Also, do I have to remove the paint? There seems to be two layers?
Flag
Thank you for your time. Well done.
Flag