
Press shortcut → speak → get text. Free and open source ❤️


![]()
![]()
![]()
![]()
![]()
![]()
![]()
Whispering is an open-source speech-to-text application. Press a keyboard shortcut, speak, and your words will transcribe, transform, then copy and paste at the cursor.
I really like hands-free voice dictation. For years, I relied on transcription tools that were almost good, but they were all closed-source. Even those claiming to be "local" or "on-device" were still black boxes that left me wondering where my audio really went.
So I built Whispering. It's open-source, local-first, and most importantly, transparent with your data. Your data is stored locally on your device, and your audio goes directly from your machine to a local provider (Whisper C++, Speaches, etc.) or your chosen cloud provider (Groq, OpenAI, ElevenLabs, etc.) without any middleman or vendor lock-in. For me, the features were good enough that I left my paid tools behind (I used Superwhisper and Wispr Flow before).
Productivity apps should be open-source and transparent with your data, but they also need to match the UX of paid, closed-software alternatives. I hope Whispering is near that point. I use it for several hours a day, from coding to thinking out loud while carrying pizza boxes back from the office.
Tip
Whispering is designed for quick transcriptions, not long recordings. For extended recording sessions, use a dedicated recording app.
Note
The terms Epicenter Whispering and Whispering are interchangeable and refer to the same app.
- Epicenter Whispering emphasizes the app's place in the larger ecosystem.
- Whispering may be used for brevity and/or to focus on the standalone app.
Here's an overview:
Click to watch: Complete setup and usage guide (5 min)
Note: We recently added support for Whisper C++, which isn't included in the video. For setup, see the docs below.
and here's how I personally am using it with Claude Code these days.
There are plenty of transcription apps out there, each with their own strengths. Whispering has a few tricks up its sleeve, like a voice-activated mode for truly hands-free operation (no button holding), and customizable AI transformations with any prompt/model. The space is full of great ideas, but I just wanted to add some extra competition from the OSS ecosystem.
Built with Svelte 5 and Tauri, so it's tiny (~22MB) and starts instantly. The codebase is well-documented and designed to be understood and audited. That way, you know where your audio goes, how it's processed, and what data is stored. And finally, the cost savings. When you cut out the middleman, you pay providers directly:
| Service | Cost per Hour | Light Use (20 min/day) | Moderate Use (1 hr/day) | Heavy Use (3 hr/day) | Traditional Tools |
|---|---|---|---|---|---|
whisper-large-v3-turbo (Groq) |
$0.04 | $0.40/month | $1.20/month | $3.60/month | $15-30/month |
whisper-large-v3 (Groq) |
$0.111 | $1.11/month | $3.33/month | $9.99/month | $15-30/month |
gpt-4o-mini-transcribe (OpenAI) |
$0.18 | $1.80/month | $5.40/month | $16.20/month | $15-30/month |
| Local | $0.00 | $0.00/month | $0.00/month | $0.00/month | $15-30/month |
We're hoping that together in the open-source, local-first community, we can build something better than any closed-source alternative. The code is open-source because I believe that fundamental tools shouldn't require trusting a black box. Companies pivot, get acquired, or shut down. But open source is forever. ❤️
Set up Whispering and be ready to transcribe in about two minutes.
🍎 macOS
The fastest way to install Whispering on macOS:
brew install --cask epicenter-whisperingThis automatically handles installation and updates.
| Architecture | Download | Requirements |
|---|---|---|
| Apple Silicon | Whispering_7.7.2_aarch64_darwin.dmg | M1/M2/M3/M4 Macs |
| Intel | Whispering_7.7.2_x64_darwin.dmg | Intel-based Macs |
💡 Tip: Not sure which Mac you have? Click the Apple menu → About This Mac. Look for "Chip" or "Processor":
- Apple M1/M2/M3/M4 → Use Apple Silicon version
- Intel Core → Use Intel version
Installation steps:
- Download the
.dmgfile for your architecture - Open the downloaded file
- Drag Whispering to your Applications folder
- Open Whispering from Applications
- "Unverified developer" warning: Right-click the app → Open → Open
- "App is damaged" error (Apple Silicon): Run
xattr -cr /Applications/Whispering.appin Terminal
🪟 Windows
| Installer Type | Download | Description |
|---|---|---|
| MSI Installer | Whispering_7.7.2_x64_en-US_windows.msi | Recommended Standard Windows installer |
| EXE Installer | Whispering_7.7.2_x64-setup_windows.exe | Alternative installer option |
- Download the
.msiinstaller (recommended) - Double-click to run the installer
- If Windows Defender appears: Click "More Info" → "Run Anyway"
- Follow the installation wizard
Whispering will appear in your Start Menu when complete.
🐧 Linux
| Package Format | Download | Compatible With |
|---|---|---|
| AppImage | Whispering_7.7.2_amd64_linux.AppImage | All Linux distributions |
| DEB Package | Whispering_7.7.2_amd64_linux.deb | Debian, Ubuntu, Pop!_OS |
| RPM Package | Whispering-7.7.2-1.x86_64_linux.rpm | Fedora, RHEL, openSUSE |
AppImage (Universal)
wget https://github.com/epicenter-md/epicenter/releases/download/v7.7.2/Whispering_7.7.2_amd64_linux.AppImage
chmod +x Whispering_7.7.2_amd64_linux.AppImage
./Whispering_7.7.2_amd64_linux.AppImageDebian/Ubuntu
wget https://github.com/epicenter-md/epicenter/releases/download/v7.7.2/Whispering_7.7.2_amd64_linux.deb
sudo dpkg -i Whispering_7.7.2_amd64_linux.debFedora/RHEL
wget https://github.com/epicenter-md/epicenter/releases/download/v7.7.2/Whispering-7.7.2-1.x86_64_linux.rpm
sudo rpm -i Whispering-7.7.2-1.x86_64_linux.rpmTip
Links not working? Find all downloads at GitHub Releases
Try in Browser (No Download)
No installation needed! Works in any modern browser.
📝 Note: The web version doesn't have global keyboard shortcuts, but otherwise works great for trying out Whispering before installing.
Whispering offers two approaches to transcription. Pick the one that fits your needs:
🏠 Option A: Local Transcription (Whisper C++)
Best for: Complete privacy, offline use, no ongoing costs
Your audio never leaves your device. Works without internet. Free forever.
First, download a model (required):
- Open Whispering
- Click Settings (⚙️) → Transcription
- Select Whisper C++ from the dropdown
- Choose a model (start with
Smallfor good balance of speed and accuracy) - Click Download button next to the model
- Wait for download to complete (may take a few minutes)
- Verify the model shows as activated
⚠️ Important: You must download a model before you can transcribe.
- Click the record button or use your keyboard shortcut
- Say "Testing local transcription"
- Press the stop record button and wait for processing to complete
🎉 Success! Your words are now in your clipboard. Paste anywhere!
📝 Note: Local transcription is slower than cloud options but provides complete privacy. Processing speed depends on your hardware and the model size you chose.
☁️ Option B: Cloud Transcription (Groq)
Best for: Fast setup, near-instant results, high accuracy
I personally use Groq for most of my transcriptions because it's incredibly fast and accurate.
💡 Tip: Why Groq? Fastest transcription models, super accurate, generous free tier, and unbeatable pricing (as cheap as $0.04/hour using
whisper-large-v3-turbo)
- Visit console.groq.com/keys
- Sign up (free, no credit card required) → Create API key → Copy it
- Open Whispering
- Click Settings (⚙️) → Transcription
- Select Groq from the dropdown
- Paste your API key in the API key field
- Choose a model (
whisper-large-v3-turbois fastest and cheapest)
- Click the record button or use your keyboard shortcut
- Say "Testing cloud transcription"
- Results appear almost instantly
🎉 Success! Your words are now in your clipboard. Paste anywhere!
📝 Note: Cloud transcription requires an internet connection and sends your audio to Groq's servers. Your API key ensures the data goes directly from you to Groq with no middleman.
Having trouble? Common issues & fixes
- No transcription? → Double-check API key in Settings
- Shortcut not working? → Bring Whispering to foreground (see macOS section below)
- Wrong provider selected? → Check Settings → Transcription
macOS: Global shortcut stops working?
This happens due to macOS App Nap, which suspends background apps to save battery.
Quick fixes:
- Use Voice Activated mode for hands-free operation (recommended)
- Bring Whispering to the foreground briefly to restore shortcuts
- Keep the app window in the foreground (even as a smaller window)
Best practice: Keep Whispering in the foreground in front of other apps. You can resize it to a smaller window or use Voice Activated mode for minimal disruption.
Accidentally rejected microphone permissions?
If you accidentally clicked "Don't Allow" when Whispering asked for microphone access, here's how to fix it:
- Open System Settings → Privacy & Security → Privacy → Microphone
- Find Whispering in the list
- Toggle the switch to enable microphone access
- If Whispering isn't in the list, reinstall the app to trigger the permission prompt again
If you accidentally blocked microphone permissions, use the Registry solution:
Registry Cleanup (Recommended)
- Close Whispering
- Open Registry Editor (Win+R, type
regedit) - Use Find (Ctrl+F) to search for "Whispering"
- Delete all registry folders containing "Whispering"
- Press F3 to find next, repeat until all instances are removed
- Uninstall and reinstall Whispering
- Accept permissions when prompted
Alternative solutions
Delete App Data: Navigate to %APPDATA%\..\Local\com.bradenwong.whispering and delete this folder, then reinstall.
Windows Settings: Settings → Privacy & security → Microphone → Enable "Let desktop apps access your microphone"
See Issue #526 for more details.
Take your transcription experience to the next level with these advanced features:
🎯 Custom Transcription Services
Choose from multiple transcription providers based on your needs for speed, accuracy, and privacy:
- API Key: console.groq.com/keys
- Models:
whisper-large-v3-turbo($0.04/hr),whisper-large-v3($0.111/hr) - Why: Fastest, cheapest, generous free tier
- API Key: platform.openai.com/api-keys (Enable billing)
- Models:
whisper-1($0.36/hr),gpt-4o-transcribe($0.36/hr),gpt-4o-mini-transcribe($0.18/hr) - Why: Industry standard
- API Key: elevenlabs.io/app/settings/api-keys
- Models:
scribe_v1,scribe_v1_experimental - Why: High-quality voice AI
- API Key: None needed!
- Why: Complete privacy, offline use, free forever
🤖 AI-Powered Transformations
Transform your transcriptions automatically with custom AI workflows:
Quick Example: Format Text
- Go to Transformations (📚) in the top bar
- Click "Create Transformation" → Name it "Format Text"
- Add a Prompt Transform step:
- Model:
Claude Sonnet 3.5(or your preferred AI) - System prompt: `You are an intelligent text formatter specializing in cleaning up transcribed speech. Your task is to transform raw transcribed text into well-formatted, readable content while maintaining the speaker's original intent and voice.
- Model:
Core Principles:
- Preserve authenticity: Keep the original wording and phrasing as much as possible
- Add clarity: Make intelligent corrections only where needed for comprehension
- Enhance readability: Apply proper formatting, punctuation, and structure
Formatting Guidelines:
Punctuation & Grammar:
- Add appropriate punctuation (periods, commas, question marks)
- Correct obvious transcription errors while preserving speaking style
- Fix run-on sentences by adding natural breaks
- Maintain conversational tone and personal speaking patterns
Structure & Organization:
- Create paragraph breaks at natural topic transitions
- Use bullet points or numbered lists when the speaker is listing items
- Add headings if the content has clear sections
- Preserve emphasis through italics or bold when the speaker stresses words
Intelligent Corrections:
- Fix homophones (e.g., "there/their/they're")
- Complete interrupted thoughts when the intention is clear
- Remove excessive filler words (um, uh) unless they add meaning
- Correct obvious misspeaks while noting significant ones in [brackets]
Special Handling:
- Technical terms: Research and correct spelling if unclear
- Names/places: Make best guess and mark uncertain ones with [?]
- Numbers: Convert spoken numbers to digits when appropriate
- Time references: Standardize format (e.g., "3 PM" not "three in the afternoon")
Preserve Original Intent:
- Keep colloquialisms and regional expressions
- Maintain the speaker's level of formality
- Don't "upgrade" simple language to sound more sophisticated
- Preserve humor, sarcasm, and emotional tone
Output Format: Return the formatted text with:
- Clear paragraph breaks
- Proper punctuation and capitalization
- Any structural elements (lists, headings) that improve clarity
- [Bracketed notes] for unclear sections or editorial decisions
- Original meaning and voice intact
Remember: You're a translator from spoken to written form, not an editor trying to improve the content. Make it readable while keeping it real.`
- User prompt: `Here is the text to format:
{{input}}` 4. Save and select it in your recording settings
What can transformations do?
- Fix grammar and punctuation automatically
- Translate to other languages
- Convert casual speech to professional writing
- Create summaries or bullet points
- Remove filler words ("um", "uh")
- Chain multiple steps together
Example workflow: Speech → Transcribe → Fix Grammar → Translate to Spanish → Copy to clipboard
Setting up AI providers for transformations
You'll need additional API keys for AI transformations. Choose from these providers based on your needs:
- API Key: platform.openai.com/api-keys
- Models:
gpt-4o,gpt-4o-mini,o3-miniand more - Why: Most capable, best for complex text transformations
- API Key: console.anthropic.com/settings/keys
- Models:
claude-opus-4-0,claude-sonnet-4-0,claude-3-7-sonnet-latest - Why: Excellent writing quality, nuanced understanding
- API Key: aistudio.google.com/app/apikey
- Models:
gemini-2.5-pro,gemini-2.5-flash,gemini-2.5-flash-lite - Why: Free tier available, fast response times
- API Key: console.groq.com/keys
- Models:
llama-3.3-70b-versatile,llama-3.1-8b-instant,gemma2-9b-it, and more - Why: Lightning fast inference, great for real-time transformations
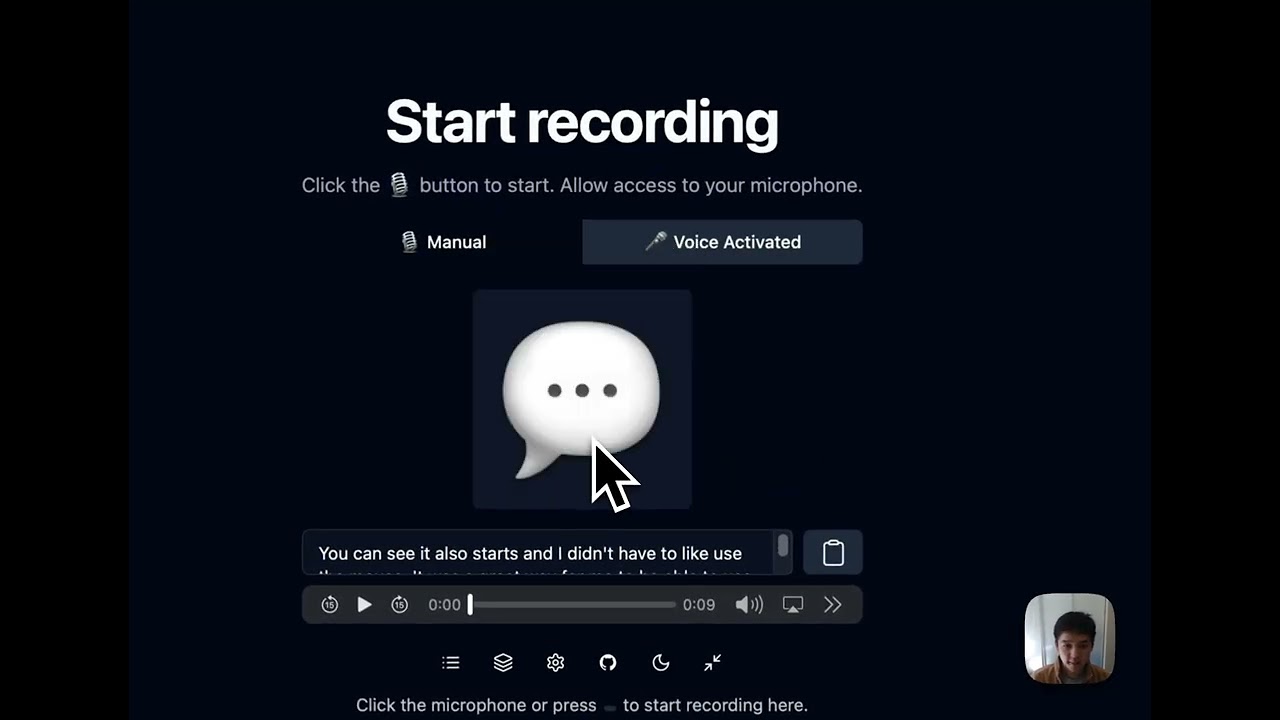
🎙️ Voice Activity Detection (VAD)
Hands-free recording that starts when you speak and stops when you're done.
Two ways to enable VAD:
Option 1: Quick toggle on homepage
- On the homepage, click the Voice Activated tab (next to Manual)
Option 2: Through settings
- Go to Settings → Recording
- Find the Recording Mode dropdown
- Select Voice Activated instead of Manual
How it works:
- Press shortcut once → VAD starts listening
- Speak → Recording begins automatically
- Stop speaking → Recording stops after a brief pause
- Your transcription appears instantly
Perfect for dictation without holding keys!
⌨️ Custom Shortcuts
Change the recording shortcut to whatever feels natural:
- Go to Settings → Recording
- Click on the shortcut field
- Press your desired key combination
- Popular choices:
F1,Cmd+Space+R,Ctrl+Shift+V
Whispering stores as much data as possible locally on your device, including recordings and text transcriptions. This approach ensures maximum privacy and data security. Here's an overview of how data is handled:
-
Local Storage: Voice recordings and transcriptions are stored in IndexedDB, which is used as blob storage and a place to store all of your data like text and transcriptions.
-
Transcription Service: The only data sent elsewhere is your recording to an external transcription service—if you choose one. You have the following options:
- External services like OpenAI, Groq, or ElevenLabs (with your own API keys)
- A local transcription service such as Speaches, which keeps everything on-device
-
Transformation Service (Optional): Whispering includes configurable transformation settings that allow you to pipe transcription output into custom transformation flows. These flows can leverage:
- External Large Language Models (LLMs) like OpenAI's GPT-4, Anthropic's Claude, Google's Gemini, or Groq's Llama models
- Hosted LLMs within your custom workflows for advanced text processing
- Simple find-and-replace operations for basic text modifications
When using AI-powered transformations, your transcribed text is sent to your chosen LLM provider using your own API key. All transformation configurations, including prompts and step sequences, are stored locally in your settings.
You can change both the transcription and transformation services in the settings to ensure maximum local functionality and privacy.
Most apps are middlemen charging $30/month for API calls that cost pennies. With Whispering, you bring your own API key and pay providers directly. Your audio goes straight from your device to the API. No servers in between, no data collection, no subscriptions.
I built this for myself and use it every day. The code is open source so you can verify exactly what it does.
Svelte 5 + Tauri. The app is tiny (~22MB), starts instantly, and uses minimal resources. The codebase is clean and well-documented if you want to learn or contribute.
Yes, use the Speaches provider for local transcription. No internet, no API keys, completely private.
With Groq (my favorite): $0.02-$0.06/hour. With OpenAI: $0.18-$0.36/hour. Local transcription: free forever. I use it several hours daily and pay about $3/month total.
Your recordings stay on your device in IndexedDB. When you transcribe, audio goes directly to your chosen provider using your API key. No middleman servers. For maximum privacy, use local transcription.
Note: we use anonymized event logging with Aptabase, an open-source, privacy-first analytics service. No personal data is attached to any of these events. You can see exactly what events we log in analytics.ts and where they are logged by searching for rpc.analytics.logEvent in our codebase. You can turn this off in settings at any time.
Yes - set up AI transformations to fix grammar, translate languages, or reformat text. Works with any LLM provider.
Desktop: Mac (Intel & Apple Silicon), Windows, Linux. Web: Any modern browser at whispering.epicenter.so.
Open an issue on GitHub. I actively maintain this and respond quickly.
Whispering showcases the power of modern web development as a comprehensive example application:
- Svelte 5: The UI reactivity library of choice with cutting-edge runes system
- SvelteKit: For routing and static site generation
- Tauri: The desktop app framework for native performance
- WellCrafted: Lightweight type-safe error handling
- Svelte Sonner: Toast notifications for errors
- TanStack Query: Powerful data synchronization
- TanStack Table: Comprehensive data tables
- IndexedDB & Dexie.js: Local data storage
- shadcn-svelte: Beautiful, accessible components
- TailwindCSS: Utility-first CSS framework
- Turborepo: Monorepo management
- Rust: Native desktop features
- Vercel: Hosting platform
- Zapsplat.com: Royalty-free sound effects
- React: UI library
- shadcn/ui: Component library
- Chrome API: Extension APIs
Note: The browser extension is temporarily disabled while we stabilize the desktop app.
Whispering uses a clean three-layer architecture with 97% code sharing between desktop and web versions:
- Service Layer: Platform-agnostic business logic with Result types
- Query Layer: Reactive data management with caching
- UI Layer: Clean Svelte 5 components with minimal logic
The architecture achieves extensive code reuse through build-time platform detection, allowing the same codebase to run natively on desktop (via Tauri) and in the browser.
→ For developers: See the detailed Architecture Deep Dive to understand how everything fits together.
- Clone the repository:
git clone https://github.com/epicenter-md/epicenter.git - Change into the project directory:
cd epicenter - Install the necessary dependencies:
bun i
To run the desktop app and website:
cd apps/whispering
bun tauri devIf you have concerns about the installers or want more control, you can build the executable yourself. This requires more setup, but it ensures that you are running the code you expect. Such is the beauty of open-source software!
cd apps/whispering
bun i
bun tauri buildFind the executable in apps/whispering/target/release
We welcome contributions! Whispering is built with care and attention to clean, maintainable code.
- Follow existing TypeScript and Svelte patterns throughout
- Use Result types from the WellCrafted library for all error handling
- Follow WellCrafted best practices: explicit errors with
Result<T, E>, structuredTaggedErrorobjects, and comprehensive error context - Study the existing patterns in these key directories:
- Services Architecture - Platform-agnostic business logic
- Query Layer Patterns - RPC pattern and reactive state
- Constants Organization - Type-safe configuration
→ New to the codebase? Start with the Architecture Deep Dive to understand how everything fits together.
We'd love to expand Whispering's capabilities with more transcription and AI service adapters! Here's how to add a new adapter:
Overview of the adapter system:
- Transcription services (
services/transcription/): Convert audio to text - Completion services (
services/completion/): Power AI transformations in the transformation pipeline - Query layer (
query/): Provides reactive state management and runtime dependency injection - Settings layer: Stores API keys and user preferences
Adding a new transcription service involves four main steps:
-
Create the service implementation in the appropriate transcription subdirectory:
- Cloud services:
src/lib/services/transcription/cloud/(OpenAI, Groq, Deepgram, ElevenLabs) - Local services:
src/lib/services/transcription/local/(WhisperCpp, Parakeet) - Self-hosted services:
src/lib/services/transcription/self-hosted/(Speaches)
// Example: src/lib/services/transcription/cloud/your-service.ts import { WhisperingErr, type WhisperingError } from '$lib/result'; import type { Settings } from '$lib/settings'; import { Err, Ok, tryAsync, type Result } from 'wellcrafted/result'; // Define your models directly in the service file export const YOUR_SERVICE_MODELS = [ { name: 'model-v1', description: 'Description of what makes this model special', cost: '$0.XX/hour', }, { name: 'model-v2', description: 'A faster variant with different trade-offs', cost: '$0.YY/hour', }, ] as const; export type YourServiceModel = (typeof YOUR_SERVICE_MODELS)[number]; export function createYourServiceTranscriptionService() { return { async transcribe( audioBlob: Blob, options: { prompt: string; temperature: string; outputLanguage: Settings['transcription.outputLanguage']; apiKey: string; modelName: (string & {}) | YourServiceModel['name']; // Add any service-specific options }, ): Promise<Result<string, WhisperingError>> { // Validate API key if (!options.apiKey) { return WhisperingErr({ title: '🔑 API Key Required', description: 'Please enter your YourService API key in settings.', action: { type: 'link', label: 'Add API key', href: '/settings/transcription', }, }); } // Make the API call const { data, error } = await tryAsync({ try: () => yourServiceClient.transcribe(audioBlob, options), catch: (error) => WhisperingErr({ title: '❌ Transcription Failed', description: error.message, action: { type: 'more-details', error }, }), }); if (error) return Err(error); return Ok(data.text.trim()); }, }; } export const YourServiceTranscriptionServiceLive = createYourServiceTranscriptionService();
Don't forget to export your service in
src/lib/services/transcription/index.ts:import { YourServiceTranscriptionServiceLive } from './cloud/your-service'; export { // ... existing exports YourServiceTranscriptionServiceLive as yourservice, };
And add the API key field to the settings schema in
src/lib/settings/settings.ts:'apiKeys.yourservice': z.string().default(''),
- Cloud services:
-
Update the service registry in
src/lib/services/transcription/registry.ts:// Add import for your service icon (as SVG) import yourServiceIcon from '$lib/constants/icons/your-service.svg?raw'; // Add import for your models import { YOUR_SERVICE_MODELS, type YourServiceModel, } from './cloud/your-service'; // Add to the TranscriptionModel union type type TranscriptionModel = | OpenAIModel | GroqModel | ElevenLabsModel | DeepgramModel | YourServiceModel; // Add to TRANSCRIPTION_SERVICE_IDS array export const TRANSCRIPTION_SERVICE_IDS = [ 'whispercpp', 'parakeet', 'Groq', 'OpenAI', 'ElevenLabs', 'Deepgram', 'speaches', 'YourService', // Add your service here ] as const; // Add to TRANSCRIPTION_SERVICES array (in the appropriate section) export const TRANSCRIPTION_SERVICES = [ // ... existing services // Add in the cloud services section: { id: 'YourService', name: 'Your Service Name', icon: yourServiceIcon, invertInDarkMode: true, // or false, depending on your icon description: 'Description of what makes your service special', models: YOUR_SERVICE_MODELS, defaultModel: YOUR_SERVICE_MODELS[0], modelSettingKey: 'transcription.yourservice.model', apiKeyField: 'apiKeys.yourservice', location: 'cloud', // or 'local' or 'self-hosted' }, // ... rest of services ] as const satisfies SatisfiedTranscriptionService[];
-
Wire up the query layer in
src/lib/query/transcription.ts:// Add to the switch statement in transcribeBlob function case 'YourService': return services.transcriptions.yourservice.transcribe(blob, { outputLanguage: settings.value['transcription.outputLanguage'], prompt: settings.value['transcription.prompt'], temperature: settings.value['transcription.temperature'], apiKey: settings.value['apiKeys.yourservice'], modelName: settings.value['transcription.yourservice.model'], });
-
Update the settings UI in
src/routes/(config)/settings/transcription/+page.svelte:<!-- Add after other service conditionals --> {:else if settings.value['transcription.selectedTranscriptionService'] === 'YourService'} <LabeledSelect id="yourservice-model" label="YourService Model" items={YOUR_SERVICE_MODELS.map((model) => ({ value: model.name, label: model.name, ...model, }))} bind:selected={ () => settings.value['transcription.yourservice.model'], (selected) => settings.updateKey('transcription.yourservice.model', selected) } renderOption={renderModelOption} /> <YourServiceApiKeyInput /> {/if}
Create the API key input component in
src/lib/components/settings/api-key-inputs/YourServiceApiKeyInput.svelte:<script lang="ts"> import { LabeledInput } from '$lib/components/labeled/index.js'; import { Button } from '$lib/components/ui/button/index.js'; import { settings } from '$lib/stores/settings.svelte'; </script> <LabeledInput id="yourservice-api-key" label="YourService API Key" type="password" placeholder="Your YourService API Key" value={settings.value['apiKeys.yourservice']} oninput={({ currentTarget: { value } }) => { settings.updateKey('apiKeys.yourservice', value); }} > {#snippet description()} <p class="text-muted-foreground text-sm"> You can find your YourService API key in your <Link href="https://yourservice.com/api-keys" target="_blank" rel="noopener noreferrer" > YourService dashboard </Link>. </p> {/snippet} </LabeledInput>
And export it from
src/lib/components/settings/index.ts:export { default as YourServiceApiKeyInput } from './api-key-inputs/YourServiceApiKeyInput.svelte';
AI transformations in Whispering use completion services that can be integrated into transformation workflows. Here's how to add a new AI provider:
-
Create the completion service in
src/lib/services/completion/:// src/lib/services/completion/your-provider.ts import { WhisperingErr, type WhisperingError } from '$lib/result'; import { Err, Ok, tryAsync, type Result } from 'wellcrafted/result'; export function createYourProviderCompletionService() { return { async complete(options: { apiKey: string; model: string; systemPrompt: string; userPrompt: string; temperature?: number; }): Promise<Result<string, WhisperingError>> { // Validate API key if (!options.apiKey) { return WhisperingErr({ title: '🔑 API Key Required', description: 'Please add your YourProvider API key.', }); } // Make the completion request const { data, error } = await tryAsync({ try: () => yourProviderClient.complete(options), catch: (error) => WhisperingErr({ title: '❌ Completion Failed', description: error.message, action: { type: 'more-details', error }, }), }); if (error) return Err(error); return Ok(data.text); }, }; } export const YourProviderCompletionServiceLive = createYourProviderCompletionService();
-
Register the service in
src/lib/services/completion/index.ts:import { YourProviderCompletionServiceLive } from './your-provider'; export { // ... existing exports YourProviderCompletionServiceLive as yourprovider, };
-
Wire up the transformation handler in
src/lib/query/transformer.ts:// Add a new case in the handleStep function's prompt_transform switch statement case 'YourProvider': { const { data: completionResponse, error: completionError } = await services.completions.yourprovider.complete({ apiKey: settings.value['apiKeys.yourprovider'], model: step['prompt_transform.inference.provider.YourProvider.model'], systemPrompt, userPrompt, }); if (completionError) { return Err(completionError.message); } return Ok(completionResponse); }
-
Add API key to settings in
src/lib/settings/settings.ts:'apiKeys.yourprovider': z.string().default(''),
-
Update transformation types to include your provider models and configuration
Always use the WhisperingErr helper for user-facing errors:
// Good: User-friendly error with action
return WhisperingErr({
title: '⏱️ Rate Limit Reached',
description: 'Too many requests. Please try again in a few minutes.',
action: {
type: 'link',
label: 'View rate limits',
href: 'https://yourservice.com/rate-limits',
},
});
// Handle different error types
if (error.status === 401) {
return WhisperingErr({
title: '🔑 Invalid API Key',
description: 'Your API key appears to be invalid or expired.',
action: {
type: 'link',
label: 'Update API key',
href: '/settings/transcription',
},
});
}
// Use with tryAsync for automatic error mapping
const { data, error } = await tryAsync({
try: () => apiClient.makeRequest(),
catch: (error) =>
WhisperingErr({
title: '❌ Request Failed',
description: error.message,
action: { type: 'more-details', error },
}),
});Create a test file alongside your service:
// Example: src/lib/services/transcription/cloud/your-service.test.ts
import { describe, it, expect } from 'vitest';
import { createYourServiceTranscriptionService } from './your-service';
describe('YourService Transcription', () => {
it('should handle missing API key', async () => {
const service = createYourServiceTranscriptionService();
const result = await service.transcribe(new Blob(), {
apiKey: '',
// other options
});
expect(result.error).toBeDefined();
expect(result.error?.title).toContain('API Key Required');
});
// Add more tests
});When submitting a PR for a new adapter, include:
- The service implementation with comprehensive error handling
- All type definitions and constants
- Query layer integration
- Settings UI components
- Tests covering success and error cases
- Documentation of any special requirements or limitations
- Example
.enventries if needed
We're excited to see what services you'll integrate! Feel free to open an issue first to discuss your adapter idea.
- Fork the repository
- Create a feature branch:
git checkout -b feature/your-feature-name - Make your changes and commit them
- Push to your fork:
git push origin your-branch-name - Create a pull request
When preparing a new release, use our version bumping script to update all necessary files:
# Update version across all project files
bun run bump-version <new-version>
# Example:
bun run bump-version 7.0.1This script automatically updates:
- Root
package.json - App
package.json - Tauri configuration (
tauri.conf.json) - Cargo manifest (
Cargo.toml)
After running the script, follow the displayed instructions to commit, tag, and push the changes.
- UI/UX improvements and accessibility enhancements
- Performance optimizations
- New transcription or transformation service integrations
Feel free to suggest and implement any features that improve usability—I'll do my best to integrate contributions that make Whispering better for everyone.
Whispering's local transcription capabilities are powered by amazing open-source projects:
-
transcribe-rs by CJ Pais - A unified Rust library providing abstraction over multiple speech-to-text engines (Whisper and Parakeet). This library enables Whispering to seamlessly support different transcription engines with a consistent API.
-
Handy by CJ Pais - The original project that birthed
transcribe-rs. Handy is a an awesome cross-platform desktop speech-to-text application, and I personally use it especially when developing Whispering locally. -
whisper.cpp by Georgi Gerganov - High-performance C/C++ port of OpenAI's Whisper model that makes local transcription fast and efficient.
Special thanks to CJ Pais for creating and maintaining essential libraries that make local, privacy-preserving transcription possible in Whispering.
Whispering is released under the MIT License. Fork it, modify it, build on top of it, make it yours.
We're built in public, shaped by user feedback. If you encounter any issues or have suggestions for improvements, please open an issue on the GitHub issues tab. I really appreciate it!
- Community Discord: Discord
- Feature Requests, Issues, and Bug Reports: GitHub Issues
This project is supported by amazing people and organizations:


Transcription should be free, open, and accessible to everyone. Join us in making it so.