
InteractiveExtensionsを自分で実装するシリーズは続きますが、より現場寄りなネタを1つ。
UIとModel間のデータバインドというとMFCのDDXからWPFのBindingまで長きに渡り続いていますが、最近データバインドでググるとWPFのネタは多くでますが、WindowsFormsとの境界が混じりわかりにくくなっている印象です。そこで本エントリではWPFは一切除外し、WindowsFormsでのデータバインドに絞ってご紹介したいと思います。
データバインドの方法
データバインドするには【1. バインドする元のデータ】、【2.バインドする先のUI】、【3.それらをつなぐもの】 の3つが不可欠です。概念図から。

まず1.バインドする元のデータはビジネスロジックに依るところですが、ここでは以下の例を元にします。
DisplayModel.cs
1 2 3 4 5 6 7 8 9 10 11 12 13 14 15 16 17 18 19 20 21 22 23 | namespace DataBindSample{ public class DisplayModel { private int a; private int b; public int A { set { a = value; } get { return a; } } public int B { set { b = value; } get { return b; } } public int Difference { get { return a - b; } } }} |
これで【1.バインドする元のデータ】が作成できました。次は、順に【2.バインドする先のUI】を以下のように作りましょう、ここではまだぺたぺたコントロールを張るだけです。

最後は【3.それらをつなぐもの】を作ります。これにはVisualStudioのウィザードを活用するのがオススメ。まず、VS2010ではツールメニュー内[データ] – [データソースの追加]ですが、VS2013では[表示] – [その他のウィンドウ] – [データソース]で選択してウィンドウを開き、[新しいデータソースの追加]を選択します。

オブジェクトを選択し[次へ]をクリック。

先ほど作った【1.バインドする元のデータ】のクラスを選択します、これにてデータソースに今のクラスが追加されました。次に【2.バインドする先のUI】にBindingSourceコントロールをドラッグアンドドロップします。その上でDataSourceプロパティに先ほどのクラスを選択します。これにてBindingSourceを使う準備は一旦完了※ここではクラスを指定しただけなのでインスタンスは未割当なので後で割り当てます。
これをバインドするコントロールに順に割り当てていきます。バインド先のオブジェクトのDataBindingsの(詳細)ボタンをクリックし、バインドするプロパティを割り当てます。

データ更新モードとはバインドするタイミングです。デフォルトでOnValidationとなっていますが、これではフォーカス遷移時にしかバインドが実行されません。今回のようなDiffという差分を常に確認したいアプリケーションではOnPropertyChangedのほうが適切かと思います。同様にB, DiffをそれぞれTextBox, Labelとバインドします。バインド先のnumericUpDownのValueはDecimalだけどTextBoxのTextはstringだけど、、大丈夫です。
最後にバインドするインスタンスを設定します。
1 2 3 4 5 6 7 8 9 10 11 12 13 14 15 16 17 18 | namespace DataBindSample{ using System.Windows.Forms; public partial class BindingForm : Form { private DisplayModel _model; public BindingForm() { InitializeComponent(); _model = new DisplayModel() { A = 50, B = 20 }; bindingSource.DataSource = _model; } }} |
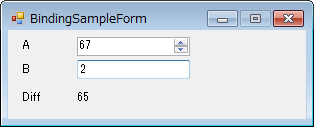
これを実行するとバインドされA, B, Diffが常に整合のとれた状態になります。
双方向のデータバインド
あれ、INotifyPropertyChangedは?と思った方がいるのではないでしょうか。まず、INotifyPropertyChangedインターフェースとはデータの更新をUIに通達するためのインターフェースです。

INotifyPropertyChangedでは変更したプロパティ名をイベントを介してBindingSourceに通達します。ですが、先ほどの例ではINotifyPropertyChangedを実装していませんが、Diffが更新されていたのでしょうか?答えはINotifyPropertyChangedインターフェースの英語版のCommunityAdditionにあります。

INotifyPropertyChangedは変更のあったプロパティを渡せるのが通常の使い方ですが(全部のプロパティが更新された場合はプロパティ名にstring.emptyを指定します)、BindingSourceコントロールはINotifyPropertyChangedによらず全ての関連プロパティを取得しなおすのです。その分パフォーマンス低下は懸念されますが、先ほどの例ではINotiftyPropertyChangedの実装が不要になると言えます。
ではBindingSourceコントロールを使う限りINotifyPropertyChangedは実装が不要なのか?答えはNOです。先の例では次のコードを実行すると、不整合が生まれてしまいます。

1 2 3 4 5 6 7 8 9 10 11 12 13 14 15 16 17 18 19 20 21 22 23 | namespace DataBindSample{ using System.Windows.Forms; public partial class BindingForm : Form { private DisplayModel _model; public BindingForm() { InitializeComponent(); _model = new DisplayModel() { A = 50, B = 20 }; bindingSource.DataSource = _model; } private void buttonReset_Click(object sender, System.EventArgs e) { _model.A = 100; } }} |
プログラムで値を書きかえられてもBindingSourceがその変更を知る術がないからです。
で、INotifyPropertyChangedを実装するとこんな感じ。
DisplayModel.cs
1 2 3 4 5 6 7 8 9 10 11 12 13 14 15 16 17 18 19 20 21 22 23 24 25 26 27 28 29 30 31 32 33 34 35 36 37 38 39 40 | namespace DataBindSample{ using System.ComponentModel; public class DisplayModel : INotifyPropertyChanged { #region INotifyPropertyChangedメンバー public event PropertyChangedEventHandler PropertyChanged = (_, __) => { }; #endregion private int a; private int b; public int A { set { a = value; NotifyPropertyChanged("A"); } get { return a; } } public int B { set { b = value; NotifyPropertyChanged("B"); } get { return b; } } public int Difference { get { return a - b; } } // C#5.0(≒VS2012)以降ではCallerMemberName属性が使える private void NotifyPropertyChanged(string propertyName = "") { PropertyChanged(this, new PropertyChangedEventArgs(propertyName)); } }} |
本来ならA, Bの値セットで”Diff”プロパティも変ったよと教える必要がありますが、先ほどの「BindingSourceの各プロパティを一律取りなおす」という特性を利用してほったらかしにしています。(ォィ
単体検証を追加する
実際の商品レベルはまだまだ先です。数値をnumericUpDownにバインドした場合は良いのですが、textBoxにバインドしたところではユーザが自由に入力をできてしまいます。先ほどの例でやってみるとわかりますが、textBoxに ‘d’ などと数値以外の値を入れるとエラーも何も出ず、フォーカスが移動できなくなります。これは数値を入れないといけないのに対し、数値変換できない値を入れられバインドが不整合になるのを防いでいるのです。この状態ではそもそも何が問題かわかりません。これに対してはまずErrorProviderを使います。

Formに張り付けて、DataSourceプロパティに先ほどのbindingSourceを渡すだけ!これで先ほどの異常入力に対して何が問題かわかりますね。

さらに。Bの値は数値としてはOkだけど「 特定の値は禁止したい」場合などはIDataErrorInfoを使います。
1 2 3 4 5 6 7 8 9 10 11 12 13 14 15 16 17 18 19 20 21 22 23 24 25 26 27 28 29 30 31 32 33 34 35 36 37 38 39 40 41 42 43 44 45 46 47 48 49 50 51 52 53 54 55 56 | namespace DataBindSample{ using System.ComponentModel; public class DisplayModel : INotifyPropertyChanged, IDataErrorInfo { #region INotifyPropertyChangedメンバー public event PropertyChangedEventHandler PropertyChanged = (_, __) => { }; #endregion #region IDataErrorInfoメンバー public string Error { get { return string.Empty; } } public string this[string columnName] { get{ if (columnName == "B" && B < 0){ return "負数は駄目だよ"; } return string.Empty; } } #endregion private int a; private int b; public int A { set { a = value; NotifyPropertyChanged("A"); } get { return a; } } public int B { set { b = value; NotifyPropertyChanged("B"); } get { return b; } } public int Difference { get { return a - b; } } // C#5.0(≒VS2012)以降ではCallerMemberName属性が使える private void NotifyPropertyChanged(string propertyName = "") { PropertyChanged(this, new PropertyChangedEventArgs(propertyName)); } }} |
これだけで先ほどのErrorProviderに自動的にエラーが追加されるようになります。

この場合数値としてはOkなのでフォーカス移動は可能です(先ほどのdの場合はフォーカス移動もダメ)。この辺り凝ったつくりにしようとすると色々知っていないとハマッてしまうためオレオレ実装ができてしまうんではないかと思います。

