
LaravelとCognitoを連携したユーザー認証機構を作ったので、まとめます。
今回、Laravel側のDBとCognito側で管理する情報は以下のようにしました。
| Laravel | |
|---|---|
| ID | id |
| cognito_username | Cognitoで発行されるユーザー名 |
| メールアドレス | |
| created_at | 作成日時 |
| modified_at | 更新日時 |
| Cognito | |
|---|---|
| username | Cognitoで発行されるユーザー名 |
| メールアドレス | |
| password | ユーザーが設定したパスワード |
今回、パスワードはLaravel側のDBに持たず、Cognito側だけで管理するようにします。
Laravelプロジェクトを作成
create-project
Laravelの開発環境がある前提で、crate-projectからはじめていきます。
$ composer create-project --prefer-dist laravel/laravel laravel-cognito-tutorial
初期画面が表示されることを確認します。
migrationファイルを編集
デフォルトのmigrationファイルだとuserの情報が多いため、編集します。
database/migrations/2014_10_12_000000_create_users_table.php
// 中略

    public function up()
    {
        Schema::create('users', function (Blueprint $table) {
            $table->increments('id');
            $table->string('cognito_username')->unique();
            $table->string('email')->unique();
            $table->timestamps();
        });
    }

// 中略
また、database/migrations/2014_10_12_100000_create_password_resets_table.phpは削除します。
User.phpを編集
先ほど変更したmigrationファイルの部分を変更します。
app/User.php
<?php

namespace App;

use Illuminate\Notifications\Notifiable;
use Illuminate\Contracts\Auth\MustVerifyEmail;
use Illuminate\Foundation\Auth\User as Authenticatable;

class User extends Authenticatable
{
    use Notifiable;

    protected $fillable = [
        'cognito_username', 'email'
    ];
}
日本語化
ついでに日本語化もしておきます。
// 中略

'locale' => 'ja',
'fallback_locale' => 'ja',
メッセージファイルは、今回はこちらのリポジトリからお借りしました。
resources/lang/ja にメッセージファイルを配置します。
最後に、Cognitoを扱う際に使用する、aws-sdkをcomposerでインストールします。
$ composer require aws/aws-sdk-php
以上で、Laravelの初期設定は終了です。
Cognitoの初期設定
次にCognitoの初期設定を進めていきます。
AWSのコンソールでユーザープールを作成する
まずはAWS Cognitoのユーザープールを作成します。
今回はCognitoのデフォルトの設定をそのまま使用しました。
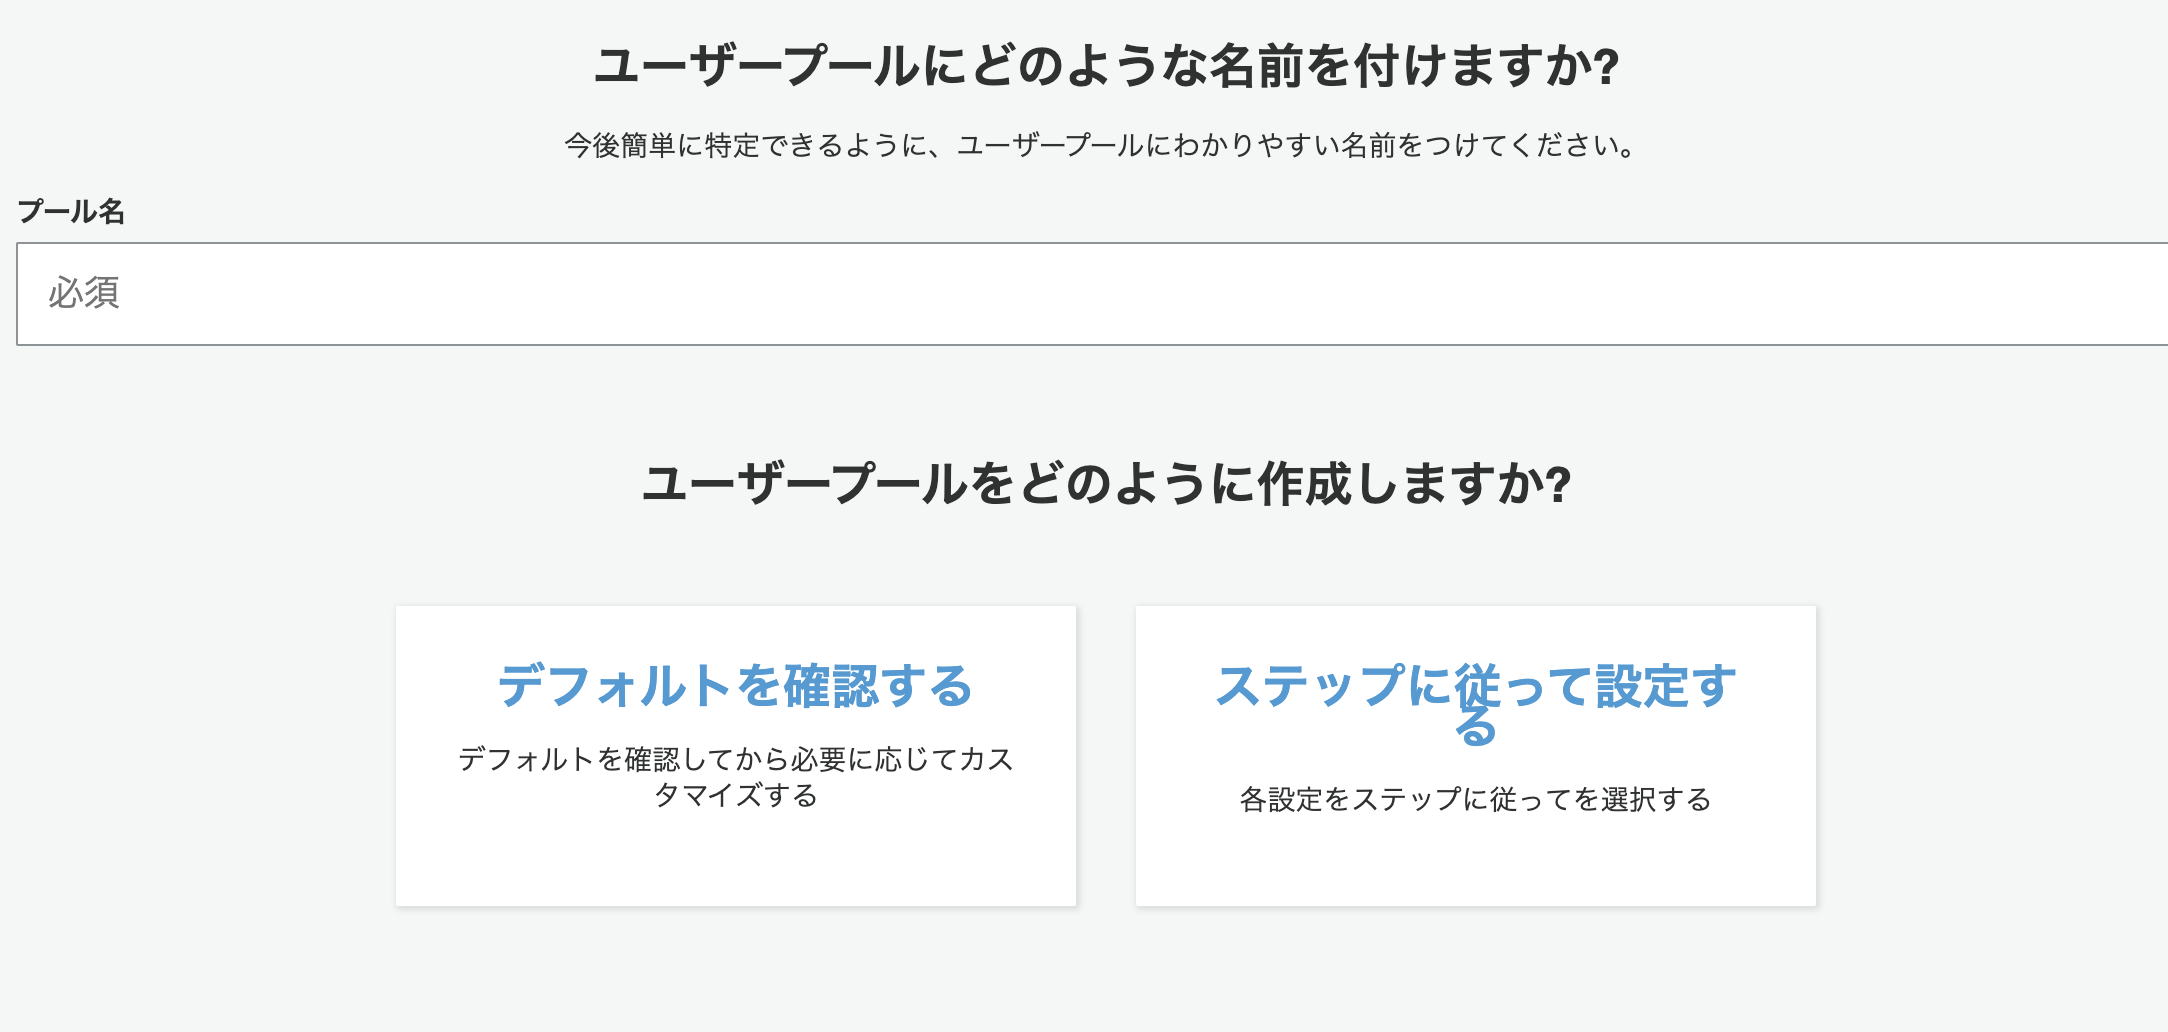
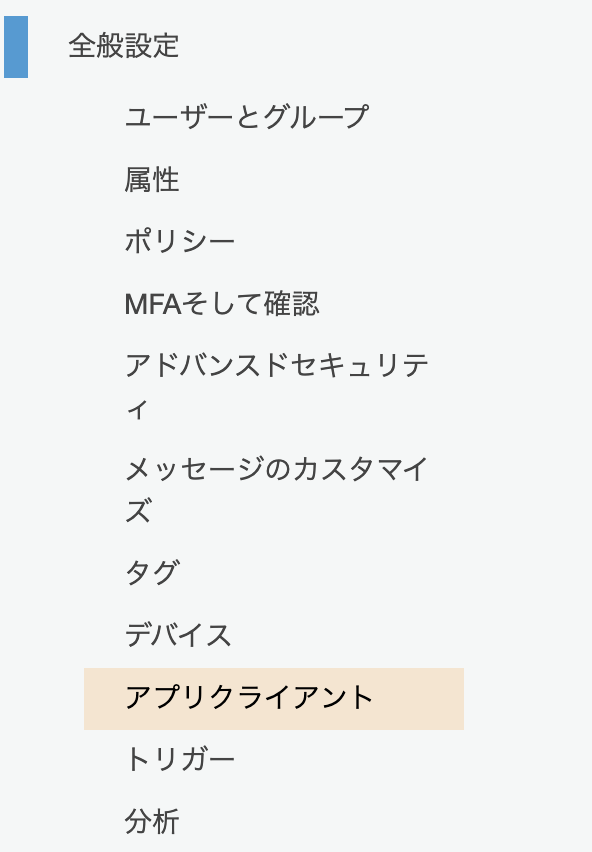
ユーザープールの作成後、アプリクライアントを作成します。
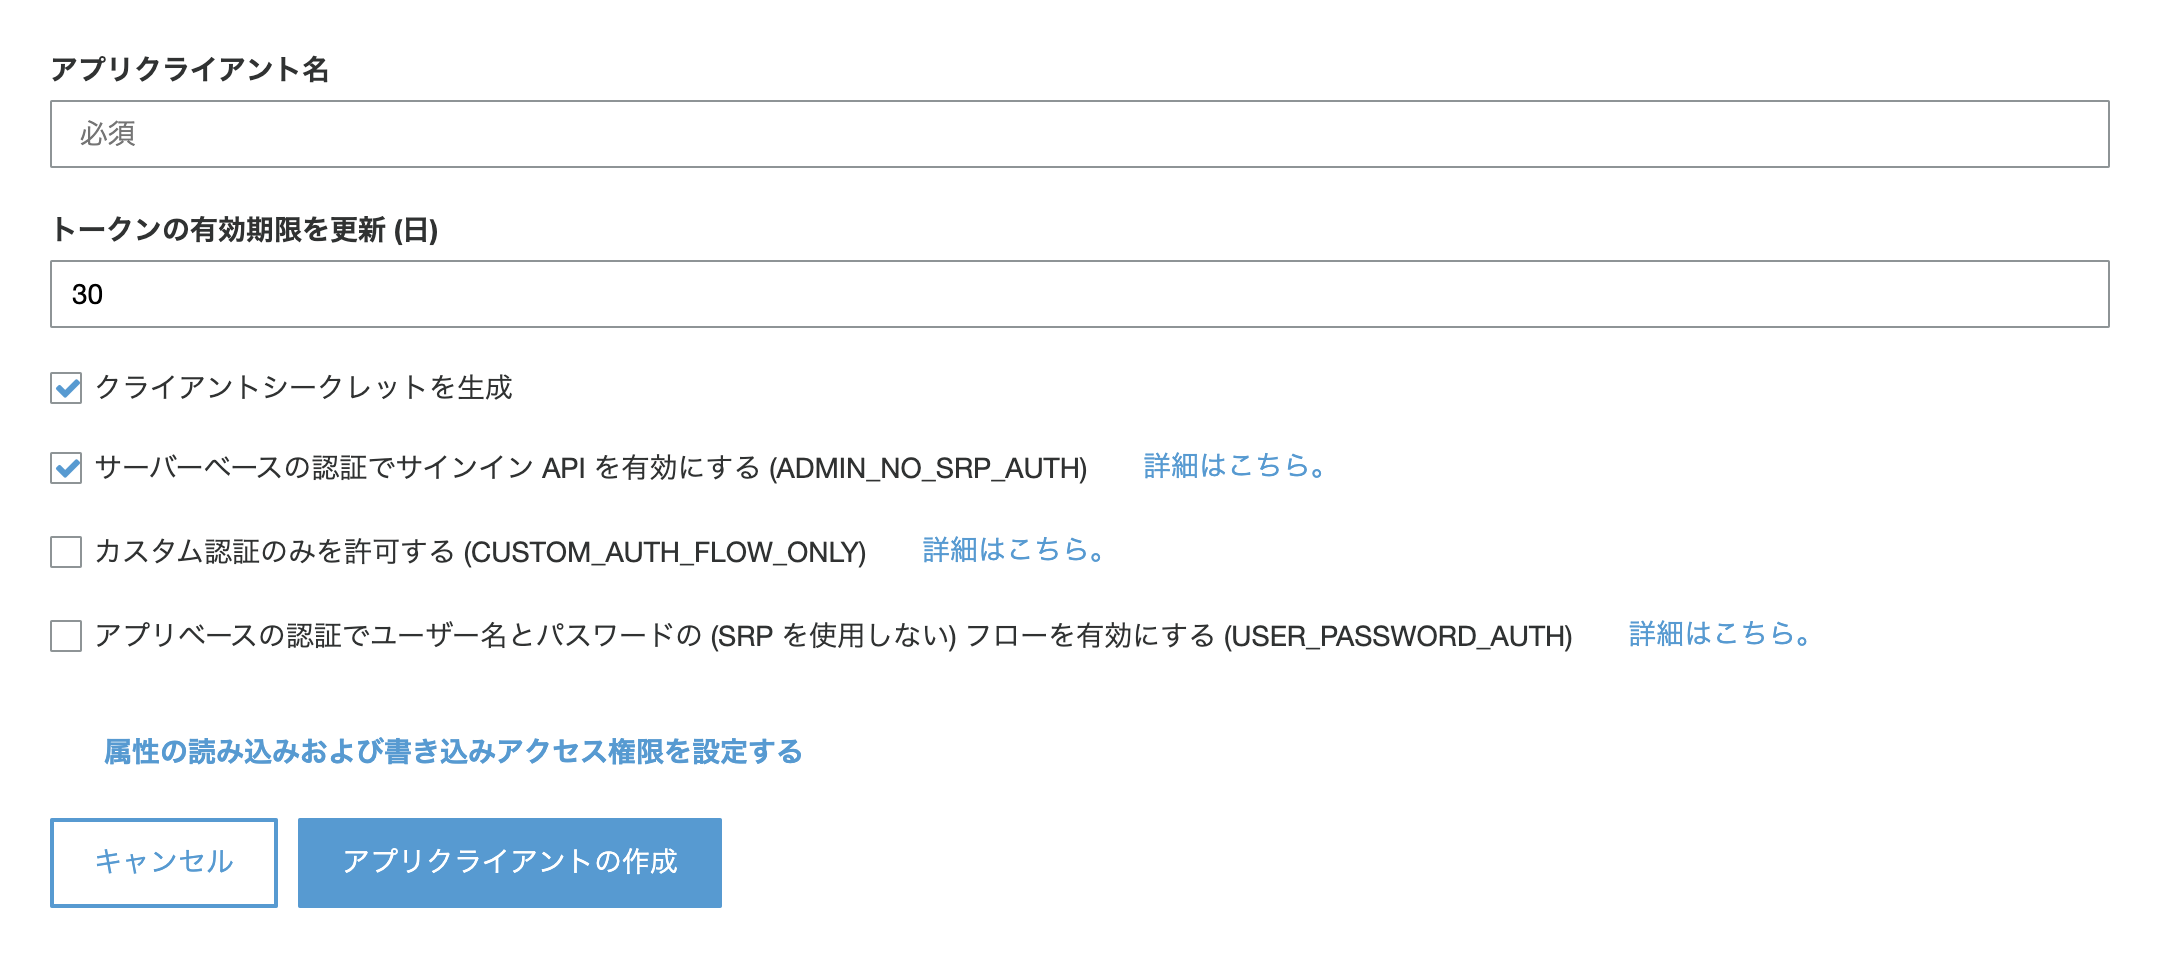
この際、「サーバーベースの認証でサインイン API を有効にする (ADMIN_NO_SRP_AUTH)」にチェックを入れるのを忘れないようにしましょう。
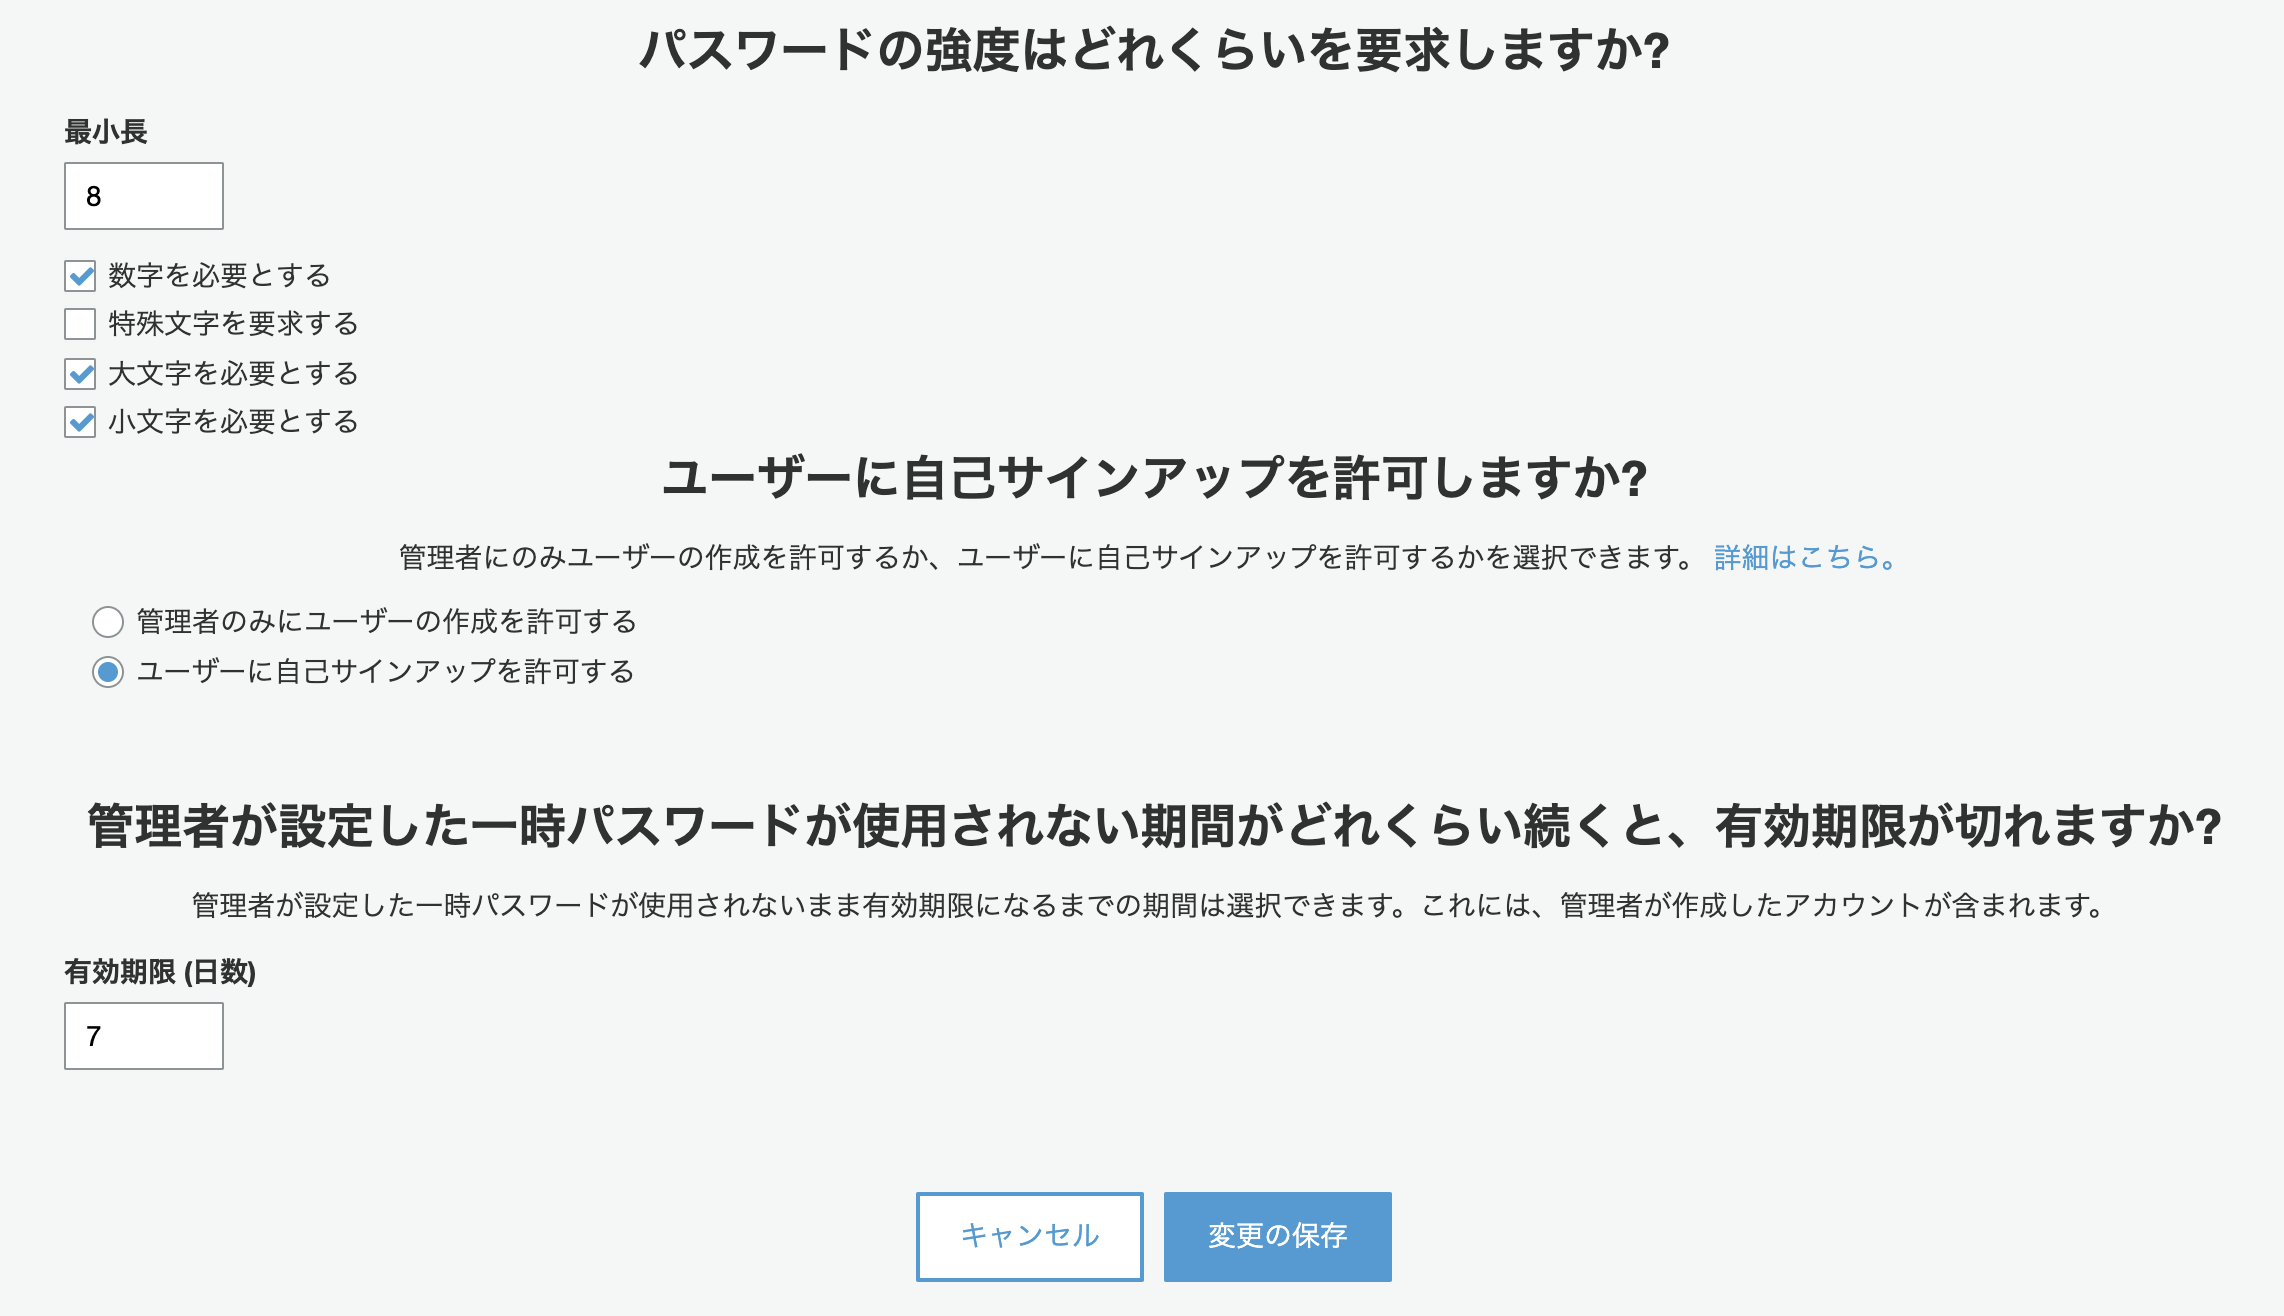
またデフォルトの設定だと、パスワードの制限がかなり厳しくなっているため、少しだけ制限を弱めます。
以下の画面の右上の編集ボタンをクリック

「特殊文字を必要とする」のチェックを外し、保存します。
最後に、作成したCognitoの情報をLaravel側に記述します。
今回はconfig配下にcognito.phpを作成しました。
<?php
return [
    'region'            =>  'ap-northeast-1',
    'version'           =>  '2016-04-18',
    'app_client_id'     =>  '*********************', // 作成したクライアントID
    'app_client_secret' =>  '*********************************', // 作成したクライアントシークレット
    'user_pool_id'      =>  'ap-northeast-1_********' // ユーザープールのID
];
Cognito Clientを実装する
CognitoのAPIにアクセスするためのクライアントを実装します。(まだ具体的なメソッドは追加していません。)
app/Cognito/CognitoClient.php
<?php
    namespace App\Cognito;

    use Aws\CognitoIdentityProvider\CognitoIdentityProviderClient;

    class CognitoClient
    {
        protected $client;
        protected $clientId;
        protected $clientSecret;
        protected $poolId;

        /**
         * CognitoClient constructor
         */
        public function __construct(
            CognitoIdentityProviderClient $client,
            $clientId,
            $clientSecret,
            $poolId
        ) {
            $this->client       = $client;
            $this->clientId     = $clientId;
            $this->clientSecret = $clientSecret;
            $this->poolId       = $poolId;
        }
    }
Cognito Guardを実装する
次にLaravelの認証系で使用されているGuardをCognito用に独自で実装します。
こちらもClientと同じくまずはinitだけで、具体的なメソッドは後から追加していきます。
app/Auth/CognitoGuard.php
<?php
namespace App\Auth;

use App\Cognito\CognitoClient;
use Illuminate\Auth\SessionGuard;
use Illuminate\Contracts\Auth\StatefulGuard;
use Illuminate\Contracts\Auth\UserProvider;
use Illuminate\Contracts\Session\Session;
use Symfony\Component\HttpFoundation\Request;

class CognitoGuard extends SessionGuard implements StatefulGuard
{
    protected $client;
    protected $provider;
    protected $session;
    protected $request;

    /**
     * CognitoGuard constructor.
     */
    public function __construct(
        string $name,
        CognitoClient $client,
        UserProvider $provider,
        Session $session,
        ?Request $request = null
    ) {
        $this->client = $client;
        $this->provider = $provider;
        $this->session = $session;
        $this->request = $request;
        parent::__construct($name, $provider, $session, $request);
    }
}
Cognito用のServiceProviderを実装する
上記で作成したCognito ClientとCognito Guardを使用するためのService Providerを作成します。
app/Providers/CognitoAuthServiceProvider.php
<?php
namespace App\Providers;

use App\Auth\CognitoGuard;
use App\Cognito\CognitoClient;
use Illuminate\Support\ServiceProvider;
use Illuminate\Foundation\Application;
use Aws\CognitoIdentityProvider\CognitoIdentityProviderClient;

class CognitoAuthServiceProvider extends ServiceProvider
{
    public function boot()
    {
        $this->app->singleton(CognitoClient::class, function (Application $app) {
            $config = [
                'region'      => config('cognito.region'),
                'version'     => config('cognito.version')
            ];

            return new CognitoClient(
                new CognitoIdentityProviderClient($config),
                config('cognito.app_client_id'),
                config('cognito.app_client_secret'),
                config('cognito.user_pool_id')
            );
        });

        $this->app['auth']->extend('cognito', function (Application $app, $name, array $config) {
            $guard = new CognitoGuard(
                $name,
                $client = $app->make(CognitoClient::class),
                $app['auth']->createUserProvider($config['provider']),
                $app['session.store'],
                $app['request']
            );

            $guard->setCookieJar($this->app['cookie']);
            $guard->setDispatcher($this->app['events']);
            $guard->setRequest($this->app->refresh('request', $guard, 'setRequest'));

            return $guard;
        });
    }
}
最後に、作成したGuardやProviderを使用するようにLaravelの設定を変更します。
app/config/app.php
 // 中略

'providers' => [
        // 中略

        /*
         * Application Service Providers...
         */
        App\Providers\AppServiceProvider::class,
        App\Providers\AuthServiceProvider::class,
        // App\Providers\BroadcastServiceProvider::class,
        App\Providers\EventServiceProvider::class,
        App\Providers\RouteServiceProvider::class,
        App\Providers\CognitoAuthServiceProvider::class, // <- 追加
];
app/config/auth.php
// 中略
'guards' => [
        'web' => [
            'driver' => 'cognito', // <- 変更
            'provider' => 'users',
        ],
    ],
以上で、Cognitoの初期設定は終了です。
ユーザー新規登録機能をつくる
続いてユーザーの新規登録の画面を作成します。
ルーティングの定義
ルーティングを定義します。
// 追加
Route::get("/register", "Auth\RegisterController@showRegistrationForm")->name('auth.register_form');
Route::post("/register", "Auth\RegisterController@register")->name('auth.register');
viewの作成
次に新規登録用のviewを作成します。
今回は、Laravelのmake:authコマンドで生成されるものを使用しました。
<!DOCTYPE html>
<html lang="{{ str_replace('_', '-', app()->getLocale()) }}">
<head>
    <meta charset="utf-8">
    <meta name="viewport" content="width=device-width, initial-scale=1">

    <!-- CSRF Token -->
    <meta name="csrf-token" content="{{ csrf_token() }}">

    <title>{{ config('app.name', 'Laravel') }}</title>

    <!-- Scripts -->
    <script src="https://ajax.googleapis.com/ajax/libs/jquery/1.12.4/jquery.min.js"></script>
    <script src="{{ asset('js/app.js') }}" defer></script>

    <!-- Fonts -->
    <link rel="dns-prefetch" href="//fonts.gstatic.com">
    <link href="https://fonts.googleapis.com/css?family=Nunito" rel="stylesheet" type="text/css">

    <!-- Styles -->
    <link href="{{ asset('css/app.css') }}" rel="stylesheet">
    <link href="{{ asset('css/style.css') }}" rel="stylesheet">
</head>
<body>
    <div id="app">
        <nav class="navbar navbar-expand-md navbar-light navbar-laravel">
            <div class="container">
                <button class="navbar-toggler" type="button" data-toggle="collapse" data-target="#navbarSupportedContent" aria-controls="navbarSupportedContent" aria-expanded="false" aria-label="{{ __('Toggle navigation') }}">
                    <span class="navbar-toggler-icon"></span>
                </button>
            </div>
        </nav>
        <main class="py-4">
            @yield('content')
        </main>
    </div>
</body>
</html>
@extends('layouts.default')

@section('content')
<div class="container">
    <div class="row justify-content-center">
        <div class="col-md-8">
            <div class="card">
                <div class="card-header">新規登録</div>

                <div class="card-body">
                    <form method="POST" action="{{ route('auth.register') }}">
                        @csrf

                        <div class="form-group row">
                            <label for="email" class="col-md-4 col-form-label text-md-right">メールアドレス</label>

                            <div class="col-md-6">
                                <input id="email" type="email" class="form-control{{ $errors->has('email') ? ' is-invalid' : '' }}" name="email" value="{{ old('email') }}" required>

                                @if ($errors->has('email'))
                                    <span class="invalid-feedback" role="alert">
                                        <strong>{{ $errors->first('email') }}</strong>
                                    </span>
                                @endif
                            </div>
                        </div>

                        <div class="form-group row">
                            <label for="password" class="col-md-4 col-form-label text-md-right">パスワード</label>

                            <div class="col-md-6">
                                <input id="password" type="password" class="form-control{{ $errors->has('password') ? ' is-invalid' : '' }}" name="password" required>

                                @if ($errors->has('password'))
                                    <span class="invalid-feedback" role="alert">
                                        <strong>{{ $errors->first('password') }}</strong>
                                    </span>
                                @endif
                            </div>
                        </div>

                        <div class="form-group row">
                            <label for="password-confirm" class="col-md-4 col-form-label text-md-right">パスワード確認</label>

                            <div class="col-md-6">
                                <input id="password-confirm" type="password" class="form-control" name="password_confirmation" required>
                            </div>
                        </div>

                        <div class="form-group row mb-0">
                            <div class="col-md-6 offset-md-4">
                                <button type="submit" class="btn btn-primary">登録</button>
                            </div>
                        </div>
                    </form>
                </div>
            </div>
        </div>
    </div>
</div>
@endsection
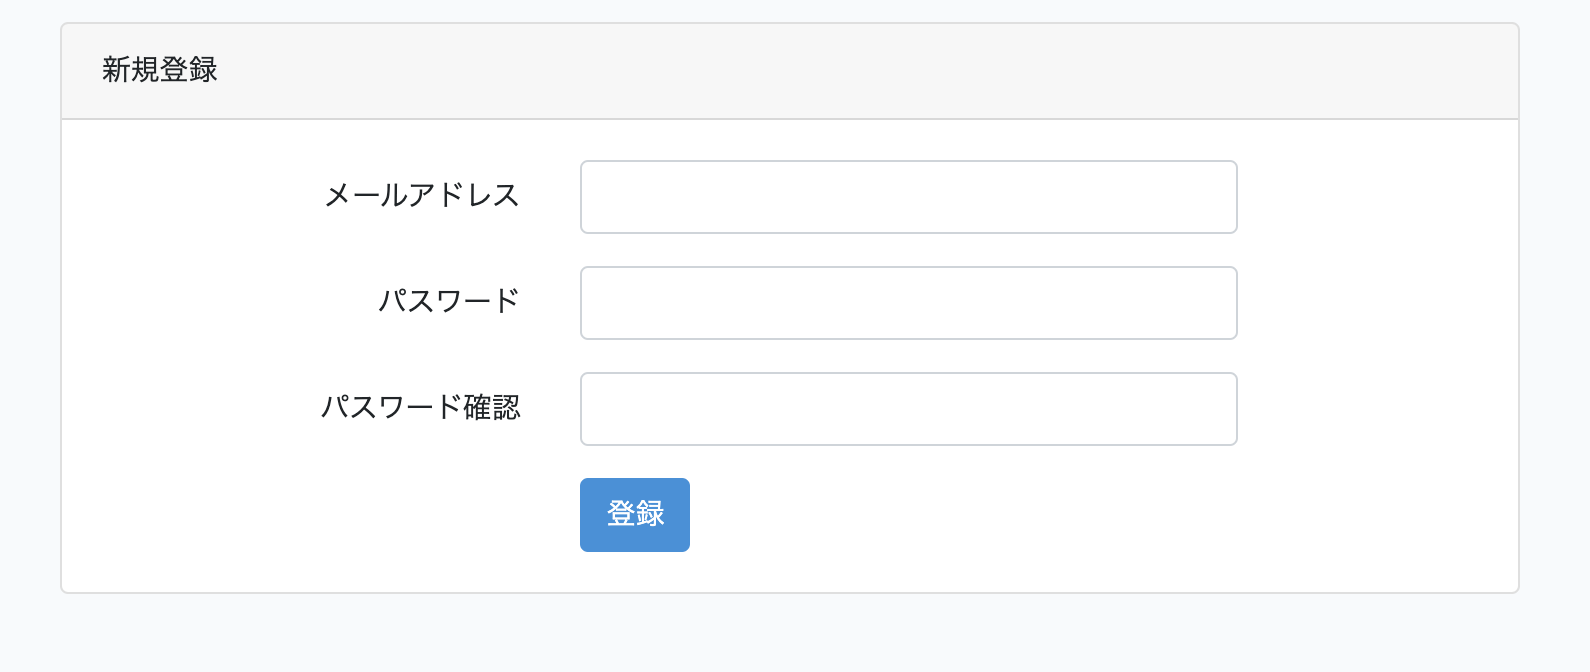
この状態で/registerにアクセスすると、以下の画面が表示されます。
Cognitoの新規登録機能を実装
まずは、先ほど作成したCognitoClientとCognitoGuardに、
ユーザー新規登録のメソッドを追加していきます。
<?php
namespace App\Cognito;
use Aws\CognitoIdentityProvider\CognitoIdentityProviderClient;
use Aws\CognitoIdentityProvider\Exception\CognitoIdentityProviderException;

class CognitoClient
{
    protected $client;
    protected $clientId;
    protected $clientSecret;
    protected $poolId;

    /**
     * CognitoClient constructor
     */
    public function __construct(
        CognitoIdentityProviderClient $client,
        $clientId,
        $clientSecret,
        $poolId
    ) {
        $this->client       = $client;
        $this->clientId     = $clientId;
        $this->clientSecret = $clientSecret;
        $this->poolId       = $poolId;
    }

    // 追加
    /**
     * register
     */
    public function register($email, $password, $attributes = [])
    {
        try
        {
            $response = $this->client->signUp([
                'ClientId' => $this->clientId,
                'Password' => $password,
                'SecretHash' => $this->cognitoSecretHash($email),
                'UserAttributes' => $this->formatAttributes($attributes),
                'Username' => $email
            ]);
        } catch (CognitoIdentityProviderException $e) {
            throw $e;
        }
        return $response['UserSub'];
    }

    /**
     * cognitoSecretHash
     */
    protected function cognitoSecretHash($username)
    {
        return $this->hash($username . $this->clientId);
    }

    /**
     * hash
     */
    protected function hash($message)
    {
        $hash = hash_hmac(
            'sha256',
            $message,
            $this->clientSecret,
            true
        );
        return base64_encode($hash);
    }

    /**
     * formatAttributes
     * attributesを保存用に整形
     */
    protected function formatAttributes(array $attributes)
    {
        $userAttributes = [];
        foreach ($attributes as $key => $value) {
            $userAttributes[] = [
                'Name' => $key,
                'Value' => $value,
            ];
        }
        return $userAttributes;
    }

    /**
     * getUser
     * メールアドレスからユーザー情報を取得する
     */
    public function getUser($username)
    {
        try {
            $user = $this->client->adminGetUser([
                'Username' => $username,
                'UserPoolId' => $this->poolId,
            ]);
        } catch (CognitoIdentityProviderException $e) {
            return false;
        }
        return $user;
    }
Guardにも追加します。
// 中略
   /**
     * register
     * ユーザーを新規登録
     */
    public function register($email, $pass, $attributes = [])
    {
        $username = $this->client->register($email, $pass, $attributes);
        return $username;
    }

    /**
     * getCognitoUser
     * メールアドレスからCognitoのユーザー名を取得
     */
    public function getCognitoUser($email)
    {
        return $this->client->getUser($email);
    }

// 中略
カスタムバリデーションを追加
次に、Cognitoに既に存在するユーザーの登録を防ぐためのカスタムバリデーションを作成します。
<?php
namespace App\Validators;

use Illuminate\Auth\AuthManager;

class CognitoUserUniqueValidator {

    public function __construct(AuthManager $AuthManager)
    {
        $this->AuthManager = $AuthManager;
    }

    public function validate($attribute, $value, $parameters, $validator)
    {
        $cognitoUser = $this->AuthManager->getCognitoUser($value);
        if ($cognitoUser) {
            return false;
        }
        return true;
    }
}
カスタムバリデーションは、AppServiceProvider.phpで使用できるようにします。
// 中略

public function boot()
    {
        // 追加
        Validator::extendImplicit('cognito_user_unique', 'App\Validators\CognitoUserUniqueValidator@validate');
    }

// 中略
バリデーションメッセージを設定します。
php:resources/lang/ja/validation.php

 // 追加

 'cognito_user_unique' => '指定されたメールアドレスのユーザーは既に存在します',
Controllerの編集
最後に、RegisterControllerのregisterメソッドを上書きして、Cognitoが連携された新規登録機能を作成します。
<?php

namespace App\Http\Controllers\Auth;

use App\User;
use App\Http\Controllers\Controller;
// use Illuminate\Support\Facades\Hash; // 削除
use Illuminate\Support\Facades\Validator;
use Illuminate\Foundation\Auth\RegistersUsers;
// 追加
use Illuminate\Auth\AuthManager;
use Illuminate\Http\Request;
use App\Rules\CognitoUserUniqueRule;
use Illuminate\Auth\Events\Registered;

class RegisterController extends Controller
{
    use RegistersUsers;

    protected $redirectTo = '/';

    private $AuthManager; // 追加

    public function __construct(AuthManager $AuthManager)
    {
        $this->middleware('guest');
        // CognitoのGuardを読み込む
        $this->AuthManager = $AuthManager;
    }

    public function register(Request $request)
    {
        $data = $request->all();

        $this->validator($data)->validate();

        // Cognito側の新規登録
        $username = $this->AuthManager->register(
            $data['email'],
            $data['password'],
            [
                'email' => $data['email'],
            ]
        );

        // Laravel側の新規登録
        $user = $this->create($data, $username);
        event(new Registered($user));
        return redirect($this->redirectPath());
    }

    protected function validator(array $data)
    {
        return Validator::make($data, [
            'email' => ['required', 'string', 'email', 'max:255', 'unique:users', 'cognito_user_unique'],
            'password' => [
                'required', 'string', 'min:8', 'confirmed',
                'regex:/\A(?=.*?[a-z])(?=.*?[A-Z])(?=.*?\d)[a-zA-Z\d]{8,100}+\z/'
            ],
        ]);
    }

    protected function create(array $data, $username)
    {
        return User::create([
            'cognito_username' => $username,
            'email'            => $data['email'],
        ]);
    }
}
ユーザー登録を試してみる
ここまでできたら、画面から実際にユーザー登録をしてみます。

登録が完了すると、TOP画面に遷移し、入力したメールアドレスに以下のようなメールが届きます。

メールが届けば、ユーザー登録は完了です。
Cognitoのコンソール画面にもユーザーが登録されているのが確認できます。
今回はここまでになります。
次回は、メールの認証の実装をしていきます。
お疲れ様でした。
参考URL
https://blackbits.io/blog/laravel-authentication-with-aws-cognito
https://github.com/minoryorg/laravel-resources-lang-ja


コメント