You have 2 free member-only stories left this month.
Run an Instant Ubuntu VMs on Mac/Windows/Linux
Introduction to Ubuntu Multipass

Multipass is one of the options you can use Ubuntu with on Mac, Windows, or Linux. It is easy to launch and control Ubuntu instances. In this article, we are going to learn basic operations including mounting a local directory to a Multipass instance, opening a shell prompt, and adding a path to the ~/.bashrc.
“Multipass is a mini-cloud on your workstation using native hypervisors of all the supported plaforms (Windows, macOS and Linux), it will give you an Ubuntu command line in just a click.” — https://multipass.run/docs
Installation

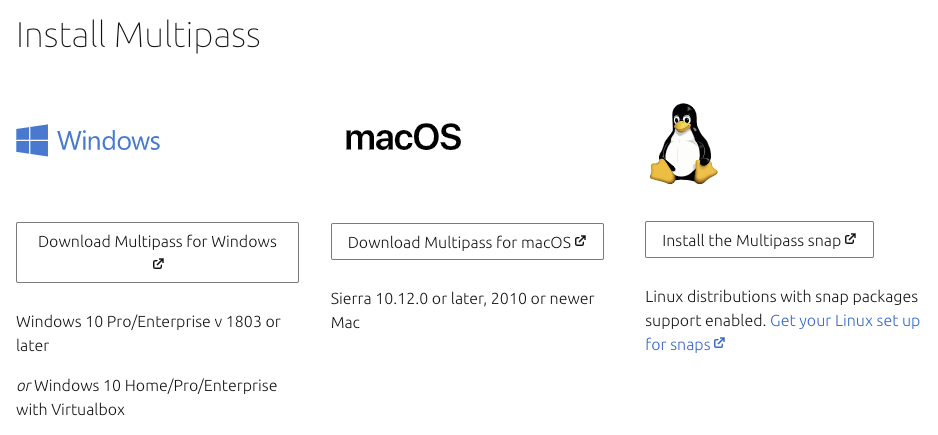
Download Multipass for your system and install it.
If you are using macOS:
brew install --cask multipassGetting started
Start a new Ubuntu instance:
$ multipass launch --name shin-instance
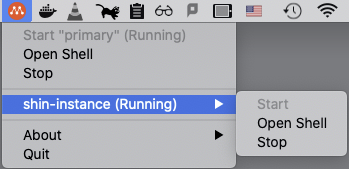
List all multipass instances:
$ multipass listStop the running instance:
$ multipass stop shin-instanceStart the instance:
$ multipass start shin-instanceShow all the Multipass commands:
Get help:
$ multipass help
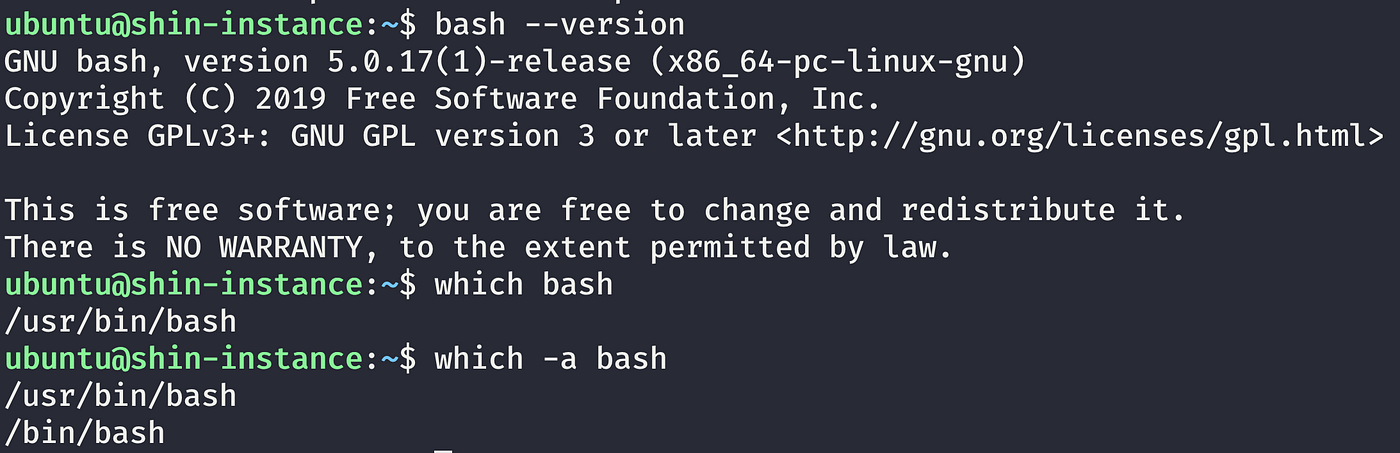
$ multipass Opening a shell prompt
Use multipass shell instance-name to open a shell prompt.
$ multipass shell shin-instanceOnce you are in the instance, you can use terminal commands:
ubuntu@shin-instance:~$ bash --version
ubuntu@shin-instance:~$ which bash
ubuntu@shin-instance:~$ which -a bash
Update
You may get an error when you run sudo apt-get update. Then run the following after opening a shell prompt:
ubuntu@shin-instance:~ $echo "nameserver 8.8.8.8" | sudo tee /etc/resolv.conf > /dev/null
ubuntu@shin-instance:~$ sudo apt-get update
# installing zsh
ubuntu@shin-instance:~$ sudo apt-get install zsh
macOS
I use the Multipass on my MacBook Pro and the DNS server that’s set up for Multipass wasn’t working.
After reading this article, I found that I need to add nameserver to /etc/resolv.conf.
$ sudo vim /etc/resolv.conf# add the followingnameserver 192.168.64.1
nameserver 1.1.1.1
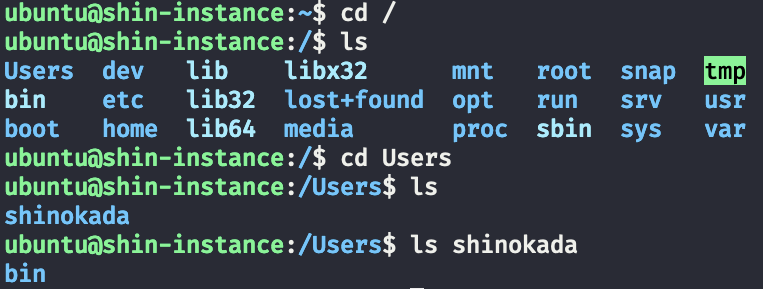
Mounting the local directory
You can mount the local directory to your Multipass instance.
# Mount my local directory (on Mac) ~/bin to the instance
$ multipass mount $HOME/bin shin-instance
You can find the local directory under /Users/username in the Multipass instance:
Adding Path to bashrc
The Multipass terminal’s config file is ~/.bashrc.
Open the shell prompt on the instance and let’s export the PATH in the ~/.bashrc:
ubuntu@shin-instance:~$ vi ~/.bashrcIn the .bashrc add the following at the end:
export PATH="/Users/username/bin:$PATH"You need to change the username accordingly.
Check if the PATH is added:
ubuntu@shin-instance:~$ echo $PATHIf it is not in the path, reload the ~/.bashrc.
# reloading .bashrc
ubuntu@shin-instance:~$ source ~/.bashrc
# or
ubuntu@shin-instance:~$ . ~/.bashrc
ubuntu@shin-instance:~$ echo $PATH
If the above method doesn’t work, then exit the instance and open a shell prompt again.
# exit
ubuntu@shin-instance:~$ exit
# connect again
$ multipass shell shin-instance
ubuntu@shin-instance:~$ echo $PATH
Cleaning up
You can delete instances:
$ multipass delete shin-instance anther-instanceYou can purge all deleted instances permanently:
$ multipass purgeConfiguration
The multipass set command sets the configuration. For example, to set the autostart login to false:
$ multipass set client.gui.autostart=falseYou can set a keyboard shortcut for the GUI to open a shell into the primary instance, the name of the primary instance, and more.
Find out more what you can do by using multipass help set.
Wrapping Up
That’s all folks. Since Multipass has limited commands it is easy to control Ubuntu instances. You can find more details in the Multipass Documentation and get help from the Multipass forum.
Newsletter