はじめに
malware解析インターンでREMnuxというmalware解析に便利なdistroがあるよ、と教えていただき、どんなものか知りたくなったのでその過程を書いてきたいと思います。windows&virtualboxが必要です。
REMnuxとは?
- malware解析やリバースエンジニアリングに必要なツールが入っている
- Ubuntuベースの軽量ディストリビューション
- office製品で発見されたmalwareを解析するためのツール(その他多数)
- 動的解析もできる!
- dockerイメージも提供されてるようです
- 詳細は、ドキュメントを参照してください
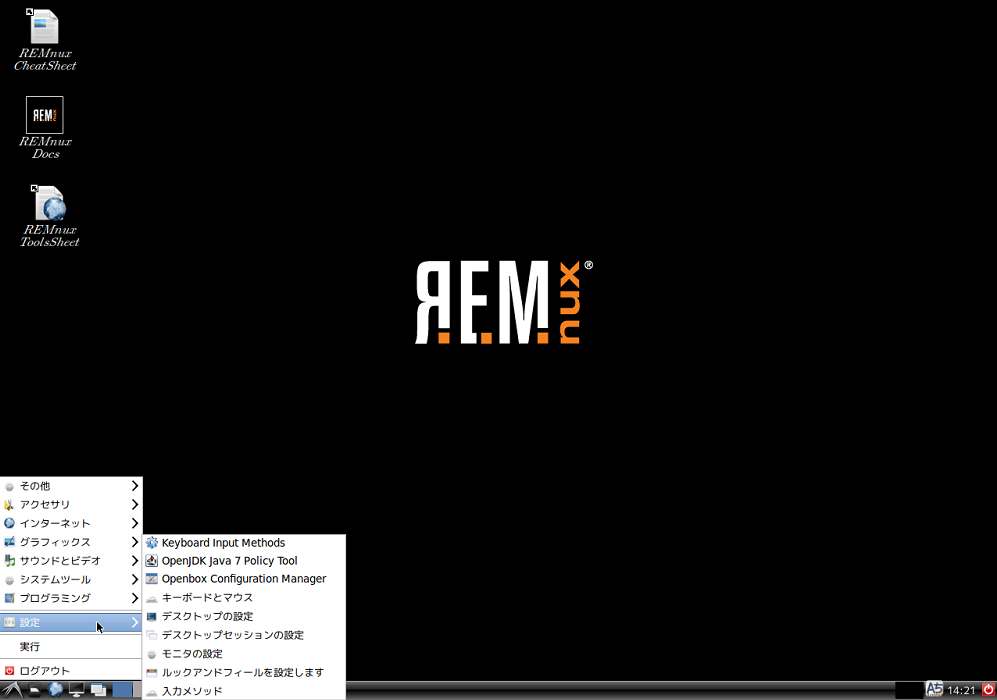
完成形⬇︎
The REMnux distribution includes many free tools useful for examining malicious software. These utilities are set up and tested to make it easier for you to perform malware analysis tasks without needing to figure out how to install them. The tools installed on REMnux can help you:
- Examine browser malware
- Analyze malicious document files
- Extract and decode suspicious artifacts
- Handle laboratory network interactions
- Review multiple malware samples
- Examine properties and contents of suspicious files
- Investigate Linux and Windows malware
- Perform memory forensics
REMnux cheat sheet
REMnuxをダウンロード
- REMnuxホームページ内の"download the REMnux virtual applianse file"をクリック
- ovaファイル形式でダウンロードされます(2GB)
- ハッシュ値の確認をcmdで行って下さい↓
certutil -hashfile ダウンロードしたremnux-6.0-ova-public.ovaのPATH SHA256- REMnuxのホームページに載っているハッシュ値と合致していることを確認できればOKです
virtualboxにインポート
- virtualboxを起動
- 左上のファイルをクリック
- 仮想アプライアンスのインポートをクリック
- 先ほどダウンロードしたremnux-6.0-ova-public.ovaを選択
- 次へを押すと仮想アプライアンスの設定が表示されます(必要に応じて設定)
- インポートをクリックで完了です
以下の項目は順不同
まず次のコマンドを実行するとつまずかずに設定できると思います
1. setxkbmap jp
2. sudo passwd root
3. su root
4. apt-get update && apt-get upgrade
update-remnux
remnuxを起動することができたら、
1. sudo update-remnux full
2. sudo reboot
remnux@remnux:~$ update-remnux --help
Unknown parameter '--help'.
Specify 'full' to perform a full installation.
Launch without any parameters for a typical upgrade.


remnux@remnux:~$ sudo update-remnux full
 * INFO: Installing REMnux. Details logged to /var/log/remnux-install.log.
 * INFO: Updating the base APT repository package list...
 * INFO: Installing the software-properties-common package...
 * INFO: Enabling additional APT repositories...
 * INFO: Updating the APT repository package list...
 * INFO: Upgrading all APT packages to latest versions...
 * INFO: Installing APT Package: xterm
 * INFO: Installing APT Package: vbindiff
 * INFO: Installing APT Package: wxhexeditor
...
...
 * INFO: Applying REMnux backwards compatibility settings
 * INFO: Taking the dog for a walk
 * INFO: Setting permissions for root
 * INFO: Updating REMnux documentation
 * INFO: Cleaning Up
 * INFO: ---------------------------------------------------------------
 * INFO: REMnux Installation Complete!
 * INFO: See documentation at https://REMnux.org/docs
 * INFO: Reboot for the settings to take full effect ("sudo reboot").
 * INFO: ---------------------------------------------------------------
日本語の設定
sudo apt-get install ibus-anthy language-pack-ja fonts-vlgothicexport LANG=ja_JP.UTF-8update-locale LANG=ja_JP.UTF-8
再起動後、
1.設定→Keyboard input Methodsでanthyを追加してください
画面のリサイズ
起動直後は画面サイズが小さいので大きくしましょう!
まずrootのパスワードを設定します
また、キーボードの挙動もおかしいと思うので日本語配列に設定(一時的な設定)します
setxkbmap jp
-
sudo passwd rootで新しいrootのパスワードを設定します - rootユーザになったら
/etc/default/grubを設定します -
vi /etc/default/grubで設定ファイルを開くと次のようになります
# If you change this file, run 'update-grub' afterwards to update
# /boot/grub/grub.cfg.
# For full documentation of the options in this file, see:
#   info -f grub -n 'Simple configuration'

GRUB_DEFAULT=0
GRUB_HIDDEN_TIMEOUT=0
GRUB_HIDDEN_TIMEOUT_QUIET=true
GRUB_TIMEOUT=10
GRUB_DISTRIBUTOR=`lsb_release -i -s 2> /dev/null || echo Debian`
GRUB_CMDLINE_LINUX_DEFAULT="splash quiet"
GRUB_CMDLINE_LINUX=""
...
...
GRUB_CMDLINE_LINUX=""の所にvga=975を入れます
vga=795です。
vga解像度の値は他にもあるそうです
GRUB_CMDLINE_LINUX="vga=795"
設定を反映させるために次のコマンドを打ちます
grub-mkconfig -o /boot/grub/grub.cfg
root@remnux:~# grub-mkconfig -o /boot/grub/grub.cfg
Generating grub configuration file ...
Warning: Setting GRUB_TIMEOUT to a non-zero value when GRUB_HIDDEN_TIMEOUT is set is no longer supported.
Linux イメージを見つけました: /boot/vmlinuz-3.13.0-53-generic
Found initrd image: /boot/initrd.img-3.13.0-53-generic
Found memtest86+ image: /boot/memtest86+.elf
Found memtest86+ image: /boot/memtest86+.bin
完了
設定が反映されたので再起動すると画面が1280*1024の大きさになります
ロケールの設定
dpkg-reconfigure tzdata- asiaを選択
- tokyoを選択
root@remnux:~# dpkg-reconfigure tzdata

Current default time zone: 'Asia/Tokyo'
Local time is now:      Wed Sep 19 19:57:34 JST 2018.
Universal Time is now:  Wed Sep 19 10:57:34 UTC 2018.
キーボードの設定
再起動後また日本語配列ではなくなってしまうため、恒久的な設定をします
dpkg-reconfigure keyboard-configuration
- 標準105キー(国際) PC を選択
- 日本語 を選択
- キーボードレイアウトも日本語 を選択
- その後3つくらい質問されますがそのままenterで大丈夫です
root@remnux:~# dpkg-reconfigure keyboard-configuration
Your console font configuration will be updated the next time your system
boots. If you want to update it now, run 'setupcon' from a virtual console.
update-initramfs: deferring update (trigger activated)
initramfs-tools (0.103ubuntu4.11) のトリガを処理しています ...
update-initramfs: Generating /boot/initrd.img-3.13.0-53-generic
キーボードとロケールの設定が終わると次のようになりました
remnux@remnux:~$ localectl
   System Locale: LANG=ja_JP.UTF-8
       VC Keymap: n/a
      X11 Layout: jp
       X11 Model: pc105
参考文献
- 解析環境: HTTPS通信も解析できるマルウェア解析環境の構築(2018-08-05)
- REMnuxは遊べるぞ~!!(1)(2016-09-24)
- マルウェア解析に特化したLinuxディストリビューションREMnuxを使ってみた(2014-05-25)
- CentOS7 コンソールの解像度変更(2017/07/26)
- REMnuxの設定-でーたべーす(2014-08-30)
- REMnux インストール(2016-06-05)
- Linux入門、ローカライゼーションのためのロケール情報設定方法(2016-10-20)
- Ubuntuに日本語localeを設定する(2008-11-04)
- Debianで日本語フォントが化けるようになった時の対症療法(2014-01-21)
- Ubuntu 16.04LTSのキーボードを日本語(JIS)に変更する(2017-03-10)

コメント