こんにちは、あんはるです。
接触確認アプリ「Cocoa」の開発に貢献したこと、そして、簡単に開発に参加する方法を紹介します。
追記 7/12
この記事見て実際に接触確認アプリを改善してみました!っていう方
いらっしゃったらご連絡ください
接触確認アプリ「Cocoa」はOSSだった!
ニュースで話題になっていた接触確認アプリ「Cocoa」。誰が、どこの会社が、作っているのだろうか、と気になっていましたが、OSSで開発されていると知りました。
つまり、自分でも「Cocoa」の開発ができるということです。
私がした改善(マージされたプルリク)
問題を発見
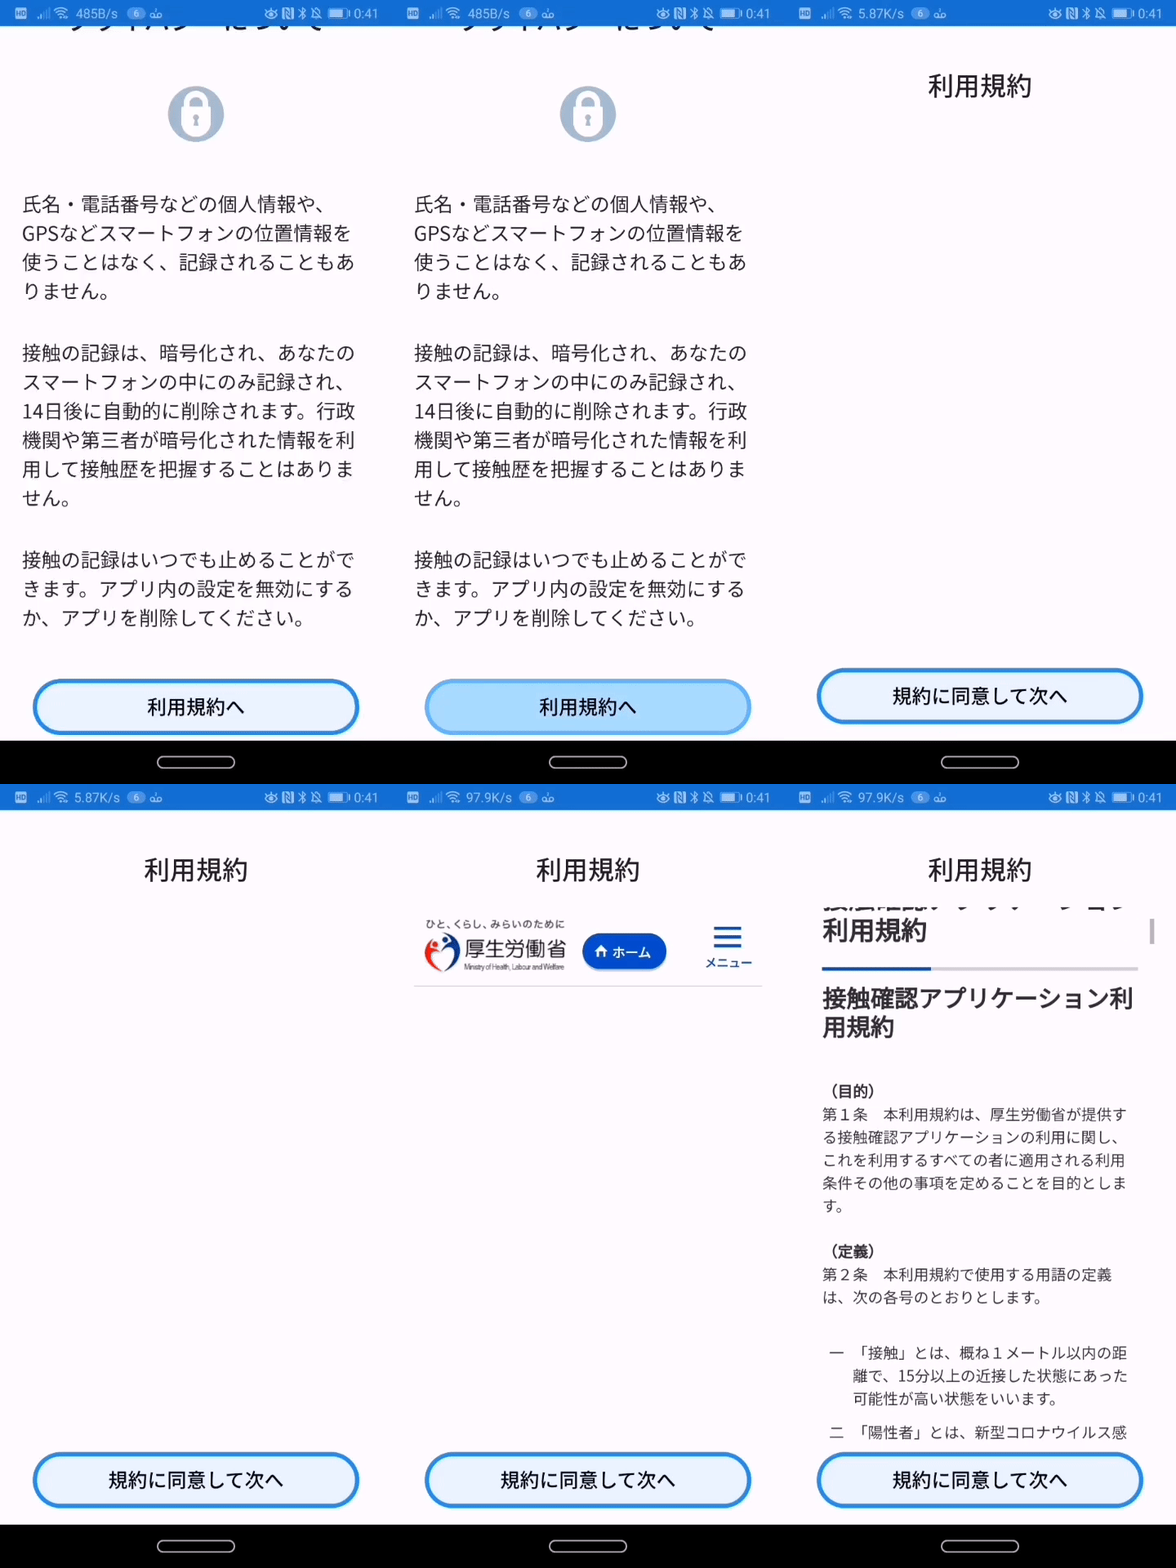
初めてアプリを起動しとき、利用規約の同意するページが出ます。
その時、利用規約のウェブページがはめ込まれているのですが、読み込んでる間何も出ないという問題です。
ソースコードを編集
このアプリは、Xamarinで書かれています。今まで使ったことがなかったので、ちょっと勉強しました。
編集した箇所
まず、ProgressBarを追加します。
<Grid Style="{StaticResource DefaultGridLayout}">
        <Grid.RowDefinitions>
            <RowDefinition Height="Auto" />
            <RowDefinition Height="*" />
            <RowDefinition Height="Auto" />
        </Grid.RowDefinitions>
        <Label Grid.Row="0" Margin="0,0,0,20" Style="{StaticResource DefaultTitleLabel}" Text="{x:Static resources:AppResources.TutorialPage3Title}" />
        <StackLayout Grid.Row="1">
            <ProgressBar  Progress="0.0" IsVisible="false" HorizontalOptions="FillAndExpand" x:Name="activity_indicator"  />
            <views:NavigatePopoverWebView
                Source="{x:Static resources:AppResources.UrlTermOfUse}"
                Style="{StaticResource DefaultWebView}"
                VerticalOptions="FillAndExpand" Navigating="OnNavigating" Navigated="OnNavigated" HorizontalOptions="FillAndExpand" />
        </StackLayout>
        <Button Grid.Row="2"
            AutomationId="NextButton"
            Command="{Binding Path=OnClickAgree}"
            Style="{StaticResource DefaultButton}"
            Text="{x:Static resources:AppResources.TutorialPage3ButtonText}" />
    </Grid>
そして、ProgressBarが動くようにするのと、ローディングが終わったら消えるようにします。
using Xamarin.Forms;
using Xamarin.Forms.Xaml;

namespace Covid19Radar.Views
{
    [XamlCompilation(XamlCompilationOptions.Compile)]
    public partial class TutorialPage3 : ContentPage
    {
        public TutorialPage3()
        {
            InitializeComponent();
        }
        protected async override void OnAppearing()
        {
            base.OnAppearing();
            await activity_indicator.ProgressTo(1.0, 900, Easing.SpringIn);

        }

        public void OnNavigating(object sender, WebNavigatingEventArgs e)
        {
            activity_indicator.IsVisible = true;


        }

        public void OnNavigated(object sender, WebNavigatedEventArgs e)
        {

            activity_indicator.IsVisible = false;

        }
    }
}
プルリクを出す(改善依頼)
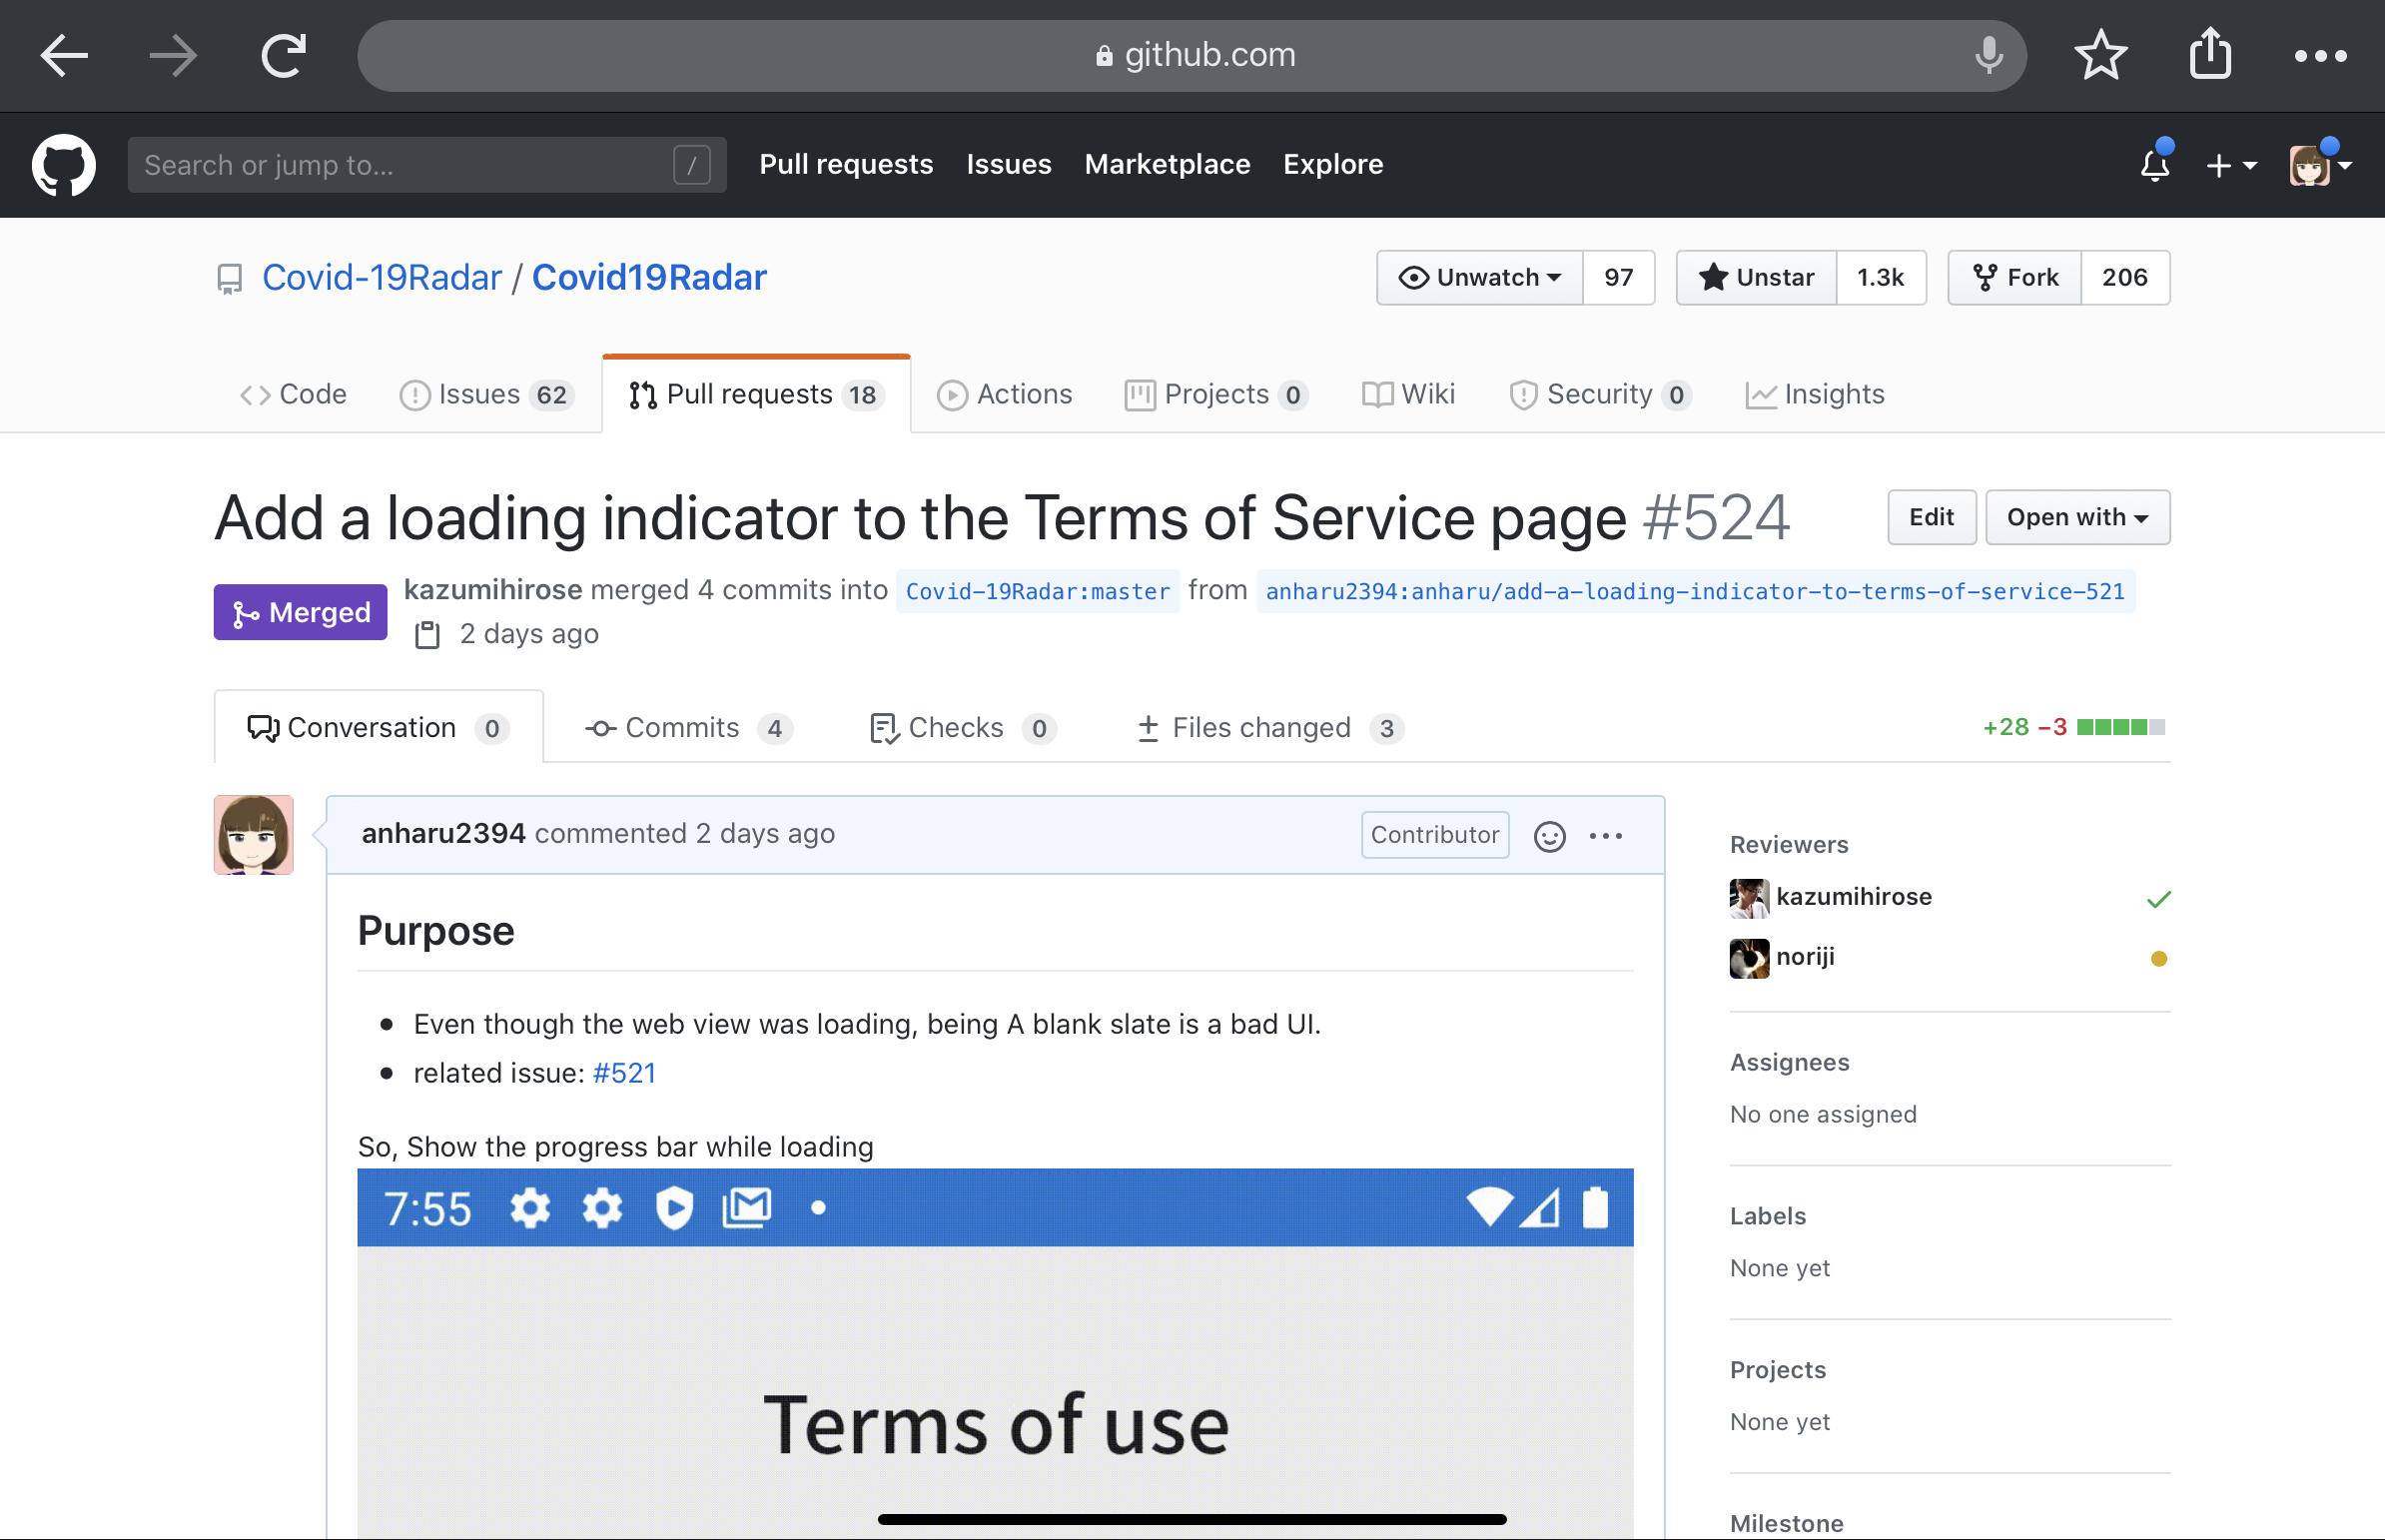
この編集をプルリクに出して、レビュワーにレビューしてもらいます。
プルリクのスクリーンショット↓
一日もたたずに採用🎉
@Kazumihirose さんのレビュー・マージにより、私の改善が採用されました🎉 🎉
おそらく、次のアップデートには反映されていると思います。
あなたもできる、一日でXamarinを学びアプリ改善してみよう
Twitterで日々寄せられるバグ報告
「なんかCocoa使いづらいなぁ」「この表示なんか変じゃない?」と思ったら、実際にアプリを改善してみましょう。
誰でも改善できるのがOSSの良いところです。
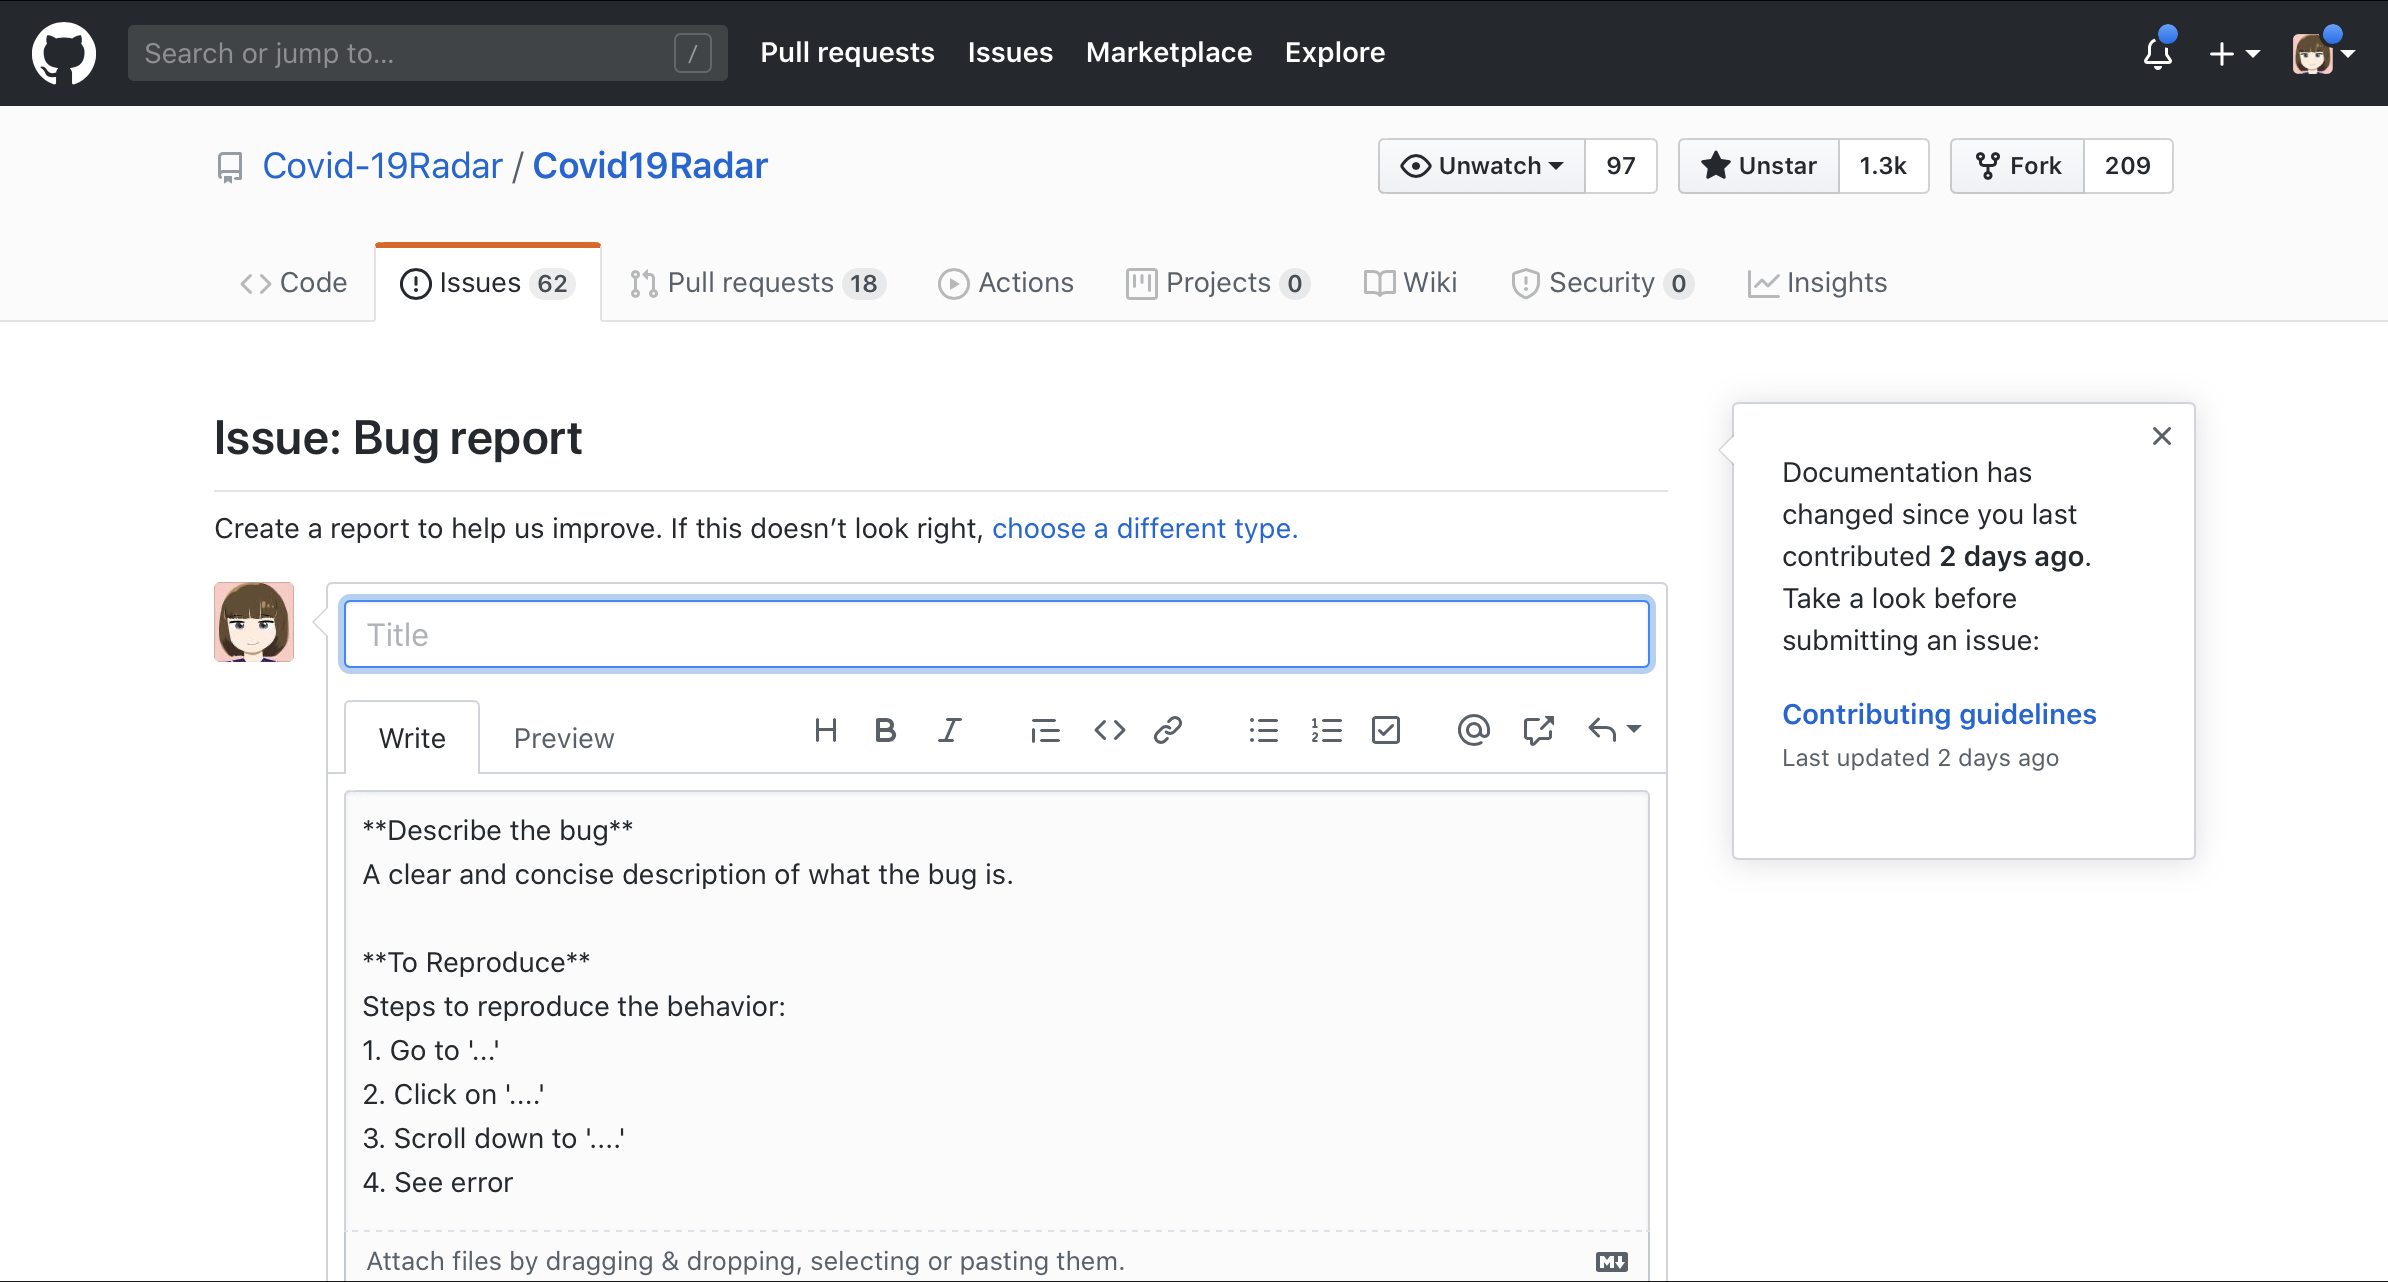
見つけた問題・バグをGitHubのissueで報告
https://github.com/Covid-19Radar/Covid19Radar/issues
を開き、
右下の、New issueボタンを押しましょう。
Issueの作成画面に映るので、問題に関して説明やどういう手順を踏んだら問題が起こるのかはっきりさせましょう。
規約などはありませんが、英語で書いている方が多いので英語の方がいいのかもしれません。(日本語でもOK)
環境構築
https://github.com/Covid-19Radar/Covid19Radar/blob/master/doc/Developer.md
このリンクに、インストールすべきものは書いてあります。
主に、Xamarinの導入なので、https://docs.microsoft.com/ja-jp/xamarin/get-started/installation/
を参考にしてみましょう。
Xamarin入門する
コードを改善するには、Xamarinをわかっていないといけません。
しかし、アプリの見た目の改善ならば本当に一部くらいわかっていればOKなのでそんなに入門に時間がかかりません。
アプリの見た目の改善ができるようになる Xamarin入門
アプリを操作してて見つかる問題の大多数はアプリの見た目や挙動の改善だと思うので、Xamarin.formsによるユーザー インターフェイス(画面の見た目)を作成する方法を紹介します。
公式でみたい方は、https://docs.microsoft.com/ja-jp/xamarin/xamarin-forms/user-interface/
を見るといいと思います。
C#で書かれている
c#の文法については、https://ufcpp.net/study/csharp/
などを見ながらやっていきましょう。
ユーザー インターフェイス(画面の見た目)を作成しよう
ユーザー インターフェイス(UI)は、画面の見た目のことです。
UIを作成するために理解しておくべき4つの概念があります。
- ページ
- レイアウト
- ビュー
ページ
画面のすべてまたは大部分を占めます。
https://docs.microsoft.com/ja-jp/xamarin/xamarin-forms/user-interface/controls/pages
から引用
Android でいうActivityのようなものです。
ContentPage、MasterDetailPage、NavigationPage、TabbedPage、CarouselPage、TemplatedPageという6種類のPageあります。
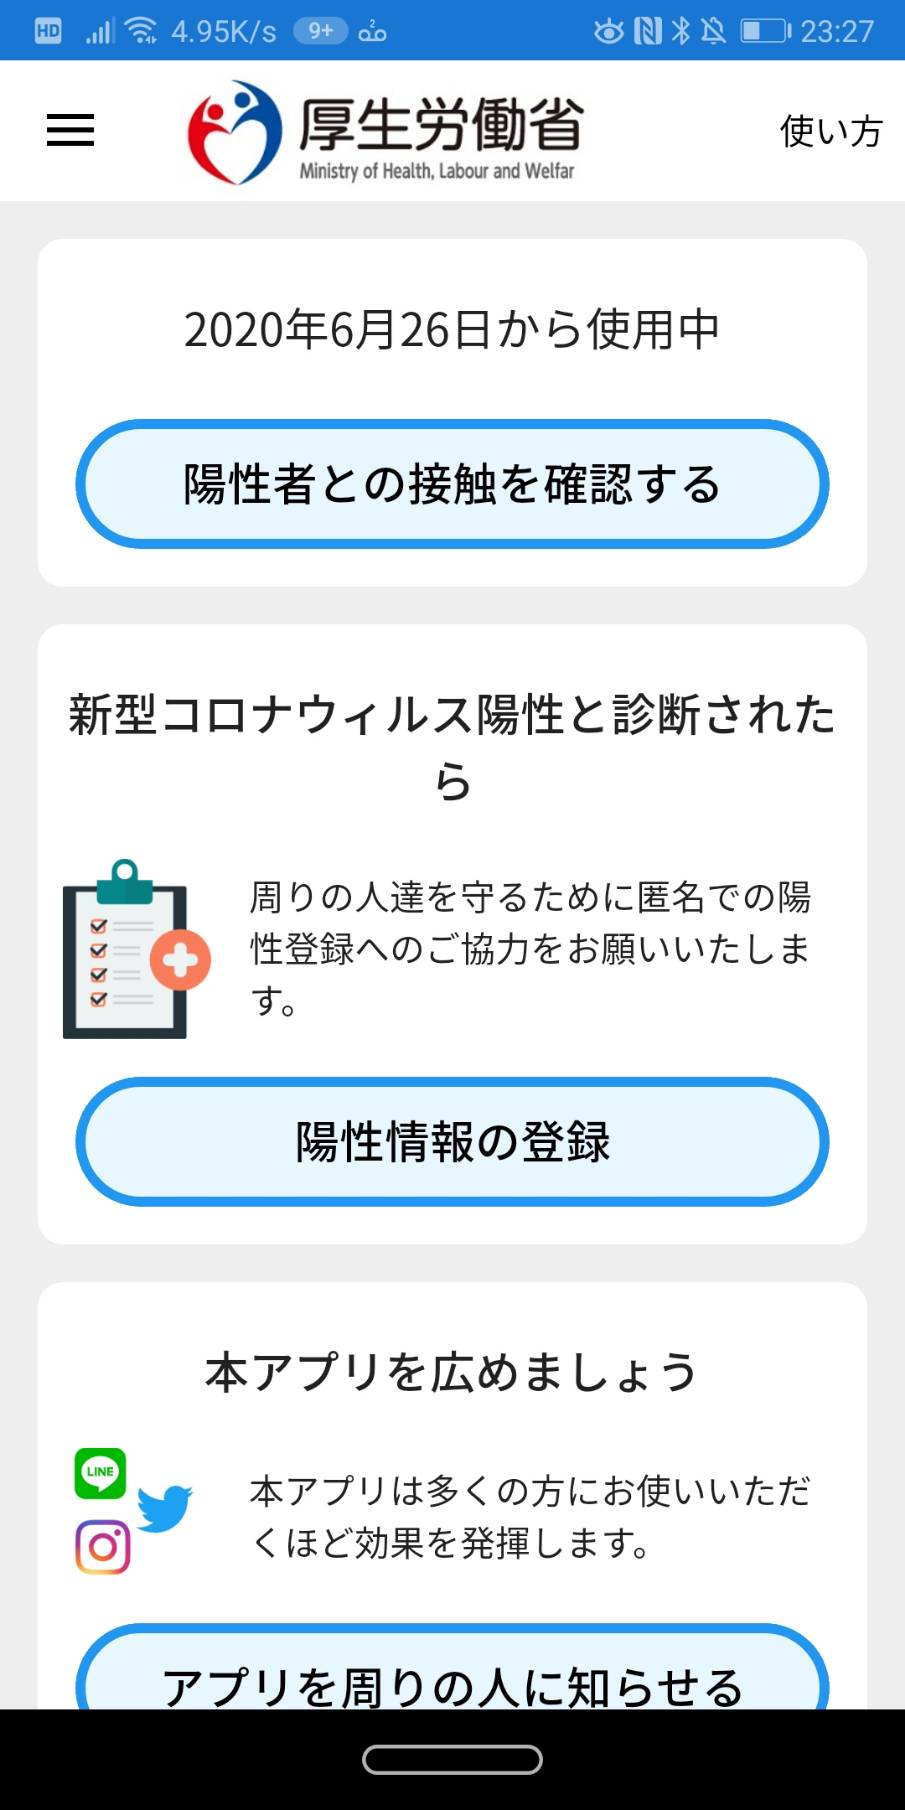
接触確認アプリ「Cocoa」のページ
HomePageのコードをみてみましょう。
https://github.com/Covid-19Radar/Covid19Radar/blob/master/Covid19Radar/Covid19Radar/Views/HomePage/HomePage.xaml
より
<?xml version="1.0" encoding="utf-8" ?>
<ContentPage
    x:Class="Covid19Radar.Views.HomePage"
    xmlns="http://xamarin.com/schemas/2014/forms"
    xmlns:x="http://schemas.microsoft.com/winfx/2009/xaml"
    xmlns:ffimageloading="clr-namespace:FFImageLoading.Forms;assembly=FFImageLoading.Forms"
    xmlns:ios="clr-namespace:Xamarin.Forms.PlatformConfiguration.iOSSpecific;assembly=Xamarin.Forms.Core"
    xmlns:prism="http://prismlibrary.com"
    xmlns:resources="clr-namespace:Covid19Radar.Resources;assembly=Covid19Radar"
    ios:Page.UseSafeArea="true"
    prism:ViewModelLocator.AutowireViewModel="True"
    NavigationPage.TitleIconImageSource="HeaderLogo.png"
    Style="{StaticResource DefaultPageStyle}"
    Visual="Material">
    <ContentPage.ToolbarItems>
        <ToolbarItem
            AutomationId="LabelMainTutorial"
            Command="{prism:NavigateTo 'HelpMenuPage'}"
            Order="Primary"
            Priority="1"
            Text="{x:Static resources:AppResources.MainTutorial}" />
    </ContentPage.ToolbarItems>

    <ScrollView>
        <StackLayout
            Padding="15"
            BackgroundColor="#EEEEEE"
            Spacing="15">
            <Frame
                Padding="10"
                CornerRadius="10"
                HasShadow="False">
                <StackLayout Spacing="0">
                    <Label HorizontalTextAlignment="Center" Style="{StaticResource DefaultLabel}">
                        <Label.FormattedText>
                            <FormattedString>
                                <Span Text="{Binding StartDate}" />
                                <Span Text="{x:Static resources:AppResources.HomePageDescription0}" />
                                <Span Text=" " />
                                <Span Text="{Binding PastDate}" />
                                <Span Text=" " />
                                <Span Text="{x:Static resources:AppResources.HomePagePastDays}" />
                                <Span Text=" " />
                                <Span Text="{x:Static resources:AppResources.HomePageDescription1}" />
                            </FormattedString>
                        </Label.FormattedText>
                    </Label>
                    <Button
                        AutomationId="ButtonExposures"
                        Command="{Binding Path=OnClickExposures}"
                        Style="{StaticResource DefaultButton}"
                        Text="{x:Static resources:AppResources.HomePageDescription2}" />

                </StackLayout>
            </Frame>
            <Frame
                Padding="10"
                CornerRadius="10"
                HasShadow="False">
                <StackLayout Spacing="0">
                    <Label Style="{StaticResource DefaultSubTitleLabel}" Text="{x:Static resources:AppResources.HomePageDescription3}" />
                    <Grid ColumnSpacing="15" RowSpacing="0">
                        <Grid.ColumnDefinitions>
                            <ColumnDefinition Width="0.2*" />
                            <ColumnDefinition Width="0.8*" />
                        </Grid.ColumnDefinitions>
                        <Grid.RowDefinitions>
                            <RowDefinition Height="Auto" />
                        </Grid.RowDefinitions>
                        <ffimageloading:CachedImage
                            Grid.Row="0"
                            Grid.Column="0"
                            Aspect="AspectFit"
                            Source="HOMEPage10.png" />
                        <Label
                            Grid.Row="0"
                            Grid.Column="1"
                            Style="{StaticResource DefaultLabelSmall}"
                            Text="{x:Static resources:AppResources.HomePageHeader2Description}"
                            VerticalTextAlignment="Center" />
                    </Grid>

                    <Button
                        Command="{prism:NavigateTo 'SubmitConsentPage'}"
                        Style="{StaticResource DefaultButton}"
                        Text="{x:Static resources:AppResources.HomePageDescription4}" />
                </StackLayout>
            </Frame>
            <Frame
                Padding="10"
                CornerRadius="10"
                HasShadow="False">
                <StackLayout Spacing="0">
                    <Label Style="{StaticResource DefaultSubTitleLabel}" Text="{x:Static resources:AppResources.HomePageHeader3Title}" />
                    <Grid ColumnSpacing="15" RowSpacing="0">
                        <Grid.ColumnDefinitions>
                            <ColumnDefinition Width="0.2*" />
                            <ColumnDefinition Width="0.8*" />
                        </Grid.ColumnDefinitions>
                        <Grid.RowDefinitions>
                            <RowDefinition Height="Auto" />
                        </Grid.RowDefinitions>
                        <ffimageloading:CachedImage
                            Grid.Row="0"
                            Grid.Column="0"
                            Aspect="AspectFit"
                            Source="HOMEPage11.png" />
                        <Label
                            Grid.Row="0"
                            Grid.Column="1"
                            Style="{StaticResource DefaultLabelSmall}"
                            Text="{x:Static resources:AppResources.HomePageHeader3Description}"
                            VerticalTextAlignment="Center" />
                    </Grid>
                    <Button
                        Command="{Binding Path=OnClickShareApp}"
                        Style="{StaticResource DefaultButton}"
                        Text="{x:Static resources:AppResources.HomePageDescription5}" />
                </StackLayout>
            </Frame>
        </StackLayout>

    </ScrollView>
</ContentPage>
このように、画面の一番大きな単位は、Pageであり、HomePageは、ContentPageが使われていますね。
レイアウト
レイアウトは画面を分けたり、要素をまとめたりする役目をしています。
HomePageでは、各塊ごとに、Frameというレイアウトが使われていますね。
           <Frame
                Padding="10"
                CornerRadius="10"
                HasShadow="False">
                <StackLayout Spacing="0">
                    <Label HorizontalTextAlignment="Center" Style="{StaticResource DefaultLabel}">
                        <Label.FormattedText>
                            <FormattedString>
                                <Span Text="{Binding StartDate}" />
                                <Span Text="{x:Static resources:AppResources.HomePageDescription0}" />
                                <Span Text=" " />
                                <Span Text="{Binding PastDate}" />
                                <Span Text=" " />
                                <Span Text="{x:Static resources:AppResources.HomePagePastDays}" />
                                <Span Text=" " />
                                <Span Text="{x:Static resources:AppResources.HomePageDescription1}" />
                            </FormattedString>
                        </Label.FormattedText>
                    </Label>
                    <Button
                        AutomationId="ButtonExposures"
                        Command="{Binding Path=OnClickExposures}"
                        Style="{StaticResource DefaultButton}"
                        Text="{x:Static resources:AppResources.HomePageDescription2}" />

                </StackLayout>
            </Frame>
            <Frame
                Padding="10"
                CornerRadius="10"
                HasShadow="False">
                <StackLayout Spacing="0">
                    <Label Style="{StaticResource DefaultSubTitleLabel}" Text="{x:Static resources:AppResources.HomePageDescription3}" />
                    <Grid ColumnSpacing="15" RowSpacing="0">
                        <Grid.ColumnDefinitions>
                            <ColumnDefinition Width="0.2*" />
                            <ColumnDefinition Width="0.8*" />
                        </Grid.ColumnDefinitions>
                        <Grid.RowDefinitions>
                            <RowDefinition Height="Auto" />
                        </Grid.RowDefinitions>
                        <ffimageloading:CachedImage
                            Grid.Row="0"
                            Grid.Column="0"
                            Aspect="AspectFit"
                            Source="HOMEPage10.png" />
                        <Label
                            Grid.Row="0"
                            Grid.Column="1"
                            Style="{StaticResource DefaultLabelSmall}"
                            Text="{x:Static resources:AppResources.HomePageHeader2Description}"
                            VerticalTextAlignment="Center" />
                    </Grid>

                    <Button
                        Command="{prism:NavigateTo 'SubmitConsentPage'}"
                        Style="{StaticResource DefaultButton}"
                        Text="{x:Static resources:AppResources.HomePageDescription4}" />
                </StackLayout>
            </Frame>
            <Frame
                Padding="10"
                CornerRadius="10"
                HasShadow="False">
                <StackLayout Spacing="0">
                    <Label Style="{StaticResource DefaultSubTitleLabel}" Text="{x:Static resources:AppResources.HomePageHeader3Title}" />
                    <Grid ColumnSpacing="15" RowSpacing="0">
                        <Grid.ColumnDefinitions>
                            <ColumnDefinition Width="0.2*" />
                            <ColumnDefinition Width="0.8*" />
                        </Grid.ColumnDefinitions>
                        <Grid.RowDefinitions>
                            <RowDefinition Height="Auto" />
                        </Grid.RowDefinitions>
                        <ffimageloading:CachedImage
                            Grid.Row="0"
                            Grid.Column="0"
                            Aspect="AspectFit"
                            Source="HOMEPage11.png" />
                        <Label
                            Grid.Row="0"
                            Grid.Column="1"
                            Style="{StaticResource DefaultLabelSmall}"
                            Text="{x:Static resources:AppResources.HomePageHeader3Description}"
                            VerticalTextAlignment="Center" />
                    </Grid>
                    <Button
                        Command="{Binding Path=OnClickShareApp}"
                        Style="{StaticResource DefaultButton}"
                        Text="{x:Static resources:AppResources.HomePageDescription5}" />
                </StackLayout>
            </Frame>
そのほかにも、StackLayoutやGridなどがありますね。
それぞれ役割があるので、詳しくはhttps://docs.microsoft.com/ja-jp/xamarin/xamarin-forms/user-interface/controls/layouts をみてみましょう。
ビュー
ビューは、ボタンやラベル(テキストを表示できる)やイメージ(画像を表示できる)などの要素です。他のフレームワークでは、ウィジットなどと呼ばれたりします。
上のコードを見れば、ButtonやLabelがたくさん使われていますね。
接触確認アプリ「Cocoa」のUIはどこに書いてある?
- ページ
- レイアウト
- ビュー
が理解できたのなら、属性を変えたり、要素を追加することでUIを改善できます。
データを提供する部分はもう備わっているのでそれについては考えずUI改善に集中できます。
最後に、どの画面がどこのファイルにあるのかみてみましょう。
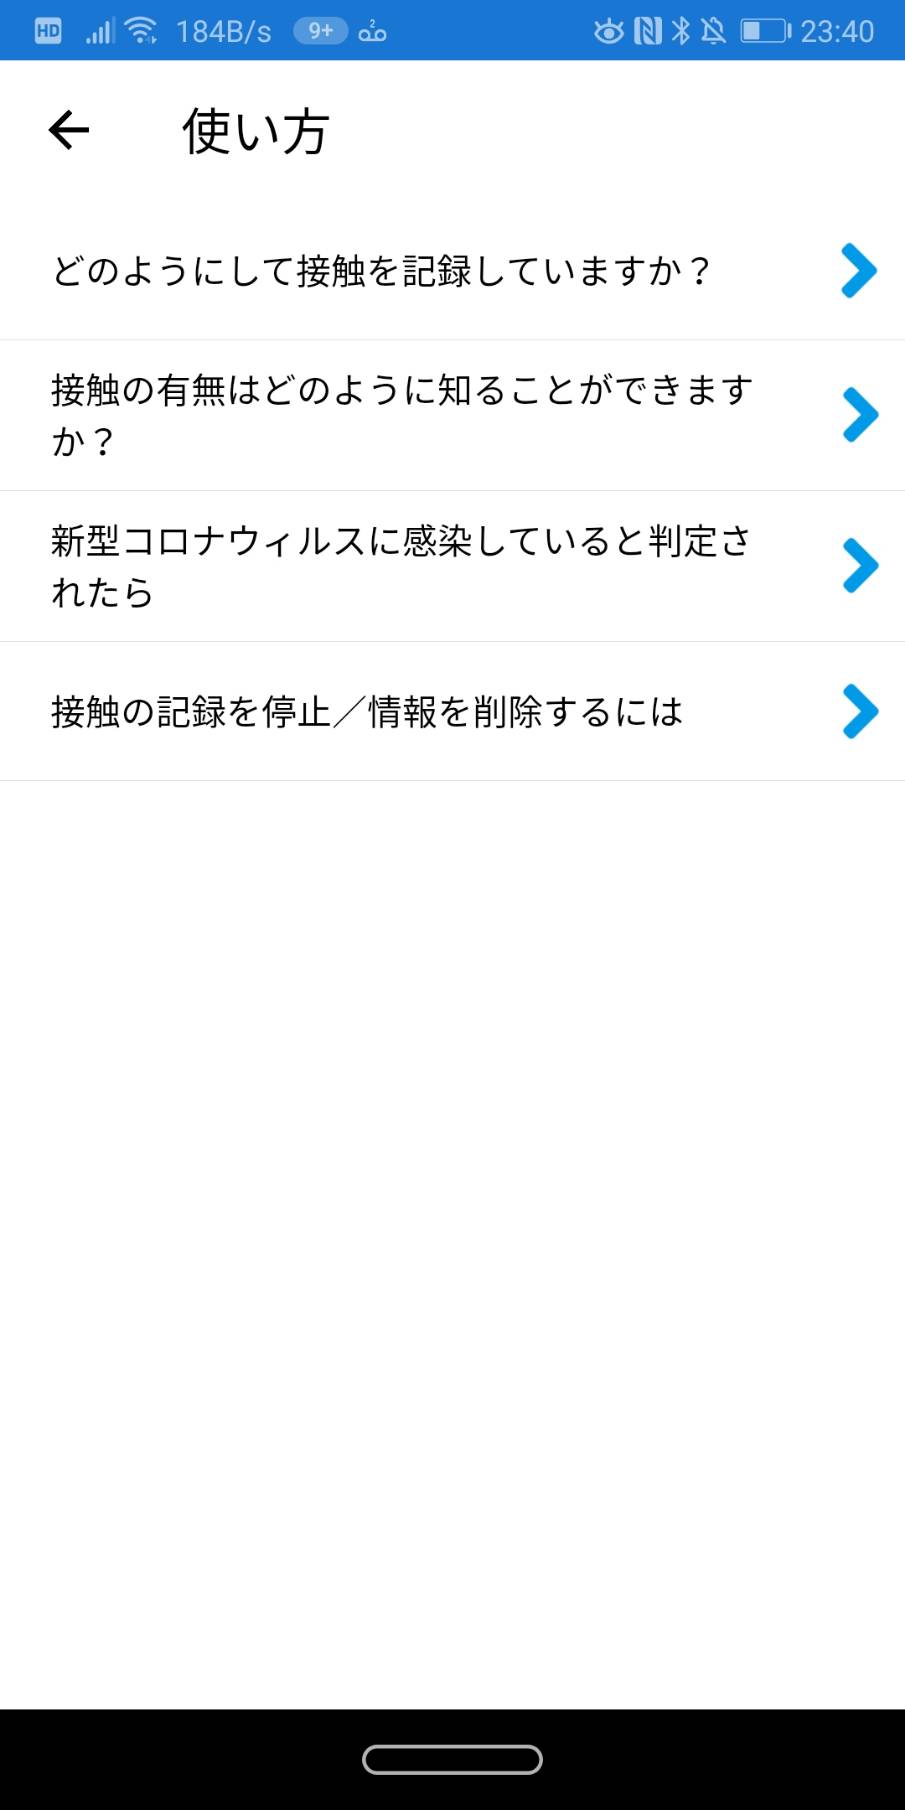
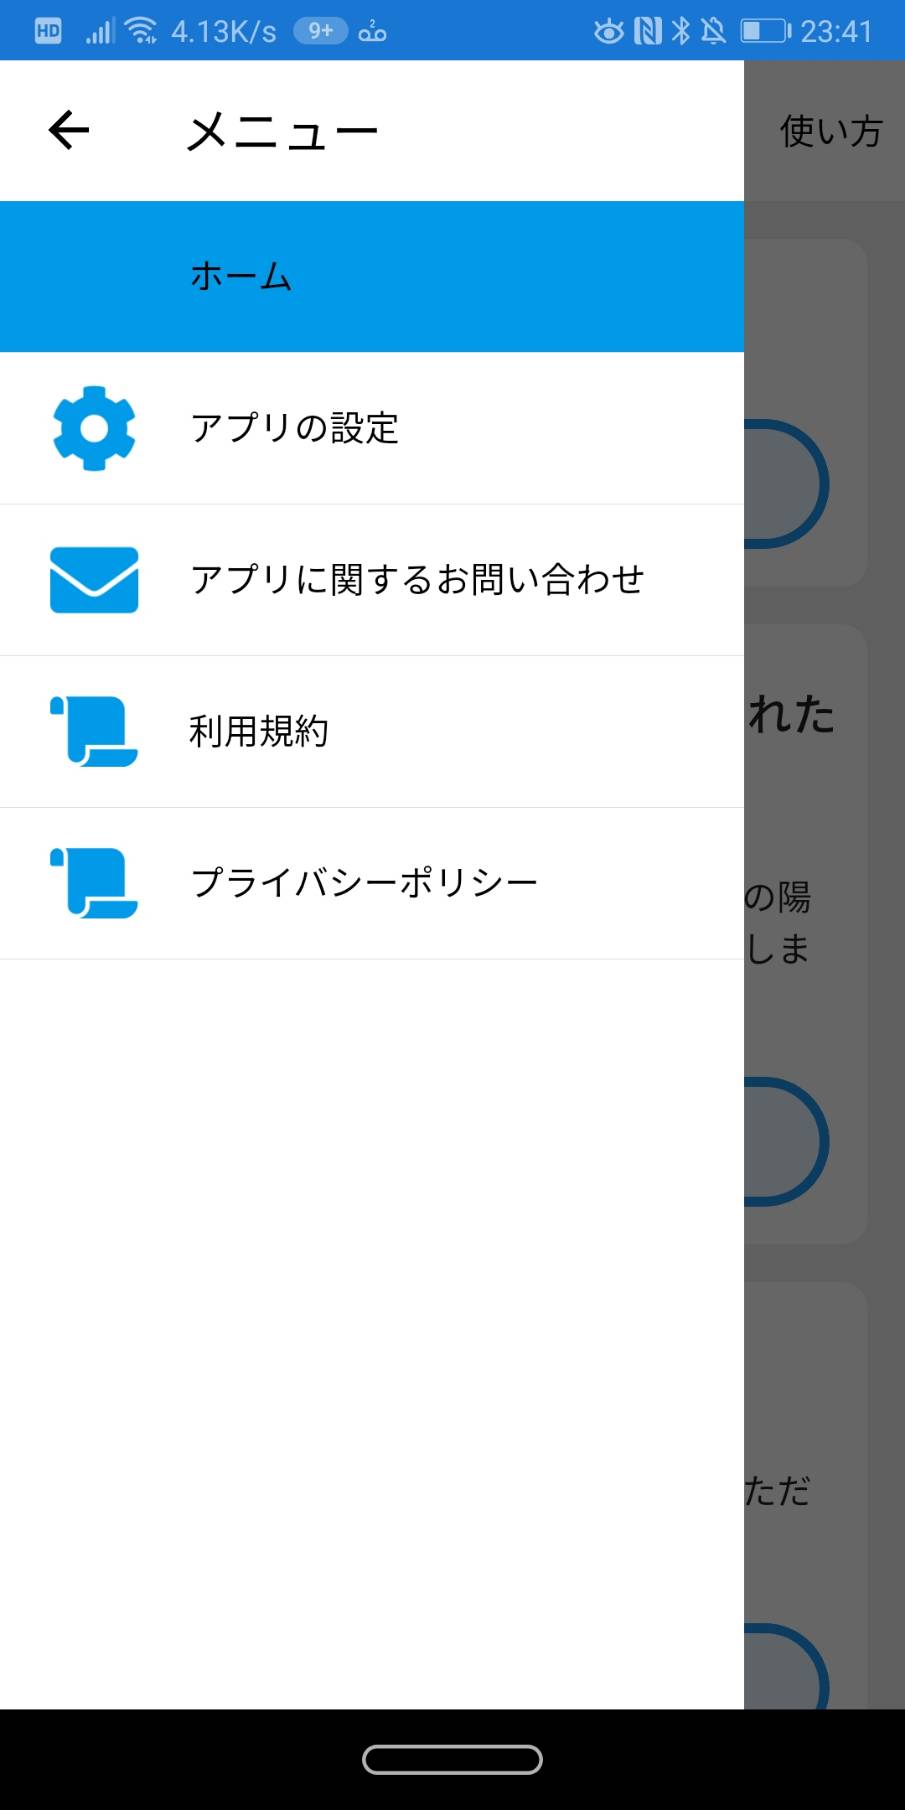
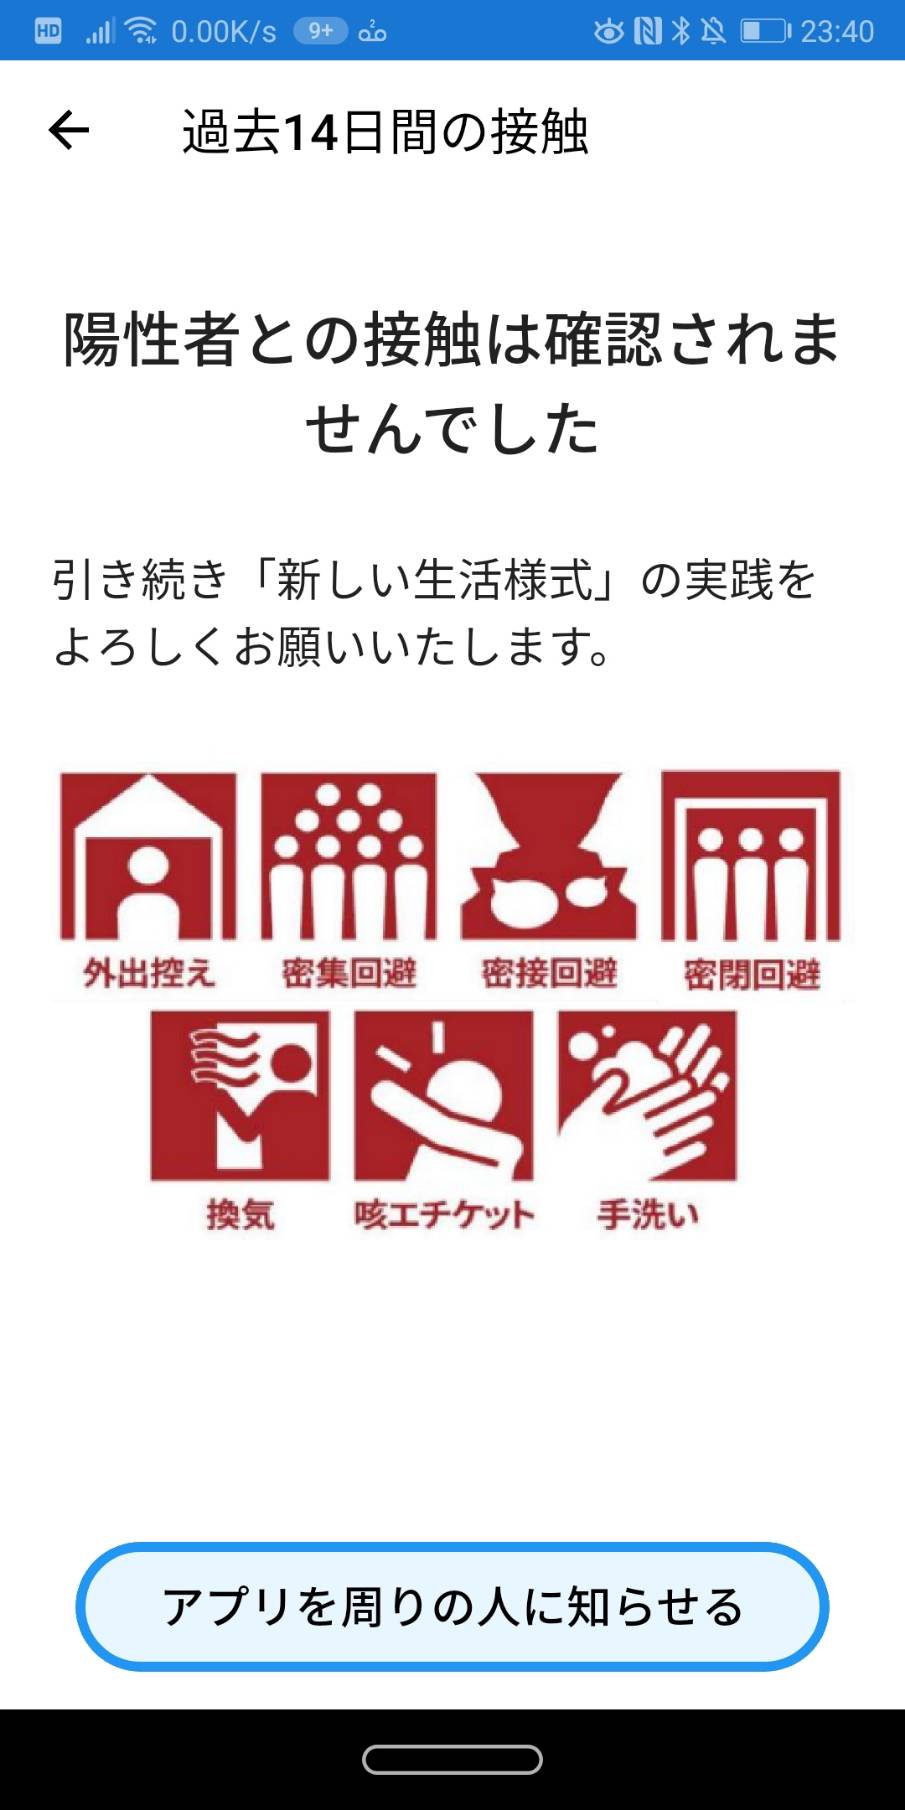
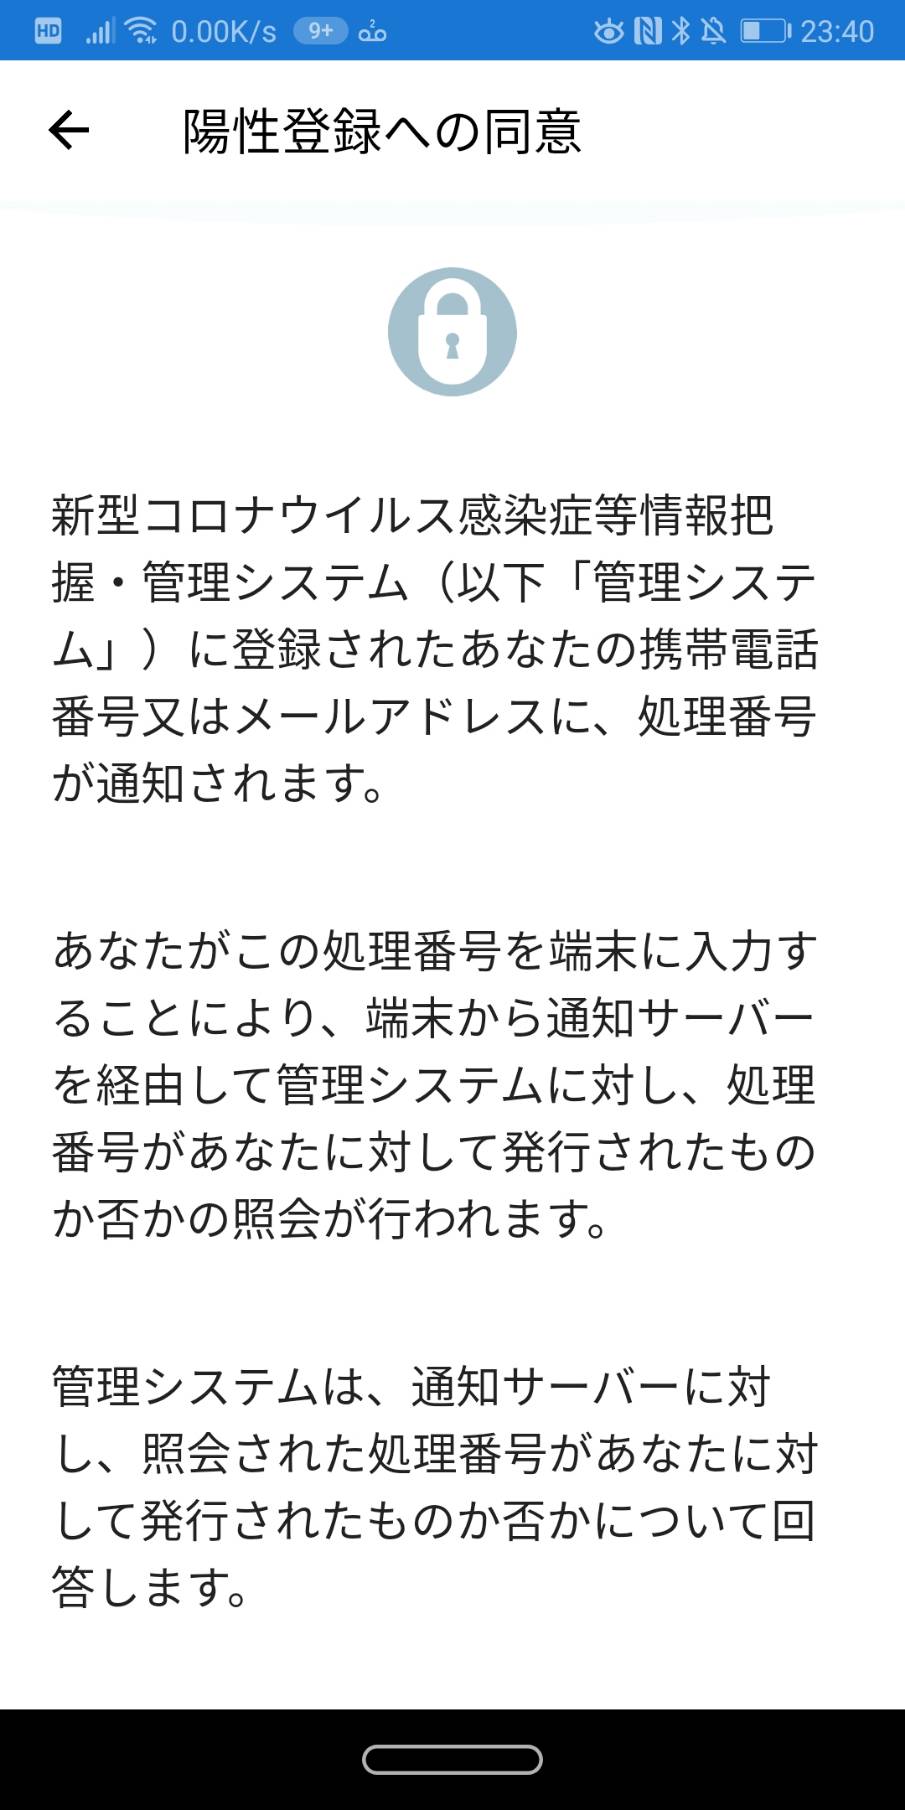
HomePage
HelpMenuPage
MenuPage
NotContactPage
SubmitConsentPage
SettingsPage
主な、Pageを紹介しました。問題を見つけたら、問題のPageにいき、ソースコードを編集してみましょう。
プルリクエストを出してみよう!
あなたのUIの改善を反映させるには、プルリクエストを送り、レビュワーに許可をもらって、改善が反映されます。(レビュー→masterへマージ→リリースという流れ)
プルリクエストを出す方法は https://qiita.com/Anharu/items/572f5f6c30c6edbec349#コードを編集する で紹介しているので、そちらをみていただければ嬉しいです。
まとめ
賛否両論あった、接触確認アプリ「Cocoa」。だけど、悪いところを見つけたら、自分で修正していけば、「Cocoa」はもっともっと良くなっていくと思います。
開発の初期メンバーさん(@kazumihiroseさん, @DarkCrash3さん, norijiさん,runceelさん)は日本中で使われるであろう社会性の高いアプリに対して、プレッシャーやストレスを感じているかもしれません。
その方々に対して、尊敬の念を示し、OSSの利点を生かしてみんなの力を合わせて改善するということが大事だと思います。
Twitterからの声
参考文献
https://github.com/Covid-19Radar/Covid19Radar
https://docs.microsoft.com/ja-jp/xamarin/xamarin-forms/user-interface/
https://dev.classmethod.jp/articles/getting-started-xamarin-forms/
