With all the talk about privacy concerns recently, Google's name keeps coming up because they are a very data-driven company. As an Android user, they know basically everything about you based on your device usage, and that can scare some people off who are worried about their privacy and security. You do have some say in what personal data Google controls, but what if you wanted even more?
One of the best ways to take complete control over your device is to install a custom ROM. A typical custom ROM comes without Google's core apps (Gapps), but you would typically install the separate Gapps package to get them back. However, if you want more control over your device, you can skip the Gapps install and go with MicroG instead.
You should note that many apps require Google Play Services to work correctly; otherwise, there would be no point in having them installed. MicroG injects a modified version of those core Google services required by most apps, but without all of the tracking or any extra Google apps and background services. This increases your level of privacy and can even improve battery life.
Requirements
Step 1Make Sure Your ROM Supports Signature Spoofing
Just about all custom ROMs support signature faking by default, which is used to make the system think the real Google Play Services are installed. It is required and necessary for this whole thing to work. You might need to double check the place you got your custom ROM from to see if it does support signature faking in the first place for MicroG.
Step 2Skip the Gapps Installation
At this point, you should already have picked out a custom ROM you plan on flashing to your device, and it should have support for signature faking. As mentioned before, you would typically install a Gapps package after flashing a ROM to get the Google services back onto your device. However, to use MicroG, you must make sure you do not install a Gapps package at all when following this guide.
If you did install Gapps by accident (second nature), go ahead and flash the custom ROM again and wipe data to be safe. After you take care of that, boot into the operating system and make sure the Google apps and services are not present, then you can move onto the next step.
Step 3Install NanoDroid for MicroG
In the past, to get the entire MicroG package to work, you would have had to download multiple separate apps. However, NanoDroid comes along to simplify things with a single ZIP file that you can flash right in a custom recovery, such as TWRP.
Once you download the file onto your internal storage, go ahead and boot into recovery mode, so you're sitting on the main screen of TWRP. Tap "Install," browse for the location where you stored the NanoDroid file, then tap the file and swipe the slider to begin the installation. Once it finishes, you can reboot your device and head into the app drawer of your home launcher to locate the new MicroG settings app.
Step 4Grant the Proper Permissions
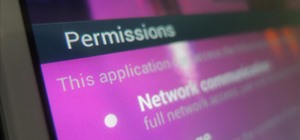
When you open the MicroG app for the first time, you might see a notification at the top letting you know to grant permissions to the app. Expand the notification, tap "Request Missing Permissions," and then proceed to grant the permissions to all four requests when prompted to do so. It's highly essential that you do this; otherwise, the other apps you use won't have access to the modified Google services at all, which defeats the purpose of MicroG.
Step 5Take the Self-Check Test
Open the MicroG app and tap the "Self-Check" section at the top of the screen. If your ROM supports signature faking mentioned from Step 1, the first checkbox should be checked and will say "System has signature spoofing support."
You should also notice that just about everything else has an active checkbox, which is exactly what you want to see. If you are getting a message that says "Your ROM has no native support for signature spoofing" then you need to go back to Step 1 and find a custom ROM for your device that can support this option.
Your experience will not be a great one without signature spoofing, so look at the documentation for the ROM, ask the developer, or even ask the community if you can't figure it out. Alternatively, you can flash a ROM and take the Self-Check test real quick to find out in an instant. Once you find a ROM that passes the test and works for you, then you can move onto the next step.
Step 6Configure Location Services (Optional)
If you want to be able to use location services, such as GPS for maps or weather, you need to enable the options within the MicroG app. Since you are no longer relying on official Google Play Services to fetch your location data, MicroG handles it through the UnifiedNlp settings.
From the main screen on the MicroG app, tap "UnifiedNlp Settings," then "Configure location backends," and make sure Mozilla Location Service is checked. Tap "OK," then tap "Configure address lookup backends," and also make sure that "Nominatim" is checked as well.
Bring up the quick settings from the status bar and make sure your location settings are on so you can use your new location services without Google. From this point on, GPS should work just like you were using the real Google Play Services. Now you can work on building out your list of apps to get your device back up and running since you didn't install a Gapps package.
Don't forget that you can use MicroG with any custom ROM that supports signature faking, which means you'll almost always have a wide variety of choices to pick from. If you don't have a favorite ROM yet, don't be afraid to experiment until you find one that has everything you need. Good luck and have fun!
This article was produced during Gadget Hacks' special coverage on smartphone privacy and security. Check out the whole Privacy and Security series. Don't Miss: The Best Phones for Rooting & Modding





















Be the First to Comment
Share Your Thoughts