
はじめに
Node.jsでCLI(Command Line Interface)を作りたくなることがあると思います。
そして、GitHubに公開されているCLIを見ると、色々なライブラリを組み組み合わせて便利なCLIを作っているようです。
この記事では、Node.jsでCLIをどう作るのか?そして、CLI開発を支える便利なライブラリを紹介します。
身の回りのCLI
CLIの作り方を見る前に、普段の開発で触れているCLIを見てみましょう。
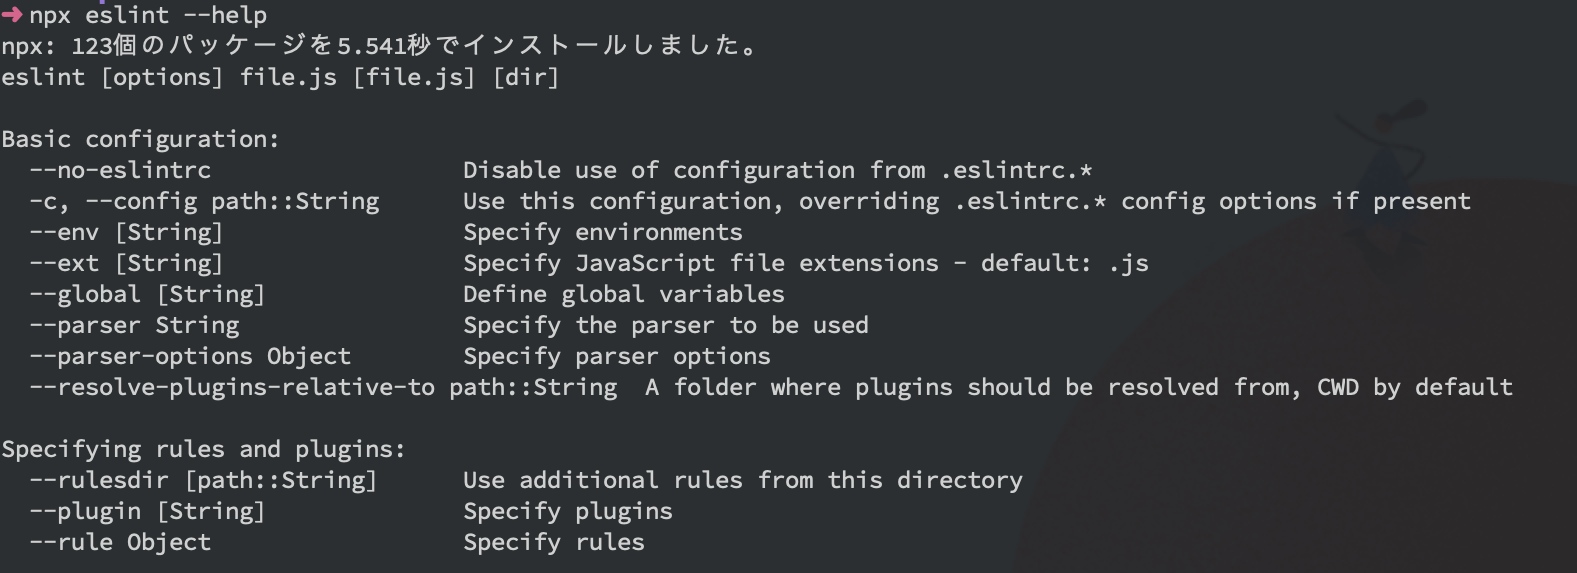
ESLint
CLIには基本的に--helpオプションが用意されていますね。
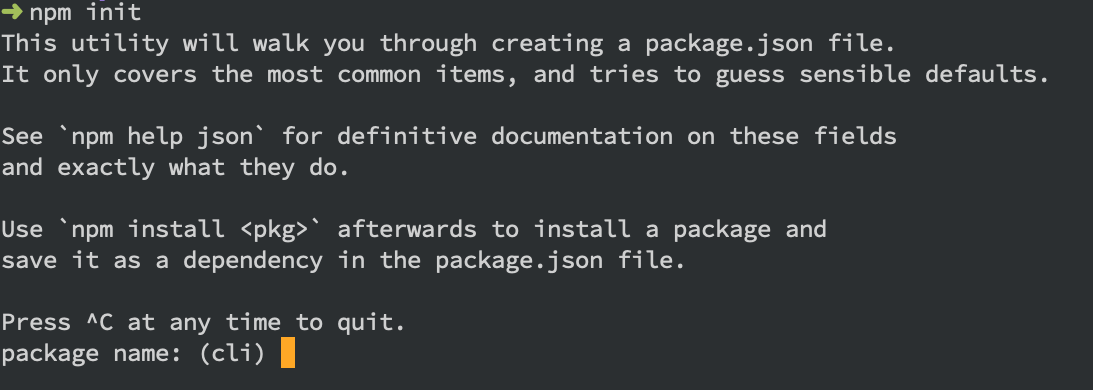
npm
ユーザーの入力を受け取る対話的なCLIも多いですね。
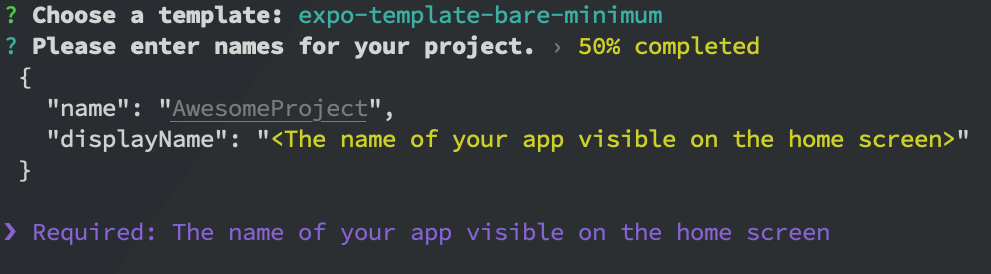
expo
プレースホルダーがあることで入力する内容のイメージを伝えることができます。
stencil
様々な選択方法をユーザーに提供したり、分かりやすく色付けすることも可能です。


Node.jsでのCLIの作り方
それでは、Node.jsでCLIを作っていきます。
一般的にCLIの開発では便利なライブラリを使いますが、今回は汎用的な知識としてライブラリを使わずに標準モジュールだけで開発します。
ここでは、以下のような引数を1つ受け取り、ユーザーの入力を受け取るCLIを作ります。
引数の受け取り
Node.jsでprocess.argvはコマンドライン引数を含む配列を返します。この配列の3つ目からの要素にコマンドライン引数が格納されています。
Node.js Documentation | process.argv
// lib/index.js
console.log(process.argv[2]);
console.log(process.argv[3]);
$ node lib/index.js foo bar
foo
bar
ここから実際に作成するCLIのコードを書いていきます。
1つの引数を必ず受け取るようにチェックしつつ、受け取った値を使ってメッセージを表示します。
lib/index.js
const [, , firstArg] = process.argv;

if (!firstArg) {
  console.error("Please pass one argument!!");
  process.exit(1);
}

const msg = `
  Hello!! ${firstArg} san.
  I am Toshihisa Tomatsu.
  GitHub: https://github.com/toshi-toma
  Twitter: https://twitter.com/toshi__toma
`;

console.log(msg);
$ node lib/cli.js tom

  Hello!! tom san.
  I am Toshihisa Tomatsu.
  GitHub: https://github.com/toshi-toma
  Twitter: https://twitter.com/toshi__toma
ユーザーの入力を受け取る
次はCLIでよくあるユーザーの入力を受け取れるようにしましょう。ここでは組み込みのモジュールreadlineを使います。
Node.js Documentation | Readline
また、readlineのquestion関数を利用すると、ユーザーへのプロンプトメッセージの表示と、ユーザー入力の受け取りまでを行うことができ便利です。
lib/index.js
// ...
const readline = require("readline");

const rl = readline.createInterface({
  input: process.stdin,
  output: process.stdout
});

rl.question("Please enter names for your project: ", answer => {
  console.log(`Thank you!! Let's start ${answer}`);

  rl.close();
});
node bin/cli.js tom

    Hello!! tom san.
    I am Toshihisa Tomatsu.
    GitHub: https://github.com/toshi-toma
    Twitter: https://twitter.com/toshi__toma

Please enter names for your project:
ユーザーの入力を受け取り、それを使ったメッセージの表示まで行えました。
動作確認
CLIの作成は行えましたが、実際にユーザーが利用する場合、eslint file1.js file2.jsだったりnpm initといった形式で利用します。
ここでは実際のCLIのように実行できるようにします。
npm init
まずはpackage.jsonを用意する必要があるので、npmのinitコマンドで作成します。
$ npm init -y
package.json bin
package.jsonのbinフィールドで、コマンドとファイルのマッピングを行えます。
こうしておくことでパッケージのインストール時にglobal installやlocal installで適切な場所にシンボリックリンクを作成します。
今回は、bin/cli.jsをコマンド実行用に用意します。
{
  // ...
  "bin": {
    "cli": "bin/cli.js"
  },
  // ...
}
bin/cli.js
ファイルの先頭に#!/usr/bin/env nodeをつけるのを忘れないように。
bin/cli.js
#!/usr/bin/env node

require("../lib/index")();
先程作成したlib/index.jsを外部から利用できるようにmodule化しておきます。
lib/index.js
const readline = require("readline");

module.exports = () => {
  const [, , firstArg] = process.argv;

  if (!firstArg) {
    console.error("Please pass one argument!!");
    process.exit(1);
  }

  const msg = `
    Hello!! ${firstArg} san.
    I am Toshihisa Tomatsu.
    GitHub: https://github.com/toshi-toma
    Twitter: https://twitter.com/toshi__toma
  `;

  const rl = readline.createInterface({
    input: process.stdin,
    output: process.stdout
  });

  console.log(msg);

  rl.question("Please enter names for your project: ", answer => {
    console.log(`Thank you!! Let's start ${answer}`);

    rl.close();
  });
};
npm link
コマンドを用意できたので手元で試してみます。
ここではnpm linkを使うと便利です。
$ npm link
audited 1 package in 0.951s
found 0 vulnerabilities

/usr/local/bin/cli -> /usr/local/lib/node_modules/@toshi-toma/cli/bin/cli.js
/usr/local/lib/node_modules/@toshi-toma/cli -> /Users/toshi-toma/dev/github.com/toshi-toma/cli
こうすることで先程用意したcliコマンドを実行することができます。
$ cli
Please pass one argument!!
npm publish
最後に、誰でもこのコマンドが使えるようにnpmにpublishします。
今回は自分用に作っただけなので、scoped packageとして公開します。
まず、npmにログイン済みなことを確認してください。もしアカウントを持ってない人は、アカウントを作成して、ログインを行ってください。
Creating a new user account on the public registry
$ npm whoami
toshi-toma
あとはpackage.jsonのnameとpublishConfigを指定します。
nameは@<ユーザー名>/パッケージ名とします。
{
  "name": "@toshi-toma/cli",
  "publishConfig": {
    "access": "public"
  },
  // ...
}
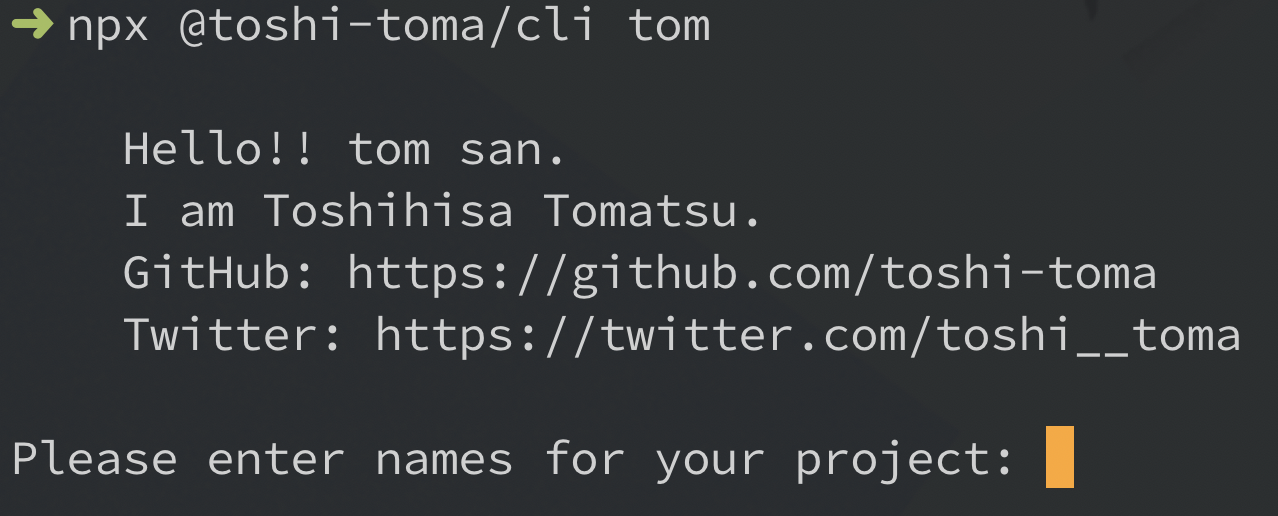
最後にnpm publishコマンドを実行すれば、@<ユーザー名>/パッケージ名としてパッケージが公開されます。
npx @toshi-toma/cli tom

    Hello!! tom san.
    I am Toshihisa Tomatsu.
    GitHub: https://github.com/toshi-toma
    Twitter: https://twitter.com/toshi__toma

Please enter names for your project:
便利なライブラリ
Node.jsでCLIを作る方法を紹介しましたが、特に何もライブラリを使わずに標準モジュールだけで作成しました。process.argvやreadlineだと実装が複雑になったり面倒です。
また実際はコマンドライン引数のパースやオプション、バリデーション、helpの作成など複雑な処理を実装することになります。それを簡単に実装できるライブラリを使うのが一般的なようです。
ここからは、CLI作成に便利なライブラリを紹介します。
コマンドの作成や引数のパース
yargs
https://github.com/yargs/yargs
yargsはコマンドやオプションの作成及び引数のパース、helpの自動作成などCLI作成を便利に行えるライブラリです。
require("yargs")
  .scriptName("console")
  .usage("$0 <cmd> [args]")
  .command(
    "hello [name]",
    "console your name!",
    yargs => {
      yargs.positional("name", {
        type: "string",
        default: "Toshihisa",
        describe: "the name to say hello to"
      });
    },
    function(argv) {
      console.log("hello", argv.name, "welcome to yargs!");
    }
  )
  .help().argv;
$ node lib/yargs.js --help
console <cmd> [args]

コマンド:
  console hello [name]  console your name!

オプション:
  --version  バージョンを表示                                [真偽]
  --help     ヘルプを表示                                    [真偽]
minimist
https://github.com/substack/minimist
minimistはコマンドライン引数のパースを行ってくれるシンプルなライブラリです。
const argv = require("minimist")(process.argv.slice(2));
console.log(argv);
$ node lib/minimist.js src -a bar --watch
{ _: [ 'src' ], a: 'bar', watch: true }
cac
cacはCLI作成に必要な機能が実装されたシンプルなライブラリです。option、version、help、parseといった4つのAPIについて知るだけで使えるので非常に簡単です。
const cli = require("cac")();

cli.option("--type [type]", "Choose a project type", {
  default: "node"
});
cli.option("--name <name>", "Provide your name");

cli.command("lint [...files]", "Lint files").action((files, options) => {
  console.log(files, options);
});
cli.help();
cli.version("0.0.0");
cli.parse();
$ node lib/cac.js --help
cac.js v0.0.0

Usage:
  $ cac.js <command> [options]

Commands:
  lint [...files]  Lint files

For more info, run any command with the `--help` flag:
  $ cac.js lint --help

Options:
  --type [type]  Choose a project type (default: node)
  --name <name>  Provide your name
  -h, --help     Display this message
  -v, --version  Display version number
commander
https://github.com/tj/commander.js
commanderはとても有名で使われているCLI作成に必要なAPIが用意されたライブラリです。
const program = require("commander");

program
  .command("clone <source> [destination]")
  .description("clone a repository into a newly created directory")
  .action((source, destination) => {
    console.log("clone command called");
  });

program
  .version("0.1.0")
  .command("install [name]", "install one or more packages")
  .command("list", "list packages installed", { isDefault: true })
  .parse(process.argv);
meow
https://github.com/sindresorhus/meow
meowはテンプレートリテラルを使ったとてもシンプルにCLIを作成できるライブラリです。
const meow = require("meow");
const foo = require(".");

const cli = meow(
  `
    Usage
      $ foo <input>

    Options
      --rainbow, -r  Include a rainbow

    Examples
      $ foo unicorns --rainbow
      🌈 unicorns 🌈
`,
  {
    flags: {
      rainbow: {
        type: "boolean",
        alias: "r"
      }
    }
  }
);

console.log(cli);

foo(cli.input[0], cli.flags);
色付け
chalk
https://github.com/chalk/chalk
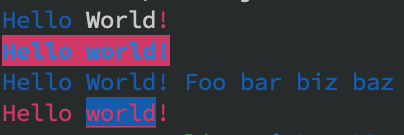
chalkは以下のようにchalk.red("文字列")とするだけで色付けが行えます。
また、chalk.blue.bgRed.bold("Hello world!")のように必要なスタイルをチェーンできるのも直感的で簡単です。
似たライブラリにkleurがあります。
const chalk = require("chalk");

console.log(chalk.blue("Hello") + " World" + chalk.red("!"));
console.log(chalk.blue.bgRed.bold("Hello world!"));
console.log(chalk.blue("Hello", "World!", "Foo", "bar", "biz", "baz"));
console.log(chalk.red("Hello", chalk.underline.bgBlue("world") + "!"));
UI
ora
https://github.com/sindresorhus/ora
oraを使えば、綺麗なスピナーが簡単に表示できます。
const ora = require("ora");

const spinner = ora("Loading unicorns").start();

setTimeout(() => {
  spinner.color = "yellow";
  spinner.text = "Loading rainbows";
}, 1000);
clui
https://github.com/nathanpeck/clui
cluiはコマンドラインのUIツールキットで、ゲージやスピナー、プログレスバーなどを簡単に表示することができます。
const Spinner = require("clui").Spinner;

let countdown = new Spinner("Exiting in 5 seconds...  ", [
  "⣾",
  "⣽",
  "⣻",
  "⢿",
  "⡿",
  "⣟",
  "⣯",
  "⣷"
]);

countdown.start();

let number = 5;
setInterval(function() {
  number--;
  countdown.message("Exiting in " + number + " seconds...  ");
  if (number === 0) {
    process.stdout.write("\n");
    process.exit(0);
  }
}, 1000);
figlet
https://github.com/patorjk/figlet.js
figletはテキストからアスキーアートを作成できるライブラリです。
const figlet = require("figlet");

figlet("Hello World!!", function(err, data) {
  console.log(data);
});
$ node lib/figlet.js
  _   _      _ _        __        __         _     _ _ _
 | | | | ___| | | ___   \ \      / /__  _ __| | __| | | |
 | |_| |/ _ \ | |/ _ \   \ \ /\ / / _ \| '__| |/ _` | | |
 |  _  |  __/ | | (_) |   \ V  V / (_) | |  | | (_| |_|_|
 |_| |_|\___|_|_|\___/     \_/\_/ \___/|_|  |_|\__,_(_|_)
update-notifier
https://github.com/yeoman/update-notifier
update-notifierを使えばアップデート情報のボックスを簡単に表示することができます。
terminal-image
https://github.com/sindresorhus/terminal-image
ターミナルに画像を表示することができます。
terminal-link
https://github.com/sindresorhus/terminal-link
ターミナルでリンクを作成することができます。
log-symbols
https://github.com/sindresorhus/log-symbols
ログレベルを表現する時に便利です。info、success、warning、errorが用意されています。
その他
ink
https://github.com/vadimdemedes/ink
inkはReactでCLIを作成できるライブラリです。GatsbyやParcelでも利用されているようです。
import React from "react";
import { render, Box } from "ink";

const Demo = () => <Box>Hello World</Box>;

render(<Demo />);
shelljs
https://github.com/shelljs/shelljs
shelljsはその名の通り、Node.jsから簡単にUnixシェルコマンドを利用できます。Windows/Mac/Linuxでポータブルに動作するのも便利です。
const shell = require("shelljs");

console.log(shell.which("git"));
console.log(shell.cat("package.json"));
shell.cp("package.json", "package-copy.json");
shell.ls("lib/**/*.js").forEach(function(file) {
  console.log(file);
});
clear
https://github.com/bahamas10/node-clear
clearを使えば、ターミナルの画面を一旦まっさらにすることができます。
const clear = require("clear");
clear();

console.log("Hello clear");
inquirer
https://github.com/SBoudrias/Inquirer.js/
inquirerはインタラクティブなCLIのインターフェイスを作成できるライブラリです。回答の方法は入力、リストやチェックボックス、パスワード形式など、様々な方法が用意されています。
似たライブラリでEnquirerやpromptsがあります。
const inquirer = require("inquirer");

inquirer
  .prompt([
    {
      name: "name",
      message: "What's your name?",
      default: "toshi-toma"
    },
    {
      type: "list",
      name: "job",
      message: "What is your occupation?",
      choices: ["Frontend", "Backend", "Infra"]
    },
    {
      type: "checkbox",
      name: "country",
      message: "Where are you from?",
      choices: ["Japna", "US", "China", "Others"]
    }
  ])
  .then(({ name, job, country }) => {
    console.log(name);
    console.log(job);
    console.log(country);
  });
listr
https://github.com/SamVerschueren/listr
listrは任意のタスクリストのステータスや進捗を表示することができるライブラリです。タスクをListrの配列に渡すだけです。
const Listr = require("listr");
const tasks = new Listr([
  {
    title: "Task 1",
    task: () => Promise.resolve("Foo")
  },
  {
    title: "Can be skipped",
    skip: () => {
      if (Math.random() > 0.5) {
        return "Reason for skipping";
      }
    },
    task: () => "Bar"
  },
  {
    title: "Task 3",
    task: () => Promise.resolve("Bar")
  }
]);

tasks.run().catch(err => {
  console.error(err);
});
$ node lib/listr.js
  ✔ Task 1
  ↓ Can be skipped [skipped]
    → Reason for skipping
  ✔ Task 3
oclif、gluegun
https://github.com/oclif/oclif
https://github.com/infinitered/gluegun
CLIを作成するフレームワークもあるようです。
まとめ
Node.jsでシンプルなCLIの作成方法から、CLI作成を簡単に行える便利なライブラリを紹介しました。
自分でも調べてみて、便利なライブラリや似たライブラリがとても多く、実際どれを使えばいいのか分かりませんでした。
だいたいできることは同じなので、サンプルコードを見て、好みで使ってみるのがいいと思います。
そして、安定のsindresorhusがとても便利なライブラリをたくさん作成してくれていることが分かります。

