
New Blender Sculpt Mode: Introduction
Hi! My name is Pablo Dobarro. I'm a 24 years old 3D artist and software developer from Spain. During the last few months I’ve been developing a custom Blender version known in the Blender community as the sculpt-mode-features branch. I added a lot of new features and workflows to several areas of Blender, trying to make the best possible tool for stylized sculpting.
If you never used Blender or you never used Blender for sculpting, this blog post may be for you. I’m going to give you a summary of what the new features are and how to start trying them. On the other hand, if you are and experienced Blender user, I wrote a blog post in code.blender.org explaining all the technical details of this development.
Why?
I started learning 3D art while I was taking a computer engineering degree. I enrolled in an online course of 3D character modeling where we were taught 3DSMax and ZBrush. I already knew Blender, so after finishing the course, I began working on my portfolio using Blender, ZBrush and Marvelous designer.
After learning the regular character workflow and applying it to some pieces, I started noticing some problems that were annoying me:
- I can’t work efficiently using ZBrush’s viewport. I like to see the character with real materials and lightning from the beginning. I always worked with ZBrush in one monitor and the Cycles preview in another one, syncing the scene constantly with GoZ. I tried a ton of matcaps and lightning setups in ZBrush, but if I spend more than an hour sculpting without seeing the Cycles preview the result is a disaster. I need to go back a tweak everything again, which makes me waste a lot of time.
- The workflow between ZBrush and Blender is an absolute nightmare. There are addons to support GoZ, which make the process easier, but that does not solve the problem. If you are working on a complex scene with rigs, modifiers and meshes with multiple materials and uvs, pressing the GoZ button by accident could easily mean 8 hours of extra work.
On top of that, my computer engineering degree was not particularly great in terms of content, so I also needed something “real” to show some software development skills. I consider this new Blender sculpt mode as another piece of my portfolio. I thought that it was reasonable to spend a few months working on this before continuing making art.
Small disclaimer: If want to sculpt extremely high poly models with a lot of subdivisions and surface detail, Blender probably still won’t work for you. Brush performance is OK, but the issue is how Blender manages high poly meshes internally. Operations like switching the active sculpting object or changing modes are going to be really slow and your workflow is going to be constantly interrupted. There are also some issues with the detail propagation across the subdivisions levels. Modifying the mesh in a subdivision level may destroy the detail in the highest ones. Solving those issues require deeper changes which may affect other areas of Blender, so I can’t tell when they are going to be fixed.
If your art style is similar to mine and you have a computer with a mid range graphics card, this could totally work for you. Blender does not have the insane amount of sculpting features ZBrush has, but almost everything you may need to work comfortably is now there. On top of that...
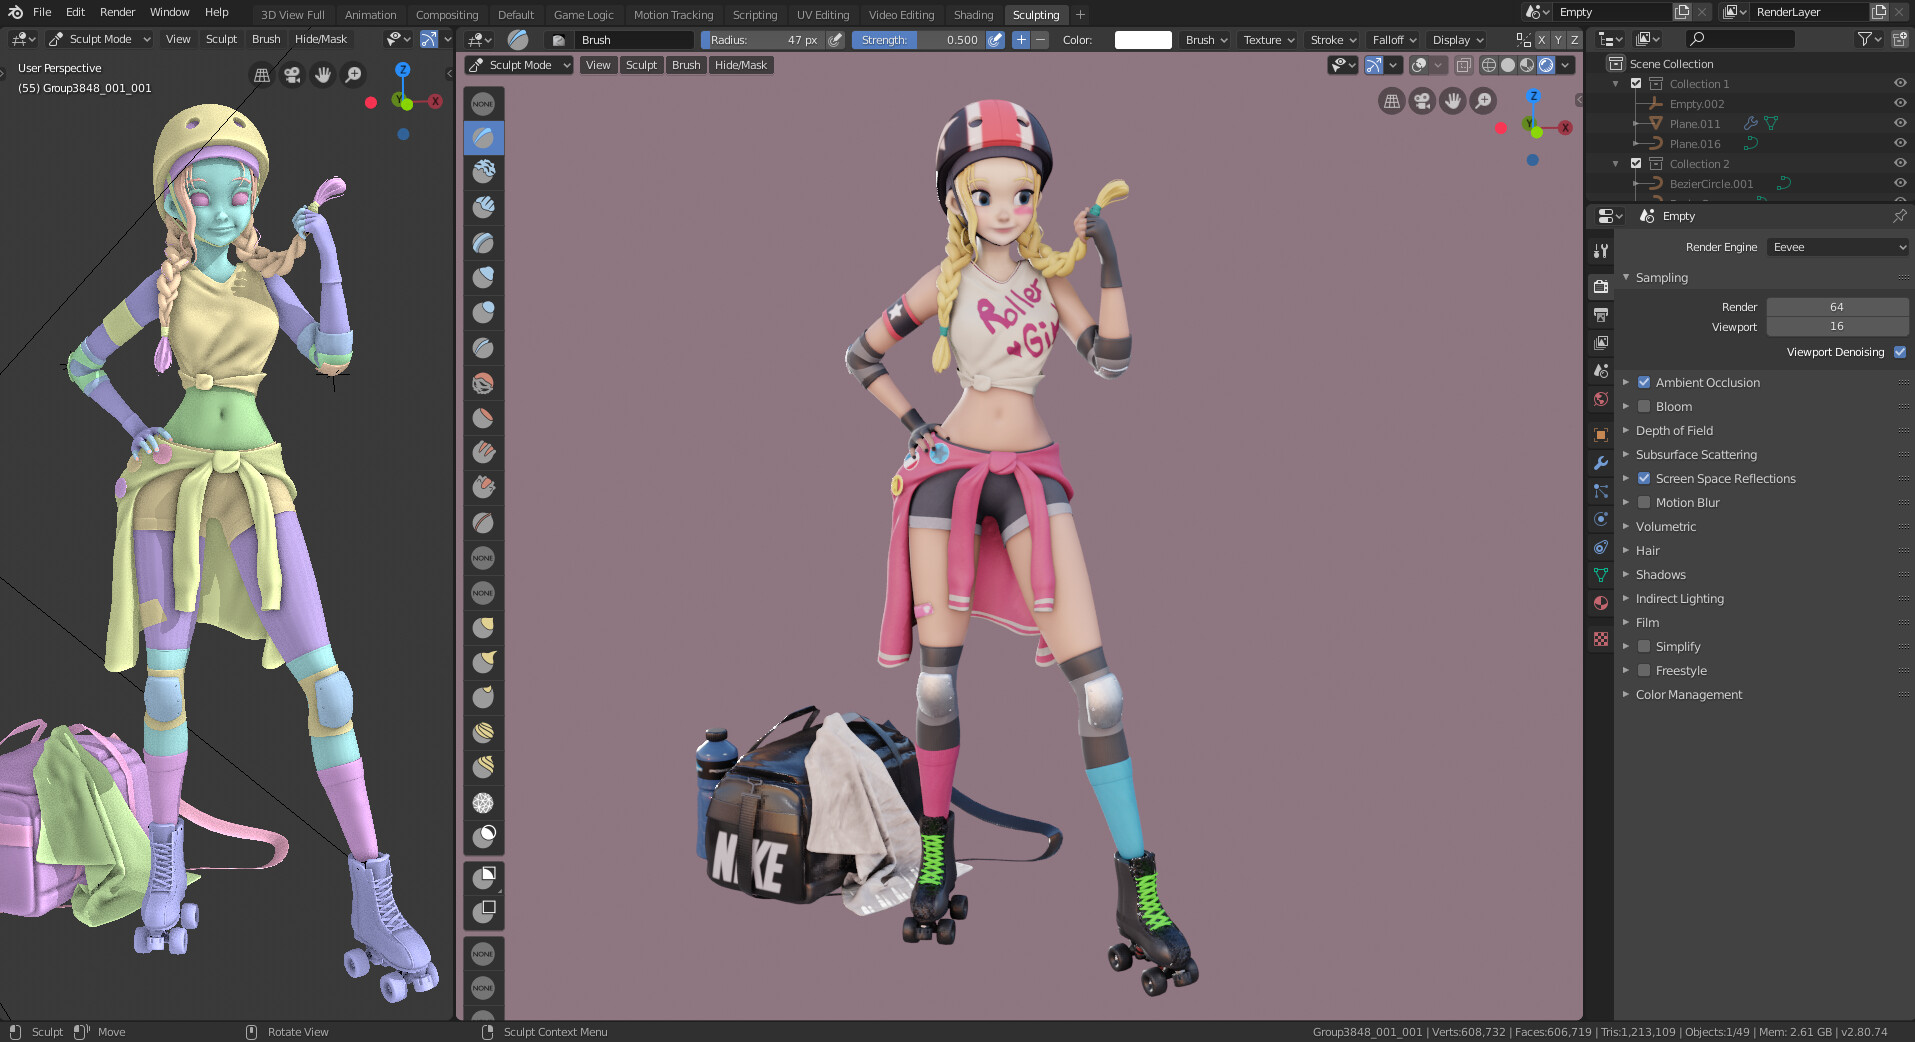
- You can sculpt with EEVEE enabled, a real time render engine with PBR materials and real time lightning.
- You can work with an unlimited number of viewports on different shading modes updating in real time as you sculpt
- You can work with procedural generated content in your sculpt using Blender’s modifier system, curves, particles and simulations
- You have a full featured scene management system with file linking, instances, collections…
- You can use a real rigging and animation system to pose you characters

New features
There were a lot of small tweaks and changes I made to make the sculpting experience in Blender better, but here is a summary of the most important and workflow changing features I added:
Brush system tweaks
The most noticeable change is that now this Blender version has a brush cursor which follows the surface normal. That was not only a visual change, some tweaks and parameters where added to the brush deformation code to support this feature properly. With those new parameters you can now easily recreate brushes like Dam Standard, Trim dynamic, HPolish and Move from ZBrush
On top of that, I also added an alternative smooth mode which relaxes the topology without modifying the volume (similar to the smooth brush in ZBrush when you release Shift), and I fixed some issues with the stroke sampling code, so now brushes should behave properly on curved surfaces.
Voxel remesher
Blender already has dyntopo, which is similar to Sculptris Pro mode in Zbrush. It triangulates the topology to a desired level of detail as you sculpt. In Blender, this has a noticeable performance penalty. When using dyntopo, you need to be careful with the vertex count of your sculpt. If you go too high, brush strokes are going to be unusable slow.
This build introduces the voxel remesher, which is the equivalent to Dynamesh in Zbrush. When you run it, it recalculates the geometry as a quad manifold mesh. Unlike dyntopo, this mesh is static, so it does not have any performance penalty. This means that you can now use a much higher resolution when blocking the shapes of your sculpts.
The voxel remesher uses OpenVDB, so it is super fast. In fact, you can run it in real time using the Remesh modifier, and even use it as a CSG modeling tool. It also preserves the vertex colors and the mask of the sculpt when you update your mesh. And yes, an automatic retopology remesh mode similar to ZRemesher is also planned.
Sculpt vertex colors
Blender already has a vertex paint mode which is great for low poly models, but it is completely unusable when you try to paint on a mesh with more than 100k vertices because of design and performance issues.
I wrote a whole new vertex paint system and I ported all the functionality from the old one. This new vertex paint mode is up to 90 times faster in some operations, it supports all features from sculpt mode (symmetry, optimized mesh viewport drawing, masks, undo…) and, of course, you can sculpt and paint at the same time, just like Polypaint in ZBrush.
Transform tool
Blender has a general purpose transform system which supports snapping, orientations, constraints, a complex keymap, gizmos and so on. Now you can use this same transform operator from sculpt mode on meshes with millions of vertices without any lag. It also includes some functionality to position the pivot point automatically, similar to the icons in the transform gizmo in ZBrush.
On top of that, I created a pose tool. You can click and drag on the mesh to generate a mask and position the pivot point automatically. The mask generation is super responsive, so you can use it to pose high poly meshes.
Mesh, mask and color filters
Filters are operations which affect all the vertices in the sculpt, taking the mask into account, like the sliders in the deform panel in ZBrush .
The mesh filter tool has some basic deformation algorithms and a noise generator you can use to create surface detail. The color filter has HSV, brightness/contrast and channels adjustments for the sculpt vertex colors. Grow, shrink, blur and sharpen mask operations are also supported, as well as cavity mask generation.
Automasking and mask generators
Blender has vertex groups, but they were not designed to be used in sculpt mode (they are often used for rigging and modifiers). Adding something similar to polygroups requires a lot of design work, so in the meantime, I added some mask generators. These operators generate a mask by clicking on the mesh, following certain parameters.
Probably the most useful is the mask by normal operator. It generates a mask limited by the ‘edges’ that were sculpted on your mesh, so you can use it to select ‘faces’ of your hard surface sculpts. It is similar to polygroups by normal in ZBrush, but it just generates the mask.
I also added an automasking system. The UI is not ready yet, but some of its functionality is already exposed. You can prevent brushes to affect the open edges of your mesh or topologically unconnected areas, which means you can use the grab brush as move or move topological.
Try it!
I first want to clarify that all the features I showed you here are not a Blender addon. You can’t install them on top of your current Blender installation. You need to have another Blender installation with a different executable, which has been compiled with the code of these features. Also, this development is currently not part of the official Blender 2.80 you can download from Blender.org.
The code of this Blender version is in the sculpt-mode-features branch of the official Blender repository. You can build the code following the tutorial in the Blender developer documentation (try it! it is not hard).
If you don’t want to build Blender, I provide a ready to use executable for Windows on my Patreon. You can also search for builds of the sculpt-mode-features branch on Graphicall or other Blender forums for Mac Windows and Linux.
When you have that build, just run it (you don’t need to install anything or modify your current Blender installation in any way). If you see ‘Branch: sculpt-mode-features’ on the splash screen, it is already working.
Just a few notes:
- Yes, it is going to crash (more than I would like to), but it should not damage your files, so try to save often.
- Don’t try to use any of the new features with dyntopo or multires sculpting, they won’t work and you will have a 100% guarantee crash.
- You can open files created with the official Blender 2.8 version. You can also copy objects and materials between the official version and this one.
- This Blender version is under active development, so features may change at any moment. Try to make sure that your build is up to date.
- You won’t find every tool I mentioned in this post in the menus or in the search box. Some of them are not intuitive at all to configure, even for experienced Blender users.
- If something in sculpt mode is totally broken it is probably a configuration issue. Some quick tips:
- If the brushes are not deforming the mesh check if the normal radius parameter is not 0.0
- If the sculpt vertex colors are not displaying in the viewport, add a vertex color layer
I’ll try to make more detailed blog post explaining each feature in detail, how to configure them properly and how I use them in my workflow.
I would be really grateful if you start playing with this Blender version, especially if you are into stylized sculpting and you use ZBrush or 3D Coat. Your feedback is really valuable to improve the design of the tools as much as possible before including them in the official Blender release. You can follow me on Twitter where I regulary post development updates and personal projects.
Thank you!
Pablo