Serverless Framework
Serverless Frameworkは簡単に言うと、yamlで記述した設定ファイルを元に、CloudFormation経由でAWS上のサーバレスアーキテクチャを構築管理してくれるAWS Lambdaを中心としたインフラまわりのフレームワークです。
フレームワークと聞くとRuby on RailsやCakePHPなどを思い浮かべてしまいますが、そういったアプリケーション的な機能は薄く、少し意味合いが違った印象です。
10月にv1.0になり、すでに現在v1.4.0になってます。
それ以前のバージョンとはかなり変わっているので注意
お天気チャンネル for LINE
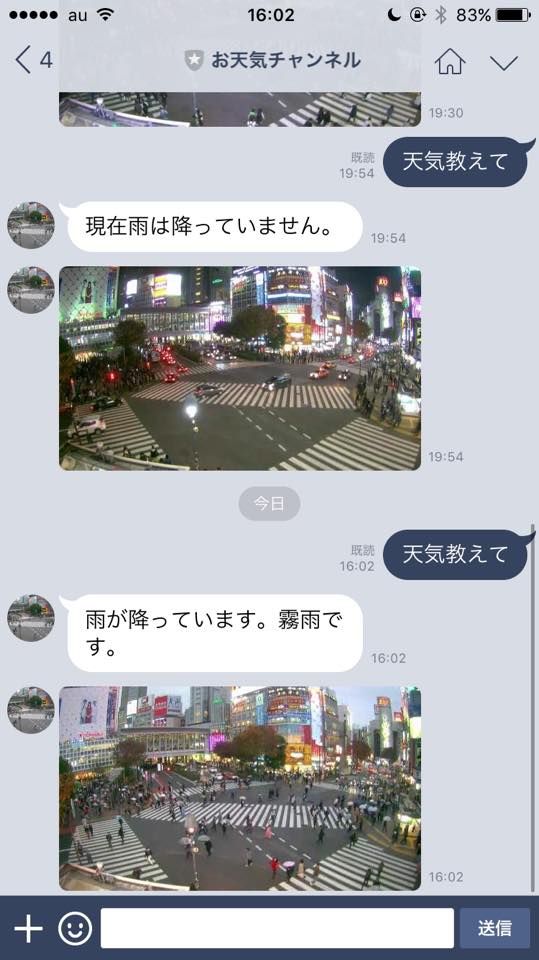
LINEで「天気教えて」ってメッセージを送ると、
現在の渋谷の天気情報とスクランブル交差点のウェブカメラの画像を返してくれるChatBotをつくりました。
https://line.me/R/ti/p/%40wra7063k
地味に便利
LINE@
まだアカウントを持っていなければLINE Business Centerからアカウントを作成し、
LINE DevelopersでChannel Access Tokenを準備してください。
LINE Messaging API
Messaging APIはLINEでメッセージが届くとWebhook経由でリクエストが届きます。
Webhookなので必要なときだけコードを実行するAWS Lambdaのようなイベント駆動のシステムを使用したアーキテクチャは、このようなBOTに適しているといえます。
また、LINE APIはhttpsが必須ですが、Serverlessで構築するAPI Gatewayがカバーしてくれます。
下準備
ドキュメントを見ながら実装していきます。
https://serverless.com/framework/docs/providers/aws/guide/intro/
node.jsのバージョン
実際にAWS Lambda上で動作するnode.jsはv4.3.2なので、nodebrewなどでバージョンを合わせておいた方が良いでしょう。
$ nodebrew install-binary v4.3.2
$ nodebrew use v4.3.2
$ node -v
v4.3.2
installよりinstall-binaryを使うと速い
AWS準備
aws-cliインストール
$ pip install awscli
$ aws --version
aws-cli/1.11.28 Python/2.7.12 Darwin/16.1.0 botocore/1.4.85
かなり頻繁アップデートされるので、気が向いたときにupgradeかけると良いです。
$ pip install --upgrade awscli
アクセスキー設定
指示に従い、Access Key IDとSecret Access Keyとリージョンを設定しておきます。
$ aws configure
IAMポリシー設定
ドキュメントではAdministratorAccessの権限をセットしろと書かれているのですが、流石に強権すぎるので、インラインでセットします。
とりあえず、今回はこの辺があればOKです。
{
    "Version": "2012-10-17",
    "Statement": [
        {
            "Effect": "Allow",
            "Action": [
                "cloudformation:*",
                "s3:*",
                "iam:*",
                "apigateway:*",
                "lambda:*"
            ],
            "Resource": "*"
        }
    ]
}
Serverlessインストール
コマンド実行できるようにnpmでグローバルにインストールしてしまいます。
$ npm install -g serverless
$ serverless -v
1.3.0
Serverlessサービスの雛形作成
Serverlessでは1つ1つをサービスという単位で作成していきます。
pythonとかjavaとか色々選べますが、今回はaws-nodejsを選択
$ serverless create --template aws-nodejs --path tenkibot
Serverless: Generating boilerplate...
Serverless: Generating boilerplate in "/xxxx/xxxx/xxxx/xxxx/tenkibot"
 _______                             __
|   _   .-----.----.--.--.-----.----|  .-----.-----.-----.
|   |___|  -__|   _|  |  |  -__|   _|  |  -__|__ --|__ --|
|____   |_____|__|  \___/|_____|__| |__|_____|_____|_____|
|   |   |             The Serverless Application Framework
|       |                           serverless.com, v1.3.0
 -------'

Serverless: Successfully generated boilerplate for template: "aws-nodejs"
実行するとtenkibotの中にhandler.jsとserverless.ymlが作成されています。
さらに、package.jsonがないのでnpm initする
$ cd ./tenkibot
$ npm init
ディレクトリー構成はこんな感じ
$ tree
.
├── handler.js
├── package.json
└── serverless.yml
ローカル実行環境
Serverlessには実行環境がなく、nodeコマンドとかで頑張ることもできますが、面倒なので
serverless-offlineをインストールしてAPI Gatewayをローカルでシミュレートしてもらいます。
$ npm install --save-dev serverless-offline
そしてserverless.ymlに2つ書き加えます
plugins:
  - serverless-offline

functions:
  hello:
    handler: handler.hello
    events:
      - http:
          path: hello
          method: get
そしてローカル実行
$ serverless offline start
Serverless: Starting Offline: dev/us-east-1.

Serverless: Routes for hello:
Serverless: GET /hello

Serverless: Offline listening on http://localhost:3000
これで http://localhost:3000/hello にアクセスし
{
  "message": "Go Serverless v1.0! Your function executed successfully!",
  ...
}
と返ってくればOKです。
LINE WebHook作成
superagentをインストール
API通信用にsuperagentを使用します。
$ npm install --save-dev superagent
Function作成
新しくline.jsというファイルを作成し、その中にリクエストの処理を記述していきます。
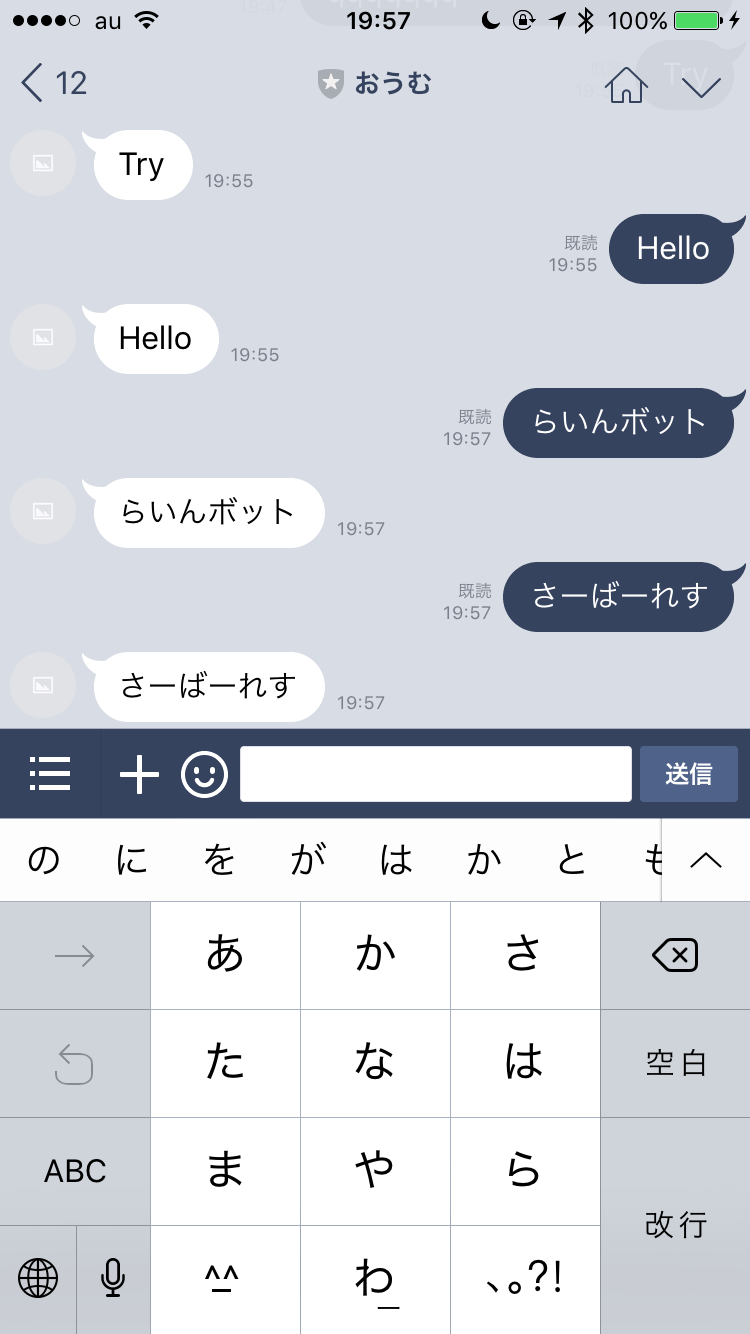
ひとまずオウム返しするBOT
accessTokenにはLINE Developersで取得したChannel Access Tokenを使用してください。
const request = require('superagent');
const endpoint = 'https://api.line.me/v2/bot/message/reply';
const accessToken = 'xxxxxxxxxxxxxxxxxxxxxxxxxxxxxx';

module.exports.webhook = (event, context, callback) => {
  var body = JSON.parse(event.body);
  body.events.forEach(function(data) {
    var replyToken = data.replyToken;
    var message = data.message.text

    request.post(endpoint)
            .set('Content-type', 'application/json; charset=UTF-8')
            .set('Authorization',  'Bearer ' + accessToken)
            .send({
              replyToken: replyToken,
              messages: [
                {
                  type: 'text',
                  text: message,
                },
              ],
            })
            .end(function(error){
              if (error) {
                console.log(error);
              }
            });
  });

  callback(null, {statusCode: 200, body: JSON.stringify({})});
};
URLを作成
serverless.ymlに新しく作ったFunctionを追記します。
この記述がAPI Gatewayに反映されます、routing的なものだと考えてください。
handlerにはファイル名.ファンクション名の形式で指定します。
handler: src/facebook.webhookみたいにを作ることもできます。
functions:
  lineWebhook:
    handler: line.webhook
    events:
      - http:
          path: line/webhook
          method: post
これで http://localhost:3000/line/webhook というURLにPOSTすると動作するようになりました。
実際にlocalでこのままためそうとすると、LINEに送っちゃうのでお気をつけて
デプロイ
region設定
serverless.ymlにデプロイのための追記を行います。
regionがデフォルトでus-east-1なので、東京リージョン(ap-northeast-1)に変更します。
provider:
  name: aws
  runtime: nodejs4.3
  stage: dev
  region: ap-northeast-1
デプロイ実行
ここまでできたら後はAWSにデプロイするだけ
$ serverless deploy
Serverless: Creating Stack...
Serverless: Checking Stack create progress...
.....
.....
.....
Serverless: Stack update finished...

Service Information
service: tenkibot
stage: dev
region: ap-northeast-1
api keys:
  None
endpoints:
  POST - https://xxxxxxxxxx.execute-api.ap-northeast-1.amazonaws.com/dev/line.webhook
  GET - https://xxxxxxxxxx.execute-api.ap-northeast-1.amazonaws.com/dev/hello
functions:
  tenkibot-dev-lineWebhook: arn:aws:lambda:us-east-1:000000000000:function:tenkibot-dev-lineWebhook
  tenkibot-dev-hello: arn:aws:lambda:us-east-1:000000000000:function:tenkibot-dev-hello
endpointsの
GET - https://xxxxxxxxxx.execute-api.us-east-1.amazonaws.com/dev/hello
ここにアクセスすると、ローカルで実行したときと同じようにGo Serverless v1.0! Your function executed successfully!が表示されます。
Webhook URLを設定する
先程のendpointsから
POST - https://xxxxxxxxxx.execute-api.us-east-1.amazonaws.com/dev/line.webhook
このURLをLINE DevelopersのWebhook URLを設定します。
完成
LINEで友達追加して、メッセージ送るとオウム返しされれば完成です。
うまくいかない場合はCloudWatchのログにからデバッグできます。
おわり
最初に説明したお天気チャンネルは、更にYahoo! 気象情報APIやウェブカメラの秘密のAPIを組み合わせて作っています。
AWSと聞くと若干高いイメージですが、
AWS Lambdaは月1,000,000件が無料なので、普通の使い方ではまず課金されない。
その後は0.20 USD/1,000,000 件のリクエスト(0.0000002 USD/リクエスト)と書かれているので、CloudFormationやAPI Gateway含め、値が小さ過ぎむしろコスト計算が大変。
Amazonもかなり力を入れてるみたいなので、もうAPIのサーバーとか必要のない時代が迫ってるのかもしれない
サーバー管理いらないし、リリースに気を使わなくて良いってのはかなりメリット


