前回の記事ではVyOS用の仮想マシンをセットアップしました。
今回はVyOS(1.1.6)のインストールと基本セットアップを行っていきます。
まず仮想マシンをDVDブートするためにISOファイルをマウントさせる必要があります。
やり方は色々ありますが、今回はホスト側にISOファイルを転送しマウントさせる方法を取ります。
[ISOをホスト側のストレージに転送]
1.

2.

3.
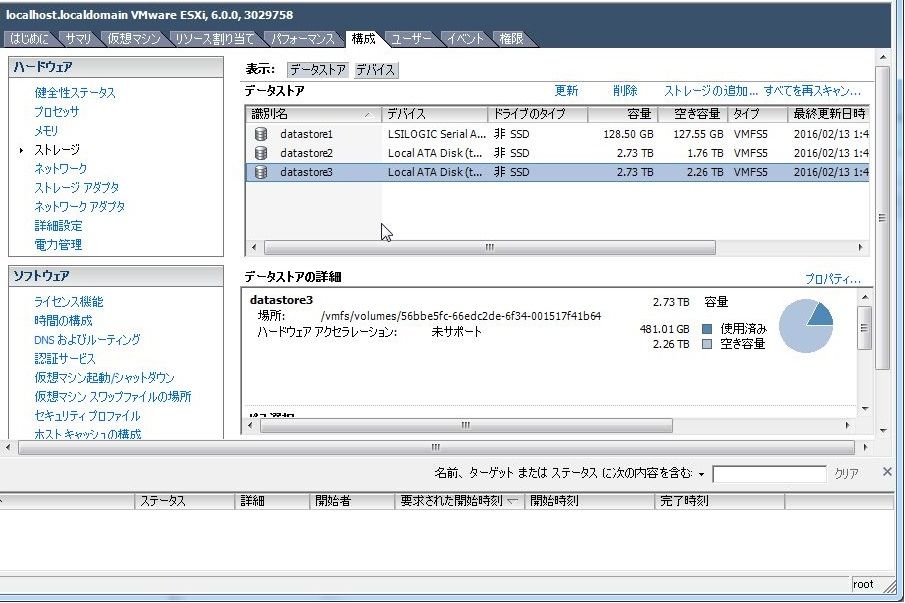
ストレージ上で任意のフォルダを選択

4.
メニューバー上部の矢印が書いてあるアイコンを選択⇒[アップロード]

5.
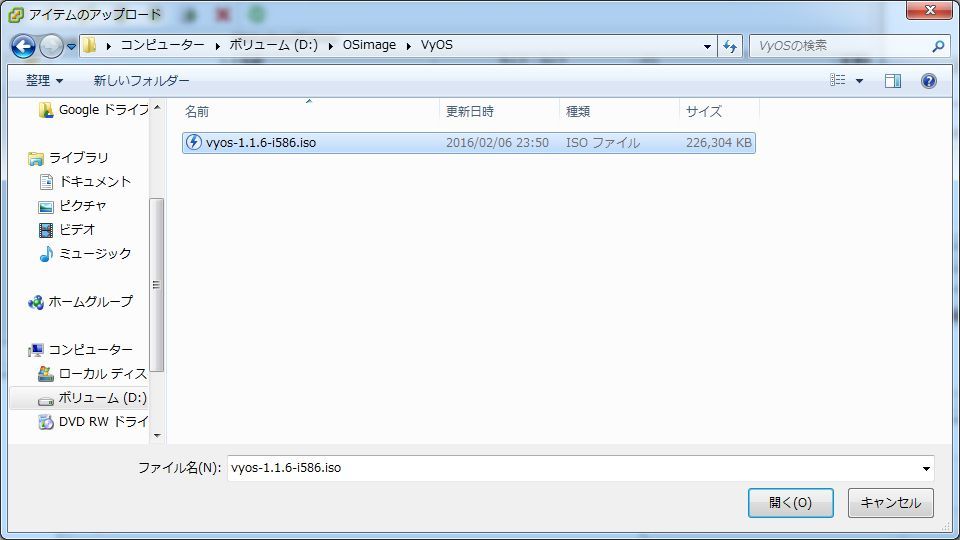
アップロードするファイル(VyOSのISO)を選択

[仮想マシンでマウントするよう設定]
1.

2.

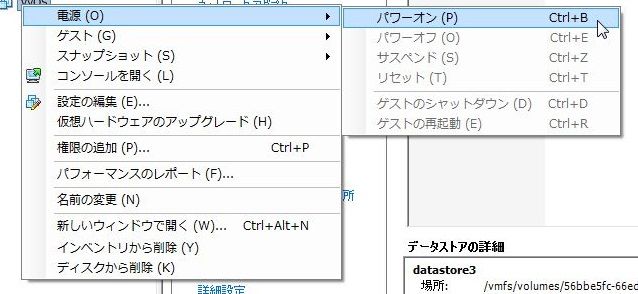
これで仮想マシンがインストール用のISOをマウントする準備が整ったので電源を投入します。

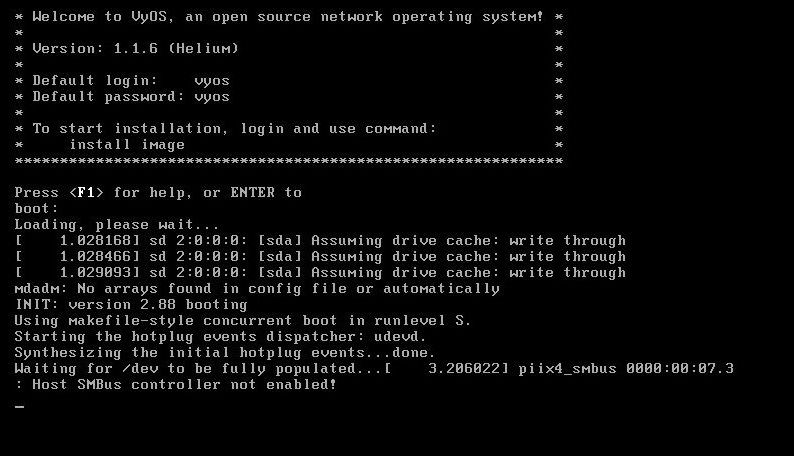
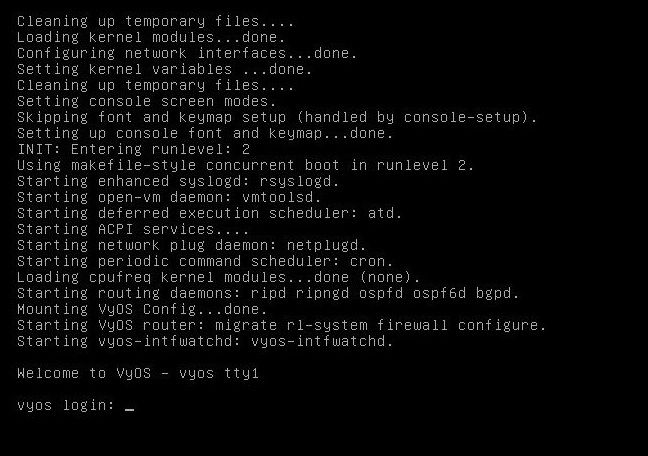
自動的にDVDブートしてVyOSが上がってきます


"vyos login"のプロンプトが帰ってきたら準備完了。
[VyOSのインストール]
1.
デフォルトのIDとパスワード(vyos/vyos)でログイン
2.
インストールコマンドを実行
3.
インストールウィザードが表示されるので必要に応じて変更
4.
まだDVDブートのままなので再起動
5.
再起動が終わったら再度デフォルトのIDとパスワード(vyos/vyos)でログイン
6.
ログイン後configureコマンドで構成定義モードに変更し、各インターフェースにゲートウェイとなるアドレスを付与
またわかりやすいようにdescriptionで接続先の名称を記載しました。
※VyOS上のインターフェース名(eth x)とvSwitchとの接続先は仮想マシン作成時に登録したvNIC順番通りになってましたが、不安ならshow interfaces detailでMACアドレスを確認し、仮想マシンのプロパティのネットワークアダプタに表示されているMACアドレスと比較すると良いと思います。
7.
管理者アカウント(vyos)のパスワードを変更
8.
sshでリモートからログインできるようにsshサービスを起動
9.
設定内容が想定通りか確認
10.
設定内容を保存
11.
(任意)設定が反映されているか確認
ちなみにshow configurationでは階層構造で設定情報が表示されますが、実際に入力するコマンドベースで出力したい場合は以下のコマンドを入力することで出力できます。
これならコピペもできるのでテキストベースでバックアップに利用できそうです。
今回はVyOS(1.1.6)のインストールと基本セットアップを行っていきます。
まず仮想マシンをDVDブートするためにISOファイルをマウントさせる必要があります。
やり方は色々ありますが、今回はホスト側にISOファイルを転送しマウントさせる方法を取ります。
[ISOをホスト側のストレージに転送]
1.
1 | [構成]⇒[ストレージ]⇒任意のストレージを選択 |
2.
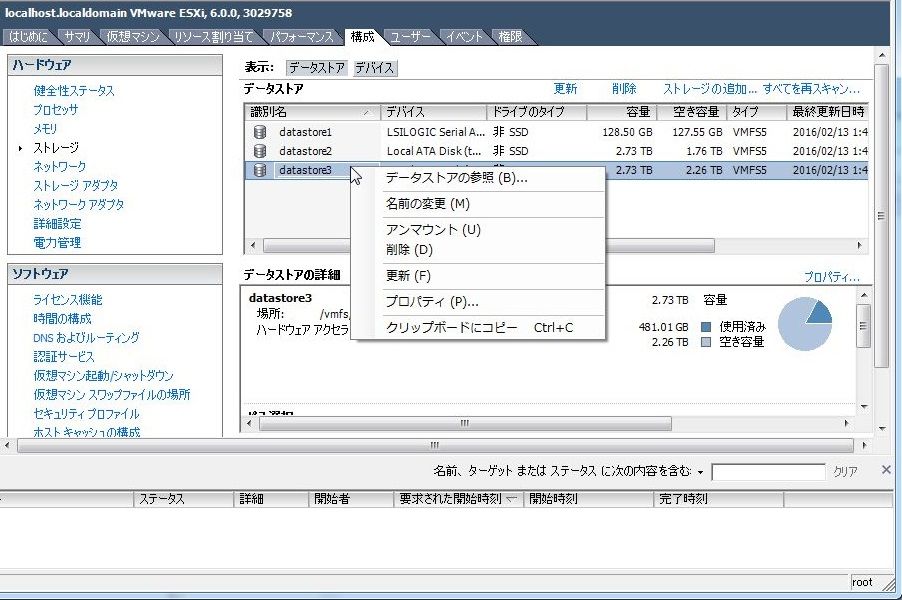
1 | 右クリック⇒[データストアの参照] |
3.
ストレージ上で任意のフォルダを選択

4.
メニューバー上部の矢印が書いてあるアイコンを選択⇒[アップロード]

5.
アップロードするファイル(VyOSのISO)を選択
[仮想マシンでマウントするよう設定]
1.
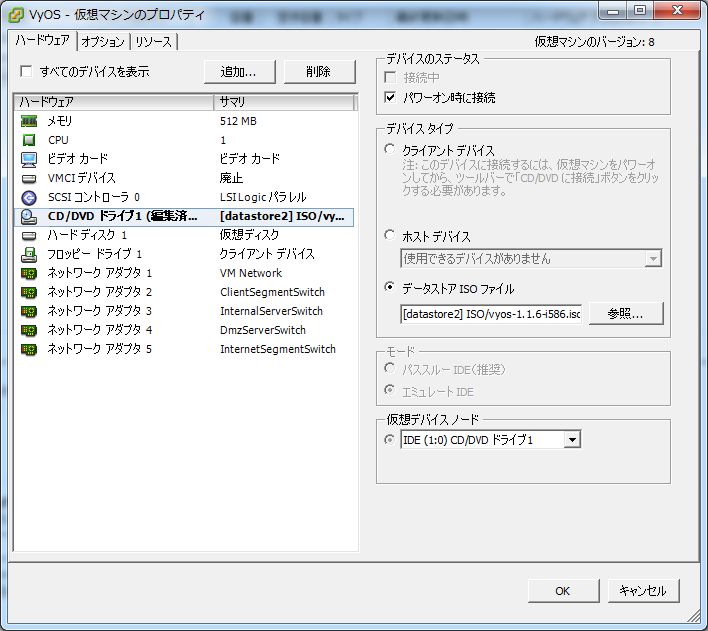
1 | 仮想マシンを右クリック⇒[設定の編集] |
2.
1 | [CD/DVDドライブ]⇒[データストアISOファイル]をチェック⇒参照でアップロードしたISOを選択[CD/DVDドライブ]⇒[パワーオン時に接続]にチェック |
これで仮想マシンがインストール用のISOをマウントする準備が整ったので電源を投入します。
自動的にDVDブートしてVyOSが上がってきます
"vyos login"のプロンプトが帰ってきたら準備完了。
[VyOSのインストール]
1.
デフォルトのIDとパスワード(vyos/vyos)でログイン
1 2 3 | vyos login: vyosPassword:vyos@vyos:~$ |
2.
インストールコマンドを実行
1 | vyos@vyos:~$ install image |
3.
インストールウィザードが表示されるので必要に応じて変更
1 2 3 4 5 6 7 8 9 10 11 12 13 14 15 16 17 18 19 20 21 22 23 24 25 26 27 28 29 30 31 32 33 34 35 36 37 38 39 40 41 42 43 44 45 46 47 48 49 50 51 | Welcome to the VyOS install program. This scriptwill walk you through the process of installing theVyOS image to a local hard drive.Would you like to continue? (Yes/No) [Yes]: [return]Probing drives: OKLooking for pre-existing RAID groups...none found.The VyOS image will require a minimum 1000MB root.Would you like me to try to partition a drive automaticallyor would you rather partition it manually with parted? Ifyou have already setup your partitions, you may skip this stepPartition (Auto/Parted/Skip) [Auto]: [return] I found the following drives on your system: sda 2147MBInstall the image on? [sda]: [return]This will destroy all data on /dev/sda.Continue? (Yes/No) [No]: YesHow big of a root partition should I create? (1000MB - 2147MB) [2147]MB: [return]Creating filesystem on /dev/sda1: OKDone!Mounting /dev/sda1...What would you like to name this image? [1.1.6]: [return]OK. This image will be named: 1.1.6Copying squashfs image...Copying kernel and initrd images...Done!I found the following configuration files: /config/config.boot /opt/vyatta/etc/config.boot.defaultWhich one should I copy to sda? [/config/config.boot]: [return]Copying /config/config.boot to sda.Enter password for administrator accountEnter password for user 'vyos': Retype password for user 'vyos': I need to install the GRUB boot loader.I found the following drives on your system: sda 2147MBWhich drive should GRUB modify the boot partition on? [sda]: [return]Setting up grub: OKDone!vyos@vyos:~$ |
4.
まだDVDブートのままなので再起動
1 2 3 | vyos@vyos:~$ reboot Proceed with reboot? (Yes/No) [No] Yesvyos@vyos:~$ |
5.
再起動が終わったら再度デフォルトのIDとパスワード(vyos/vyos)でログイン
1 2 3 | vyos login: vyosPassword: vyos@vyos:~$ |
6.
ログイン後configureコマンドで構成定義モードに変更し、各インターフェースにゲートウェイとなるアドレスを付与
またわかりやすいようにdescriptionで接続先の名称を記載しました。
※VyOS上のインターフェース名(eth x)とvSwitchとの接続先は仮想マシン作成時に登録したvNIC順番通りになってましたが、不安ならshow interfaces detailでMACアドレスを確認し、仮想マシンのプロパティのネットワークアダプタに表示されているMACアドレスと比較すると良いと思います。
1 2 3 4 5 6 7 8 9 10 11 | vyos@vyos:~$ configurevyos@vyos:~# set interfaces ethernet eth0 address 192.168.x.254/24vyos@vyos:~# set interfaces ethernet eth0 description ToLocalSwitchvyos@vyos:~# set interfaces ethernet eth1 address 192.168.z.254/24vyos@vyos:~# set interfaces ethernet eth1 descriptionvyos@vyos:~# set interfaces ethernet eth2 address 10.0.z.254/24vyos@vyos:~# set interfaces ethernet eth2 descriptionvyos@vyos:~# set interfaces ethernet eth3 address 172.16.z.254/24vyos@vyos:~# set interfaces ethernet eth3 descriptionvyos@vyos:~# set interfaces ethernet eth4 address 172.31.z.254/24vyos@vyos:~# set interfaces ethernet eth4 ToInternetsegSwitch |
7.
管理者アカウント(vyos)のパスワードを変更
1 | vyos@vyos:# set system login user vyos authentication plaintext-password 新しいパスワード |
8.
sshでリモートからログインできるようにsshサービスを起動
1 | vyos@vyos:# set service ssh |
9.
設定内容が想定通りか確認
1 2 3 4 5 6 7 8 9 10 11 12 13 14 15 16 17 18 19 20 21 22 23 24 25 26 27 28 29 30 31 32 33 34 35 36 37 38 39 40 41 42 43 44 45 46 47 48 49 50 51 52 53 54 55 56 57 58 59 60 61 62 63 64 65 66 67 68 69 70 71 72 73 74 75 76 77 78 79 80 81 82 83 84 85 86 87 88 89 90 91 92 93 94 95 96 97 98 99 100 101 | vyos@vyos# showinterfaces { ethernet eth0 { address 192.168.x.254/24 description ToLocalSwitch duplex auto hw-id 00:0c:29:c0:42:34 smp_affinity auto speed auto } ethernet eth1 { address 192.168.z.254/24 description ToPCsegSwitch duplex auto hw-id 00:0c:29:c0:42:3e smp_affinity auto speed auto } ethernet eth2 { address 10.0.z.254/24 description ToLocalSVsegSwitch duplex auto hw-id 00:0c:29:c0:42:48 smp_affinity auto speed auto } ethernet eth3 { address 172.16.z.254/24 description ToDMZsegSwitch duplex auto hw-id 00:0c:29:c0:42:52 smp_affinity auto speed auto } ethernet eth4 { address 172.31.z.254/24 description ToInternetsegSwitch duplex auto hw-id 00:0c:29:c0:42:5c smp_affinity auto speed auto } loopback lo { }}service { ssh { port 22 }}system { config-management { commit-revisions 20 } console { device ttyS0 { speed 9600 } } host-name vyos login { user vyos { authentication { encrypted-password **************** plaintext-password **************** } level admin } } ntp { server 0.pool.ntp.org { } server 1.pool.ntp.org { } server 2.pool.ntp.org { } } package { auto-sync 1 repository community { components main distribution helium password **************** url http://packages.vyos.net/vyos username "" } } syslog { global { facility all { level notice } facility protocols { level debug } } } time-zone UTC}[edit]vyos@vyos# |
10.
設定内容を保存
1 2 3 4 5 6 7 8 9 | vyos@vyos# commit[edit]vyos@vyos# saveSaving configuration to '/config/config.boot'...Done[edit]vyos@vyos# exitexitvyos@vyos:~$ |
11.
(任意)設定が反映されているか確認
1 | vyos@vyos:~$ show configuration |
1 | vyos@vyos:~$ show configuration commands |

コメント