SOVIET PROGENY

The T-72 is either the most famous or the most infamous main battle tank in modern history, depending on your nationality. What isn't subjective, though, is that the T-72 is one of the most prolific tanks in modern history, and for very good reason.
But before we take a look at the T-72 in earnest, we must first remember that the original Ural variant has undergone several major upgrades throughout its lifetime, creating significant discrepancies between each successive model, and to complicate matters, each model in itself may have subtle improvements implemented during overhauls, identifiable only by batch year.
But before we take a look at the T-72 in earnest, we must first remember that the original Ural variant has undergone several major upgrades throughout its lifetime, creating significant discrepancies between each successive model, and to complicate matters, each model in itself may have subtle improvements implemented during overhauls, identifiable only by batch year.
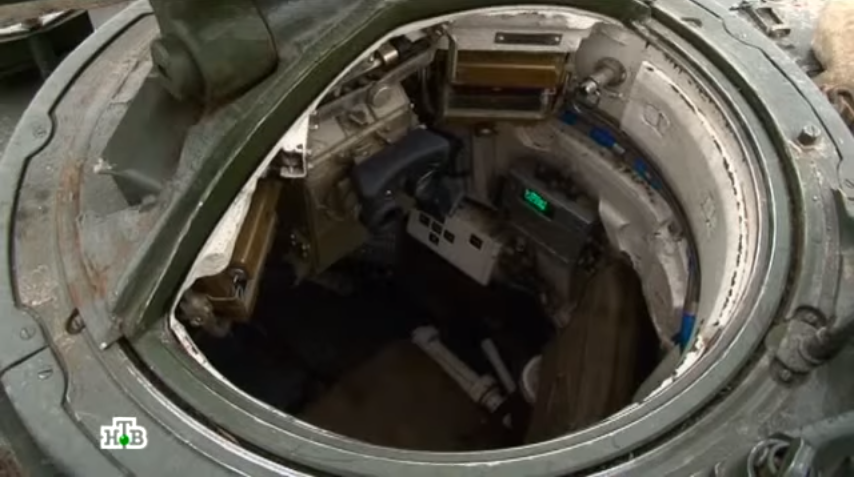
COMMANDER'S STATION
 |
| From Stefan Kotsch's fantastic website |
The commander's station is rather cramped, which is exacerbated by bulky winter clothing, but still noticeably less cramped than the gunner's station, which suits his duty just fine. His main means of battlefield surveillance is a forwards-facing TKN-3 binocular periscope, augmented by two TNP-165 periscopes on either side of it and two more TNPA-65A viewing prisms aimed to his rear quarter. All viewing devices are electrically heated to prevent fogging.

A snug fit also ensures that the commander will not be rocked around too violently while traversing difficult terrain, but it can get uncomfortable in hot weather. Like with the gunner's station, the commander's ventilation is provided by a single adjustable plastic fan, which is about as powerful as your typical desk fan. But because the commander has his own hatch, he may opt to simply stick himself out of the hatch and ride on the turret.


As for equipment, the commander's station is packed chock full of various knick-knacks essential for commanding the tank and also things that are not directly related to his job and are only placed near him because there was space.

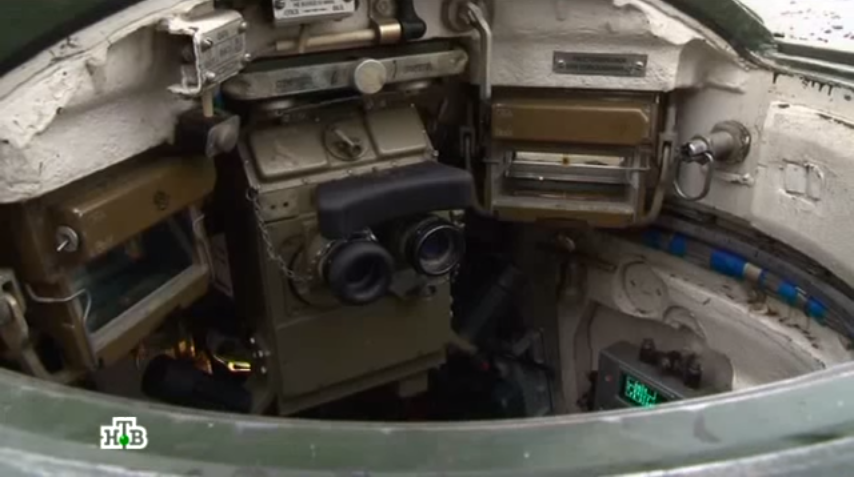
As for equipment, the commander's station is packed chock full of various knick-knacks essential for commanding the tank and also things that are not directly related to his job and are only placed near him because there was space.

In the photo above, we can see the R-123 radio transceiver at the very bottom. The silver-gray box above it is a control switch for the intercom system, and the white box beside it is a master control panel for most of the functions in the tank. This control panel (pictured below) gives the commander dominion over things like the lights and the ventilator, and behind the silver and milk-white metal covers at the corners of the panel are the emergency engine stop button and the emergency fire extinguishing system engagement (activates all the fire extinguishers connected to the automatic firefighting system in the fighting compartment) button, respectively.

Above that is a dome light and the already-mentioned plastic fan.
Above that is a dome light and the already-mentioned plastic fan.
TKN-3M/ TKN-3MK

The TKN-3M is an pseudo-binocular periscope with night vision capability in two modes; passive and active. In the passive mode of operation, the TKN-3M employs light intensification, which is usable in lighting conditions as dark as a typical moonless, starlit night (0.005 lux). As the amount of light increases, the effective viewing distance increases. A tank-sized target is discernible at up to 400m with 0.005 lux ambient light, but identifying the same tank is entirely possible at distances of up to 600m in moonlit nights or even 800m to 1000m during the brighter part of twilight hours. Any brighter and the image would be overexposed. Overall, the TKN-3M offers very poor night viewing capabilities compared to modern thermal imaging sights, but it was equally advanced as other IR sighting systems built in the 60's (the TKN-3 first appeared in the early 60's), and the use of light intensification technology was completely novel feature, up until the late 70's.
The TKN-3 itself has a fairly average angular FOV of 10 degrees in the day channel, or 8 degrees in the night channel. It has a fixed 5x magnification in the day channel and 3x magnification in the night channel. This is quite limited, making long-distance observation problematic, especially if the weather is unfavourable. It can be manipulated to elevate and depress to a reasonable degree, offering some limited aerial view for the commander. Still, it is slightly better than the x3 sight for the CWS that the commander of an Abrams would have to rely upon. This did not change until the M1A2 was introduced in the early 90's.
The TKN-3MK is a slightly updated variant with a 2nd Generation light intensifier, giving it better image quality and a slightly greater identification range of 500m. All T-72Bs are equipped with it.
Due to the fact that the periscope is unstabilized, identifying another tank at a distance is very difficult while on the move over very rough terrain. However, the commander is meant to bear down and brace against the handles of the periscope for some improvised stabilization, which is adequate for keeping the target within view for average off-road conditions, but not good enough for range finding or precise target designation, but the latter does depend on the skill of the commander somewhat.
The active mode requires the use of the OU-3GA IR spotlight which is mounted on the rotating cupola. The distance at which a tank-sized target can be identified in this mode is around 400m, without exception. Surplus OU-3GA spotlights have become rather popular on the civilian market in recent times as floodlights for off-roading 4x4s, or just for recreation. In this site here, you can see the spotlight in action.

The spotlight clearly illuminates an apartment building 700 m away, though the effect is not as pronounced because of the nearby streetlamps increasing the amount of ambient light. Also, the OU-3GA that they used was battery powered and ran on only 55W. The spotlight is designed to run on 110W when connected to the tank's electrical system.
Rotation of the cupola can be done by either using the TKN-3's set of grips to slide the cupola around the race ring, or the cupola-mounted anti-aircraft machine gun cradle's handles, if the commander is outside the hatch. By rotating the cupola, the commander can attain a full 360 degrees of vision.
Contrary to popular belief, a hunter-killer regime is not at all exclusive to modern Western tanks. Rudimentary hunter-killer cooperation dates back to WW2, where commanders would have to yell out the direction of the target by referring to the angle indicated on his cupola's race ring. The gunner can slew the turret towards the target by referring to an azimuth indicator corresponding to the commander's, usually marked out on the turret ring. Later on, tanks like the Conqueror pioneered a semi-automatic system where the commander only has to press a button to activate the electrical powered traverse drive and slew the turret towards whatever target he is viewing through his optic. The T-72, like the T-64 and T-62 before it, has this feature as well. As you would expect, the commander performs as the hunter in the hunter-killer system. On the end of the TKN-3MK's left hand grip is a button to initiate turret slewing to aim at whatever the commander has his crosshairs on. But even that isn't new. The T-62 tank, which began production in 1963, already featured the TKN-3 binocular sight and the same automatic target designation capability, but the T-72 features an additional electric motor that automatically counter-rotates his cupola so that his original orientation is preserved. Most Western tanks of the 50's and 60's already had the same hunter-killer feature, with some notable exceptions like the M1 and M1A1 Abrams, which did not have a similar feature until the M1A2 variant came about.
Once the turret is slewed towards the target, the gunner will then see the target, lay the gun more precisely, and then engage. The commander has duplicated controls for ammunition selection, so can select the most appropriate shell type for the type of target he has spotted in advance for the convenience of the gunner, allowing him to fire as soon as he has aimed. This sort of cooperation between the gunner and commander allows the T-72 to potentially attain its maximum rate of fire of 9 rounds per minute, if there are enough things to shoot at, of course.
The TKN-3M sight has a stadia reticle intended for approximate manual range estimation of tank-sized targets 2.7m tall from a distance of 800m to 3 to 3.2km, although this might be slightly optimistic for most situations. However, it is entirely possible for the crew to see and engage targets at such distances if weather conditions and the geography of the battlefield allows for it. Example of such geography should include plenty of high ground. Stadiametric ranging is not an accurate way to determine target distance. At long distances, distance errors may be up to hundreds of meters,

The spotlight clearly illuminates an apartment building 700 m away, though the effect is not as pronounced because of the nearby streetlamps increasing the amount of ambient light. Also, the OU-3GA that they used was battery powered and ran on only 55W. The spotlight is designed to run on 110W when connected to the tank's electrical system.
 |
| The TKN-3's aperture has a small wiper |
 |
| Notice the toothed external ring on the cupola. Also notice the red electric motor in the upper right corner of the photo |
The TKN-3M sight has a stadia reticle intended for approximate manual range estimation of tank-sized targets 2.7m tall from a distance of 800m to 3 to 3.2km, although this might be slightly optimistic for most situations. However, it is entirely possible for the crew to see and engage targets at such distances if weather conditions and the geography of the battlefield allows for it. Example of such geography should include plenty of high ground. Stadiametric ranging is not an accurate way to determine target distance. At long distances, distance errors may be up to hundreds of meters,
 |
| Diagram of the view through the TKN-3M |
 |
| View through the TKN-3MK. Notice the modified reticle. The stadia-reticle rangefinder remains the same |
A horizontal stadia rangefinder is objectively superior to a "choke" type stadia rangefinder, like the type found on M551 Sheridan light tanks. Whereas a "choke" rangefinder indicates target distance based on width, a horizontal rangefinder depends on height instead. A "choke" rangefinder would not be able to accurately determine distance if the target tank was not oriented directly towards the observer, which meant that against both stationary and mobile targets, and especially targets moving side-to-side, it would be mostly useless for actually finding range. Keep in mind that depending on the direction which a tank could be travelling, the observer could be seeing the tank lengthwise and not its actual design width. It would also be impossible to accurately guess a target's real width given a silhouette of an unknown size. A horizontal-type rangefinder, on the other hand, can measure distance no matter which direction the target is travelling in, and if a tank was in a hull-down position, the height of a tank would generally be halved, given that only the turret is exposed, giving the observer a fighting chance to approximate target distance.
As mentioned before, the TKN-3 sight depends on an OU-3GA xenon arc IR spotlight for illumination when operating in the 'active' mode. An inherent shortcoming to the usage of IR spotlights is that enemy tanks using a sight operating on the same type of system can see the light as well, along with its source. The SVD sniper rifle, for example, had a PSO-1 scope that had an IR filter to let the sniper exploit this trait and allowed the shooter to see enemy tanks at night. This makes it easy for the T-72 to be caught in an ambush at night by other tanks of the era like M48s, M60s, Leopard 1s, Chieftains, etc, though the inverse also applies. The T-72 can easily see and engage enemy tanks maneuvering in the dark without switching on its own spotlight. Like turning on a flashlight in the dark, you may not be able to see very far, but anyone can spot your torch from miles away.
As mentioned before, the TKN-3 sight depends on an OU-3GA xenon arc IR spotlight for illumination when operating in the 'active' mode. An inherent shortcoming to the usage of IR spotlights is that enemy tanks using a sight operating on the same type of system can see the light as well, along with its source. The SVD sniper rifle, for example, had a PSO-1 scope that had an IR filter to let the sniper exploit this trait and allowed the shooter to see enemy tanks at night. This makes it easy for the T-72 to be caught in an ambush at night by other tanks of the era like M48s, M60s, Leopard 1s, Chieftains, etc, though the inverse also applies. The T-72 can easily see and engage enemy tanks maneuvering in the dark without switching on its own spotlight. Like turning on a flashlight in the dark, you may not be able to see very far, but anyone can spot your torch from miles away.
Contrary to what some believe, the IR spotlights will NOT glow like the sun when viewed by a thermal imaging sight. Thermal imaging sights operate in the 8-15 micrometer wavelength while the IR light emitted and used by the TKN-3 system is in the 0.75-1.4 micrometer wavelength. Thermal imaging sights will be completely incapable of picking up its emissions, though the heat generated from the lamp could be somewhat registerable at closer ranges.
The T-72B2 and B3 variants introduced full duplication of the firing controls for the commander. He has a LED screen linked to the Sosna-U sight, and the necessary controls for firing the main gun and the co-axial machine gun at his disposal.
COMMUNICATION

The T-72 was originally supplied with an R-123 radio. The R-123 radio had a frequency range of between 20 MHZ to 51.5 MHZ. It could be tuned to any frequency within those limits via a knob, or the commander could instantly switch between four preset frequencies for communications within a platoon. It had a range of between 16km to 50km. The R-123 had a novel glass prism window at the top of the apparatus that displayed the operating frequency. An internal bulb illuminated a dial, imposing it onto the prism where it is displayed. The R-123 had an advanced modular design that enabled it to be repaired quickly by simply swapping out individual modules.
Beginning in 1984, the R-123 was replaced by the R-173 radio in the new T-72B. The R-173 had a frequency range of between 30 MHZ to 75.999MHZ and 10 preset frequencies. It had an electronic keypad for entering the desired frequency, and a digital display. Both the radio and intercom system are directly routed to the throat mike and headset, which are integral parts of the iconic Russian tanker's helmet.

The throat mike gives very good voice clarity and doesn't pick up any ambient noise, which makes the throat mike system inherently superior to open mikes like those used in a U.S Army tanker's headset.
The R-173M radio itself is a variable frequency FM radio. It has 10 pre-programmed frequencies. Communications with it are rather easy to intercept and jam or listen in to. For instance, Chechen fighters during the Chechnya campaign were able to listen in to radio chatter and even interject bogus commands over Russian airwaves. For this very reason, the new, frequency-hopping R-168-25UE-2 was rapidly launched into service in the 2000's to replace it. The T-72B3 uses
 |
| R-173 |
The R-168-25UE-2 frequency-hopping encrypted radio set is used for communications on all levels. It replaced both the R-173M and R-123 radio stations in the T-72B3 modernization.
 |
| R168-25UE-2 |
The R-168 family of radios is now the standard throughout the Russian ground forces, from infantry platoons to tank companies. It can produce frequency hops 100 times a second, and the data is encrypted as well.
Command variants of the T-72 were equipped with an additional R-123 radio. As of today, the R-123 radio is completely antiquated. It is an analogue design first used in the T-62 back in the early 60's to replace the R-113. Command variants were easily identifiable via their distinctively elongated second antenna.
The modern day Russian army no longer fields command variants of the T-72 due to a drastic shift in combat doctrine. Instead, all command variants of T-72s had their R-123 radios removed, leaving all T-72B3 tanks with a single R-168-25UE-2 radio.
Besides the updated communications hardware, the tank's intercom was also revised to unify both inter-tank and inter-crew communications control into a single control unit, shown below:

It's worth noting that the ventilation system for the T-72 draws air from the same port as the engine air intake, at the engine deck directly behind the right quadrant of the turret. The ventilation system has filters that ensures a supply of clean air. The same filters are responsible for filtering out radioactive particles or biochemical agents in NBC-contaminated areas. The ventilator housing and the white pipe leading to the air intake can be seen tucked away in the rear corner of the fighting compartment:

Unlike with NATO tanks, the commander's means of surveying the battlefield is conducted with periscopes and not with vision blocks. The commander's head is located below the cupola ring, too. The implications of this design decision is that the commander has rather unremarkable - substandard, actually - all-round visibility. But like all design decisions, this one does have its advantages. The commander is completely withdrawn from large-caliber sniper fire (12.7mm-type) and deliberately concentrated machine gun fire. There is absolutely zero chance that his eyes may be injured by broken glass, since the internal periscope aperture is protected by ballistic glass.


For forward observation, two TNPO-160 periscopes are provided. Each has a total horizontal range of vision of 78 degrees, and a vertical field of view of 28 degrees - 12 degrees above the horizontal axis and 16 degrees below
Two TNPA-65A periscopes bring up the rear. They are mounted directly in the hatch, and thus view the rear two quadrants of the turret. Unfortunately, there is a glaringly obvious blind spot directly behind, since this is where the hatch's locking latch handle is located.

It provides only 14 degrees of binocular vision horizontally and 6 degrees of vertical vision.
The TNPO-160 periscopes with the TKN-3 binocular periscope comprise the forward vision assembly of the commander. Despite the very limited all-round visibility (compared to NATO tanks) offered by the commander's five periscopes, he can still compensate by simply rotating his cupola. While he may not have convenient and immediate all-round awareness, at least he still has reasonable coverage as is.
The commander's hatch is of a forward-opening, 500mm-diameter half-moon type, mounted on the rotating cupola. The hatch is fully airtight and watertight up to a depth of around 3m. The hatch is quite small, and exiting through it in a hurry may be problematic if the commander is wearing winter clothing.
It is spring-loaded, so that it can stay open when the commander wishes to view the battlefield with binoculars, or when he needs to use the complementary AAMG. A simple rotating handle locks the hatch when closed, preventing it from bouncing up and down when the tank is in motion.
It is spring-loaded, so that it can stay open when the commander wishes to view the battlefield with binoculars, or when he needs to use the complementary AAMG. A simple rotating handle locks the hatch when closed, preventing it from bouncing up and down when the tank is in motion.


Because it opens forward, the thick hatch gives the commander full-body protection from machine gun fire whenever he wants to pop out for tactical assessment with binoculars. To look over the hatch, all he needs to do is to stand on his seat.
 |
| The commander is shielded from machine gun and sniper fire by his hatch |
In some modifications beginning in the mid-70's, the commander's cupola may also feature a rather peculiar full-body shield, mounted forward of the hatch. All T-72s operated by the Russian ground forces today feature this shield.

The lower part is a simple hanging canvas sheet, which isn't intended to be part of the protection scheme per se. It is just a face shield for the commander for if he were to sit outside on the turret while on road marches, to shelter him from the dust cloud kicked up by the lead tank in front.

The shield made of very thin sheet steel and is thus not bulletproof, splinter-proof or fragmentation-proof (though the commander's hatch is).

The lower part is a simple hanging canvas sheet, which isn't intended to be part of the protection scheme per se. It is just a face shield for the commander for if he were to sit outside on the turret while on road marches, to shelter him from the dust cloud kicked up by the lead tank in front.
The shield made of very thin sheet steel and is thus not bulletproof, splinter-proof or fragmentation-proof (though the commander's hatch is).
GUNNER'S STATION
The gunner's station is dominated by the GPS (Gunner's Primary Sight), which tips the scales at 80kg. He is responsible for all of the weapons-related equipment, including the autoloader, stabilizer, cannon, co-axial machine gun, the sighting devices and their associated instruments.
The gunner's station is the most cramped position in the T-72, and even more so if he is wearing winter clothing, but it would be a mistake to make the cramped nature of the gunner's station as a unique and defining feature of the T-72. As a whole, the T-72's turret does indeed have a much smaller volume than most tanks, but the space for each individual crew member is very much the same. Though few would think it, the gunner's station here is no smaller than that of the vast majority of NATO tanks, where the gunner is wedged between his sight and the commander's knees, with the gun breech to his left and the turret wall to his right and barely any shoulder room. Case in point:
Chieftain:
 |
| Mr. Cutland in this picture can lean back only because the commander's seat behind him is not occupied |
Abrams:
 |
| The gunner of an Abrams is crammed into a small corner, with the gun breech inches from his head (The gunner does not have a shoulder guard) Photo credit: Chris Conners from afvdb.50megs |

The commander, and driver in most NATO tanks are living in luxury, of course, but this is usually not the case for the gunner.
In any case, internal space seems to be more psychological than physical. Volume and comfort-wise, the gunner's station in a T-72 is quite adequate for legacy tank, though still undoubtedly cramped. But then again, that is not to say that crampedness of the gunner's station is purely negative. A snug fit ensures that the gunner will not be knocked around too much while the tank is in motion, which is undoubtedly a small benefit to targeting precision while driving on uneven ground. It isn't so much an issue while on long marches, because both turret occupants may simply sit on the turret roof instead. In this respect, the T-72 has a slight ergonomic advantage over NATO tanks as well as preceding Soviet tanks in that the gunner has his own hatch and he can exit whenever he likes. In the event of an internal fire, the entire crew can bail out with no fuss. This is quite unlike tanks like the Abrams, or indeed, any other manually-loaded tank, including older Soviet tanks, where the gunner is not provided with his own hatch. On long marches, he might be forced to stay put in his decidedly cramped station for hours at a time, and if the commander were incapacitated or killed, the gunner would have to squeeze through the commander's body to bail out. This is not a problem for the T-72.
Ventilation is provided by a single adjustable hard rubber fan mounted on a ball joint. It is more than enough in European climates where temperatures are usually around 20° C (68° F) or less, but in hot, desert regions averaging 30° C to 40° C is only useful for increasing air circulation to stave off stuffiness, and little else. Still, it's better than some tanks that do not provide any personal ventilation.
For general visibility, the gunner is provided with a single forward-facing TNPO-165 periscope and another TNPA-65A periscope on his hatch, pointing to the left.
 |
| 1A40-1 sighting complex and 1K13-49 night vision/auxiliary sight |


The indicator is akin to a clock, with a minute arm and a second arm. The larger arm roughly shows the direction the turret is pointing to, being a tool of convenience, but also points out the turret's traverse in degrees. The smaller arm (which rotates very rapidly if the turret is turning) is the arc minute arm. It points out the orientation of the turret in increments of 1/60ths of a degree. It is only of any real use when the tank is called upon for indirect fire.

The gunner is provided with a single half-moon hatch. Its most distinctive feature is the smaller circular port hole at its center, intended for snorkel installation. The hatch is spring loaded to hold it in place when open, and to give a little leeway for the gunner when opening it. It is locked with a simple rotating latch. There is a single TNPA-65 periscope embedded in it, pointing to the left (mentioned above). It is rather small and slit-like, but it provides the gunner with some precious limited sideways visibility. It provides only 14 degrees of binocular vision horizontally and 6 degrees of vertical vision.

In the gunner's case, periscopes are not very useful on a day-to-day basis. For one, the gunner must concentrate on his job of gunning the gun, and he will not be able to see much from out of the few vision devices that he has. Still, the periscopes are useful for letting outside light in, all the better for the gunner when buttoned up.
SIGHTING COMPLEXES
Because of the T-72's status as a "mobilization model", the more expensive parts were usually kept as affordable as possible. It was to be manned by conscripts with minimal training, and T-72 crews received fewer opportunities to conduct firing exercises during peacetime than T-64 and T-80 crews. The sighting systems suffered the most from this practice. The T-72 never had a true ballistic computer and the fire control system required far more manual input than the best analogues of the time. Nevertheless, it must be noted that T-72s still had very comparable protection to its domestic contemporaries (in the case of ammunition placement, it was undoubtedly superior) and comparable firepower, although T-72 units usually received the latest ammunition later than T-64s and T-80s. This fact considerably helped offset the lack of sophisticated sighting devices, but the shortage of technology (but not the lack thereof) in an increasingly technological stage of the Cold War was not comforting.TPD-2-49
The T-72 first entered service in 1973 sporting the TPD-2-49 optical coincidence rangefinder. It can be used to identify and engage tank-type targets and bunkers at up to 4000m in the direct fire mode.


The gunner turns a wheel located just above his hand grips to line up the two halves:

A major flaw with optical coincidence rangefinders in general is that they don't work very well on camouflaged targets. Even tanks simply painted the same shade as the environment can be difficult to accurately range because the outlines of the tank may not be very clear to the gunner. Ranging errors were more or less irrelevant to the T-72 because it fired very-high-velocity APFSDS ammunition, but firing HEAT on targets would be very difficult at longer ranges, not to mention moving ones. Still, stationary targets like bunkers
All in all, optical coincidence sights were generally considered wholly unsatisfactory due to their cost and complexity of operation, which the TPD-2-49 was no exception to. They were also fragile, despite extensive shockproofing and anti-vibration bushings. Any misalignment as a result of shocks from tank shell impacts could cause the sight to be so inaccurate that it becomes useless, and this was a big problem with the T-72 (and indeed, every other tank with such a rangefinder) because an optical tube connecting the first aperture to the main sighting unit ran across the turret roof above the gun. Hitting anywhere in that vicinity could put the sight out of commission. This, in addition to the issues mentioned above, meant that production was summarily discontinued just two years later in 1975 and all T-72 Urals were refitted with TPD-K1 laser rangefinding sights in the T-72 Ural-1 modernization later in that same year (The Ural-1 modernization retained the turret of the Ural, but swapped out the sight). Since it was of no use anymore, the TPD-2-49's second optic port was blocked off and permanently welded shut.
Still, the fact of the matter is that the TPD-2-49 placed the T-72 Ural on at least equal footing with the best NATO tanks at the time, including the M60A1 and Chieftain.
T-72 Ural-1 & T-72A
1A40 Sighting Complex
TPD-K1

The TPD-K1 is part of the 1A40 sighting complex, which included the TPD-K1 itself, plus the ballistic calculator and the sight-stabilizer interface. It was first installed on the 1975-76 upgrade of the T-72 Ural, which became the 'Ural-1', and later carrying over to the T-72A in 1979 and to the T-72B in 1983. It is the gunner's primary sight, mounted directly in front of him. It has a fixed 8x magnification and a 9° field of view. Though it might not be anything special today, it was a huge leap in electroptic gunnery technology in 1975. In fact, the TPD-K1 gave the T-72 a 3-year head start over its Western nemesis the M60, which received its own AN/VVG-2 laser rangefinder unit in 1978 as part of the M60A3 upgrade.
The sight aperture housing on the turret roof is armoured to withstand small arms fire, and a thin steel shroud extension shelters the aperture from thrown mud, rain, sand and snow. The extended side walls are of a much thicker steel meant to protect from bullets and fragmentation. The aperture itself has a layer of bolt-on SET-5L ballistic glass (19mm thick) to protect it from bullets and shell splinters. It is provided with a small wiper to remove any debris or mud that might obstruct the gunner's vision.
The sight aperture itself is just a periscope. There are no integral components in it, just a high-quality prism head with an interface with the stabilizer arms, so the financial loss from a destroyed sight head is totally negligible. Tank crews carry an extra sight head in internal stowage for quick field repairs.


  |
| Armoured sight housing and shroud |
The TPD-K1 incorporates a removable solid-state IR laser rangefinder (pictured below). It has a maximum error of 10m at distances of 500m to 3000m. From 3000m to 4000m, the maximum error threshold increases to 15m. The rangefinder becomes somewhat unresponsive and inaccurate past 3000m.
 |
| Detached rangefinder unit |
 |
| Attached to the right side of the TPD-K1 sight module |

It has a digital display for precise readouts, but range information is ported through to the range indicator dial on the top of the gunner's viewfinder, which the gunner can read for manual input if necessary. To lase a target, the gunner must place the illuminated red circle over it and fire off the laser for 1 to 3 seconds, less at closer ranges, adding about 1 second per every 1350 m. If the target is mobile, it must be tracked within the boundaries of the red circle until the range is obtained. The rangefinder unit must take 6 seconds to cool down between uses.
 |
| Range input unit |
Range information is automatically routed to the sighting unit, and the sight makes the necessary corrections and adjusts the reticle accordingly. The illustrations below shows what happens duing the ranging process.

Firstly, note the circle at the center of the viewfinder. That is where the target must go in order to determine the distance to it. Once that is done, the reticle instantly lowers, and the range indicator dial at the top spins to show the distance with an accuracy of within 10 m. The lasing circle stays where it is for lasing the next victim.
The TPD-K1 features a
stadia-reticle rangefinder with distance
indicators for ranges of 500m to 4000m that can be used to gauge target
distance if the laser rangefinder is malfunctioning. This and the manual
gun laying
drives allow the gunner to continue engaging targets even if all aiming
systems have completely lost power. The sight's vertical stabilization is linked to the vertical manual drive for cannon elevation.


The TPD-K1 is independently stabilized in the vertical plane. Thus, the gunner's view is not affected by any deficiencies in the gun's stabilization drives, and the gunner can see and engage targets beyond the gun's immediate capabilities in vertical elevation.

 |
| 1 - Ranging scales for co-axial machine gun (ПУЛ stands for Pulemyot, or machine gun), 2 - Ranging scales for HE-Frag shells (ОФ stands for High Explosive), 3 - Laser range finder distance indicator dial, 4 - Stadia-reticle range finder |
The sight includes graduations for firing the PKT machine gun to a maximum range of 1800m, for firing HE-Frag shells to a maximum range of 5000m, for manually applying lead on moving targets, and an auxiliary stadia rangefinder for manually determining the distance to a tank-type target or a bunker 2.7m in height at distances from a minimum of 500m up to 4000m (there is no need for a ballistic solution for targets closer than 500m). The stadia rangefinder is for emergency use only. On the top of the sight picture is the range indicator dial for the laser range finder, which is also capped at 4000m. Once the gunner has lased the target, the range will be displayed here. The gunner must then manually input the data into the analogue ballistic computer.
To operate the sight, the gunner must first toggle the type of shell into the sight's control unit beforehand.
Once this is done, the sight will automatically adjust itself for appropriate elevation. All the gunner must do now is to place the center chevron onto the target and fire. Subsequent shots do not require the process to be repeated, unless the gunner changes shell types or uses the co-axial machine gun, although already knowing the range, he may simply ignore the procedure and use the ranging scales to engage.
1A40-1


The 1A40-1 sighting unit is a slightly improved TPD-K1M primary sight modified to include an additional eyepiece for the gunner's left eye. The new UVBU unit calculates the necessary amount of lead for a moving target and displays it in figures which can be manually applied by the gunner on the lateral scale in the TPD-K1M. It works by determining the rate of rotation of the turret as the gunner is lasing the target and then translating that information into mils, which is displayed for the gunner to read. The gunner can then know which horizontal chevron he should place on the target and set. All T-72Bs are equipped with this.

With all sighting units, the gunner must first input the shell type into the UVP control unit (pictured) in order for the sight to automatically obtain a firing solution. Once set, the sight automatically accounts for different ballistic characteristics of different projectiles. Of course, none of this is needed if operating completely manually.
 |
| Notice the blank spaces on the indicator card; these are left in anticipation of new ammunition. The introduction and use of 3BK-29, for example, would necessitate reprogramming the UVP unit at a depot. The card would then be filled in. |
Shell type selection is done with toggle switches right above the hand grips. One for HEAT-MP shells, one for APFSDS and another for HE-Frag.

The hand grips have two buttons each. The left trigger button is for firing the co-axial machine gun and the left thumb button is resetting the laser rangefinder. The right trigger button is for firing the main cannon, and the right thumb button is for firing off the laser rangefinder.
AUXILIARY SIGHTS
The gunner has access to a secondary gun sight primarily intended for night operations, although these may also be used as a backup in case the main sight is damaged. The auxiliary sight of the T-72B was also the missile guidance control unit.
TPN-1-49-23


The TPN-1-49-23 is the gunner's auxiliary sight for the T-72 Ural and T-72A variants. It can either use ambient light intensification or use infrared light conversion and intensification by relying on the L-2AG "Luna" IR spotlight for illumination. The Luna spotlight is mounted co-axially to the main gun, and swivels along with it. Like the commander's OU-3GA spotlight, the L-2AG Luna spotlight is a xenon arc lamp with a simple IR filter slide. Removing the filter transforms the IR spotlight into a regular white light spotlight. The level of ambient infrared light and therefore visual clarity can be cumulatively improved if multiple vehicles sporting IR spotlights, like BTRs, BRDMs, BMPs and other T-series tanks are illuminating the battlefield.
Like the main sight, the TPN-1-49-23 is protected by a squarish, squat armoured housing, with a bolt-on steel cover for the aperture.
 |
| As you can see, there is also small IR light (the filter is removed here) mounted outside of his hatch, to the left of the sight housings. Its purpose remains unclear. |
The sight can be relied upon to identify tank-type targets at around 800 m in the active mode with the IR spotlight, but the distance at which the gunner can see a vehicle - but not distinguish it - is a few hundred meters farther. The passive setting allows the same target to be spotted at ranges of up to 800m if the ambient light is no less than 0.005 lux, which is the typical brightness of a moonless, starlit night with clear skies. Clarity and spotting distance improves with increasing brightness. The identification distance is expanded to around 1000m on moonlit nights, and it is possible to spot tanks at distances of more than 1300m during dark twilight hours, although low magnification and mediocre resolution complicates viewing beyond that range. Soviet enthusiasm for light intensification technology gave the T-64 and T-72 a significant night fighting advantage over their Western counterparts, whom relied solely on IR imaging technology for decades. Case in point: The M60 received a light intensifier sight only in 1977 with the M60A1 Passive modernization, and the original 1978 production M60A3 had the passive nightsighg before receiving the AN/VSG-2 thermal imaging sight in 1989. As for IR imaging itself, the TPN-1-49-23 was on par with the M60, but narrowly loses out to the Chieftain, which benefits from a massive 2 kW 570mm spotlight while the L-2AG ran on just 600 W.
If used as a backup sight, it can be used to identify tank-type targets at up to 3000m in daylight or more, if the geography and weather permits it. It has a field of view of 6 degrees at maximum magnification. Variable zoom allows reduction of magnification to 1x to give the gunner much better general visibility for spotting targets. The sight is independently stabilized in the vertical plane with 20 degrees of elevation and 5 degrees of depression.
This sight does not have the ability to guide gun-launched ATGMs like the Svir.
Though the cover can be removed and the sight used during daytime, light intensification must never be activated, because excessive light input will overload the sight unit and possibly damage it. In accordance with this, the aperture has shutters linked to the trigger unit. Upon firing, the shutters automatically close to shield the unit from the intense flash of cannon fire at night. The shutter may also be manually opened and closed via a handle, if the situation calls for it.
This sight first appeared with the T-72 Ural in 1972, and the T-72B1 is also a notable user, being a variant lacking the more advanced 1K13-49 sight.
1K13-49

 |
| Daytime mode |
 |
| 1K13-49 image in the passive light amplification mode, aimed at nothing in particular (Photo credit: Stefan Kotsch) |
The sight has a field of view of 5 degrees in the daylight setting or 6°4' in the nighttime setting. It is independently stabilized in the vertical plane, with +20° elevation -7° depression.

The sight aperture has two protective housings; one enclosing the sensitive optical workings of the aperture itself with a tempered glass window and a shock-proof shell, and another very heavy duty steel carapace covering that, along with a thick steel window shield.


Like the TPN-1-49-23, it too has automatic shutters. Key exterior differences lie in its distinctly larger armoured housing, and the aperture window cover is now openable from inside the tank via a pull lever.
SOSNA-U


The SOSNA-U is a multi-channel FLIR (Forward-Looking Infrared) sight with capabilities matching those of its contemporary rivals, giving the T-72 a much needed boost in target acquisition and engagement capabilities. It can be used to identify and engage tank-type targets at a distance of 5000m in daytime in the normal optical channel, and up to 3500m in either day or night through the thermal imaging channel and like the 1K13-49 sight, it can be used to guide GLATGMs. SOSNA-U has an integrated laser rangefinder and also features automatic target tracking. Generally speaking, it is incomparably superior to its predecessors in every way.
The SOSNA-U is considered the de facto main sight for T-72B2 and T-72B3 gunners, relegating the TPD-K1 to the back-up role instead. Unfortunately, the designers apparently didn't see it fit to swap the placement of these two sighting units, resulting in less than optimal placement of the SOSNA-U. Another rather strange quirk is that the sight aperture window cover has to be manually opened by unbolting it, which seems to be a step backwards from the 1K13-49's safer and more convenient recourse.

STABILIZERS
Stabilizer precision and sensitivity is a crucial factor in overall engagement capabilities, especially when on the move. In a continuation of the endearing Russian tradition of naming military hardware after innocent, peaceful things, the stabilizers are named after flowers.
The hydraulic pump and power supply system are located in the hull, while the electric motor for turret traversal is at the turret ring in front of the gunner, behind the sights.
(Beware, the specifications given are not completely reliable)
2E28M "Sireneviy" (Lilac) Electric/Hydroelectric Stabilizer
The 2E28M 2-axis stabilizer is the first stabilizer ever to be used in the T-72, having appeared on it since the very beginning. It is too imprecise to guarantee hits on the move at ranges greater than 500m, but it is extremely valuable for its ability to automatically lay the gun on any given target quickly and precisely on short stops. It can provide very workable accuracy against tank-type targets at average European combat distances, which is 1.5km. The precision of the stabilization devices should not be any less than the 2E15 "Meteor" stabilizer used in the T-62 tank since 1961. As such, although the author was not able to find any data on the 2E28M itself, it is inferred that the accuracy of stabilization is improved by at least a little bit.
This stabilizer is very slow to turn at only 18° per second. It would take it a minimum of 20 seconds to do a complete 360° revolution. This has the effect of inhibiting the T-72's ability to react to the unexpected emergence of a dangerous target from different directions.
An inherent shortcoming of hydraulic stabilizers is their risk factor in case of turret penetration. Hydraulic fluid is highly flammable, and it would most likely cause and spread an internal fire very quickly. This is an especially serious concern to the T-72, since it has numerous shells in loose storage which can accidentally detonate from uncontrolled fires.
It uses MGE-10A, a type of mineral hydraulic oil with very low temperature sensitivity, having an operating range of between -65°C to 75°C. The entire system operates at 7.25 psi. This is quite dangerous, as with all hydraulic systems, because hydraulic oil may spurt out from burst tubes at high speeds, spraying large portions of the interior with the flammable liquid.
The system revolves around the use of a gyrostabilizer meant for measuring angular velocities in order to enforce corrections.
Vertical Stabilizer
Maximum Cannon Elevating Speed: 3.5° per second
Minimum Cannon Elevating Speed: Estimated 0.06° per second (?)
Horizontal Stabilizer
Maximum Turret Traverse Speed: 18° per second
Minimum Turret Traverse Speed: Estimated 0.06° per second (?)
Average time taken for complete rotation: 20 to 22 seconds
For a minimum traverse and elevation speed of 0.06° per second, the stabilizer should have an accuracy of 1 mil, equivalent to a stabilization accuracy of 1 meter at 1000 m.
The sum total of the components belonging to the stabilization system weighs 320 kg.
2E42-2 "Zhasmin" (Jasmine) Hybrid Electro-Hydromechanical Stabilizer
 |
| Hydraulic pump, relay box and high-precision electric motor, from left to right. |
The 2E42-2 combines an electric turret rotation and stabilization drive with a hydraulic cannon elevation and stabilization drive. It was first used on the T-72B.
The hydraulic pump for powering the cannon elevation system is located under the cannon's breechblock, and the electric motor for turret traverse is installed in front of the gunner, behind his TPD-K1 sight unit.
The stabilizer is precise enough to lay the gun to within 0.5 mil on the vertical axis and 0.9 mil on the horizontal axis of the target, meaning that the gun can be lain with an accuracy of at least 0.5 m on the vertical plane and 0.9 m on the horizontal one, which would in turn mean that the shot dispersion should have an laterally oblong grouping.
Vertical Stabilizer
Maximum elevating speed: 3.5° per second
Minimum elevating speed: 0.05° per second
Horizontal Stabilizer
Maximum turret slew speed: 24° per second
Minimum turret slew speed: 0.054° per second
2E42-4 Electric/Hydroelectric Stabilizer
The 2E42-4 two-axis stabilizer is an improved modification of the 2E42-2, now including a much more powerful horizontal drive for much faster turret rotation. The T-72B3 is equipped with this stabilizer.
Vertical Stabilizer
Maximum elevating speed: 3.5° per second
Minimum elevating speed: 0.05° per second
Horizontal Stabilizer
Maximum turret slew speed: 40° per second
Minimum turret slew speed: 0.054° per second
The 2E42-4 stabilizer offers a significant weight reduction of 120 kg over the 2E42-2 stabilizer, for a total weight of 200 kg. This is mainly because of the design simplification of the electrohydraulic gun elevation drive, the improved turret traverse motor, and the usage of solid state electronics in the digitized control unit instead of transistors.
MANUAL
Manual traverse and elevation is possible with all T-72 turrets through the use of two flywheels located behind the hand grips. There are two gear settings; coarse and precise. The former allows the turret to turn as fast as the gunner can work the flywheel, while the latter produces minute changes to the turret and gun's positioning. Gun laying with the manual traverse can be just as accurate as with stabilizers, if not more so given that extreme care is taken, though obviously much, much slower and nearly impossible to achieve on the move. The gun elevation flywheel has a solenoid button for firing the main gun.

METEOROLOGICAL MAST
The T-72 first received a meteorological sensor unit with the T-72BA sub-variant. This manifested in the form of the DVE-BS unit, which can detect changes in wind speed and automatically register it in the ballistic computer. The maximum calculable winds speed is 25m/s. The information gathered is synchronized with the automatic lead calculation unit found in the 1A40-1 sighting complex. The T-72B2 and T-72B3 are also equipped with a DVE-BS unit.


PRIMARY

The T-72 is equipped with the ubiquitous 125mm smoothbore D-81 cannon - otherwise known as the 2A46 - and its variants. It can fire a wide range of shells including; APFSDS, HEAT, HE-Frag -
and from 1981 onwards - ATGMs, among other rarities like canister grapeshot (canister filled with thousands of tungsten pellets).
The original T-72 Ural, however, sported the 2A26M2 gun (D-81T), a derivative of the 2A26 gun first mounted on the T-64. It had a barrel length of 6350mm, or 50.8 calibers. All variants of the 2A46 series had a barrel length of 6000mm, or 48 calibers. This is shorter than the 55-caliber 120mm British rifled L11 and L30 canons (6600mm) and shorter than the smoothbore Rheinmetall L/55 cannon (6600mm), but longer than the Rheinmetall L/44 (5280mm) cannon. One of the main problems encountered with the original 2A26M2 gun was related to its excessive length. The barrel was so long that after a period of sustained firing, it could warp heavily enough to effectively un-zero the sights, and the insufficient stiffness meant that as the tank traveled across rough terrain, the vibrations and rocking motions caused the barrel to oscillate up and down. Unless the stabilizer was activated, this could seriously affect accuracy while firing on the move.
The 2A26M2 cannon had an electroplated chrome lining but lacked a thermal sleeve and had
generally poor longevity. The barrel had a life of a measly 600 EFC (Effective Full Charge). Replacing it was no easy task, either.
The turret had to be lifted by a crane and positioned so that the gun assembly could be removed through the rear. This was a highly
time-consuming process that required specialized equipment. The 2A26M2 cannon had a rated maximum chamber pressure of 450 MPa.
In 1974, NII Stali mastered and implemented several advanced material processing technologies, which were subsequently transferred to the production of new 2A46 guns (D-81TM). These new technologies included electroslag remelting, differential isothermal quenching and thermomechanical processing. This enabled the 2A46 to become much more durable than the 2A26, and much more accurate to boot. The barrel life for this model is around 900 EFC. The T-72A mounts this gun. Interestingly, it appears that exported T-72M1s never received this new gun. It would seem that Warsaw pact states that also produced the T-72 never did acquire these technologies either. The maximum rated chamber pressure was not increased and remained at 450 MPa.
In 1983, the T-72B was introduced and with it, the 2A46M. The chief modification was the improvement of barrel life by the usage of a new, more durable chrome lining to reduce wear from new high-energy APFSDS shells. Accuracy when firing on the move was improved by a very substantial 50% due to improvements to barrel stiffness. Overall, the barrel life was increased to 1200 EFC. The 2A46M was also a milestone product in another way - its mounting enabled quick replacement in the field through the front, without removing the turret. The procedure took about 2 hours. The maximum rated chamber pressure was increased to 500 MPa in accordance with the appearance of said high-energy APFSDS shells.
The introduction of the 2A46M can also be seen as a good example of the T-72's status within the Soviet tank fleets. Whereas the T-72 had to wait until 1983 to receive it, the T-64B and T-80B were already ahead by three years with their own 2A46M-1.
 The T-72B2 and T-72B3 build upon the T-72B
with the inclusion of the 2A46M-5 gun (D-81TM-5), which was first introduced in 2005 and can be considered the most
perfect of the entire
series. The barrel's seating has been improved such that it is optimized in tune with barrel oscillation, and the trunnions that secure the gun itself to the turret have been improved. Plus, the dynamic balancing of the barrel during the firing procedure (while the shell is still in the barrel and after it has left) have been better tuned, thus minimizing detrimental oscillations at the muzzle. All this helps produce superior shot groupings. The
design of the gun itself decreases the dispersion of all shell types by
an average of 15% to 20%, and the accuracy when firing on the move has been increased 1.7 times, thanks to a decreased inclination to vibrate when the tank is in motion over rough ground. There is a distinct probability that the
fortification of the barrel has led to an increased barrel life. If so, the barrel life rating should be around 1500 EFC. The maximum rated chamber pressure was further increased to 600 MPa. This is slightly lower than for cannons like the RM L/44 or licensed copies like the M256, but be reminded that the 2A46 series of guns has a 8.5% larger bore area, and that area is a factor in pressure.
The T-72B2 and T-72B3 build upon the T-72B
with the inclusion of the 2A46M-5 gun (D-81TM-5), which was first introduced in 2005 and can be considered the most
perfect of the entire
series. The barrel's seating has been improved such that it is optimized in tune with barrel oscillation, and the trunnions that secure the gun itself to the turret have been improved. Plus, the dynamic balancing of the barrel during the firing procedure (while the shell is still in the barrel and after it has left) have been better tuned, thus minimizing detrimental oscillations at the muzzle. All this helps produce superior shot groupings. The
design of the gun itself decreases the dispersion of all shell types by
an average of 15% to 20%, and the accuracy when firing on the move has been increased 1.7 times, thanks to a decreased inclination to vibrate when the tank is in motion over rough ground. There is a distinct probability that the
fortification of the barrel has led to an increased barrel life. If so, the barrel life rating should be around 1500 EFC. The maximum rated chamber pressure was further increased to 600 MPa. This is slightly lower than for cannons like the RM L/44 or licensed copies like the M256, but be reminded that the 2A46 series of guns has a 8.5% larger bore area, and that area is a factor in pressure.
Needless to say, firing from a worn-out gun barrel is highly dangerous. Critical fracturing is possible, but thankfully, the fuses of explosive ammunition like HE-Frag and HEAT shells exclude the possibility of premature detonation. Still, disintegrated fragments may potentially harm people and equipment in the vicinity.

Worn out barrels also tend to exhibit worse accuracy. This was especially noticeable during the war in Iraq, where Iraqi T-72s often urgently needed barrel replacements, because they had been used since the Iran-Iraq war. Because of the embargo on military equipment, they had no access to fresh barrels and they lacked the technology to produce their own. Firing APFSDS shells, especially the first generation ones that Iraq was supplied with (steel sabot with copper driving bands, and bore-riding projectile fins), was especially harsh on the barrel. The 2A28M2 cannons that Iraqi T-72Ms (analogues of T-72 Ural and Ural-1) and T-72M1s could only tolerate 160 to 170 of such APFSDS shells before becoming unsafe to fire. The 2A46M-2 on the T-72B could fire 220 contemporary APFSDS shells (high energy APFSDS), but the latest 2A46M-5 can let off at least 500 of the currently most common shells (3BM-44).
The gun can elevate +14 degrees and depress -6 degrees when facing the front, but elevate +17 degrees and depress only -3 degrees when facing the rear, with the engine compartment in the way. This is generally sufficient for cross-country driving with lots of minor dips, dives and bumps, but the T-72 is unable to fully take advantage of certain hills for hull-down shooting, but it is free to take cover behind mounds, rocky outcrops, or maybe in a self-made tank hole dug into the ground. The lackluster gun depression as compared to NATO tanks tends to become an issue in highly irregular terrain.
The original T-72 Ural, however, sported the 2A26M2 gun (D-81T), a derivative of the 2A26 gun first mounted on the T-64. It had a barrel length of 6350mm, or 50.8 calibers. All variants of the 2A46 series had a barrel length of 6000mm, or 48 calibers. This is shorter than the 55-caliber 120mm British rifled L11 and L30 canons (6600mm) and shorter than the smoothbore Rheinmetall L/55 cannon (6600mm), but longer than the Rheinmetall L/44 (5280mm) cannon. One of the main problems encountered with the original 2A26M2 gun was related to its excessive length. The barrel was so long that after a period of sustained firing, it could warp heavily enough to effectively un-zero the sights, and the insufficient stiffness meant that as the tank traveled across rough terrain, the vibrations and rocking motions caused the barrel to oscillate up and down. Unless the stabilizer was activated, this could seriously affect accuracy while firing on the move.
 |
| 2A46M |
In 1974, NII Stali mastered and implemented several advanced material processing technologies, which were subsequently transferred to the production of new 2A46 guns (D-81TM). These new technologies included electroslag remelting, differential isothermal quenching and thermomechanical processing. This enabled the 2A46 to become much more durable than the 2A26, and much more accurate to boot. The barrel life for this model is around 900 EFC. The T-72A mounts this gun. Interestingly, it appears that exported T-72M1s never received this new gun. It would seem that Warsaw pact states that also produced the T-72 never did acquire these technologies either. The maximum rated chamber pressure was not increased and remained at 450 MPa.
In 1983, the T-72B was introduced and with it, the 2A46M. The chief modification was the improvement of barrel life by the usage of a new, more durable chrome lining to reduce wear from new high-energy APFSDS shells. Accuracy when firing on the move was improved by a very substantial 50% due to improvements to barrel stiffness. Overall, the barrel life was increased to 1200 EFC. The 2A46M was also a milestone product in another way - its mounting enabled quick replacement in the field through the front, without removing the turret. The procedure took about 2 hours. The maximum rated chamber pressure was increased to 500 MPa in accordance with the appearance of said high-energy APFSDS shells.
The introduction of the 2A46M can also be seen as a good example of the T-72's status within the Soviet tank fleets. Whereas the T-72 had to wait until 1983 to receive it, the T-64B and T-80B were already ahead by three years with their own 2A46M-1.

Needless to say, firing from a worn-out gun barrel is highly dangerous. Critical fracturing is possible, but thankfully, the fuses of explosive ammunition like HE-Frag and HEAT shells exclude the possibility of premature detonation. Still, disintegrated fragments may potentially harm people and equipment in the vicinity.

Worn out barrels also tend to exhibit worse accuracy. This was especially noticeable during the war in Iraq, where Iraqi T-72s often urgently needed barrel replacements, because they had been used since the Iran-Iraq war. Because of the embargo on military equipment, they had no access to fresh barrels and they lacked the technology to produce their own. Firing APFSDS shells, especially the first generation ones that Iraq was supplied with (steel sabot with copper driving bands, and bore-riding projectile fins), was especially harsh on the barrel. The 2A28M2 cannons that Iraqi T-72Ms (analogues of T-72 Ural and Ural-1) and T-72M1s could only tolerate 160 to 170 of such APFSDS shells before becoming unsafe to fire. The 2A46M-2 on the T-72B could fire 220 contemporary APFSDS shells (high energy APFSDS), but the latest 2A46M-5 can let off at least 500 of the currently most common shells (3BM-44).
The gun can elevate +14 degrees and depress -6 degrees when facing the front, but elevate +17 degrees and depress only -3 degrees when facing the rear, with the engine compartment in the way. This is generally sufficient for cross-country driving with lots of minor dips, dives and bumps, but the T-72 is unable to fully take advantage of certain hills for hull-down shooting, but it is free to take cover behind mounds, rocky outcrops, or maybe in a self-made tank hole dug into the ground. The lackluster gun depression as compared to NATO tanks tends to become an issue in highly irregular terrain.
All of the D-81 cannons have a recoil stroke of between 300 to 340mm, more for the high-pressure APFSDS rounds and less for HEAT and HE-Frag rounds.
AMMUNITION STOWAGE

AUTOLOADER
 |
| The circular notch on the electric motor top disk (center) marks where the tray lines up flush with the trap door on the carousel cover. The notch allows projectiles 720mm long to pass through even though the tray itself is only 680mm in length. |
The T-72 uses an AZ electromechanical carousel-type autoloader with a 22-round capacity. Each shell and propellant charge stored within the carousel is housed within a 680mm-long two-tiered steel tray, which has extended bills to properly line up the shell or propellant charge with the gun chamber. The carousel is approximately 1880mm in diameter.
 |
| Trays being dropped in place. You can also see the tank's escape hatch to the left of the photo. The carousel's memory drives and electric motor are in the center, and the protruding leg is the means by which the carousel is manually rotated |


Carousel rotation motor (Left), Carousel memory unit (Right)
The time needed for a shell to load is 6.5 seconds, but in reality, the carousel must rotate to present fresh ammunition, so the actual total cycle time can be between 7 to 8 seconds, if switching ammunition types. This ensures a maximum rate of fire of around 8 rounds per minute. Because the gunner's primary sight is independently stabilized, he can conduct ranging and aim at the target before the loading procedure is finished, whereby the cannon, which is slaved to the sight, will elevate to the proper superelevation automatically, thereby allowing the T-72 to achieve this maximum rate of fire in practical terms. This is no different from all tanks with independently stabilized gunsights. Here is a video of the T-90 firing (link). If a T-90 can fire 2 shots in 13 seconds, then rest assured that a T-72 can too. As far as I know, there is no difference between them save for certain unrelated modifications which we will discuss later.
 The T-72 does not have a significant disadvantage when compared to human loaded counterparts, which include the majority of NATO tanks. Most examples can achieve a 4 to 5 second loading time - when their tank is immobile. However, it's a whole different story on rough terrain.
An
advantage to the autoloader is that a bumpy ride, change of direction
or slope traversal will never affect the autoloader's
operation in any way. It can maintain its normal cyclic loading rate in
whatever
condition or orientation the tank is in. In
manually-loaded tanks, the whole vehicle will pitch and dive as it drives
over ruts and mounds while the gun, which would be disconnected from the stabilization system in certain tanks like the Abrams, will jump around on its own volition (called "drifting" by tankers). If the gunner is engaging another target
after firing his shot, the turret might be rotating as well, which might throw off
the loader's delicate balance. It's not very easy to load a 20kg+ unitary cartridge, and this could mean that
the average loading time for each shell might be anywhere from 4 seconds
to 8 seconds, in addition to fatiguing the loader. This problem is an alien concept for the T-72, since all loading
processes are automated.
The T-72 does not have a significant disadvantage when compared to human loaded counterparts, which include the majority of NATO tanks. Most examples can achieve a 4 to 5 second loading time - when their tank is immobile. However, it's a whole different story on rough terrain.
An
advantage to the autoloader is that a bumpy ride, change of direction
or slope traversal will never affect the autoloader's
operation in any way. It can maintain its normal cyclic loading rate in
whatever
condition or orientation the tank is in. In
manually-loaded tanks, the whole vehicle will pitch and dive as it drives
over ruts and mounds while the gun, which would be disconnected from the stabilization system in certain tanks like the Abrams, will jump around on its own volition (called "drifting" by tankers). If the gunner is engaging another target
after firing his shot, the turret might be rotating as well, which might throw off
the loader's delicate balance. It's not very easy to load a 20kg+ unitary cartridge, and this could mean that
the average loading time for each shell might be anywhere from 4 seconds
to 8 seconds, in addition to fatiguing the loader. This problem is an alien concept for the T-72, since all loading
processes are automated.Besides, the autoloader can maintain its cyclic loading speed throughout an extended engagement until the carousel is exhausted. A human loader, on the other hand, will be exhausted from his duties long before the ammunition is exhausted, whether it be from excessive heat, excessive cold, shortage of food, shortage of water, anything you can imagine.
All in all, the T-72's autoloader is entirely satisfactory for generating a sustainable rate of fire for realistic encounters. While NATO tanks with human loaders were intended to put out as many shots as possible on huge formations of approaching Soviet tanks while staying stationary behind cover, the T-72 never had such a requirement. In modern shoot-and-scoot combat where tanks rarely stop moving or risk getting hit themselves, the advantage of human loaders become much less apparent. In this sense, the T-72's autoloader is not a hindrance at all, but an advantage, if the system is not at least on par with its Western counterparts.
With that in mind, having compared firing rate, it would be illogical to not also compare ammunition capacity, especially against the T-72's most famous rival - the Abrams. Surprising as it may be, the T-72 carries more ready ammunition; 22 in the carousel compared to 18 in the Abrams' bustle ready racks. However, neither carousel nor bustle are easy to replenish once emptied.

First, the cannon's stub catcher needs to pivot up and clear the way. Then, each tray is lifted up by the electrically-powered "bicycle chain" elevator through a trapdoor to breech-level, whereby the rigid chain rammer rams the projectile into the gun chamber first, followed by its propellant charge.
 |
| Autoloader elevator behind the stub catcher, lowered |
 |
| Trapdoors located just underneath the gun breech |

The autoloading/ejection cycle requires the gun to be locked at a pre-programmed elevation of +3 degrees, which is done so automatically as the cycle begins. Originally, there were some problems with sight-and-cannon zeroing because the sight was independently stabilized, and the cannon's vertical stabilizer would sometimes fail to synchronize with the sight's stabilizer as it finished its loading cycle. That small misalignment might cause slower shells like HEAT and HE-Frag to miss pinpoint targets, though it really wasn't a problem for APFSDS shells. However, this issue was only ever mentioned by second hand testers of captured T-72s, specifically Iraqi T-72s, so the issue might stem from either great age, battle wear, lack of maintenance during service and during storage afterwards, or all of the above. The later 2E42-2 stabilizer likely removed the issue completely.
The carousel's overhead bulkhead acts as a false floor for the turrets' occupants. Although the bulkhead rotates in line with the turret, both the turret's occupants are still provided with foot rests (pictured).
The bulkhead provides protection for the shells within by preventing residual high-energy fragments from shattered projectiles and cumulative jets from reaching the ammunition below. This, of course, applies only when turret penetrations occur. The carousel has no side protection worth considering.
 |
The carousel underneath the bulkhead operates independently. It can rotate to line up new shells at a speed of around 70 degrees per second, which is basically instantaneous.

Unfortunately, the autoloader can only accommodate projectiles 720mm or less in length due to the size constraints of the carousel and the size of the gap available between the autoloader elevator and the gun breech. According to some, new carousels for some T-72 variants like the T-72B2, B3 and T-90A can hold shells up to 740mm in length, and the old ones can hold shells only 680mm in length. Apparently, this was to allow them to accommodate the lengthier Svinets-2 (?) APFSDS shell.
Video evidence has shown that new autoloaders are programmed to initiate an additional step immediately after firing, and that is to momentarily open and close the shell casing stub ejection port without actually ejecting a case stub, most likely to evacuate any fumes present.
The autoloader has an average malfunction rate of 1 per 3000 cycles, if it is properly lubricated throughout its use. Malfunctions typically stem from worn-out parts. Customers of exported second-hand T-72s usually encounter autoloader issues far more often than with newly manufactured units mainly because of this. Repairing the autoloader itself is quite simple thanks to its simplicity.
LOOSE STOWAGE
Aside from the carousel itself, ammunition is stored in racks located throughout the interior of the tank in various nooks and crannies of varying accessibility. There are a total of twelve such cartridges. There are twelve propellant charge spaces in a vertical conformal fuel tank/rack hugging the carousel, easily accessed by either the gunner or commander. There are another six shell spaces on the engine-fighting compartment bulkhead above and behind the vertical conformal rack. There are another three shell spaces on the port side hull, in the form of tension latched holders.
 |
| Rear shell racks, coloured green |
 |
| Shell racks coloured green, propellant charge containers below |
Then, there are three more shell spaces along with an adjoining three propellant charge spaces in a conformal fuel tank/rack located on the starboard side (pictured), and three more shell spaces in a similar conformal fuel tank on the hull's port side.
It is possible to fill the three hull fuel tank-cum-ammo racks with water instead of diesel, thus transforming them into wet storage bins. (Read the "Road Endurance" section of this article under "Mobility" for a full explanation)
More shells and propellant charges are stowed on top of the carousel cover itself.
 |
| Red for propellant charges and Green for shells |
The gunner has a full set of autoloader controls for selecting ammunition to fire, or to replenish the autoloader. In order to fill up the autoloader - which is not by any means quick or convenient - the loading process has to be reversed. The type of shell entered must be inputed into the autoloader control boards for it to "memorize" for future use. The total time needed to refill the autoloader is between 15 minutes to 20 minutes.
The commander also has a full set of autoloader controls at his disposal. He can either aid the gunner in selecting the appropriate shells for the target type (which he identified), or load shells for his own use as with in the T-72B2 and B3 variants.
If the autoloader malfunctions, it is still possible to operate the autoloader's elevator mechanism manually using a crank wheel (pictured). The commander will be responsible for loading while the gunner engages. The benchmark time needed for a complete manual loading cycle is 26 to 30 seconds.

It is also possible to load the gun with ammunition from the stowage racks located all around the interior, but as they are not very accessible (to put it mildly), the benchmark loading time would still be in the 20 to 30-second region. As such, manual loading is something to be done in emergencies only, not only because it is much slower than normal automated loading, but because it also forces one of the two crew members to abandon his usual duties.
Loose ammunition stowage is the leading cause of catastrophic destructions involving ammunition detonation. While the carousel is decently protected from overhead fragments, the shells and propellant charges located behind it and behind the commander's seat are not. The easiest course of action is, of course, to simply remove these loose shells before entering battle.
AMMUNITION
 |
There are 4 main types of ammunition for the 125mm gun. There is no predetermined mix of ammunition. A typical loadout for a breakthrough assault or troop support mission would see that HE-Frag shells are loaded in large quantities, for example, while more HEAT and APFSDS shells would be loaded for ambushes where light vehicles and other MBTs are expected.
PROPELLANT CHARGES

The GUV-7 electric/percussion primer is used, giving the option to either fire the shell normally using the fire controls on the gunner's hand grips or the button on the manual traverse flywheel, or to use the manual lever-operated striker pin incorporated into the gun's breechblock.

Zh 40

Original propellant charge designed for the 2A45 used in the first T-64. It uses 15/1TR VA propellant compound. It's most distinctive quality is the ghastly amount of fumes it produces upon firing.
Charge mass: 5.66 kg
Length: 408mm
Zh 52

Newer propellant charge modified to produce minimal smoke upon firing without changing its ballistic potential to maintain compatibility with all shell types excluding high-energy APFSDS ones. It uses 12/7 VA propellant compound. This model has completely replaced the Zh40 in frontline use. Here is a video of the Zh52 propellant charge being opened up: click

Charge mass: 5.786kg
Length: 408mm
Zh 63
High-energy propellant to launch APFSDS shells at even higher velocities. It uses 16/1TR VA propellant compound. It can only be used with newer APFSDS shells.
Charge mass: 5.8kg (?)
Length: 408mm
Fuses
V-15
Two part superquick, distance armed piezoelectric fuse. Point-detonating design that has provisions for graze initiation to allow detonation despite steep angles of incidence. It is distance-armed 2.5m from the muzzle.
V-429E
The V-429E fuse is point-detonating, distance armed and with variable sensitivity settings. It has two settings - superquick and delayed. The former is fixed at 0.027 seconds and the latter at 0.063 seconds. Superquick action guarantees reliable detonation in snowy or swampy ground, and delayed action gives a small time allowance for the shell to penetrate its target before detonating. This is meant for bunker busting and for erasing light vehicles from existence.
Contrary to some allegations, the fuse will not detonate by jolting or by touching the gun barrel's canvas muzzle when firing, or by touching rain drops for that matter. The fuse is distance-armed only after traveling 5m to 20m from the muzzle, precluding the possibility of accidental detonations, even without the protective cap and even in the superquick setting.
HE-Frag
The T-72 normally carries 12 HE-Frag shells in the autoloader, although this will almost certainly vary by situation. These shells have traditionally been predominant in Soviet armoured tactics, where tanks were regarded as the tip of the spear during breakthroughs. Bunkers, ATGM teams and troop concentrations - not tanks - were the bane of any and all armoured targets, and thus became high priority targets. Heavy breakthrough tanks with thick armour for charging down anti-tank guns to clear the way for calvary tanks were once the main counterforce, but with the advent of the Main Battle Tank and the phasing out of heavy tanks, the T-72 takes over this role in full, fulfilling both the role of a breakthrough heavy tank and calvary tank. HE-Frag shells therefore comprise the most important part of the T-72's loadout.When attacking infantry in the open, such as anti-tank teams, advancing troops, or machine gun nests, the fuze should be set in the "superquick" mode, giving it a delay of 0.027 seconds to ensure that the shell will detonate instantly upon meeting soft ground like mud and snow, allowing it to exploit its thick steel shell to its fullest as shrapnel.
When attacking reinforced concrete targets like bunkers and pill boxes, the shell could be set in the "penetrating" mode, giving it a delay of 0.063 seconds (as mentioned above), allowing the shell with its thick steel casing to travel a fair distance into target material before detonating, which is great because the impact of the big, heavy shell creates fractures, cracks and fault lines, making it a lot easier for the explosives to blow apart the entire structure. If targeting civilian buildings like houses, the shell would have no problem at all passing through cinder block or brick walls, allowing it to explode inside a building for maximum effect.
With that in mind, HE-Frag may even be used as an alternative to more specialized anti-armour shells like APFSDS and HEAT against heavy-armour under certain circumstances, like when all other ammunition has run out, or if effective destruction cannot be achieved. A direct hit will likely result in the debilitating disability of the cannon, destruction of aiming devices and the destruction of the driver's vision blocks, producing a firepower and mobility kill. In many cases, the drivers of modern tanks have an unsettlingly high probability of being killed or at least severely injured by a turret or glacis hit due to insufficient blast attenuation. In fact, the T-72 would have been particularly suitable for this task, since NATO tanks (even up til now) often do not have spall liners, making it exceptionally easy for a 125mm HE-Frag shell to cause kill, maim, and injure behind the armour of all-steel tanks like the M60, Chieftain, Leopard 1, AMX 30, and so on. Of course, the best effect will be achieved with the fuze set in the "penetrating" mode. However, modern tanks sporting composite armour arrays are somewhat alien to this problem.
HE-Frag shells are overkill against lightly armoured targets, especially with the variable sensitivity fuse. When adjusted to the "penetrating" setting, the shell is able to punch huge holes in thin to medium-thickness steel armour (20mm to 40mm region) and explode inside. This is especially applicable to armoured personnel carriers like the M113 or Stryker.
HE-Frag shells are quite barrel-friendly. They have an EFC rating of 1, meaning that if a barrel was rated for 1000 EFC, it would be able to fire 1000 HE-Frag shells before needing replacement.
3OF19
Total Shell Mass: 23 kgMuzzle velocity: 850 m/s
Explosive mass: 3.148 kg
Explosive composition: TNT
It's worth noting that TNT is a relatively sensitive explosive compound. The risk of an ammo detonation is significantly higher if these shells are present.
3OF26

Improved HE-Frag shell with compressed explosive charge of a different composition designed to provide added incendiary effect. Explosive compression means that the explosive charge has increased in density - that is, it has a greater mass for the same volume.
This shell uses plastic driving bands instead of copper ones, in an effort to reduce barrel wear.
Maximum Chamber Pressure: 3432 bar
Total Length: 676mm
Total Shell Mass: 23.3 kg
Muzzle velocity: 850 m/s
Explosive mass: 3.4kg
Explosive composition: A-IX-2 (Phlegmatized RDX + Aluminium filings) (Aluminium is pyrophoric. Detonation produces incendiary effects, increasing the chance of igniting or burning objects in its proximity)
A-IX-2 is much less sensitive than TNT. The risk of ammo detonation is much lower if these shells are stowed.
Practice HE-Frag
Practice HE-Frag shell that emulates the ballistic characteristics of live HE-Frag shells. Contains a 200-gram TNT charge that acts as a visual hit marker for the trainee gunner.Maximum Chamber Pressure: 3432 bar
Total Length: 676mm
Total Shell Mass: 23.3 kg
Muzzle velocity: 850 m/s
HEAT-MP
The T-72 carries a substantial number of HEAT shells in stowage for its proven flexibility, high performance and economy. They are powerful enough to pierce contemporary armour in most cases and their explosive factor allows them to be used against light or unarmoured vehicles with a much better result than with APFSDS shells. HEAT shells may also be used against hardened concrete bunkers or simple earthen fortifications with good results, and it is entirely feasible to engage personnel owing to the very thick steel case containing the charge which is able to produce high-velocity splinters magnificently.When engaging heavy armour frontally, HEAT shells are still able to damage optics and weapons. One might even call it insurance. Like HE-Frag shells, each one is semi-guaranteed to put a tank out of action or at least cripple it.
Against thickly armoured targets, HEAT shells produce deep but small holes. The secondary methods of destruction aside from the cumulative jet itself (which is the primary one) is the blast of the explosion of expanding gasses rushing through the hole in the armour, flash of heat and sparks (small pieces of armour burning up) following perforation, which can set internal equipment alight. It is difficult killing crew members without a direct hit by the cumulative jet unless there is a very significant armour overmatch, forcing HEAT shells to rely mostly on causing internal fires. But still, there is a high likelihood of striking at least one crew member if one could score a hit.
HEAT shells also retain a characteristic advantage over APFSDS shells in that they wear down the barrel at a greatly reduced rate. Whereas firing one HEAT shell is equivalent to one EFC, an APFSDS shell can be equivalent to 3, 5 or even 7 EFC.
The following data, including the penetration values, are gathered and calculated personally by the author.
Glossary:
Wave Shaper: Object or device that infleunces the propagation of blast waves in a way that is beneficial to jet formation. Typically composed of an inert material with low sound speed.A-1X-1: Phlegmatized RDX, consisting of 96% RDX and 4% wax.
OKFOL: Explosive compound composed of 75% HMX and 25% RDX.
Standoff Probe: Extended structure to increase the distance between the shaped charge cone and the target material, i.e, standoff.
Explosive Pressing: The process of increasing the density of explosive compounds by high-pressure mould pressing. The result is more explosive mass per volume, translating to more energy.
All of the information presented below are backed by either photographic or videographic evidence, or official documentation.
3VBK-7
BK-12
First 125mm HEAT shell, originally for complementing the T-64. By the time the T-72 emerged, it had been long replaced by the 3BK-14.
Projectile weight: 19kg
Muzzle velocity: 905 m/s
Explosive Charge: A-1X-1
Explosive Charge Weight: 1760g
Shaped Charge Cone material: Steel
Shaped Charge Cone diameter: 105mm
Shaped Charge Cone angle: 36°
Shell wall thickness: Tapering from 7mm (front) to 17.5mm (base)
Standoff probe diameter: 65mm tapering to 45mm
Standoff probe wall thickness: 7.5mm
Penetration: 420mm RHA
This shell is still effective against semi-modern tanks such as the M1 Abrams, Challenger 2 and Leopard 2 and most of their updated variants, but only on side engagements. Both the hull side and turret side of the above tanks are vulnerable.
3VBK-10
BK-14
Updated HEAT shell with similar dimensions as the 3BK-12, but with minor internal differences. It is characterized by distinct knurls around the top edge of the main body surrounding the standoff post. This shell uses a cylindrical wave shaper with a slight taper.
Maximum Chamber Pressure: 2900 bar
Projectile Weight: 19.8 kg
Muzzle velocity: 905 m/s
Explosive Charge: OKFOL
Explosive Charge Weight: 1760g
Shaped Charge Cone material: Steel
Shaped Charge Cone diameter: 105mm
Shaped Charge Cone angle: 36°
Shell wall thickness: Tapering from 7mm (front) to 17.5mm (base)
Standoff probe diameter: 65mm tapering to 45mm
Standoff probe wall thickness: 7.5mm
Penetration: 450mm RHA
BK-14M


Modified variant featuring unknown improvements. Based on normal practices observed with 115mm HEAT shells, however, it is likely that the BK-14M warhead uses an improved liner, possibly aluminium or tantalum.
Maximum Chamber Pressure: 2900 bar
Total Length: 678mm
Projectile Weight: 19.8 kg
Muzzle velocity: 905 m/s
Explosive Charge: OKFOL
Explosive Charge Weight: 1760 g
Shaped Charge Cone material: Steel
Shaped Charge Cone diameter: 105mm
Shaped Charge Cone angle: 36°
Shell wall thickness: Tapering from 7mm (front) to 17.5mm (base)
Standoff probe diameter: 65mm tapering to 45mm
Standoff probe wall thickness: 7.5mm
Penetration: 480mm RHA
3VBK-16
BK-18
 Improved version of the 3BK-14. Visually
identical to the 3BK-14, but differs in that it features an aluminium
shaped charge cone. Aluminium is pyrophoric, meaning that it burns when
finely pulverized and when under extreme stress. Under those conditions,
it can produce a very strong incendiary effect, increasing its killing power in
the event of a perforating hit. The noxious fumes
produced by burning aluminium may also force the crew to leave their vehicle.
Improved version of the 3BK-14. Visually
identical to the 3BK-14, but differs in that it features an aluminium
shaped charge cone. Aluminium is pyrophoric, meaning that it burns when
finely pulverized and when under extreme stress. Under those conditions,
it can produce a very strong incendiary effect, increasing its killing power in
the event of a perforating hit. The noxious fumes
produced by burning aluminium may also force the crew to leave their vehicle.Unlike the lightly tapered wave shaper of the 3BK-14, it has a cylindrical one, which coincides with the usage of a different cone material with different physical properties. Like its predecessors, it has distinct knurls around the top edge of the main body.
This model is very widespread in current Army stocks alongside the 3BK-18M.
Maximum Chamber Pressure: 2900 bar
Total Length: 678mm
Projectile Weight: 19.8 kg
Muzzle velocity: 905 m/s
Explosive Charge: OKFOL
Explosive Charge Weight: 1760 g
Shaped Charge Cone material: Aluminium
Shaped Charge Cone diameter: 105mm
Shaped Charge Cone angle: 36°
Shell wall thickness: Tapering from 7mm (front) to 17.5mm (base)
Standoff probe diameter: 65mm tapering to 45mm
Standoff probe wall thickness: 7.5mm
Penetration: 500mm RHA
This shell is still marginally effective in frontal engagements with semi-modern tanks like the M1A1 Abrams, Challenger 2 and Leopard 2, but only if the hull front is struck. And even then, there is very little overmatch and the beyond-armour effect is not very strong. There is no chance of this shell perforating the turret front of the above tanks.
BK-18M
Variant of the 3BK-18 probably using a steel cone, as indicated by the reversion to a lightly tapered wave shaper. The 3BK-18M is possibly a cheaper modification of the 3BK-14 by retaining the same liner cone but featuring explosive pressing technology to increase the energy density of the explosive charge by compression, which translates to more power and more penetration for any given volume.
This model is very widespread in current Army stocks alongside the 3BK-18.
Projectile Weight: 19.8 kg
Muzzle velocity: 905 m/s
Explosive Charge: A-1X-1 or OKFOL (strangely, both have been encountered)
Explosive Charge Weight: 1760 g
Shaped Charge Cone material: Aluminium, >99.5% purity
Shaped Charge Cone diameter: 105mm
Shaped Charge Cone angle: 36°
Shell wall thickness: Tapering from 7mm (front) to 17.5mm (base)
Penetration: 550mm
This shell can better guarantee the penetration of the hull front for tanks like the M1A1 Abrams, Challenger 2 and the Leopard 2, and with much better beyond-armour effect.
3VBK-17
BK-21
Improved shell featuring a dirty copper-coloured cone with extreme elongation. It uses a cylindrical wave shaper. It isn't seen very often, and it is probably not in service at all.
Projectile Weight: 19.8 kg
Muzzle velocity: 905 m/s
Explosive Charge: OKFOL
Explosive Charge Weight: ~1400g (?)
Shaped Charge Cone material: Copper or Brass
Shaped Charge Cone diameter: 105mm
Shaped Charge Cone angle: 36°
Shell wall thickness: Tapering from 7mm (front) to 17.5mm (base)
Penetration: ~650mm
BK-21B
Radically improved, using a DU-Ni alloy cone. DU-Ni cumulative jets exhibit superior jet consistency and will not break up in flight as quickly as other materials, offering very good overall performance. The new liner also seems to offer superior penetration against complex armour arrays. Unfortunately (or fortunately, depending on your perspective), production costs and the difficulty of controlling the variables associated with using it makes usage impractical. The shell uses an arrow-shaped wave shaper.
DU as a material for shaped charges is highly polluting. If perforation occurs, the interior of the tank will be filled with highly dangerous DU particles, which will be very difficult to remove. Whereupon the lack of perforation, the hole created in the armour array will still contain DU particles, posing a hazard for crew and technicians working in and out of the target object or vehicle.
DU is also pyrophoric, and like aluminium, will wreck havoc in the confined spaces of an armoured vehicle.
Projectile Weight: 19.8 kg
Muzzle velocity: 905 m/s
Explosive Charge: OKFOL
Explosive Charge Mass: ~1400g (?)
Shaped Charge Cone material: DU-Ni
Shaped Charge Cone diameter: 105mm
Shaped Charge Cone angle type: Medium, 60°
Shell wall thickness: Tapering from 7mm (front) to 17.5mm (base)
Penetration: >650mm (?)
3VBK-21
BK-25
A HEAT shell that is very seldom seen. Cutaway photos show that it has a silvery-gray shaped charge cone, but its shape and dimensions betray that it is definitely not steel nor aluminium like the ones before it. It is very likely that it is tantalum, which is known to be a viable cone material. It uses a rather oddly rounded wave shaper. Very little is known about this shell other than these facts.
Projectile Weight: 19.8 kg
Muzzle velocity: 905 m/s
Explosive Charge: OKFOL
Explosive Charge Mass: ~1400g (?)
Shaped Charge Cone material: Tantalum / Tantalum alloy
Shaped Charge Cone diameter: 105mm
Shaped Charge Cone angle type: Medium, 60°
Shell wall thickness: Tapering from 7mm (front) to 17.5mm (base)
Penetration: ~600mm (?)
BK-25
Same interior configuration as its parent but with a
bulkier bevel connecting the standoff post to the main body. Liner
material is unknown, but all other components appear to be identical.
Projectile Weight: 19.8 kg
Muzzle velocity: 905 m/s
Explosive Charge: OKFOL
Explosive Charge Mass: ~1400g (?)
Shaped Charge Cone material: (?)
Shaped Charge Cone diameter: 105mm
Shaped Charge Cone angle:
Shell wall thickness: Tapering from 7mm (front) to 17.5mm (base)
Penetration: ~600mm (?)
Explosive Charge Mass: ~1400g (?)
Shaped Charge Cone material: (?)
Shaped Charge Cone angle:
Shell wall thickness: Tapering from 7mm (front) to 17.5mm (base)
Penetration: ~600mm (?)
3VBK-25
BK-29
Relatively recent (late 80's) shell with tandem warhead configuration primarily to aid in penetration of complex armour arrays and to defeat ERA-equipped targets. Despite it being heavier than its single-charge predecessors, it travels slightly faster thanks to the usage of the slightly higher-energy Zh 52 propellant charge.
The precurser shaped charge is located halfway down the standoff probe and may be rightfully considered a fully-fledged warhead all on its own, having a considerable explosive charge backing it and complete with its own standoff accounted for. This is at odds with Western practices, which often does not take full advantage of the precurser warhead for enhanced performance on modern armour.
This shell is characterized by the lack of "teeth" on the front edges of the primary warhead case, and the new fuse, which is fully conical in shape. The shell uses a hemispherical wave shaper. Both charges have base fuzes.
Projectile Weight: >20 kg
Muzzle velocity: 915 m/s
Explosive Charge: A-1X-1
Explosive Charge Weight: ?
Shaped Charge Cone material: Brass or Copper
Shaped Charge Cone diameter: 105mm
Shell wall thickness: Tapering from 7mm (front) to 17.5mm (base)
Precurser Explosive Charge: A-1X-1
Precurser Charge Cone material: Steel / Aluminium / Tantalum (?)
Precurser Charge Cone diameter: 40mm
Precurser Charge penetration: >160m (?)
Standoff probe diameter: 67mm tapering to 45mm
Standoff probe wall thickness: 7.5mm
Primary charge penetration (without precurser/after reactive armour): ~620mm
Primary charge penetration (after precurser/without reactive armour): ~820mm
BK-29M
 Likely to be updated warhead implementing explosive pressing technology, further compressing the explosive
compound (A-1X-1) to attain higher densities, and thus achieve a
greater net mass of explosive. Alternatively, a more suitable shaped charge liner may have been used. The author cannot independently confirm either assertions.
Likely to be updated warhead implementing explosive pressing technology, further compressing the explosive
compound (A-1X-1) to attain higher densities, and thus achieve a
greater net mass of explosive. Alternatively, a more suitable shaped charge liner may have been used. The author cannot independently confirm either assertions.Explosive Charge: A-1X-1
Explosive Charge Weight: ?
Shaped Charge Cone material: Brass or Copper
Shaped Charge Cone diameter: 105mm
Shell wall thickness: Tapering from 7mm (front) to 17.5mm (base)
Precurser Charge Cone material: Aluminium, Steel, Tantalum (?)
Precurser Charge Cone diameter: 40mm
3VBK-27
BK-31
Enigmatic and ingeniously designed triple-charge HEAT shell. It is probably not in service at present. It can penetrate 800mm of steel armour with a hardness of probably about 280 BHN, as demonstrated by a cutaway.
Total length: 665mm
Penetration: 800mm RHA (No reactive armour)
 |
| From Vasily Fofanov's website |
Practice rounds
VP5
Single-charge inert HEAT warhead designed to exactly emulate the ballistic trajectories of the 3BK-14 and 3BK-18 shells. There is a 200-gram squib inside the warhead that acts as a visual hit marker for the trainee gunner.
Total Length: 678mm
Projectile Weight: 19.8 kg
Muzzle velocity: 905 m/s
BK-29I

Training round imitating the exact flight characteristics of the 3BK-29 shell.
APFSDS
Despite pioneering APFSDS shells with the introduction of the 2A20 115mm gun, the Soviets never had the technology to mass produce true long rod tungsten or depleted uranium projectiles until the mid-80's, whereas the Americans had already fielded the M774 DU APFSDS round since the mid-70s. So they were in a bit of a quandary. Their best APFSDS rounds were technologically crude sheathed core projectiles that were incredibly economical (very little tungsten is present in them), but limited in scope and growth potential.
The only way to improve their performance without any radical design changes was to increase mass and increase speed, but this could not be easily done with the 115mm gun. The HEAT rounds for the "Molot" were good, but undependable due to terrible accuracy, so they weren't of much use, even though they were more than capable of taking out any tank, bunker or anything in between. For the moment, the "Molot" was more than capable of killing any NATO tank at average combat distances, but it would not have been enough had there been even a modest uparmouring like the Stillbrew modification on the Chieftain. Of course, no one was smart enough to come up with something like Stillbrew until the mid-80's, but that's not the point. They never really got past this problem until the 80's when the Soviet ammunition industry finally matured enough to begin churning out sheathed long rod penetrators, but before that, in one form or another, all 125mm APFSDS rounds were made of maraging steel, with an armour piercing cap, supplemented by a small tungsten slug - the same basic principle as the 3BM-3 introduced in 1961. Producing high-quality weapons-grade tungsten carbide and other tungsten alloys in slug form was difficult and expensive, and extruding tungsten alloy rods was no mean feat. The equipment simply didn't exist in the USSR. This had meant that the T-72 was only ever armed sufficiently to deal with current threats, and not future ones. Knowing this makes it all the easier to imagine the panic when the first intelligence on Leopard 2 deployments started trickling in.
The main defeat mechanism of APFSDS shells against armoured targets is by killing crew members with shards and fragmentation of the shell after armour perforation, but a secondary mechanism is setting internal equipment alight, just like HEAT shells. The huge kinetic energy and extreme forces imparted during armour defeat results in some of that kinetic energy being converted to heat energy, which results in a flash of heat and a shower of high velocity sparks from particles of both armour material as well as penetrator material. And of course, the flash and sparks work to set flammable items on fire.
The earlier Soviet APFSDS shells were made mostly out of steel, and had steel armour piercing caps at the tip to protect the rest of the penetrator from huge impulsive forces. The relative softness of steel meant that the performance of these early APFSDS shells was not at all comparable to modern APFSDS shells, which dispensed with armour piercing caps entirely. Whereas modern shells are generally completely unaffected by sloping of less than 70 degrees, early Soviet shells performed significantly worse on high incidence angles. Advances in materials' science alleviated this issue greatly in the early-80's, but only when fully-tungsten alloy or fully-depleted uranium shells were introduced in significant quantities in the mid-80's did the problem quite literally reverse itself. New APFSDS shells are able to penetrate more sloped armour than unsloped armour, thanks to the peculiar tendency of long rods to veer towards the perpendicular axis of the plate, which is rather inconvenient, since newly emerging NATO tanks like the Leopard 2, Challenger and the Abrams all had "blocky" composite armour that deprived the T-tanks the chance to flex their newfound muscles.
However, Soviet 125mm APFSDS ammunition never had any trouble killing NATO tanks of the same era. Indeed, during a Swedish test in the early 90's involving an Strv 103 and a T-72M1, a BM-22 shell was fired at the frontal armour of the S-tank, and it was so powerful that it went through the front and came out the back, at least according to this website here. It is not difficult to imagine that the BM-15 from which the BM-22 was derived would produce a similar result, and experience with the T-62 and its 115mm APFSDS ammunition had shown that it was more than enough against the Chieftain. While it may seem awfully imprudent to say so, it is all but impossible to argue that Soviet ammunition technology at the time was insufficient against the best that NATO could come up with. Until everyone's favourite tank the Leopard 2 came along. But new and advanced composite armour was not a panacea. The sides of the hull and turret were inconvenient places to armour up, but NATO found creative solutions to the Soviet 4.9-inch problem.
The Leopard 2 attempted to shield the crew compartment from the side with three heavy 100mm steel plate modules (consisting of two 50mm plates) bolted to the side of the hull just over the first two roadwheels (Source). From an incidence angle of 30 degrees, this arrangement yielded a 200mm thick sloped plate. Absolutely miserable protection against long rod penetrators and HEAT warheads, BUT, quite effective against the sheathed core APFSDS rounds common in the Red Army inventories. Refering to this report here (link), it's clear what they were going for. The 125mm APFSDS rounds that are so effective against individual homogeneous plates also shatter magnificently after passing through them. This would have been incredibly lethal to the older plain-steel legacy tanks like the M60 and Leopard 1, but these ballistic plates are capable of stripping the steel from the projectile, leaving only the small tungsten carbide core to travel on by itself. While lethal on its own right, its small size and limited fragmentation spread after passing through the 50mm base armour of the side hull makes it a dubious antagonist. The probability of achieving a first round kill was thus greatly reduced. The Abrams implemented a similar design with its 60mm plates. These were thinner, and the Abrams' base armour is much thinner at only 28.575mm (1 1/8 inches 420 BHN welded hard steel bilayer), but they covered the hull all the way down to the fifth roadwheel.
It be remembered that the Soviet standard for certifying armour piercing projectiles is a V80, or 80%, referring to the expected consistency of achieving full armour perforation given a certain projectile velocity. In formulas, V80 must replace V50 (50% armour perforation). For example, if a certain projectile has to penetrate 500mm of steel, then at least 80% of all projectiles of that type must achieve that standard. This is very different from the NATO standard of only 50%. Soviet standards were not only stricter, but the steel they used for targets was of a greater hardness than NATO targets. In reality, the given penetration data does not correspond to the actual achievable penetration of these shells.
Format:
3BM-xx (Projectile assembly - projectile plus incremental charge)
3BM-xx (Projectile)
3BM-10
3BM-9
An extremely rudimentary projectile with a maraging steel penetrator body. Maraging steel is preferred for its malleability, which prevents the high-velocity shell from shattering outright upon impact. Overall, it had generally sufficient penetration capabilities, but it was prone to ricocheting. Still, it is quite remarkable for being the first service munition that is fired at hypersonic speeds (Mach 5+).
This shell would have been what T-72 Urals were given for their first year of service as a sort of intermediary before the supply of 3BM-15 shells (introduced in the same year as the T-72 Ural) was assured. T-64s would be the first to transition to the newer ammunition, and the T-72 had to wait.
This shell used a steel "ring" type sabot with a copper driving band. Sabot construction is critical to shooting accuracy, but the "ring" type sabot was only satisfactory.
Muzzle velocity: 1800 m/s
Penetration at 2000m:
245mm @ 0°
95mm @ 45°
70mm @ 60°
OR
Penetration at 2000m:
290mm RHA @ 0° (According to Zaloga)
3BM-16
3BM-15

The 3BM-15 is a steel-sheathed, tungsten-cored APFSDS shell with a tri-petal steel sabot, introduced in 1972. It is externally identical to the 3BM-9 projectile.
The 3BM-15 was a very decent for its time. Although decently hefty and very speedy, the shell primarily relies on a small tungsten alloy sub-penetrator core to do the job. A ballistic windshield was crimped onto the maraging steel shock absorber cap, whose duty was to reduce the impact impulse to prevent ricochets and to reduce shock to the rest of the projectile body. The projectile body is maraging steel, which peels away upon impact while the core continues onward - an extremely inefficient arrangement. This means that most of the momentum of the shell is used to crater a massive hole near the entry point of the armour instead of being tapped to achieve deeper penetration. This arrangement is not particularly well-suited for slanted impacts.
All this doesn't mean that it cannot go through large amounts of steel, however. The 3BM-15 is certified to penetrate 150mm RHA at 60 degrees. The photo below shows the result of the shell penetrating a 200mm steel block (of unknown hardness) at 0 degrees, entering from the top and exiting from the bottom, leaving very large holes on either end. The 3BM-15 clearly outmatched all NATO armour at the time, which could not stand up to it even in the thickest places.
 |
| The steel body disintegrated inside the armour as it entered, but the tungsten slug passed onwards leaving a very clean tunnel (indicating that it still had plenty of momentum). It is unknown at what range this shot occured |
An extra tidbit lies in that in the event of a penetration whereby the steel body has not peeled off fully, it functions to blast the interior of the target tank with hundreds of large pieces of steel - absolutely devastating to interior equipment and crew members alike. Thus, while the 3BM-15 was lethal to all NATO tanks of the time, it was exceptionally lethal to tanks like the AMX-30 and Leopard 1, which had particularly thin armour. The way the shell disintegrates in the first 150mm or so of armour also meant that the 3BM-15 had extraordinarily high lethality in side engagements. However, this shell became essentially useless against new NATO armour during the early 80's. Still, it remains functional against the side aspects of any modern tank today, despite the inclusion of thick ballistic side skirts on some of them (like the Abrams tank). Generally speaking, the 3BM-15 will not be affected too badly by this arrangement, because the entire assembly will still be able to continue onwards with only the ballistic cap compromised.
The tip of the penetrator is flat. This is to improve performance on sloped armour, but flat tipped penetrators tend to have worse penetration on unsloped or perpendicular armour. In order to not compromise at all, American designers have ingeniously implemented a stepped tip design, which produces the performance of sharp tips on unsloped armour, and of flat tips on sloped armour.
Mass of Incremental Charge: 4.86kg
Maximum Chamber Pressure: 4440 bar
Muzzle velocity: 1785 m/s
Steel body maximum diameter: 44mm
Steel body minimum diameter: 30mm
Core diameter: 20mm
Length of projectile: 548mm
Length of core: 71mm
Mass of steel body: 3.63kg
Mass of core: 0.270kg
Certified penetration at 2000m:
310mm @ 0°
200mm @ 45°
150mm @ 60°


Notice that the tip is flat and hollowed-out. The steel "wedge" in front of the tungsten carbide slug protects it from shattering (Photos credit to PzGr40 from wk2ammo.com)
(Sourced from unisgroup.ba, wk2ammo.com, Vasily Fofanov)
3BM-17
3BM-18

This shell is essentially identical to the 3BM-15 externally, but it lacked the tungsten carbide core of its parent and only had a modified AP cap, presumably to reduce ricochet probabilities slightly. Thus, it was slightly superior to the 3BM-9, but still far behind the 3BM-15 in penetration performance.
Total length: 591.7mm
Length of projectile only: 548mm
Muzzle velocity: 1780 m/s
Penetration performance at 2000m:
310mm RHA @ 0°
OR
Penetration at 2000m:
330mm RHA @ 0° (According to Zaloga)
3BM-23
3BM-22

Last derivative of the 3BM-15, introduced in 1976. It features an enlarged and improved shock absorber cap in front of the tungsten carbide core, presumably to reduce detrimental effects of a partial ricochet. It retains the steel "ring"-type sabot.
It is currently completely obsolete, though still usable in side engagements. Existing stocks are currently being expended in live-fire exercises, for which older projectiles are favoured since they are less harsh on the gun barrel.
Mass of Incremental Charge: 4.86kg
Maximum Chamber Pressure: 4440 bar
Muzzle velocity: 1785 m/s
Steel body maximum diameter: 44mm
Steel body minimum diameter: 30mm
Core diameter: 20mm
Length of projectile: 548mm
Length of core: 71mm
Mass of steel body: 3.63kg
Mass of core: 0.270kg
Certified Penetration at 2000m:
380mm @ 0°
170mm @ 60°
3BM-27
3BM-26

Like the 3BM-22, the tungsten carbide core is located at the rear of the projectile body. This means that it will only begin to come in contact with the armour only when the steel body in front has been completely eroded from doing its share of the work. There is an air space forward of the core to allow it room for forward travel as the rest of the body decelerates within the target material. This is to allow the core to retain the same 1720 m/s velocity despite the rest of the steel body having decelerated to a complete stop.
At the very front is the ballistic windshield, crimped onto the AP cap. The AP cap acts as something of a shock absorber to ensure that the steel body does not shatter on impact.
The new "bucket" type sabot greatly contributes to improved accuracy.
Projectile Weight: 4.8kg
Muzzle Velocity: 1720 m/s
Certified penetration at 2000m:
410mm @ 0°
200mm @ 60°
3BM-33 (Vant)
3BM-32
 The 3BM-32 is a depleted uranium monobloc projectile. It is quite short - shorter than its predecessors, in fact, which is one of its most distinctive features. It has a tapered mild steel sheath over a depleted uranium-nickel-zinc alloy penetrator rod. The sheath was negligibly thin over the front and rear thirds of the projectile, but it was much more pronounced in the middle. Its sole reason of existence is to provide a suitable region for machining the sabot-projectile interface. It is likely to be medium hardness steel, and it should peel off quite easily in order to not interfere with the physical interactions between the DU rod and the target armour material.
As you can see in the photos below, the type of damage inflicted by long-rod (left, 120mm APFSDS on T-72M turret) and cored shells (right, 3BM-15 APFSDS hit on T-72A turret marked "5") is drastically different. Whereas the long-rod shells enter cleanly and efficiently imparted its kinetic energy on a minimally small area, cored shells tend to waste most of their energy blowing out a large crater. (Note the very deep impressions from the 3BM-15's steel fins in the photo on the right, as compared to the skin-deep cuts from the aluminium fins of the unknown 120mm APFSDS shell.)


The shell's stubbyness was somewhat compensated for by the benefits of the new Zh63 high-energy propellant charge, which was introduced alongside it. The "bucket" style sabot design from the 3BM-26 was carried over and slightly modified.
Total length: ?
Length of projectile only: 480mm
Total mass of projectile assembly: 7.05kg
Projectile Weight: 4.85kg
Muzzle velocity: 1700 m/s
Penetration at 2000m:
430mm RHA @ 0°
250mm RHA @ 60°
(From official plaque)
3BM-44 (Mango)
3BM-42


The 3BM-42 projectile has a segmented design specifically intended to defeat the new and advanced composite armour arrays on NATO armour appearing in the early 80's. Whether it was ever needed is arguably arguable, since NATO composite armour at the time was heavily biased towards HEAT protection and paid much less attention to KE protection. It is generally similar to the 3BM-32 in external layout (midway taper) due to the use of a similar "bucket"-type sabot, but the projectile is significantly lengthier. This helps yield much better penetration performance.
The sabot itself is made out of a lighter V-96Ts1 aluminium alloy, helping to decrease parasitic mass and thus increase firing efficiency. Like with the 3BM-32, the long-rod Tungsten alloy penetrator (or penetrators, in this case) are encased by a thin sheath, but it is the sheath is apparently composed of a more appropriate material, possibly magnesium alloy. This alloy would seem to have a lower yield strength than the mild steel sheath on the Vant, so as to peel away and disintegrate even more efficiently.
 |
| Mango in the possession of a lucky individual |
Total mass: 7.05kg
Mass of projectile only (without sabot): 4.75kg
Total length: 609.37mm
Length of projectile only: 580mm
Chamber pressure with Zh40/Zh52: 443.8 mPa
with Zh63: ?
EFC rating: 5
Muzzle velocity: 1715m/s
Certified penetration at 2000m:
450mm @ 0°
230mm @ 60°
(From Fofanov's website)
ATGM
(In Progress!)
TRAINING ROUNDS

3P-35 Practice rounds were available. They emulated the ballistic trajectories of APFSDS shells, but were made of steel and were purposefully shaped so that the tip would begin to produce a vortex behind it to create huge amounts of drag to drastically slow down the projectile after it had traveled 3000m. To compensate for the inherently worse ballistic shaping, the shell's muzzle velocity is 1830 m/s.
SPECIAL
Blanks for replicating the recoil and flash of cannon fire. Mostly used during sales demonstrations.
The 4Kh33 blank charge consists of 12/1 TP smokelss powder housed in a simple cardboard cylinder.
SECONDARY

It is fired by the gunner using his hand grip controls. The commander may also cut in on the action and use the 6P7.S6.12 electric solenoid switch attached to the machine gun.
 |
| Notice the cable leading away from the PKT to the left |


| The PKT is removed in this picture, but you can see the mounting point |


TERTIARY

The
T-72 has a pintle-mounted heavy machine gun for the commander, which is primarily
intended for the anti-aircraft role, though it may be used to shoot at ground
targets too. The mount can fit either the NSVT or the Kord machine
gun, with a special buffered cradle. The NSVT is more commonly seen on
T-72s, whereas the Kord is only sometimes seen on T-90s. However, there
is no rule regarding which tank uses what machine gun; all are
inter-compatible as long as the cradle is modified. All T-72B3s use the KORD machine gun.
The paddle-trigger is electric.
Rotating the cradle and elevating the machine gun is done manually; the
former by rotating the entire mount on the axis of the cupola, and the
latter by turning a flywheel located to the right of the machine gun. The commander has to
stand on his seat in order to reach the machine gun.
 |
| Pulling the trigger paddle |
 |
| He releases it! |
The AAMG has an inclusive supplementary K10-T
collimator sight, which facilitates accurate aiming at both ground level
and high
altitude targets. It is tinted to reduce glare when aiming in the
direction of the sun.


 |
 |
| Hungarian Ron Swanson aiming through such a sight |
 |
| View through the sight |
 |
| The collimator projects a clear, crisp aiming reticle |
Using the collimator isn't compulsory. If it is damaged or unsuitable, the iron sights on the machine gun may still be readily relied upon.
The machine gun has a nominal effective range of approximately 800m against aerial targets, but this is variable. Obviously, the probability of hitting a hovering helicopter would be much higher than hitting a moving fixed-wing aircraft.
As a rule, anti-aircraft machine guns (AAMG) are more or less useless for shooting down aircraft. Although it isn't difficult penetrating some of the more obvious weak areas such as the plexiglass windscreen on a helicopter, the chances of actually hitting a fast, moving target is rather slim. On the contrary, the role of an AAMG is to be a deterrent; it's objective is to "shake up" the pilot(s) into pulling back from an attack, or perhaps even make him miss his shot. Serious anti-aircraft work is to be carried out only by the SHORADSs (Short Range Air Defence Sytems) accompanying the T-72.
The
machine gun is fed from a 50-round box. Four additional boxes of ammunition
are stored in metal bins in the turret and two more are strapped to the outside of the turret, which the
commander can reach down and access. The commander has to pull a large
charging lever to cycle the gun (pictured below).


PROTECTION
First and foremost - I did all of these estimates myself. Armour effectiveness is a hotly debated subject, and I have no intention of throwing unsubstantiated figures or confusing data around, so all of the information below (except the photos) is original. Prudence calls, and I must warn against directly estimating armour values if the armoured region is not visually identifiable, or if the armour employs a complex projectile-defeating mechanism. In case of uncertainty, a better way to determine armour effectiveness is by reading up tests and combat experience testimonies, and then determine effectiveness by noting which warhead or penetrator penetrated where.
A good indication of a tank's true survivability is its resistance to catastrophic destruction, which can refer to the tendency for a fire to start and the likelyhood of that fire spreading and consuming the entire vehicle or the possibility of the ammunition exploding. In this sense, the T-72 stands on equal footing with opponents of the era. But seeing as modern rivals now often include armoured or separated ammunition storage, the T-72 is clearly at a serious disadvantage. In spite of this, the T-72 maintains a very slight edge grounded in its use of diesel instead of extremely volatile jet fuel (as with the American Abrams tank). Although there really isn't much difference between the two if both are exposed to incendiary ammunition, the viscocity of diesel means that it won't spread quite as fast and the intensity of a diesel flame is much less aggressive as compared to petrol or jet fuel flames, so putting them out is much easier.
Protection qualities depend greatly on the variant being considered. As the years go on, the protection value markedly increases, reaching its zenith with the T-72B2 variant with the Relikt armour package. We shall examine the protection qualities of all the main variants in detail armour-wise.
The myth of the T-72's inferiority in terms of protection is just that - a myth. Various T-72s have proven their worth in various conflicts, but the lack of media coverage on the successes tend to skew views in favour of the image of burning wrecks. To list one incident in Grozny, in the year 2000, a T-72B tail number 611 took 3 hits from Fagot ATGMs and 6 hits from RPGs during 3 days of intense fighting and remained in battle with only minor damage. These are the same types of weapons that an Abrams or a Challenger 2 faced during campaigns in the Middle East. There are plenty of other cases. One only needs to be motivated to search.
The T-72 carries on the best traditions of top-notch metallurgy and steel processing, started since just before WW2. As a testament to its quality, an ex-GDR T-72M1 tested in Meppen (details here) withstood 24 hits from a mix of 105mm and 120mm APFSDS and HEAT shells on the turret front without a single fracture or crack.
COMMON CHARACTERISTICS
The hull side, hull roof, hull bottom and rear armour of all T-72s are identical, regardless of the variant. The hull side and the turret side are both 80mm thick, but the hull thickness over the engine is slightly thinner at 70mm. The side armour is more than enough to withstand 20mm armour-piercing ammunition fired from various aircraft, such as the AH-1 Cobra firing the 20x102mm round, or A-1 Skyraider, firing the 20x110mm round. Ad hoc use of M61 Vulcan gattling guns on non-ground attack aircraft such as on the F-4 Phantom would not have yielded any better result.
 |
| Drive sprocket area. Note the thickness |
 |
| This picture shows quite clearly how the upper hull side is thicker than the lower sloped side. |
 |
| The thickness of the side armour can be clearly seen here |
The hull roof is 20mm thick at its thinnest, the rear is around 40mm thick, and the hull bottom is 20mm thick. The hull bottom is only sufficient against explosive charges with a mass of less than 10kg detonated over the tracks and not directly under the hull. In general, up-armouring a tank to a level where it can resist even the simplest purely explosive anti-tank mine is unheard of with most Cold-war era tanks.
A very relevant topic for discussion is geometry, which plays a huge role a tank's protection scheme. The T-72 has a traditionally sloped glacis and a rounded turret. Sloping is a relatively simple science. If expressed in graph form, a highly exploitable curve can be observed:
 |
| This graph uses sin instead of cosine, and measures angle from the vertical axis and not the horizontal axis. The theory is still the same. |
Calculating it requires only a very straightforward formula: 'y ÷ cos x degrees', where 'y' is the thickness of the plate, and 'x' is the amount of slope from the vertical axis. 'y ÷ sin x degrees' can be used as well, except 'x' is now the amount of slope from the horizontal axis. The T-72's glacis has a slope of 68 degrees from the horizontal, or 22 degrees from the vertical, which, as you can see in the graph, is right in the "sweet spot" for optimum angling.
If placed on a reverse slope in near hull defilade, the angle of the glacis would be even steeper, which can compensate for the T-72's rather deficient gun depression, but only in certain cases.
The heavy sloping of the glacis had an adverse effect on most types of APDS ammunition, which were naturally more vulnerable than long rod APFSDS shells.
Note that the hardness of "normal" RHA steel for the T-72 is around 290-340 BHN, while the HHS (High-Hardness Steel) employed in the tank has a hardness of around 400 to 450 BHN. The applique armour plate used in the 1983 modification of the T-72A has a hardness of at least 500 BHN.
Before we examine the protection value of the T-72's armour, we must first consider the presence of two drastically different types of kinetic energy penetrators and their significance, which are APDS and APFSDS. APDS projectiles are bullet-shaped, and are very badly affected by sloped armour because of their tendency to fracture and ricochet. This is, of course, correlated to the shaping of the projectile and its material, but generally speaking, all APDS projectiles shared this weakness. APFSDS projectiles are longer and thinner, and tend to be much more adamant to sloping than APDS because of this. It also helps that they do not rotate, which helps reduce strain on the penetrator body and thus minimize the chance of fracturing or outright disintegration upon impact. All armour value listings presented further down below revolve around protection from APFSDS projectiles, so the values against APDS projectiles are actually much, much higher in some cases (turret top edge, glacis, lower plate, etc).
SIDE, REAR TURRET
The entire turret is made of cast steel. The side has a considerable curve to it, exaggerated in the T-72B variant, while the rear of all variants have a distinct beak, which houses the autoloader rammer. |
| The stub ejector port is also visible here |
As mentioned before, the side is 80mm thick, thinning to around 40mm at the rear. The curvature of the turret provides a nominal increase in relative thickness to around 88mm even when viewed perpendicularly. With a thick layer of anti-radiation lining backing it and with the storage bins acting as rudimentary spaced armour, the sides are more than enough to withstand any 20mm and 23mm shell at point-blank and any 25mm autocannon shell at typical combat ranges (in the vicinity of 1500m). This is including the 25mm M919 APFSDS shell. However, the armour is not thick enough to reliably protect from the very latest 30mm and 40mm APFSDS shells. Still, with some extra angling, the side turret would still have very good prospects. The rear, however, is completely hopeless.
T-72 Ural

The T-72 Ural was the original T-72, and is the least technologically gifted among its "brothers". Although the hull glacis benefited from a rudimentary tri-layer composite armour array, the turret remained purely steel.
GLACIS
The original 1973-model glacis has a composite armour array consisting of a 105mm *STEF section sandwiched between an 80mm RHA front plate and a 20mm RHA backing plate. The total thickness is 205mm perpendicularly. The glacis is angled at 68 degrees, producing a total LOS thickness of 547mm. The heavily sloped steel-STEF-steel laminate is best at defeating contemporary APDS projectiles, because of the latter's tendency to ricochet and create very large penetration routes. The thicker front steel facing first erodes the penetrator, breaking it up so that the kinetic energy is dissipated over a large area for the STEF layer to absorb (high flexural strength of fibers). Residual fragments are stopped by the 20mm RHA backing plate.
In 1976, a new glacis array was introduced, which retained the 105mm STEF section, but it now had a 60mm RHA front plate and a 50mm backing plate instead. The total thickness becomes 574mm when angled. The replacement of the 20mm backing plate in the 1973 variant might be for two possible reasons; a tendency to buckle or bulge excessively when struck, and/or the inability to reliably "catch" defeated penetrator elements of new APFSDS projectiles, which were much longer than bullet-shaped APDS projectiles. Although I cannot confirm either hypotheses, it would appear to be the most likely reason. It is possible that the front steel plate was made harder to compensate for the loss in thickness.
Blast attenuation is an aspect often overlooked when referring to tank armour. This is no different for the T-72 Ural, which has an advantage through its laminated hull armour. By placing two materials of drastically different properties in the path of the blast wave, the laminate array's effectiveness in attenuating the blast is significantly improved as compared to homogeneous materials of the same weight. This was quite important seeing as HESH (High-Explosive Squash Head) shells were and still are a British favourite.
In 1983, an additional 16mm of HHS (High Hardness Steel) applique armour was added on, which came about as a result of live fire testing of captured Israeli M111 tungsten-cored shells from Lebanon (in the 1982 war in Lebanon). Evidently, the T-72's hull glacis was vulnerable to these new acquisitions, leading to the installation of the applique plate. The hull glacis with the 16mm applique plate is presumably proofed against the M111 Hetz (penetration of ~380mm @ 1km), which gives us a figure of at least 400mm RHAe for the original hull for the T-72's type of armour (thus denoting vulnerability only at ranges of approximately 500m or so). With the addition of the 16mm plate, the glacis should become completely immune even at 500m. It's worth noting that the M111 was the most advanced 105mm shell in service around the world at the time, which was then also licence-produced in West Germany as the DM23. The timeline of the evolution of the hull array is as follows (front ... back):
1973: 80mm RHA + 105mm STEF + 20mm RHA
1976: 60mm RHA + 105mm STEF + 50mm RHA
1983: 16mm HHS + 60mm RHA + 105mm STEF + 50mm RHA
*STEF is a certain type and grade of glass-reinforced textolite, a material which consists of layered sheets of plain-woven glass textile suspended in an epoxy resin matrix. It is nearly identical to fiberglass.
Simple calculations indicate that the 16mm HHS applique armour plate weighs around 450kg, which fits in nicely with reports that some T-72 Urals and T-72As weighed 41.5 tons instead of their original 41 tons.
HHS is best used as applique armour, as in the T-72's case. The hardness and thickness yields the best results for eroding high-velocity APFSDS shells.
However, we must keep in mind that this was merely a temporary stopgap measure to keep the T-72 Ural (and the T-72A) viable for the next few years in light of the appearance of the radically better armoured T-72B succeeding them.
The lower front hull plate is around 85mm RHA plate angled at 62 degrees (determined through photo comparisons), resulting in a total thickness of 181mm. It should be noted that the first 200mm (starting from the glacis nose) of the lower front plate is backed by the glacis array, giving that area a far higher LOS thickness, almost equal to the thickness of the glacis plate itself plus 85mm. This area is something of a weak point, though a somewhat inaccessible one thanks to its very small size when viewing the tank from the front (less than a foot high at most).
TURRET
The turret is solid MBL-1 armour-grade cast steel, with the thickness being 280mm at the mantlet area, gradually increasing in thickness as it curves towards the side.The turret top edge's (area above gun breech) is especially thick at the bottom, but it thins down as it approaches the peak of the roof. The thickness along the entire area was obtained by scaling it with the turret front, which is 350mm thick, producing a variable value of 145mm to 115mm. Angled at 79 degrees, the armour there is 480mm to 415mm thick, but the peak of the turret presents less than 200mm. Adjusted for cast steel's lower effectiveness, the true armour value is equivalent to at least 400mm RHA, without having accounted for the benefits of angling. With the advent of angle-insensitive monobloc and novel KE penetrators in the mid to late 80's, this area has become one of many weak points across the T-72's frontal profile.
According to a CIA report, anti-tank guided missiles such as the M47 Dragon (450mm penetration) and TOW (450mm penetration) stood no chance of defeating the T-72 frontally. Another CIA estimate places the T-72's turret and hull glacis protection at 500mm to 550mm RHAe against HEAT warheads. Although the same report mistook the STEF layer for compressed polyurethane foam, it's a safe assumption that they weren't very far off at all.
Here is a more detailed breakdown:
KE:
Glacis: ~360mm RHAe ... ~400mm RHAe ... ~452mm RHAe (1973 ... 1976 ... 1983)
Lower plate: 181mm RHA
Hull Side: 80mm RHA
Hull roof: ~20mm
Hull rear: ~40mm
Hull floor: ~20mm
Turret front: 252mm RHAe ... 427.5mm RHAe ... 720mm RHAe (Mantlet ... Middle ... Far side)
Turret mantlet: N/A
Turret rear half: 72mm RHAe
Turret top edge: ~363mm
Turret top: 35mm ... 50mm RHAe (Guesstimation)
HEAT:
Glacis: 400mm RHAe ... 430mm RHAe ... 482mm RHAe (1973 ... 1976 ... 1983)
Lower plate: 181mm RHA
Hull Side: 80mm RHA
Hull roof: ~20mm
Hull rear: ~40mm
Hull floor: ~20mm
Turret front: 252mm ... ~427.5mm RHAe ... 720mm RHAe (Mantlet ... Middle ... Far Side)
Turret mantlet: N/A
Turret rear half: 80mm RHAe
Turret top edge: ~404mm RHAe
Turret top: 40mm ... 60mm RHAe (Guesstimation)
In
addition to solid armour protection elements, the T-72 Ural is also
equipped with four flip-out panels (known as gill armour) which were
notoriously fragile and very easy to knock off. These panels replaced
traditional side skirts and were originally found on the T-64 and were
carried
over. Why they did not combine both side skirts and gill armour is not
known.

Gill armour
These
panels acted as spaced armour - detonating HEAT warheads at a great
distance from the tank's sides. However, their coverage was limited, as
gaps will begin appearing past 35 degrees obliquity. Though they could
still work at
greater angles, glaring gaps in their coverage would begin to present
themselves.
They were more or less useless if a HEAT warhead approaches the tank
perpendicularly, but they would be exceedingly effective if they caught a
warhead. From frontal angles, gill armour completed the T-72
Ural's invulnerability to even the most powerful ATGMs of the time.

Gill armour can provide much more standoff than traditional side skirts


Gill armour is useless from the side
Under optimum conditions, a great deal of spacing
can be achieved. This would have given the T-72 Ural a good amount of
protection from guided missiles and man-portable rockets of the era within a 70
degree frontal arc.
Struck squarely in the center from a 30 degree angle, the panels can create up to 2200mm of spacing.

Notice the thick wire; it's part of the spring that flips these panels out.
The panels are made of hard rubber,
mounted on sheet steel. They offer absolutely no noticeable
protection whatsoever from armour piercing shells. These panels are no
longer seen even on unmodernized T-72 Urals, having being rapidly
replaced with conventional side skirts as seen on the T-72A. This could
be due to two reasons already mentioned above; fragility and incomplete
coverage.
Glacis: 400mm RHAe ... 430mm RHAe ... 482mm RHAe (1973 ... 1976 ... 1983)
Lower plate: 181mm RHA
Hull Side: 80mm RHA
Hull roof: ~20mm
Hull rear: ~40mm
Hull floor: ~20mm
Turret front: 252mm ... ~427.5mm RHAe ... 720mm RHAe (Mantlet ... Middle ... Far Side)
Turret mantlet: N/A
Turret rear half: 80mm RHAe
Turret top edge: ~404mm RHAe
Turret top: 40mm ... 60mm RHAe (Guesstimation)
In addition to solid armour protection elements, the T-72 Ural is also equipped with four flip-out panels (known as gill armour) which were notoriously fragile and very easy to knock off. These panels replaced traditional side skirts and were originally found on the T-64 and were carried over. Why they did not combine both side skirts and gill armour is not known.
 |
| Gill armour |
 |
| Gill armour can provide much more standoff than traditional side skirts |

 |
| Gill armour is useless from the side |
Under optimum conditions, a great deal of spacing can be achieved. This would have given the T-72 Ural a good amount of protection from guided missiles and man-portable rockets of the era within a 70 degree frontal arc.
Struck squarely in the center from a 30 degree angle, the panels can create up to 2200mm of spacing.
 |
| Notice the thick wire; it's part of the spring that flips these panels out. |
The panels are made of hard rubber, mounted on sheet steel. They offer absolutely no noticeable protection whatsoever from armour piercing shells. These panels are no longer seen even on unmodernized T-72 Urals, having being rapidly replaced with conventional side skirts as seen on the T-72A. This could be due to two reasons already mentioned above; fragility and incomplete coverage.
T-72A

Protection-wise, the
production model T-72A differs from the T-72 Ural mainly by the
implementation of composite armour arrays in the turret. The gill armour had also been replaced with a conventional side skirt.
Glacis Array
The original hull glacis on the T-72A (1979) was identical to the one on the 1976 model of the T-72 Ural. In 1983, the T-72A received the same 16mm of applique armour as the T-72 Ural. The total thickness of the glacis with the applique armour plate now becomes 231mm, or 616mm when angled at 68 degrees, identical to its predecessor.
As you may have noticed, the newer glacis armour isn't much thicker than the older version, and the new version even employs the exact same primary components. The only notable difference is the thickening of the back plate and the thinning of the front plate. The reasoning behind this decision is probably related to the appearance of longer and faster APFSDS shells. One probable weakness of the previous array would probably be the tendency to deform owing to its disproportionately large surface area to thickness ratio.
On a side note: Determining the presence of applique armour is simple business. The tow hook area is a good indicator. If the overlay is present, then applique armour is present. This is a good way of distinguishing T-72 Urals and T-72As from T-72Bs, which do not have applique armour.

TURRET
 |
| Notice the characteristic ledge on the middle of the turret "cheek" |
The T-72A has a composite turret featuring ceramic armour. The ceramic substance is better known as the oft-mentioned "Kvartz" substance, sometimes referred to as "sandbar armour" or "sand rods". The exact composition of this filling is unknown, but the name implies that it is some sort of compound which includes granules or powdered substances. The high melting point of silicon dioxide makes it the go-to choice for use in chill casting steel, which is a necessary production process for thick turrets, though it is highly unsuitable for use in armour protection. Other possibilities include granulated alumina or powdered silicon carbide, both of which are known to be suitable materials for use in chill casting as well.

METHOD OF OPERATION
All three of the powder options listed can be sintered to form coherent blocks. In this form, they might be able to contribute significantly to the overall protection of the array. Alumina, for example, is well-known for its use in high-quality composite armour thanks to its high hardness and strength paired with a very, very reasonable price tag. It is precisely the sintering process that makes powdered alumina a very viable form of tank armour - when struck by KE penetrators or cumulative jets, the most crucial factor - enormous pressure, plus heat (heat from mechanical energy transfer as well as stored heat energy) works to flash-bond each particle together in front of the offender, thus creating a solid impenetrable barrier. It might be a stretch of the imagination, but most alternatives are just plain ridiculous. Plain beach sand is in itself entirely useless as protection (tests involving regular sand to investigate its potential as anti-anti-bunker protection yielded very poor results. Very small shaped charges could pass through large amounts of regular sand almost without hindrance). The most likely candidate is alumina, perhaps mixed with certain agents to aid the sintering process. It's worth noting that the flash-sintering concept could still apply to cumulative jets.Interestingly, although processed ceramic plates are often difficult to produce and expensive, such ceramics are typically quite inexpensive in powdered or granulated form.
The cavity containing the ceramic layer, whatever it is, is present in a 1:5 ratio to the steel aspect of the turret. The turret front itself is just slightly thicker than the Ural's.

The tri-layer arrangement of the armour may help it attain greater standards of protection than homogeneous armour of the same volume. And again, as noted with the hull array, the composite nature of the T-72A's turret should give it an added damping effect against high explosives and high explosive squash heads.
All this does not yet factor in the sheer thickness of the turret, which is perfectly illustrated by the photos below:
 |
| The short first line is the "mantlet" (the T-72 doesn't actually have one), the second is the "middle", the third is the "far side", and the fourth clears the interior completely, and so is not worth mentioning, though very interesting. |
 |
| Thickness profile of T-72A turret perfectly visible |
KE:
Glacis: 400mm RHAe ... 452mm RHAe (1979 ... 1983)
Lower plate: 181mm RHA
Hull Side: 80mm RHA
Hull roof: ~20mm
Hull rear: ~40mm
Hull floor: ~20mm
Turret front: 252mm RHAe ... ~460mm RHAe ... ~600mm RHAe (Mantlet ... Middle ... Far side)
Turret mantlet: N/A
Turret rear half: 72mm RHAe
Turret top edge: 363mm RHAe
Turret top: 35mm ... 50mm RHAe (Guesstimation)
HEAT:
Glacis: 430mm RHAe ... 482mm RHAe (1976 ... 1983)
Lower plate: 181mm RHA
Hull Side: 80mm RHA
Hull roof: ~20mm
Hull rear: ~40mm
Hull floor: ~20mm
Turret front: 252mm RHAe ... ~600mm RHAe ... ~900mm RHAe (Mantlet ... Middle ... Far side)
Turret mantlet: N/A
Turret rear half: 80mm RHAe
Turret top edge: 404mm RHAe
Turret top: 40mm to 60mm RHAe (Guesstimation)
According to first hand accounts on the performance of ex-East German T-72M1s during Canadian testing, found here, new experimental 105mm shells, presumably designed in the late 80's, claimed to be "jazzed up" to match 120mm rounds in performance, failed to perforate the turret armour. Apparently, the impact only formed a "slight [dinner] plate sized bulge in the armour and cast some paint flakes around the turret wall".
The hull armour fared slightly worse, but still quite respectably.
The
T-72A introduced steel-reinforced plastic side skirts (interwoven
textile skirt), which provided complete coverage for the sides,
excluding the roadwheels. They were mounted 610mm away from the side of
the hull (perpendicularly), and could thus still drastically reduce a
shaped charge
warhead's effectiveness when fired at an angle, though certainly not to
the degree that the gill armour configuration could achieve.

In
general, "soft" side skirts like the type which the T-72A uses do not
provide enough protection from more serious warheads at right angles of
attack. At angles of 30 degrees or so, the amount of spacing provided
(1220mm angled) would be enough to dissipate the cumulative jets
from most tube-launched HEAT grenades and ATGMs of the time enough that the 80mm of side armour (160mm angled) could confidently handle them.
T-72A + KONTAKT-1

Kontakt-1 is an ERA package first introduced in 1982. All T-72As promptly began the upgrading procedure in 1983.
Mounting the blocks are easy. Each one is bolted onto a tinny spacer mounted all over the surface of the hull and turret. The ease of installing and replacing the blocks meant that the entire modification could be done as part of regular scheduled maintenance. However,
simplicity comes at a price in this case. The ERA boxes are rather
fragile, and can be quite easily knocked off when the tank is travelling
through densely wooded areas, or perhaps traversing obstacles in urban sprawl.
The operation of Kontakt-1 is quite simple, utilizing two angled
explosive plates to disrupt cumulative jets through high-velocity shockwaves and the separation of the steel sheets which comprise the block itself .
Each Kontakt-1 block consists of two 4S20 explosive elements, which are
plastic explosives packed into a flat steel plates. The mass of the explosive material in each element is 260 grams, equivalent to 280 grams of TNT. They have a low sensitivity to ensure that they can survive being hit by machine gun fire without detonating prematurely. The weight of each block is 5.3kg, and a full set covering the entire tank weighs approximately 1.2 tons.


Kontakt-1 is extremely easy and simple to install. All that are needed are some bolts and nuts.

METHOD OF OPERATION
When a cumulative jet passes through the explosive plates, the
resulting explosions will generate high-speed waves in two different
directions. This, in addition to the separation of the many steel sheets within each module caused by the buildup of pressure from the explosion, severely compromises the jet by cutting off most of its body (but not the tip, which travels at hypersonic speeds and is too fast to intercept).
The overall ERA
coverage is uncompromising. The entire tank is covered in all areas save for the rear of the hull and turret. According to a fact sheet from NII Stali, each block can reportedly reduce the penetrating effects of cumulative jets by an average of 55% at 0 degrees obliquity, and up to 80% when angled at 60 degrees. Furthermore, NII Stali claims that it can retard the penetration power of a typical anti-tank missile like the Konkurs (130mm diameter) by up to 86%, or 58% for a 125mm HEAT shell, or up to a whopping 92% for low power warheads like the one on the 66mm LAW. Because Kontakt-1 is incapable of providing significant protective value against KE penetrators, only HEAT values will be listed.
The
addition of Kontakt-1 blocks is also important for a different reason,
which is that the crew now becomes much better protected (essentially
invulnerable in covered areas) from air-delivered bomblets or submunitions as well as artillery shells with HEAT warheads, though the
hatches are not covered.
Here's a more detailed breakdown:
HEAT:
Glacis: ~800mm RHAe
Lower plate: ~600mm RHAe
Hull Side: 80mm RHA
Hull roof: ~20mm
Hull rear: ~40mm
Hull floor: ~20mm
Turret front: 930mm RHAe
Gun mantlet: N/A
Turret rear half: 80mm RHAe
Turret top edge: ~800mm RHAe
Turret top: ~200mm to ~300mm RHAe
T-72B
The hull armour fared slightly worse, but still quite respectably.
The
T-72A introduced steel-reinforced plastic side skirts (interwoven
textile skirt), which provided complete coverage for the sides,
excluding the roadwheels. They were mounted 610mm away from the side of
the hull (perpendicularly), and could thus still drastically reduce a
shaped charge
warhead's effectiveness when fired at an angle, though certainly not to
the degree that the gill armour configuration could achieve.

In
general, "soft" side skirts like the type which the T-72A uses do not
provide enough protection from more serious warheads at right angles of
attack. At angles of 30 degrees or so, the amount of spacing provided
(1220mm angled) would be enough to dissipate the cumulative jets
from most tube-launched HEAT grenades and ATGMs of the time enough that the 80mm of side armour (160mm angled) could confidently handle them.
T-72A + KONTAKT-1

Kontakt-1 is an ERA package first introduced in 1982. All T-72As promptly began the upgrading procedure in 1983.
Mounting the blocks are easy. Each one is bolted onto a tinny spacer mounted all over the surface of the hull and turret. The ease of installing and replacing the blocks meant that the entire modification could be done as part of regular scheduled maintenance. However, simplicity comes at a price in this case. The ERA boxes are rather fragile, and can be quite easily knocked off when the tank is travelling through densely wooded areas, or perhaps traversing obstacles in urban sprawl.
The operation of Kontakt-1 is quite simple, utilizing two angled explosive plates to disrupt cumulative jets through high-velocity shockwaves and the separation of the steel sheets which comprise the block itself .
Each Kontakt-1 block consists of two 4S20 explosive elements, which are plastic explosives packed into a flat steel plates. The mass of the explosive material in each element is 260 grams, equivalent to 280 grams of TNT. They have a low sensitivity to ensure that they can survive being hit by machine gun fire without detonating prematurely. The weight of each block is 5.3kg, and a full set covering the entire tank weighs approximately 1.2 tons.


 |
| Kontakt-1 is extremely easy and simple to install. All that are needed are some bolts and nuts. |

METHOD OF OPERATION
When a cumulative jet passes through the explosive plates, the resulting explosions will generate high-speed waves in two different directions. This, in addition to the separation of the many steel sheets within each module caused by the buildup of pressure from the explosion, severely compromises the jet by cutting off most of its body (but not the tip, which travels at hypersonic speeds and is too fast to intercept).
The overall ERA coverage is uncompromising. The entire tank is covered in all areas save for the rear of the hull and turret. According to a fact sheet from NII Stali, each block can reportedly reduce the penetrating effects of cumulative jets by an average of 55% at 0 degrees obliquity, and up to 80% when angled at 60 degrees. Furthermore, NII Stali claims that it can retard the penetration power of a typical anti-tank missile like the Konkurs (130mm diameter) by up to 86%, or 58% for a 125mm HEAT shell, or up to a whopping 92% for low power warheads like the one on the 66mm LAW. Because Kontakt-1 is incapable of providing significant protective value against KE penetrators, only HEAT values will be listed.
The addition of Kontakt-1 blocks is also important for a different reason, which is that the crew now becomes much better protected (essentially invulnerable in covered areas) from air-delivered bomblets or submunitions as well as artillery shells with HEAT warheads, though the hatches are not covered.
Here's a more detailed breakdown:
HEAT:
Glacis: ~800mm RHAe
Lower plate: ~600mm RHAe
Hull Side: 80mm RHA
Hull roof: ~20mm
Hull rear: ~40mm
Hull floor: ~20mm
Turret front: 930mm RHAe
Gun mantlet: N/A
Turret rear half: 80mm RHAe
Turret top edge: ~800mm RHAe
Turret top: ~200mm to ~300mm RHAe
Lower plate: ~600mm RHAe
Hull Side: 80mm RHA
Hull roof: ~20mm
Hull rear: ~40mm
Hull floor: ~20mm
Turret front: 930mm RHAe
Gun mantlet: N/A
Turret rear half: 80mm RHAe
Turret top edge: ~800mm RHAe
Turret top: ~200mm to ~300mm RHAe
T-72B

The
T-72B and the series it spawned represented a very significant step in
the evolution of the T-72, with the introduction of bulging armour in the hull and turret. Bulging
armour is a type of non-explosive reactive armour (NERA), meaning that
it has the effect of defeating the projectile rather than only passively
resisting it. This will be explained in the Bulging Armour expository section below. The T-72B is also notable for being the first T-72 to incorporate an ERA package as part of its original factory configuration. That is, all T-72Bs were built with Kontakt-1 installed. But first, we'll talk about the "plain" T-72B.
Glacis
The glacis array of the T-72B represents the first major update since
the original type found on the T-72 Ural. It is now thicker at 235mm,
which when reclined is 627mm LOS. This is just as thick, if
not in some ways thicker than the front hull plates of many of its
competitors at the time which have now become famous through extensive
media coverage. Among these are the Challenger 2, Leopard 2 and the M1
Abrams, all of which appear to have equal and perhaps sometimes even inferior hull
protection on many counts sans the latest upgrades. However, thickness isn't the most important thing. What matters most is how effective the armour actually is.
Previous assertions made on this article on the T-72B having the same type of bulging armour as the turret as well as having that same armour throughout the T-72B's lifespan have been proven wrong by photographic evidence. Hence, it is assumed that the illustration below prepared by online user Wiedzmin is correct, as the descriptions correspond to all known evidences.

4, 5, and 6 refer to the glacis configuration of the T-72B models obr. 1983, obr. 1985 and obr. 1989 respectively.
Configuration 4: 60mm RHA + 15mm Air Space + 15mm HHS + 15mm Air Space + 15mm HHS + 15mm Air Space + 15mm HHS + 15mm Air Space + 50mm RHA (215mm Total)
Configuration 5: 60mm RHA + 10mm Air Space + 10mm HHS + 10mm Air Space + 10mm HHS + 10mm Air Space + 20mm RHA + 10mm Air Space + 20mm RHA + 10mm Air Space + 50mm RHA (220mm Total)
Configuration 6: 60mm RHA + 35 Bulging Module (5mm Rubber + 3mm RHA + 19mm Air Space + 3mm RHA + 5mm Rubber) + 60mm RHA + 10mm Anti-Radiation Layer + 50mm RHA (215mm Total)
From 1983 to 1987, the T-72B incorporated simple spaced steel armour, but progressed to bulging armour in 1989. But before we go into detail, be reminded that the T-72B is always outfitted with Kontakt-1, and the 1989 variant is always outfitted with Kontakt-5. Only a few T-72Bs went into service without Kontakt-1, and those were the ones that were used during Victory Day parades. As such, the armour estimations presented below will not be relevant for HEAT warheads where T-72B obr. 1983 and obr. 1985 are concerned, and not relevant for either HEAT or KE penetrators where T-72B obr. 1989 is concerned, due to the presence of Kontakt-5 reactive armour.
Obr. 1983

Destroyed T-72B from the first Chechen war. The glacis array of a destroyed T-72B is visible down at the bottom half of the left side of the photo.
The glacis array of T-72B obr. 1983 is a textbook example of simple spaced armour comprised of multiple thin steel plates. In this case, the armour works mainly by nothing more than chipping off the tip of a long rod penetrator multiple times. Without an optimally shaped tip, a long rod projectile will not be able to properly overcome a steep slope, allowing the array to better deflect the rod upwards the further it travels. While effective against early 120mm Western APFSDS munitions like the West German DM13, that may or may not be due to the virtues of the array in itself so as much as it is thanks to the poor performance of DM13 on steep sloped targets. Pitted against 105mm APFSDS of the time, namely things like the DM23 and M833, the glacis should be immune at ranges of down to at least 1000 m.
Obr. 1985

From damaged T-72B3, taken during the 2015 Tank Biathlon. Remember, the T-72B3 program refurbishes and modernizes old T-72Bs.

The glacis array of T-72B obr. 1985 is mostly similar, but slightly more effective due to a more rational design. The additional gains in performance against kinetic energy projectiles in this variant stems from its use of plates of different hardnesses, forming a spaced THS (Triple Hardness Steel) array that is directly comparable to "NATO Heavy Triple", which is a type of proofing standard for munitions. The 10mm steel plates at the very front are of a very high hardness of around 550 BHN, while the 25mm steel plates behind them are softer at around 450 BHN. The last and first and also the thickest plates are also the softest at 340 BHN. This, in combination with the spacing, is a moderately effective regime, but not very special and certainly not an advanced construction for the mid-80's. Still, it should be adequate for newer APFSDS shells such as the 120mm DM23, M827 and the M829.
Obr. 1989
The glacis array of T-72B obr. 1989 is more advanced, but still quite crude. The single bulging module comprised of two opposing bulging plates work based on the same principle of defeat; penetrator yaw and deflection. As the penetrator enters the array, it activates the first bulging plate, which bulges downward, enacting downwards force on the penetrator, and the second bulging plate bulges upward. By the time the penetrator has activated both arrays, though, it should have already entered the steel plate behind them, so the bulging arrays mostly function to destroy the middle portion of the penetrator, leaving only the front section to go on. Stopping the front section would be the the job of the rest of the glacis, 110mm thick. Once the bulging module is spent, the remainder of the armour will then depend solely upon the sheer thickness of steel.
Turret

The turret fully retains the usual T-72 layout, with the frontal
projection up-armoured and the associated changes made to the
armour profile. There are two aspects to the turret's frontal armour;
the solid steel portions and the bulging armour. The steel armour has a
hollow cavity for the insertion of bulging armour modules. It is 130mm
thick frontally at its thickest at the front facing thinning to 90mm as it approaches the
side of the turret. The rear facing is composed of 50mm of cast steel supplemented by a HHS rolled steel plate in front of it (pictured below).

The turret is chamfered both inside and out. The interior chamfer links the squared-off turret array with the turret
ring, since the armour is so thick that it actually extends a fair
distance inwards. The exterior chamfer, on the other hand, appears to be
a design compromise to allow the driver more passage space for escaping
when the turret is aimed at the 10 o'clock to 2 o'clock positions,
since the armour bulges over the driver's hatch, possibly impeding a
quick escape. The implications of this decision is simply that the
turret ring area, which is a traditional weak point of all tanks, is now
a lot bigger. On the other hand, this also means that the driver can
get out much more easily, unlike drivers of Western MBTs like the
Abrams, Leopard 2 and Challenger 2. This could be considered one of the
many mixed blessings of the T-72.
The
T-72B turret's multi-stack bulging plate array
consists of 20 modules. This type of armour can be considered a form of
integrated NERA (Non-Explosive Reactive Armour).


Each bulging plate module may vary greatly in length, but all of them
are uniformly set at 30mm thick. They are composed of a 6mm-thick rubber
flap
sandwiched between a 21mm-thick HHS front plate and a 3mm-thick RHA
bulging plate. The modules have 22mm of spacing between one
another. The entire array is angled at 50 to the turret's latitudinal
axis.
The placement of
the plates places 5 or 6 plates into the direct line of fire of a projectile
when the turret is being shot at head-on (further elaboration later), and 2 or 3 plates when fired
on at an angle of 35 degrees. The bulging armour array appears to be extremely effective on all counts, as explained below:
How Bulging Plate Armour Works:
The photos below illustrate the effect of bulging plates on the cumulative jet from a shaped charge.


 (Non-explosive reactive armour with 5mm rubber insert and 3mm bidirectional steel bulging plates used in test)
As
you may notice, the entire jet behind the tip itself is destabilized
(from shock waves) due to
lateral forces imparted upon it from the movement of the bulging plates.
The source of energy for this movement is the jet itself, which
energizes the elastomer liner between the two bulging plates sandwiching it, thus
causing both plates to move away from each other.
How Soviet Bulging Armour Works:
The
T-72B's bulging plates work essentially as described above, except that
the front plate is much thicker and therefore much more rigid, forcing
only the
thinner back plate to bulge. It will also do it more violently, since
all of the energy is used to propel only one plate. This directional
bias is highly beneficial in
dealing with both cumulative jets and KE projectiles, as shown below:

 (Forwards
moving means that the plate bulges opposite the direction of the
cumulative jet, and "(b) backwards moving" means that the plate bulges in the
same direction of the jet)
(Forwards
moving means that the plate bulges opposite the direction of the
cumulative jet, and "(b) backwards moving" means that the plate bulges in the
same direction of the jet)
The pictures above are not of an actual simulation of cumulative jet
hitting a NERA plate in the literal sense. The plates pictured were
moved by explosives which were detonated before the jet reached the
plate, but they achieve the same effect in its essence. The
photos above shed light on an extremely important phenomenon, which are
integral to the operation of the T-72B's armour, because both the glacis' and the turret's bulging armour arrays are of a forwards
moving type, thus maximizing their potential.
The T-72B's
turret bulging plate array is of a unidirectional type, and so far it
appears to be unique. It is capable of defeating both KE projectiles and
HEAT jets, the former which the bulging array was given special
consideration for. Although bulging armour will not necessarily discriminate between
either of these adversaries, their behaviour will differ when facing
it.
When faced with HEAT shells, the bulging armour array works
mainly on the principle of jet disruption and particulation. As the
first bulging plate bulges, the midsection and the tail of the jet (the
tip is far too fast to be affected) are put under lateral stresses,
seriously deforming it. Disruption of the rather delicate shape of the
jet in addition to the inherent velocity difference between the tip and
the portions behind it cause it to break up in-flight, leaving only the
tip moving in the original velocity vector. This effect is further
amplified by the lack of any spacing after the bulging operation has
occurred, forcing the slow middle and tail of the jet, now without an efficient penetrating tip, to collide into the solid (and
angled) 21mm steel plate that is the front plate of the next bulging
module. The body of the jet, without the tip, cannot effectively penetrate armour while the tip, without a body, dissipates quickly because although it travels at extreme velocities, its mass is miniscule. Because of how inefficient the "decapitated" jet is at armour penetration, a HEAT warhead may potentially only activate the first few modules, leaving the last few untouched. Having lost such a large portion of its mass, the jet now has
minimal momentum, and thus minimal penetration. The jet tip itself will quickly dissipate.

Bulging plates shot through with cumulative jets
Bulging armour works in much the same way against KE projectiles;
According to "The Relation between Initial Yaw and Long Rod Projectile
Shape after Penetrating an Oblique Thin Plate" authored by M. Arad, D.
Touati and I. Latovitz, even one degree of yaw before striking a
thin angled plate would significantly reduce that projectile's
penetration potential against more thin plates or solid armour behind
that plate as a result of the deformation of that projectile (read the
paper to learn more).

The greater the yaw, the greater the negative
effect. The T-72B's bulging armour specifically takes advantage of this
phenomenon. The angled steel backing of the bulging modules are angled in the opposite direction to the direction of the bulging modules, meaning that while the middle part of the penetrator is being subjected to an external force (bulging plate) from a downwards angle of -50°, the front end is impacting a hard target plate angled upwards at +50° (hard steel strike plate). Be reminded that there are at least 5 to 6 bulging modules in the projectile's flight path if the turret is shot head-on. Each individual bulging module in tandem with the next module directly behind it work together to put the penetrator under great stress, causing it to yaw, and inevitably to fracture as it passes through the multi-layer array.

Path of penetrator disintegration
And then, when the projectile has inevitably gone through all of the bulging plates, it will meet the hardened rolled steel plate backing. Angled at the normal 50 degrees, the plate would measure 70mm thick, equivalent to 84 to 90mm of RHA steel, but that is an oversimplistic approximation. The value of the great hardness of this plate cannot be expressed as a simplistic armour thickness equivalence multiplier in calculations. The function of the plate is much more significant since the projectile that will be striking it will no longer have an optimal shaping, meaning that this plate could function to shatter the pre-fractured penetrator outright. The dissimilar hardnesses of the steel plate and the cast steel behind it could also be beneficial owing to differences in deformation dynamics. The rolled steel plate, being much harder, could become a shock absorber of sorts, since it will not flex as much and will distribute the the kinetic energy of the offending projectile over a very wide area of the cast steel backing, which is softer and will lightly deform and will not spall or crack. This, in addition to the anti-radiation lining acting as a spall liner, meant that after-armour effects would be greatly diminished even in the event of full armour perforation.
The only disadvantage to this type of armour is that each bulging module will be completely spent after only one hit. Given
that the T-72B's array capitalizes on placing as many modules as
possible in the path of a penetrator, this is an especially serious
issue. The thick front plate of each module may partially compensate for
this, but only just. Like the modules on the glacis, these plates on
the turret will be reduced to mere strike plates, although the modest
spacing may add to their value. The armour values for a spent array will
be listed below alongside the normal values.
Note
that bulging armour shouldn't be affected by projectiles with impressive
length/diameter ratios by any great amount. In fact, it's quite
possible that greater length/dimater ratios will actually increase the
effectiveness of the array if said projectile is longer but not wider,
which would make bending and fracturing it easier, as any rod would be.
Bending is perfectly possible despite, or because of the projectile's
forward momentum, which naturally resists a change in vector direction.
Also, a rather important point related to the effectiveness of the
bulging armour array is their ability to perform when hit at abnormal
angles, especially considering the regularity in which tanks are hit
from the flank. The answer is that bulging armour would work even better
at steeper angles, as it would be if the turret was struck from the
side. But that is not to say that the tank is better protected from the
side. Not at all; the array would still have more to lose than gain
since fewer bulging modules would be there to intercept whatever is
hitting the turret. It is in this situation that the HHS front plate of
the bulging modules again become particularly useful if the module is
spent since their thickness will drastically increase (relatively) due
to their steep angling. From an angle of 30 degrees off the tank's axis,
the two 21mm front plates would measure 240mm in thickness, and from an angle of 40 degrees, the relative slope of the bulging plates will be so high (80 degrees) that the penetrator will simply be destroyed. Paired
with working bulging modules, the T-72B is as strong when shot from a sideways angle as it is when shot directly to the front, making it essentially
impenetrable from a frontal 70-degree arc unless the weak gun mantlet was hit. When depleted, the
entire array is equivalent to 522mm in pure RHA thickness at 30 degrees off axis, but with about
126mm of spacing for added effect. Even in its least optimal state, the T-72B can still resist 120mm APFSDS projectiles like the M829 and M829A1 at distances as short as 1 kilometer.
Needless to say, the T-72B was completely adamantine to any and all anti-armour weapons of its day. Despite this, the T-72B's bulging armour is not the most advanced armour design available to the Soviets. Bulging armour was chosen for the T-72B for its very reasonable protective qualities in combination with its extremely low price tag, which coincides with the general idea of using the T-72 as a "mobilization model" behind the more advanced T-64 and T-80 series.
The complex operation of the T-72B's armour does not allow expression of its
protection value in terms of 'RHAe'. Instead, I will simply state if a
certain generation projectile can or cannot penetrate. Following the
same line of reasoning, it appears that the main portable ATGMs of the
time such as the TOW-2 and MILAN-2 and the like would be hard pressed to defeat the T-72B frontally. This was probably the catalyst
to the
development of top-attack ATGMs such as the TOW 2B, MBT LAW, Spike,
Javelin, BILL 2 and the recent MMP and
would probably be the reason why many nations with money to spare have
abandoned direct-attack ATGMs in favour of top-attack ones or are
actively moving in this direction. Proof, or a good indication at least,
of this inference is the fact that older Konkurs and Metis missiles
were used in engagements on T-72Bs in Chechnya - ending most
often with the survival of those tanks.
I will use NATO smoothbore 120mm and British 120mm rifled (although
details are extremely scarce on the latter) APFSDS shells for
comparison. Monobloc long rod projectiles like the DM33, M829, M829A1
and Charm-1 are designated 'Legacy', and more modern projectiles like the DM53, M829A2, M829A3 and Charm-3 are designated 'New'.
KE:
Glacis: ~480mm RHAe ... ~540mm RHAe ... Legacy < Armour < New (1983 ... 1985 ... 1989)
Lower plate: 181mm RHA
Hull Side: 80mm RHA
Hull roof: ~20mm
Hull rear: ~40mm
Hull floor: ~20mm
Turret front: 252mm RHAe ... Legacy < Armour < New ... Totally Invulnerable (Mantlet ... Middle ... Far Side)
Gun mantlet: N/A
Turret rear half: 72mm RHAe
Turret top edge: ~363mm RHAe
Turret top: 20mm RHA (Actual) ... ~30mm RHA (Relative)
Thanks to the unchanging principle behind all shaped charges, it is
much easier to form a baseline protection value. The T-72B is fortified
against most portable direct fire ATGMs from the 80's like the ITOW,
TOW-2, Milan 2 and HOT. Modern tandem warhead missiles like the HOT 3,
Milan 3 and Eryx are able to completely drill through it without
encountering much resistance at all. Since the former tends to have
penetration values not exceeding 800mm RHA and the latter tends to
exceed that, 900mm RHAe will be the surrogate baseline protection value.
And although it really doesn't need to be said, no Western portable
rocket grenades then or now (LAW 80, AT4, Carl Gustav) are capable of
penetrating the T-72B frontally.

The
T-72B and the series it spawned represented a very significant step in
the evolution of the T-72, with the introduction of bulging armour in the hull and turret. Bulging
armour is a type of non-explosive reactive armour (NERA), meaning that
it has the effect of defeating the projectile rather than only passively
resisting it. This will be explained in the Bulging Armour expository section below. The T-72B is also notable for being the first T-72 to incorporate an ERA package as part of its original factory configuration. That is, all T-72Bs were built with Kontakt-1 installed. But first, we'll talk about the "plain" T-72B.
Glacis
The glacis array of the T-72B represents the first major update since
the original type found on the T-72 Ural. It is now thicker at 235mm,
which when reclined is 627mm LOS. This is just as thick, if
not in some ways thicker than the front hull plates of many of its
competitors at the time which have now become famous through extensive
media coverage. Among these are the Challenger 2, Leopard 2 and the M1
Abrams, all of which appear to have equal and perhaps sometimes even inferior hull
protection on many counts sans the latest upgrades. However, thickness isn't the most important thing. What matters most is how effective the armour actually is.
Previous assertions made on this article on the T-72B having the same type of bulging armour as the turret as well as having that same armour throughout the T-72B's lifespan have been proven wrong by photographic evidence. Hence, it is assumed that the illustration below prepared by online user Wiedzmin is correct, as the descriptions correspond to all known evidences.
Previous assertions made on this article on the T-72B having the same type of bulging armour as the turret as well as having that same armour throughout the T-72B's lifespan have been proven wrong by photographic evidence. Hence, it is assumed that the illustration below prepared by online user Wiedzmin is correct, as the descriptions correspond to all known evidences.

4, 5, and 6 refer to the glacis configuration of the T-72B models obr. 1983, obr. 1985 and obr. 1989 respectively.
Configuration 4: 60mm RHA + 15mm Air Space + 15mm HHS + 15mm Air Space + 15mm HHS + 15mm Air Space + 15mm HHS + 15mm Air Space + 50mm RHA (215mm Total)
Configuration 5: 60mm RHA + 10mm Air Space + 10mm HHS + 10mm Air Space + 10mm HHS + 10mm Air Space + 20mm RHA + 10mm Air Space + 20mm RHA + 10mm Air Space + 50mm RHA (220mm Total)
Configuration 6: 60mm RHA + 35 Bulging Module (5mm Rubber + 3mm RHA + 19mm Air Space + 3mm RHA + 5mm Rubber) + 60mm RHA + 10mm Anti-Radiation Layer + 50mm RHA (215mm Total)
From 1983 to 1987, the T-72B incorporated simple spaced steel armour, but progressed to bulging armour in 1989. But before we go into detail, be reminded that the T-72B is always outfitted with Kontakt-1, and the 1989 variant is always outfitted with Kontakt-5. Only a few T-72Bs went into service without Kontakt-1, and those were the ones that were used during Victory Day parades. As such, the armour estimations presented below will not be relevant for HEAT warheads where T-72B obr. 1983 and obr. 1985 are concerned, and not relevant for either HEAT or KE penetrators where T-72B obr. 1989 is concerned, due to the presence of Kontakt-5 reactive armour.
Obr. 1983
 |
| Destroyed T-72B from the first Chechen war. The glacis array of a destroyed T-72B is visible down at the bottom half of the left side of the photo. |
The glacis array of T-72B obr. 1983 is a textbook example of simple spaced armour comprised of multiple thin steel plates. In this case, the armour works mainly by nothing more than chipping off the tip of a long rod penetrator multiple times. Without an optimally shaped tip, a long rod projectile will not be able to properly overcome a steep slope, allowing the array to better deflect the rod upwards the further it travels. While effective against early 120mm Western APFSDS munitions like the West German DM13, that may or may not be due to the virtues of the array in itself so as much as it is thanks to the poor performance of DM13 on steep sloped targets. Pitted against 105mm APFSDS of the time, namely things like the DM23 and M833, the glacis should be immune at ranges of down to at least 1000 m.
Obr. 1985
 |
| From damaged T-72B3, taken during the 2015 Tank Biathlon. Remember, the T-72B3 program refurbishes and modernizes old T-72Bs. |

The glacis array of T-72B obr. 1985 is mostly similar, but slightly more effective due to a more rational design. The additional gains in performance against kinetic energy projectiles in this variant stems from its use of plates of different hardnesses, forming a spaced THS (Triple Hardness Steel) array that is directly comparable to "NATO Heavy Triple", which is a type of proofing standard for munitions. The 10mm steel plates at the very front are of a very high hardness of around 550 BHN, while the 25mm steel plates behind them are softer at around 450 BHN. The last and first and also the thickest plates are also the softest at 340 BHN. This, in combination with the spacing, is a moderately effective regime, but not very special and certainly not an advanced construction for the mid-80's. Still, it should be adequate for newer APFSDS shells such as the 120mm DM23, M827 and the M829.
Obr. 1989
The glacis array of T-72B obr. 1989 is more advanced, but still quite crude. The single bulging module comprised of two opposing bulging plates work based on the same principle of defeat; penetrator yaw and deflection. As the penetrator enters the array, it activates the first bulging plate, which bulges downward, enacting downwards force on the penetrator, and the second bulging plate bulges upward. By the time the penetrator has activated both arrays, though, it should have already entered the steel plate behind them, so the bulging arrays mostly function to destroy the middle portion of the penetrator, leaving only the front section to go on. Stopping the front section would be the the job of the rest of the glacis, 110mm thick. Once the bulging module is spent, the remainder of the armour will then depend solely upon the sheer thickness of steel.
Turret

The turret fully retains the usual T-72 layout, with the frontal
projection up-armoured and the associated changes made to the
armour profile. There are two aspects to the turret's frontal armour;
the solid steel portions and the bulging armour. The steel armour has a
hollow cavity for the insertion of bulging armour modules. It is 130mm
thick frontally at its thickest at the front facing thinning to 90mm as it approaches the
side of the turret. The rear facing is composed of 50mm of cast steel supplemented by a HHS rolled steel plate in front of it (pictured below).

The turret is chamfered both inside and out. The interior chamfer links the squared-off turret array with the turret
ring, since the armour is so thick that it actually extends a fair
distance inwards. The exterior chamfer, on the other hand, appears to be
a design compromise to allow the driver more passage space for escaping
when the turret is aimed at the 10 o'clock to 2 o'clock positions,
since the armour bulges over the driver's hatch, possibly impeding a
quick escape. The implications of this decision is simply that the
turret ring area, which is a traditional weak point of all tanks, is now
a lot bigger. On the other hand, this also means that the driver can
get out much more easily, unlike drivers of Western MBTs like the
Abrams, Leopard 2 and Challenger 2. This could be considered one of the
many mixed blessings of the T-72.
The
T-72B turret's multi-stack bulging plate array
consists of 20 modules. This type of armour can be considered a form of
integrated NERA (Non-Explosive Reactive Armour).


Each bulging plate module may vary greatly in length, but all of them
are uniformly set at 30mm thick. They are composed of a 6mm-thick rubber
flap
sandwiched between a 21mm-thick HHS front plate and a 3mm-thick RHA
bulging plate. The modules have 22mm of spacing between one
another. The entire array is angled at 50 to the turret's latitudinal
axis.
The placement of
the plates places 5 or 6 plates into the direct line of fire of a projectile
when the turret is being shot at head-on (further elaboration later), and 2 or 3 plates when fired
on at an angle of 35 degrees. The bulging armour array appears to be extremely effective on all counts, as explained below:
The photos below illustrate the effect of bulging plates on the cumulative jet from a shaped charge.


(Non-explosive reactive armour with 5mm rubber insert and 3mm bidirectional steel bulging plates used in test)
As
you may notice, the entire jet behind the tip itself is destabilized
(from shock waves) due to
lateral forces imparted upon it from the movement of the bulging plates.
The source of energy for this movement is the jet itself, which
energizes the elastomer liner between the two bulging plates sandwiching it, thus
causing both plates to move away from each other.
The
T-72B's bulging plates work essentially as described above, except that
the front plate is much thicker and therefore much more rigid, forcing
only the
thinner back plate to bulge. It will also do it more violently, since
all of the energy is used to propel only one plate. This directional
bias is highly beneficial in
dealing with both cumulative jets and KE projectiles, as shown below:


(Forwards
moving means that the plate bulges opposite the direction of the
cumulative jet, and "(b) backwards moving" means that the plate bulges in the
same direction of the jet)
The pictures above are not of an actual simulation of cumulative jet hitting a NERA plate in the literal sense. The plates pictured were moved by explosives which were detonated before the jet reached the plate, but they achieve the same effect in its essence. The photos above shed light on an extremely important phenomenon, which are integral to the operation of the T-72B's armour, because both the glacis' and the turret's bulging armour arrays are of a forwards moving type, thus maximizing their potential.
The T-72B's turret bulging plate array is of a unidirectional type, and so far it appears to be unique. It is capable of defeating both KE projectiles and HEAT jets, the former which the bulging array was given special consideration for. Although bulging armour will not necessarily discriminate between either of these adversaries, their behaviour will differ when facing it.
When faced with HEAT shells, the bulging armour array works mainly on the principle of jet disruption and particulation. As the first bulging plate bulges, the midsection and the tail of the jet (the tip is far too fast to be affected) are put under lateral stresses, seriously deforming it. Disruption of the rather delicate shape of the jet in addition to the inherent velocity difference between the tip and the portions behind it cause it to break up in-flight, leaving only the tip moving in the original velocity vector. This effect is further amplified by the lack of any spacing after the bulging operation has occurred, forcing the slow middle and tail of the jet, now without an efficient penetrating tip, to collide into the solid (and angled) 21mm steel plate that is the front plate of the next bulging module. The body of the jet, without the tip, cannot effectively penetrate armour while the tip, without a body, dissipates quickly because although it travels at extreme velocities, its mass is miniscule. Because of how inefficient the "decapitated" jet is at armour penetration, a HEAT warhead may potentially only activate the first few modules, leaving the last few untouched. Having lost such a large portion of its mass, the jet now has minimal momentum, and thus minimal penetration. The jet tip itself will quickly dissipate.
 |
| Bulging plates shot through with cumulative jets |
Bulging armour works in much the same way against KE projectiles;
According to "The Relation between Initial Yaw and Long Rod Projectile Shape after Penetrating an Oblique Thin Plate" authored by M. Arad, D. Touati and I. Latovitz, even one degree of yaw before striking a thin angled plate would significantly reduce that projectile's penetration potential against more thin plates or solid armour behind that plate as a result of the deformation of that projectile (read the paper to learn more).

The greater the yaw, the greater the negative effect. The T-72B's bulging armour specifically takes advantage of this phenomenon. The angled steel backing of the bulging modules are angled in the opposite direction to the direction of the bulging modules, meaning that while the middle part of the penetrator is being subjected to an external force (bulging plate) from a downwards angle of -50°, the front end is impacting a hard target plate angled upwards at +50° (hard steel strike plate). Be reminded that there are at least 5 to 6 bulging modules in the projectile's flight path if the turret is shot head-on. Each individual bulging module in tandem with the next module directly behind it work together to put the penetrator under great stress, causing it to yaw, and inevitably to fracture as it passes through the multi-layer array.
 |
| Path of penetrator disintegration |
The only disadvantage to this type of armour is that each bulging module will be completely spent after only one hit. Given that the T-72B's array capitalizes on placing as many modules as possible in the path of a penetrator, this is an especially serious issue. The thick front plate of each module may partially compensate for this, but only just. Like the modules on the glacis, these plates on the turret will be reduced to mere strike plates, although the modest spacing may add to their value. The armour values for a spent array will be listed below alongside the normal values.
Note that bulging armour shouldn't be affected by projectiles with impressive length/diameter ratios by any great amount. In fact, it's quite possible that greater length/dimater ratios will actually increase the effectiveness of the array if said projectile is longer but not wider, which would make bending and fracturing it easier, as any rod would be. Bending is perfectly possible despite, or because of the projectile's forward momentum, which naturally resists a change in vector direction.
Also, a rather important point related to the effectiveness of the bulging armour array is their ability to perform when hit at abnormal angles, especially considering the regularity in which tanks are hit from the flank. The answer is that bulging armour would work even better at steeper angles, as it would be if the turret was struck from the side. But that is not to say that the tank is better protected from the side. Not at all; the array would still have more to lose than gain since fewer bulging modules would be there to intercept whatever is hitting the turret. It is in this situation that the HHS front plate of the bulging modules again become particularly useful if the module is spent since their thickness will drastically increase (relatively) due to their steep angling. From an angle of 30 degrees off the tank's axis, the two 21mm front plates would measure 240mm in thickness, and from an angle of 40 degrees, the relative slope of the bulging plates will be so high (80 degrees) that the penetrator will simply be destroyed. Paired with working bulging modules, the T-72B is as strong when shot from a sideways angle as it is when shot directly to the front, making it essentially impenetrable from a frontal 70-degree arc unless the weak gun mantlet was hit. When depleted, the entire array is equivalent to 522mm in pure RHA thickness at 30 degrees off axis, but with about 126mm of spacing for added effect. Even in its least optimal state, the T-72B can still resist 120mm APFSDS projectiles like the M829 and M829A1 at distances as short as 1 kilometer.
Needless to say, the T-72B was completely adamantine to any and all anti-armour weapons of its day. Despite this, the T-72B's bulging armour is not the most advanced armour design available to the Soviets. Bulging armour was chosen for the T-72B for its very reasonable protective qualities in combination with its extremely low price tag, which coincides with the general idea of using the T-72 as a "mobilization model" behind the more advanced T-64 and T-80 series.
The complex operation of the T-72B's armour does not allow expression of its protection value in terms of 'RHAe'. Instead, I will simply state if a certain generation projectile can or cannot penetrate. Following the same line of reasoning, it appears that the main portable ATGMs of the time such as the TOW-2 and MILAN-2 and the like would be hard pressed to defeat the T-72B frontally. This was probably the catalyst to the development of top-attack ATGMs such as the TOW 2B, MBT LAW, Spike, Javelin, BILL 2 and the recent MMP and would probably be the reason why many nations with money to spare have abandoned direct-attack ATGMs in favour of top-attack ones or are actively moving in this direction. Proof, or a good indication at least, of this inference is the fact that older Konkurs and Metis missiles were used in engagements on T-72Bs in Chechnya - ending most often with the survival of those tanks.
I will use NATO smoothbore 120mm and British 120mm rifled (although details are extremely scarce on the latter) APFSDS shells for comparison. Monobloc long rod projectiles like the DM33, M829, M829A1 and Charm-1 are designated 'Legacy', and more modern projectiles like the DM53, M829A2, M829A3 and Charm-3 are designated 'New'.
KE:
Glacis: ~480mm RHAe ... ~540mm RHAe ... Legacy < Armour < New (1983 ... 1985 ... 1989)
Lower plate: 181mm RHA
Hull Side: 80mm RHA
Hull roof: ~20mm
Hull rear: ~40mm
Hull floor: ~20mm
Turret front: 252mm RHAe ... Legacy < Armour < New ... Totally Invulnerable (Mantlet ... Middle ... Far Side)
Gun mantlet: N/A
Turret rear half: 72mm RHAe
Turret top edge: ~363mm RHAe
Turret top: 20mm RHA (Actual) ... ~30mm RHA (Relative)
Thanks to the unchanging principle behind all shaped charges, it is much easier to form a baseline protection value. The T-72B is fortified against most portable direct fire ATGMs from the 80's like the ITOW, TOW-2, Milan 2 and HOT. Modern tandem warhead missiles like the HOT 3, Milan 3 and Eryx are able to completely drill through it without encountering much resistance at all. Since the former tends to have penetration values not exceeding 800mm RHA and the latter tends to exceed that, 900mm RHAe will be the surrogate baseline protection value. And although it really doesn't need to be said, no Western portable rocket grenades then or now (LAW 80, AT4, Carl Gustav) are capable of penetrating the T-72B frontally.
HEAT:
Glacis: 500mm RHAe ... 600mm RHAe ... >700mm RHAe (1983 ... 1985 ... 1989)
Lower plate: 181mm RHA
Hull Side: 80mm RHA
Hull roof: ~20mm RHA
Hull rear: ~40mm RHA
Hull floor: ~20mm RHA
Turret front: 252mm ... ~1200mm RHAe ... Totally Invulnerable (Mantlet ... Middle ... Far Side)
Gun mantlet: N/A
Turret rear half: 80mm RHA
Turret top edge: ~404mm RHA
Turret top: 20mm RHA (Actual) ... ~30mm RHA (Relative)
Spent
Because at this point the bulging armour will no longer work as before,
the spent armour array is essentially equal to its thickness in steel plus
any debris added with spacing effects.
KE:
Glacis: 490mm RHAe (1989 only)
Lower plate: 181mm RHA
Hull Side: 80mm RHA
Hull roof: ~20mm
Hull rear: ~40mm
Hull floor: ~20mm
Turret front: 252mm RHAe ... ~500mm RHAe ... ~800mm (Mantlet ... Middle ... Far Side)
Gun mantlet: N/A
Turret rear half: 72mm RHAe
Turret top edge: ~363mm RHAe
Turret top: 20mm RHA (Actual) ... ~30mm RHA (Relative)
HEAT:
Glacis: ~500mm
Lower plate: 181mm RHA
Hull Side: 80mm RHA
Hull roof: ~20mm RHA
Hull rear: ~40mm RHA
Hull floor: ~20mm RHA
Turret front:
315mm ... ~610mm RHAe ... Totally Invulnerable (Mantlet ... Middle ... Far Side)
Gun mantlet: N/A
Turret rear half: 80mm RHA
Turret top edge: ~404mm RHA
Turret top: 20mm RHA (Actual) ... ~30mm RHA (Relative)
The T-72B's turret offers a surprising degree of modularity. The
bulging armour is simply inserted into the turret cavity module by module -
as simple as that. In the field, replacing the bulging armour is a
simple matter of cutting off the top at the weld lines (very
distinctly seen in the picture below) and putting new modules in. This
makes battle damage very easy to repair, which is especially important for
the T-72B, since its bulging plates are "single-use".

Aside from that, it must be noted that despite the huge leap in
protection relative to the previous T-72 models, the T-72B's turret
remains just as inexpensive. The sheer commodity of steel and rubber
makes the cost of producing bulging plates almost laughably cheap, while
the workmanship required to process the cast turret does not demand any
new skills or any retraining. This is undeniably an important asset
during wartime, thus preserving the T-72's position as a "mobilization model" with excellent performance at minimal cost.
Some articles claim that the T-72B has 20mm or 30mm of applique armour on its glacis, but this is blatantly false. As you
may notice in the photo below, the tow hooks are directly attached to
the glacis, unlike the tow hooks on the T-72A.

T-72A, notice the tow hook area

T-72B, notice the tow hooks
Although the glacis armour does indeed visibly protrude over the top of
the hull roof, that is simply be due the increased thickness. Since the
very definition of "applique armour" is armour that is applied as an
add-on over the original base armour, one can hardly call that
"applique".
Glacis: 500mm RHAe ... 600mm RHAe ... >700mm RHAe (1983 ... 1985 ... 1989)
Lower plate: 181mm RHA
Hull Side: 80mm RHA
Hull roof: ~20mm RHA
Hull rear: ~40mm RHA
Hull floor: ~20mm RHA
Turret front: 252mm ... ~1200mm RHAe ... Totally Invulnerable (Mantlet ... Middle ... Far Side)
Gun mantlet: N/A
Turret rear half: 80mm RHA
Turret top edge: ~404mm RHA
Turret top: 20mm RHA (Actual) ... ~30mm RHA (Relative)
Because at this point the bulging armour will no longer work as before, the spent armour array is essentially equal to its thickness in steel plus any debris added with spacing effects.
KE:
Glacis: 490mm RHAe (1989 only)
Lower plate: 181mm RHA
Hull Side: 80mm RHA
Hull roof: ~20mm
Hull rear: ~40mm
Hull floor: ~20mm
Turret front: 252mm RHAe ... ~500mm RHAe ... ~800mm (Mantlet ... Middle ... Far Side)
Gun mantlet: N/A
Turret rear half: 72mm RHAe
Turret top edge: ~363mm RHAe
Turret top: 20mm RHA (Actual) ... ~30mm RHA (Relative)
HEAT:
Glacis: ~500mm
Lower plate: 181mm RHA
Hull Side: 80mm RHA
Hull roof: ~20mm RHA
Hull rear: ~40mm RHA
Hull floor: ~20mm RHA
Turret front:
315mm ... ~610mm RHAe ... Totally Invulnerable (Mantlet ... Middle ... Far Side)
Gun mantlet: N/A
Turret rear half: 80mm RHA
Turret top edge: ~404mm RHA
Turret top: 20mm RHA (Actual) ... ~30mm RHA (Relative)
The T-72B's turret offers a surprising degree of modularity. The
bulging armour is simply inserted into the turret cavity module by module -
as simple as that. In the field, replacing the bulging armour is a
simple matter of cutting off the top at the weld lines (very
distinctly seen in the picture below) and putting new modules in. This
makes battle damage very easy to repair, which is especially important for
the T-72B, since its bulging plates are "single-use".

Aside from that, it must be noted that despite the huge leap in protection relative to the previous T-72 models, the T-72B's turret remains just as inexpensive. The sheer commodity of steel and rubber makes the cost of producing bulging plates almost laughably cheap, while the workmanship required to process the cast turret does not demand any new skills or any retraining. This is undeniably an important asset during wartime, thus preserving the T-72's position as a "mobilization model" with excellent performance at minimal cost.
Some articles claim that the T-72B has 20mm or 30mm of applique armour on its glacis, but this is blatantly false. As you
may notice in the photo below, the tow hooks are directly attached to
the glacis, unlike the tow hooks on the T-72A.
 |
| T-72A, notice the tow hook area |
| T-72B, notice the tow hooks |
Although the glacis armour does indeed visibly protrude over the top of
the hull roof, that is simply be due the increased thickness. Since the
very definition of "applique armour" is armour that is applied as an
add-on over the original base armour, one can hardly call that
"applique".
Kontakt-1

All T-72Bs are outfitted with a set of 227 blocks of Kontakt-1 covering the most of the hull and the forward arc of the turret as well as the turret roof. As mentioned before with the T-72A, each block
can reduce the penetrating effects of cumulative jets by an average of 55% at 0 degrees, and by up to 80% when angled at 60 degrees. NII Stali claims that it can retard the penetration power of a typical anti-tank missile like the Konkurs (130mm diameter) by up to 86%, or 58% for a 125mm HEAT shell, or up to a whopping 92% for low power warheads like the one on the 66mm LAW. Kontakt-1 bears special meaning for the T-72B because of its bulging
armour. Kontakt-1 is capable of reducing the penetration of a typical low yield rocket grenade to levels low enough that the front steel facings of both the turret and glacis arrays are able
to absorb the residual penetration without even damaging the modules underneath, which is quite important given the single-use nature of bulging armour. Also, it wouldn't be wrong to consider the T-72B essentially impenetrable from the flanks with single-charge rocket grenades like the AT4.
HEAT:
Glacis: Immunity to all single warheads, no conspicuous advantage over plain array against tandem warheads
Lower plate: 181mm RHA
Sides: 80mm RHA
Hull roof: ~20mm RHA
Hull rear: ~40mm RHA
Hull floor: ~20mm RHA
Turret front: ~700mm ... Immunity to all single warheads, no conspicuous advantage over plain array against tandem warheads
... Totally Invulnerable (Mantlet ... Middle ... Far Side)
Gun mantlet: N/A
Turret rear half: 80mm RHA
Turret top edge: ~900mm RHA
Turret top: Immunity to all single warheads
HEAT:
Glacis: Immunity to all single warheads, no conspicuous advantage over plain array against tandem warheads
Lower plate: 181mm RHA
Sides: 80mm RHA
Hull roof: ~20mm RHA
Hull rear: ~40mm RHA
Hull floor: ~20mm RHA
Turret front: ~700mm ... Immunity to all single warheads, no conspicuous advantage over plain array against tandem warheads
... Totally Invulnerable (Mantlet ... Middle ... Far Side)
... Totally Invulnerable (Mantlet ... Middle ... Far Side)
Gun mantlet: N/A
Turret rear half: 80mm RHA
Turret top edge: ~900mm RHA
Turret top: Immunity to all single warheads
T-72B + Kontakt-5

Kontakt-5 is a form of integrated ERA, utilizing heavy,
explosively-propelled flyer plates to disrupt cumulative jets and also
to (literally) destroy
KE projectiles. Being much heavier than the applique-mounted Kontakt-1,
it was not possible to simply bolt the panels on, thus necessiting the
incorporation of the modules into the armour array itself. The panels are
non-replaceable, but are reusable if refilled.
The entire set weighs 1.5 tons. Most of it comes from the steel portions of the modules.
The exact value for KE penetrators is often quoted to be 250mm RHAe (as
stated by NII Stali, even), but describing it as a solid figure is both
illogical and misleading. Some describe the armour as being able to
reduce a projectile's penetration by 20% to 35%, while official sources
state that it is able to improve base armour by 1.2 times. Regardless,
all given figures were clearly deliberately left vague.
According to a fact sheet from the manufacturer, Kontakt-5 can negatively affect KE pentrators by a listed minimum of 20%. This probably includes optimized penetrators designed to counter Kontakt-5.
The penetrating capability of cumulative jets can be affected by a
minimum of 50% to a maximum of 80%. The former value probably applies
only to tiles struck at a shallow slope (30°), and the latter should apply to any
and all shaped charge warheads regardless of their advancements - all shaped charges operate on the same principle.
How Kontakt-5 Works
Kontakt-5 works on the basis of
explosively-propelled flyer plates. This type of defeat mechanism is
similar, but different to that of bulging plates in that it is far more energetic, and the plate flies off the module altogether. Against HEAT warheads, the general working principle of Kontakt-5 remains the same as that of bulging armour. The cumulative jet will be subjected to lateral forces which will break it up and disperse it, though the hypervelocity tip will invariably still continue forward; Kontakt-5 cannot destroy cumulative jets completely, but it can certainly render them harmless with an efficacy similar, but slightly lower than that of Konkakt-1. For kinetic energy projectiles, Kontakt-5 operates thusly: By utilizing
explosively-propelled flyer plates, projectiles can experience catastrophic destruction from being subjected to intolerable lateral forces, thereby conditioning the projectile for
defeat by the main armour. The defeat mechanism for KE projectiles is illustrated below:

Kontakt-5 is backwards moving plate, meaning that the plate flies into the path of the penetrator. A forwards moving plate as shown in the illustration above is a plate that flies in the same direction as the penetrator, so the illustration is incorrect, but enlightening nonetheless
For present-day kinetic energy penetrators, bypassing the modules is impossible. The M829A3, for instance, was designed to travel at an unusually low speed so that it would not produce enough shock to activate the explosive material within, but even then, the success rate of this method is apparently only about 50% at most. The solution to the M829A3 problem would be simple - replace the explosive modules with more sensitive ones. No modification would be required. Kontakt-5 was originally designed to use 4S22 explosive elements. These are very potent plastic explosives sealed in a flat sheet steel box, pictured below.
T-72B + Kontakt-5
 |
Kontakt-5 is a form of integrated ERA, utilizing heavy,
explosively-propelled flyer plates to disrupt cumulative jets and also
to (literally) destroy
KE projectiles. Being much heavier than the applique-mounted Kontakt-1,
it was not possible to simply bolt the panels on, thus necessiting the
incorporation of the modules into the armour array itself. The panels are
non-replaceable, but are reusable if refilled.
The entire set weighs 1.5 tons. Most of it comes from the steel portions of the modules.
The entire set weighs 1.5 tons. Most of it comes from the steel portions of the modules.
The exact value for KE penetrators is often quoted to be 250mm RHAe (as
stated by NII Stali, even), but describing it as a solid figure is both
illogical and misleading. Some describe the armour as being able to
reduce a projectile's penetration by 20% to 35%, while official sources
state that it is able to improve base armour by 1.2 times. Regardless,
all given figures were clearly deliberately left vague.
According to a fact sheet from the manufacturer, Kontakt-5 can negatively affect KE pentrators by a listed minimum of 20%. This probably includes optimized penetrators designed to counter Kontakt-5.
The penetrating capability of cumulative jets can be affected by a
minimum of 50% to a maximum of 80%. The former value probably applies
only to tiles struck at a shallow slope (30°), and the latter should apply to any
and all shaped charge warheads regardless of their advancements - all shaped charges operate on the same principle.
How Kontakt-5 Works
Kontakt-5 works on the basis of
explosively-propelled flyer plates. This type of defeat mechanism is
similar, but different to that of bulging plates in that it is far more energetic, and the plate flies off the module altogether. Against HEAT warheads, the general working principle of Kontakt-5 remains the same as that of bulging armour. The cumulative jet will be subjected to lateral forces which will break it up and disperse it, though the hypervelocity tip will invariably still continue forward; Kontakt-5 cannot destroy cumulative jets completely, but it can certainly render them harmless with an efficacy similar, but slightly lower than that of Konkakt-1. For kinetic energy projectiles, Kontakt-5 operates thusly: By utilizing
explosively-propelled flyer plates, projectiles can experience catastrophic destruction from being subjected to intolerable lateral forces, thereby conditioning the projectile for
defeat by the main armour. The defeat mechanism for KE projectiles is illustrated below:
 |
| Kontakt-5 is backwards moving plate, meaning that the plate flies into the path of the penetrator. A forwards moving plate as shown in the illustration above is a plate that flies in the same direction as the penetrator, so the illustration is incorrect, but enlightening nonetheless |
For present-day kinetic energy penetrators, bypassing the modules is impossible. The M829A3, for instance, was designed to travel at an unusually low speed so that it would not produce enough shock to activate the explosive material within, but even then, the success rate of this method is apparently only about 50% at most. The solution to the M829A3 problem would be simple - replace the explosive modules with more sensitive ones. No modification would be required. Kontakt-5 was originally designed to use 4S22 explosive elements. These are very potent plastic explosives sealed in a flat sheet steel box, pictured below.

The mass of each cell is 280 grams, equivalent to 330 grams of TNT. It is possible to replace these cells with 4S23 cells from the Relikt ERA system, since they are exactly identical in dimensions. Case in point:

4S23 cells are hypersensitive when subjected to shocks above a certain threshold, while remaining stable when subjected to shocks under it, and they are more powerful to boot. 4S23 cells have a greatly reduced reaction time, meaning that it explodes sooner, allowing the modules to activate near-instantaneously, giving them the ability to disrupt a greater portion of a cumulative jet or intercept a kinetic energy projectile sooner. It is entirely possible that newer-production T-90A and T-72B3 tanks have been supplied with 4S23 instead of the normal 4S22, and that 4S22 is being phased out. However, this is only speculation.
 Kontakt-5 is composed of a welded steel body and explosive cells. The steel body acts to contain the immense pressure from the detonation of the explosive cells and to prevent premature damage from machine gun and autocannon fire, and the front facing of the steel body is the flyer plate. It is made of high hardness steel. The front plate measures approximately 15mm, or 40mm with the angling of the glacis accounted for. Each Kontakt-5 module contains 8 4S22 explosive cells, and so each module has the explosive power of about 2.64kg of TNT. Once the module is activated, the 8 cells detonate, producing so much pressure that the welded top is propelled (or rather, violently blown off) at tremendous speed away from the glacis. This means that the 15mm high hardness plate is attacking the penetrator at an angle of 68 degrees relative to its flight path, thus completely destroying the penetrator save the front end, which will most definitely pass through because of the lengthy reaction time that Kontakt-5 suffers from. Aside from the natural relative slowness of the explosive cells, the flyer plate, which is welded onto the partitions between each module, is secured firmly such that pressure will build up inside the module for a few milliseconds longer before the flyer plate can finally detach and actually "fly". Nevertheless, Kontakt-5 completely immunizes the T-72B from shells like the M829, M829A1 and M829A2 and DM43 at combat ranges. As you can see in the adjacent photo, the top of the welded body blew off. Since there is no hole under that module, it seems like the module beside it inadvertently set it off. Note that the partitions between the modules disintegrated under the pressure. This was long-known issue with ERA in general, and particularly with Kontakt-5 due to the sheer power of each module.
Because of the thickness of the front plate, Kontakt-5 modules have scant, but a meaningful chance of survival from the miniature precurser shaped charges on some ATGMs, specifically the TOW 2A (whose precurser shaped charge is a measly 30mm in diameter, with a very small explosive punch and no wave shaper) and the modules are protected from heavy machine gun fire as well. Their hardness, thickness and steep sloping also shield them from some forms of autocannon fire at extended ranges, including 20mm APDS and 25mm APDS. The welded rear may also act as applique armour if the module is spent, thanks to its thickness, which is almost as much as the T-72 Ural and T-72A's 16mm of applique armour.
The 1989 configuration presents 9 modules on the hull. Three of the five modules on the bottom half are loaded with eight 4S22 explosive cells each, and the other two are loaded with six. The four larger modules on top are loaded with twelve each. There are 16 modules on the turret
front, each loaded with six explosive cells. Some tanks have been seen with Kontakt-5 turret and hull modules, but with Kontakt-1 boxes on the roof. However, a dedicated hexagonal version is also available, which seems to be much more common.

The middle of the glacis is
protected by 8 Kontakt-5 modules, each with several sections which again
contains even more tiles. Curiously, the designers made a conscious decision to
leave the area on either side of the driver's periscope unprotected. Why
they did this is a complete mystery.
Also note the visible vertical partitions between each module.

The photo above shows the applique HHS underlay for the Kontakt-5 hull modules. They are approximately (at least) 12mm thick. The front plate of the modules is of the same thickness or more.


The photo above shows the thickness of the HHS box for the turret modules. The front plate is approximately 8mm thick and the backing plate is about the same. The turret modules are so powerful that their detonation is often enough to crack the ballistic glass on the sight aperture of the TPD-K1, which is placed quite far forward. While that may seem like a negative, it really isn't. After all, anyone would agree that it is preferable that an offending shell is stopped from perforating the turret, smashing into the sight unit itself and killing the gunner. The explosion from a HEAT warhead would render the explosion from the Kontakt-5 meaningless anyway.
As noted above, a new Kontakt-5 box for the roof is available. Closer inspection indicates that it is not simply a repackaged Kontakt-1 module, but a complete departure from it. Let us first take a look at the external differences:

Kontakt-1 on turret roof

Close inspection of these boxes when opened gives us an idea of the internal composition:

T-90A turret equipped with such boxes
It appears that the box itself only has space for one 4S22 explosive element, and the bolt-on top cover is quite thin, the box itself being slightly flatter than a Kontakt-1 box. Thus, these boxes are definitely a form of explosive flyer plate. As the explosive cell within detonates, the bolt-on lid is blown off at lightning speed, just like the Kontakt-5 modules, and the lid acts as a flyer plate. This armour was probably meant to increase the ability of the heavily sloped turret top to deflect grazing hits from APFSDS shells. Their role is essentially identical to that of the roof-mounted Kontakt-1 blocks, which is to protect the tank from air-delivered submunitions or bomblets as well as artillery shells of the HEAT variety.

The new "hex armour" is primarily intended to help deflect APFSDS shells from the turret's peak, which is very steeply sloped but relatively thin (Photo credit: Vitaly Kuzmin)
There are three Kontakt-5 modules located on either side of the hull. Like the turret top hexagonal boxes, these are a type of explosive bulging armour. They use the same 4S22 explosive elements as
the hull and turret modules in their construction. They provide coverage
for the entire crew area in a 100-degree frontal arc, as illustrated in
the photos below:


50 degree view
The side modules are a type of bidirectional flyer plate. The base is stamped out of sheet steel, with a bolt-on plate measuring approximately 10mm. Once the explosive cells inside are activated, the sheel steel flies off inward, and the bolt-on plate flies off outward. Their ability to confront incoming projectiles is augmented by the 1220 meters of air space behind it and the 160mm of steel armour which is the side armour of the tank (at 30 degrees obliquity). This isn't enough to reliably stop most modern APFSDS shells, but it would at least massively decrease their after-armour potency. Most older APFSDS shells like the L23 and M829 should be handily defeated by this arrangement, but the side panels are totally inadequate for dealing with already obsolete shells like the M829A2.

Photo credit: Vitaly Kuzmin
As you can see in the photo above, the front plate is disproportionately thicker than the sheet steel compartment holding the explosive elements. As the obliquity decreases, the plates will begin to
lose their effectiveness. If struck perpendicularly, the only effect
upon cumulative jets that the module can inflict will be mild
destabilization, which can be fully accredited to the explosive insert.
They would have little to no useful effect on KE projectiles then.
It is worth noting how easily these modules may be installed. Although the standard configuration is three modules at the front, the entire flank may have them installed with no modification required. Knowing that tank crews often want to live, seeing the sides of T-72s brimming with these modules is very likely during wartime.
Installing Kontakt-5
Inserting the explosive elements into the modules are quite easily done. Once filled, the modules are bolted shut.

The photo above shows the access panels opened. To fill up these, you'd need to insert the explosive elements one by one.
Each hull and turret contains eight such explosive elements in a double stack of four. The side modules contain six individual ones.

Holding one of the explosive elements. The man is filling the side ERA sections
As mentioned before, more of these side panels can be installed if deemed necessary. All the preparation necessary is to drill some new holes in the steel spacer plate protecting the fuel tanks on the fender above the track. New side panels can be simply bolted on with no fuss.
Repairing spent modules is as simple as welded a new steel body on and filling it with explosive cells.
"Novel" shells are projectiles that are designed specifically to counter Kontakt-5, such as M829A3 and DM53. Shells like the M829A2 and 120mm DM33 are not "Novel".
Here is a somewhat detailed breakdown:
KE:
Glacis: Legacy < Armour < Novel
Lower plate: 181mm RHA
Sides: 80mm RHA
Hull roof: ~20mm
Hull rear: ~40mm
Hull floor: ~20mm
Turret front: 315mm RHAe ... Legacy < Armour < Novel ... Totally Invulnerable (Mantlet ... Middle ... Far Side)
Turret mantlet: N/A
Turret rear half: 72mm RHA
Turret top edge: ~363mm RHAe
Turret top: 100mm (Guesstimation)
The mass of each cell is 280 grams, equivalent to 330 grams of TNT. It is possible to replace these cells with 4S23 cells from the Relikt ERA system, since they are exactly identical in dimensions. Case in point:
4S23 cells are hypersensitive when subjected to shocks above a certain threshold, while remaining stable when subjected to shocks under it, and they are more powerful to boot. 4S23 cells have a greatly reduced reaction time, meaning that it explodes sooner, allowing the modules to activate near-instantaneously, giving them the ability to disrupt a greater portion of a cumulative jet or intercept a kinetic energy projectile sooner. It is entirely possible that newer-production T-90A and T-72B3 tanks have been supplied with 4S23 instead of the normal 4S22, and that 4S22 is being phased out. However, this is only speculation.
 Kontakt-5 is composed of a welded steel body and explosive cells. The steel body acts to contain the immense pressure from the detonation of the explosive cells and to prevent premature damage from machine gun and autocannon fire, and the front facing of the steel body is the flyer plate. It is made of high hardness steel. The front plate measures approximately 15mm, or 40mm with the angling of the glacis accounted for. Each Kontakt-5 module contains 8 4S22 explosive cells, and so each module has the explosive power of about 2.64kg of TNT. Once the module is activated, the 8 cells detonate, producing so much pressure that the welded top is propelled (or rather, violently blown off) at tremendous speed away from the glacis. This means that the 15mm high hardness plate is attacking the penetrator at an angle of 68 degrees relative to its flight path, thus completely destroying the penetrator save the front end, which will most definitely pass through because of the lengthy reaction time that Kontakt-5 suffers from. Aside from the natural relative slowness of the explosive cells, the flyer plate, which is welded onto the partitions between each module, is secured firmly such that pressure will build up inside the module for a few milliseconds longer before the flyer plate can finally detach and actually "fly". Nevertheless, Kontakt-5 completely immunizes the T-72B from shells like the M829, M829A1 and M829A2 and DM43 at combat ranges. As you can see in the adjacent photo, the top of the welded body blew off. Since there is no hole under that module, it seems like the module beside it inadvertently set it off. Note that the partitions between the modules disintegrated under the pressure. This was long-known issue with ERA in general, and particularly with Kontakt-5 due to the sheer power of each module.
The 1989 configuration presents 9 modules on the hull. Three of the five modules on the bottom half are loaded with eight 4S22 explosive cells each, and the other two are loaded with six. The four larger modules on top are loaded with twelve each. There are 16 modules on the turret
front, each loaded with six explosive cells. Some tanks have been seen with Kontakt-5 turret and hull modules, but with Kontakt-1 boxes on the roof. However, a dedicated hexagonal version is also available, which seems to be much more common.
The photo above shows the thickness of the HHS box for the turret modules. The front plate is approximately 8mm thick and the backing plate is about the same. The turret modules are so powerful that their detonation is often enough to crack the ballistic glass on the sight aperture of the TPD-K1, which is placed quite far forward. While that may seem like a negative, it really isn't. After all, anyone would agree that it is preferable that an offending shell is stopped from perforating the turret, smashing into the sight unit itself and killing the gunner. The explosion from a HEAT warhead would render the explosion from the Kontakt-5 meaningless anyway.
As noted above, a new Kontakt-5 box for the roof is available. Closer inspection indicates that it is not simply a repackaged Kontakt-1 module, but a complete departure from it. Let us first take a look at the external differences:
Close inspection of these boxes when opened gives us an idea of the internal composition:
It appears that the box itself only has space for one 4S22 explosive element, and the bolt-on top cover is quite thin, the box itself being slightly flatter than a Kontakt-1 box. Thus, these boxes are definitely a form of explosive flyer plate. As the explosive cell within detonates, the bolt-on lid is blown off at lightning speed, just like the Kontakt-5 modules, and the lid acts as a flyer plate. This armour was probably meant to increase the ability of the heavily sloped turret top to deflect grazing hits from APFSDS shells. Their role is essentially identical to that of the roof-mounted Kontakt-1 blocks, which is to protect the tank from air-delivered submunitions or bomblets as well as artillery shells of the HEAT variety.
There are three Kontakt-5 modules located on either side of the hull. Like the turret top hexagonal boxes, these are a type of explosive bulging armour. They use the same 4S22 explosive elements as the hull and turret modules in their construction. They provide coverage for the entire crew area in a 100-degree frontal arc, as illustrated in the photos below:
 |
| The middle of the glacis is
protected by 8 Kontakt-5 modules, each with several sections which again
contains even more tiles. Curiously, the designers made a conscious decision to
leave the area on either side of the driver's periscope unprotected. Why
they did this is a complete mystery. Also note the visible vertical partitions between each module. |

The photo above shows the applique HHS underlay for the Kontakt-5 hull modules. They are approximately (at least) 12mm thick. The front plate of the modules is of the same thickness or more.


The photo above shows the thickness of the HHS box for the turret modules. The front plate is approximately 8mm thick and the backing plate is about the same. The turret modules are so powerful that their detonation is often enough to crack the ballistic glass on the sight aperture of the TPD-K1, which is placed quite far forward. While that may seem like a negative, it really isn't. After all, anyone would agree that it is preferable that an offending shell is stopped from perforating the turret, smashing into the sight unit itself and killing the gunner. The explosion from a HEAT warhead would render the explosion from the Kontakt-5 meaningless anyway.
As noted above, a new Kontakt-5 box for the roof is available. Closer inspection indicates that it is not simply a repackaged Kontakt-1 module, but a complete departure from it. Let us first take a look at the external differences:
 |
| Kontakt-1 on turret roof |
 |
Close inspection of these boxes when opened gives us an idea of the internal composition:
 |
| T-90A turret equipped with such boxes |
 |
| The new "hex armour" is primarily intended to help deflect APFSDS shells from the turret's peak, which is very steeply sloped but relatively thin (Photo credit: Vitaly Kuzmin) |
There are three Kontakt-5 modules located on either side of the hull. Like the turret top hexagonal boxes, these are a type of explosive bulging armour. They use the same 4S22 explosive elements as the hull and turret modules in their construction. They provide coverage for the entire crew area in a 100-degree frontal arc, as illustrated in the photos below:

| 50 degree view |
The side modules are a type of bidirectional flyer plate. The base is stamped out of sheet steel, with a bolt-on plate measuring approximately 10mm. Once the explosive cells inside are activated, the sheel steel flies off inward, and the bolt-on plate flies off outward. Their ability to confront incoming projectiles is augmented by the 1220 meters of air space behind it and the 160mm of steel armour which is the side armour of the tank (at 30 degrees obliquity). This isn't enough to reliably stop most modern APFSDS shells, but it would at least massively decrease their after-armour potency. Most older APFSDS shells like the L23 and M829 should be handily defeated by this arrangement, but the side panels are totally inadequate for dealing with already obsolete shells like the M829A2.
 |
| Photo credit: Vitaly Kuzmin |
As you can see in the photo above, the front plate is disproportionately thicker than the sheet steel compartment holding the explosive elements. As the obliquity decreases, the plates will begin to lose their effectiveness. If struck perpendicularly, the only effect upon cumulative jets that the module can inflict will be mild destabilization, which can be fully accredited to the explosive insert. They would have little to no useful effect on KE projectiles then.
It is worth noting how easily these modules may be installed. Although the standard configuration is three modules at the front, the entire flank may have them installed with no modification required. Knowing that tank crews often want to live, seeing the sides of T-72s brimming with these modules is very likely during wartime.
Installing Kontakt-5

Inserting the explosive elements into the modules are quite easily done. Once filled, the modules are bolted shut.

The photo above shows the access panels opened. To fill up these, you'd need to insert the explosive elements one by one.
Each hull and turret contains eight such explosive elements in a double stack of four. The side modules contain six individual ones.
 |
| Holding one of the explosive elements. The man is filling the side ERA sections |
As mentioned before, more of these side panels can be installed if deemed necessary. All the preparation necessary is to drill some new holes in the steel spacer plate protecting the fuel tanks on the fender above the track. New side panels can be simply bolted on with no fuss.
Repairing spent modules is as simple as welded a new steel body on and filling it with explosive cells.
"Novel" shells are projectiles that are designed specifically to counter Kontakt-5, such as M829A3 and DM53. Shells like the M829A2 and 120mm DM33 are not "Novel".
Here is a somewhat detailed breakdown:
KE:
Glacis: Legacy < Armour < Novel
Lower plate: 181mm RHA
Sides: 80mm RHA
Hull roof: ~20mm
Hull rear: ~40mm
Hull floor: ~20mm
Turret front: 315mm RHAe ... Legacy < Armour < Novel ... Totally Invulnerable (Mantlet ... Middle ... Far Side)
Turret mantlet: N/A
Turret rear half: 72mm RHA
Turret top edge: ~363mm RHAe
Turret top: 100mm (Guesstimation)
HEAT:
Glacis: 940mm ... 1040mm RHAe
Lower plate: 181mm RHA
Sides: 80mm RHA
Hull roof: ~20mm
Hull rear: ~40mm
Hull floor: ~20mm
Turret front: Immune to single-charge warheads
Turret mantlet: N/A
Turret rear half: 80mm RHA
Turret top edge: Immune to single-charge warheads
Turret top: 110mm RHAe ... 140mm RHAe (vs M42 HE-DP Submunition ... vs M77 HE-DP Submunition)
Spent
With both the Kontakt-5 modules and the bulging armour expended, the modules themselves may still offer some applique protection thanks to its thick steel plating, in addition to a limited spaced armour effect resulting from the cavity between the plates.
KE:
Glacis: 520mm RHAe ... 550mm RHAe ... 520 (1983 ... 1985 ... 1989 (assuming bulging module is also spent))
Lower plate: 181mm RHA
Sides: 80mm RHA
Hull roof: ~20mm
Hull rear: ~40mm
Hull floor: ~20mm
Turret front: 252mm RHAe ... ~550mm RHAe ... ~900mm (Mantlet ... Middle ... Far Side)
Gun mantlet: N/A
Turret rear half: 72mm RHAe
Turret top edge: ~363mm RHAe
Turret top: 20mm RHA (Actual) ... ~30mm RHA (Relative)
HEAT:
Glacis: ~590mm
Lower plate: 181mm RHA
Sides: 60mm RHA
Hull roof: ~20mm RHA
Hull rear: ~40mm RHA
Hull floor: ~20mm RHA
Turret front:
315mm ... ~654mm RHAe ... Totally Invulnerable (Mantlet ... Middle ... Far Side)
Gun mantlet: N/A
Turret rear half: 80mm RHA
Turret top edge: ~404mm RHA
Turret top: 20mm RHA (Actual) ... ~30mm RHA (Relative)
FUEL TANKS AS ARMOUR
Two fuel tanks are located on the two front corners of the hull (flanking the
driver), which extend from the nose of the glacis to almost up to
the turret ring.
Diesel
fuel is very capable as a form of liquid armour. Entering an enclosed liquid medium at high velocities creates shock waves, which reflect from the walls of the fuel tank and back into the penetrator entering it. This can collapse a cumulative jet or absorb the kinetic energy of a penetrator rod after passing through the main armour array. It wouldn't be wrong to consider armoured areas with fuel tanks underneath them to be
essentially immune unless the penetrator overmatches the armour by a factor of 1.2 to 1.5, though
those
same fuel tanks might also be a fire hazard if punctured or compromised. The fuel
tanks do not have thick walls, and they are not foam-filled, and according
to ex-tankers in Chechnya, they will visibly bulge and swell if penetrated by an RPG, though in those cases they were strong enough to not burst or leak. In one incident during battles in Grozny, a T-72 was struck from the side by an RPG or SPG warhead in the driver's station. This T-72 did not have Kontakt-1 installed, but the fuel tank managed to stop the cumulative jet from entering the crew compartment. Therefore, we can quite confidently say that the armour over the driver's station from the side aspect is equivalent to more than 400mm RHAe (with side hull armour and side skirt spacing factored in), which should account for its ability to resist a fairly typical PG-7VS rocket grenade. (Obviously, that is not a definitive value, considering the infinite variety of warheads available). It's possible that the fuel tanks are self-sealing, but this may not be the case. Either way, the T-72 in that incident escaped with very minor damage. Self-sealing or not, the tank was fine.
SMOKESCREEN
The T-72 can either lay its own smokescreen by injecting a fine mist of diesel fuel into the exhaust manifold, or make use of its smoke grenade mortars. The former option is an an ingenious, inexpensive, extremely useful and near-inexhaustible source of anti-IR smoke cover - A little-known fact is that the smoke generated from this method is the temperature as the exhaust, thereby completely masking the tank's thermal signature. The only shortcoming of this system is the time taken to envelop the tank. A large number of battlefield maneuvers revolve around the use of this method of smoke generation for concealment.

Low volume smokescreen while idling

High volume smokescreen while moving
But aside from this, the
T-72 also features the Tucha smoke grenade system. It can launch two types of caseless grenades; the 3D6 and the
3D17. They take advantage of a high-low propulsion system much like 40mm VOG series of grenades to launch them out of their tubes at a relatively low
velocity.
3D6
 The 3D6 smoke grenade emits "normal" smoke that can only obscure the tank in the visual spectrum. This type of grenade has been rendered next to useless with the gaining popularity of thermal imaging sights in the mid-80's, now long supplanted by the 3D17 model. It is of the slow-burning type, emitting smoke from the ground-up. It travels anywhere from 200m to 350m after launch, and it takes between 7 to 12 seconds to produce a complete smokescreen 10m to 30m in width and 3m to 10m in height, depending on various environmental factors like wind speed, humidity, altitude, etc. This is not including the time taken from launch to the grenade actually hitting the ground. This is in accordance with frontal assault tactics where tanks advance and maneuver behind a continual wall of smoke generated every forward 300m until they literally overrun enemy positions. The smokescreen can last as long as 2 minutes, again depending on environmental factors.

3D17
 The 3D17 is an advanced IR-blocking aerosol smoke grenade. It completely obturates the
passage of IR signatures or IR-based light as well as light in the visible spectrum. It is effective at concealment from FLIR sights and cameras as well as at blocking and scattering laser beams for tank rangefinders and laser-homing missiles. Unlike the 3D6, the 3D17 grenade detonates just 1 seconds after launch, allowing it to produce a complete smoke barrier in 3 seconds flat. The drawback to this is that the lingering time of the smokescreen is only about 20 seconds, depending on environmental factors. This is enough for the tank to hastily shift its position, but not much more. This grenade detonates 50m away from the tank.
The 3D17 is an advanced IR-blocking aerosol smoke grenade. It completely obturates the
passage of IR signatures or IR-based light as well as light in the visible spectrum. It is effective at concealment from FLIR sights and cameras as well as at blocking and scattering laser beams for tank rangefinders and laser-homing missiles. Unlike the 3D6, the 3D17 grenade detonates just 1 seconds after launch, allowing it to produce a complete smoke barrier in 3 seconds flat. The drawback to this is that the lingering time of the smokescreen is only about 20 seconds, depending on environmental factors. This is enough for the tank to hastily shift its position, but not much more. This grenade detonates 50m away from the tank.
Glacis: 940mm ... 1040mm RHAe
Lower plate: 181mm RHA
Sides: 80mm RHA
Hull roof: ~20mm
Hull rear: ~40mm
Hull floor: ~20mm
Turret front: Immune to single-charge warheads
Turret mantlet: N/A
Turret rear half: 80mm RHA
Turret top edge: Immune to single-charge warheads
Turret top: 110mm RHAe ... 140mm RHAe (vs M42 HE-DP Submunition ... vs M77 HE-DP Submunition)
Spent
With both the Kontakt-5 modules and the bulging armour expended, the modules themselves may still offer some applique protection thanks to its thick steel plating, in addition to a limited spaced armour effect resulting from the cavity between the plates.
KE:
Glacis: 520mm RHAe ... 550mm RHAe ... 520 (1983 ... 1985 ... 1989 (assuming bulging module is also spent))
Lower plate: 181mm RHA
Sides: 80mm RHA
Hull roof: ~20mm
Hull rear: ~40mm
Hull floor: ~20mm
Turret front: 252mm RHAe ... ~550mm RHAe ... ~900mm (Mantlet ... Middle ... Far Side)
Gun mantlet: N/A
Turret rear half: 72mm RHAe
Turret top edge: ~363mm RHAe
Turret top: 20mm RHA (Actual) ... ~30mm RHA (Relative)
With both the Kontakt-5 modules and the bulging armour expended, the modules themselves may still offer some applique protection thanks to its thick steel plating, in addition to a limited spaced armour effect resulting from the cavity between the plates.
KE:
KE:
Glacis: 520mm RHAe ... 550mm RHAe ... 520 (1983 ... 1985 ... 1989 (assuming bulging module is also spent))
Lower plate: 181mm RHA
Sides: 80mm RHA
Hull roof: ~20mm
Hull rear: ~40mm
Hull floor: ~20mm
Turret front: 252mm RHAe ... ~550mm RHAe ... ~900mm (Mantlet ... Middle ... Far Side)
Gun mantlet: N/A
Turret rear half: 72mm RHAe
Turret top edge: ~363mm RHAe
Turret top: 20mm RHA (Actual) ... ~30mm RHA (Relative)
HEAT:
Glacis: ~590mm
Lower plate: 181mm RHA
Sides: 60mm RHA
Hull roof: ~20mm RHA
Hull rear: ~40mm RHA
Hull floor: ~20mm RHA
Turret front:
315mm ... ~654mm RHAe ... Totally Invulnerable (Mantlet ... Middle ... Far Side)
Gun mantlet: N/A
Turret rear half: 80mm RHA
Turret top edge: ~404mm RHA
Turret top: 20mm RHA (Actual) ... ~30mm RHA (Relative)
FUEL TANKS AS ARMOUR
Two fuel tanks are located on the two front corners of the hull (flanking the driver), which extend from the nose of the glacis to almost up to the turret ring.
Diesel fuel is very capable as a form of liquid armour. Entering an enclosed liquid medium at high velocities creates shock waves, which reflect from the walls of the fuel tank and back into the penetrator entering it. This can collapse a cumulative jet or absorb the kinetic energy of a penetrator rod after passing through the main armour array. It wouldn't be wrong to consider armoured areas with fuel tanks underneath them to be essentially immune unless the penetrator overmatches the armour by a factor of 1.2 to 1.5, though those same fuel tanks might also be a fire hazard if punctured or compromised. The fuel tanks do not have thick walls, and they are not foam-filled, and according to ex-tankers in Chechnya, they will visibly bulge and swell if penetrated by an RPG, though in those cases they were strong enough to not burst or leak. In one incident during battles in Grozny, a T-72 was struck from the side by an RPG or SPG warhead in the driver's station. This T-72 did not have Kontakt-1 installed, but the fuel tank managed to stop the cumulative jet from entering the crew compartment. Therefore, we can quite confidently say that the armour over the driver's station from the side aspect is equivalent to more than 400mm RHAe (with side hull armour and side skirt spacing factored in), which should account for its ability to resist a fairly typical PG-7VS rocket grenade. (Obviously, that is not a definitive value, considering the infinite variety of warheads available). It's possible that the fuel tanks are self-sealing, but this may not be the case. Either way, the T-72 in that incident escaped with very minor damage. Self-sealing or not, the tank was fine.
SMOKESCREEN
The T-72 can either lay its own smokescreen by injecting a fine mist of diesel fuel into the exhaust manifold, or make use of its smoke grenade mortars. The former option is an an ingenious, inexpensive, extremely useful and near-inexhaustible source of anti-IR smoke cover - A little-known fact is that the smoke generated from this method is the temperature as the exhaust, thereby completely masking the tank's thermal signature. The only shortcoming of this system is the time taken to envelop the tank. A large number of battlefield maneuvers revolve around the use of this method of smoke generation for concealment.
 |
| Low volume smokescreen while idling |
 |
| High volume smokescreen while moving |
But aside from this, the T-72 also features the Tucha smoke grenade system. It can launch two types of caseless grenades; the 3D6 and the 3D17. They take advantage of a high-low propulsion system much like 40mm VOG series of grenades to launch them out of their tubes at a relatively low velocity.
3D6
 The 3D6 smoke grenade emits "normal" smoke that can only obscure the tank in the visual spectrum. This type of grenade has been rendered next to useless with the gaining popularity of thermal imaging sights in the mid-80's, now long supplanted by the 3D17 model. It is of the slow-burning type, emitting smoke from the ground-up. It travels anywhere from 200m to 350m after launch, and it takes between 7 to 12 seconds to produce a complete smokescreen 10m to 30m in width and 3m to 10m in height, depending on various environmental factors like wind speed, humidity, altitude, etc. This is not including the time taken from launch to the grenade actually hitting the ground. This is in accordance with frontal assault tactics where tanks advance and maneuver behind a continual wall of smoke generated every forward 300m until they literally overrun enemy positions. The smokescreen can last as long as 2 minutes, again depending on environmental factors.
3D17
 The 3D17 is an advanced IR-blocking aerosol smoke grenade. It completely obturates the
passage of IR signatures or IR-based light as well as light in the visible spectrum. It is effective at concealment from FLIR sights and cameras as well as at blocking and scattering laser beams for tank rangefinders and laser-homing missiles. Unlike the 3D6, the 3D17 grenade detonates just 1 seconds after launch, allowing it to produce a complete smoke barrier in 3 seconds flat. The drawback to this is that the lingering time of the smokescreen is only about 20 seconds, depending on environmental factors. This is enough for the tank to hastily shift its position, but not much more. This grenade detonates 50m away from the tank.
The 3D17 is an advanced IR-blocking aerosol smoke grenade. It completely obturates the
passage of IR signatures or IR-based light as well as light in the visible spectrum. It is effective at concealment from FLIR sights and cameras as well as at blocking and scattering laser beams for tank rangefinders and laser-homing missiles. Unlike the 3D6, the 3D17 grenade detonates just 1 seconds after launch, allowing it to produce a complete smoke barrier in 3 seconds flat. The drawback to this is that the lingering time of the smokescreen is only about 20 seconds, depending on environmental factors. This is enough for the tank to hastily shift its position, but not much more. This grenade detonates 50m away from the tank.
NAKIDKA
Nakidka
is a type of multi-wavelength infrared suppressant camouflage developed in 1971. Contrary to popular belief, the Soviet concept of warfare was centered
around "deep battle" (rather than Zerg rushing), which
greatly depended on "maskirovka" - the art of masking. Implementation of "maskirovka" includes decoys, stealthy operations, concealment and surprise attacks. Nakidka plays an important role in this. It is a textile
"dress" for the tank, which can neutralize the tank's IR signature (except at its exhaust outlet) and
reduce its radar cross-section in addition to presenting a totally non-reflective camouflaged surface, thus drastically reducing the tank's likelihood of being detected in the visual and non-visual spectrums.
Nakidka is resistant to napalm and is unaffected by machine gun fire, though it is possible to destroy it with high-explosives. Still, the point of Nakidka is to prevent the tank from being spotted in the first place. It holds up fine against indiscriminate area weapons. A full suit of Nakidka only adds several dozens of kilograms to the tank's overall weight.
ESCAPE HATCH
An
important survivability feature of the T-72 is the inclusion of a floor
escape hatch.
The (rather small) hatch is located directly behind the driver's seat,
and therefore
most easily accessible by him. The gunner and commander can get to the
hatch as well, but they have to be very, very flexible in order to do so unless the turret is traversed to the rear.
Nevertheless, it is indispensable in certain situations, allowing crew
members to escape the tank if it is flipped over, or if the engine
stalls
and cannot be revived quickly enough underwater. The hatch is strong enough that it does not compromise the integrity of the hull against a 6kg to 10kg anti-tank blast mine detonated under the tracks.

Note how the hatch has additional armour


The hatch is way too small to let anyone wearing winter clothes, and more rotund tankers will obviously find it impossible to exit through it. The
hatch is fully air-tight, and drops out to open. The hatch is as thick as the rest of the hull floor, and is held in very, very firmly in place by four locks.
NBC PROTECTION SUITE
Soviet designers were very conscious of the dangers of nuclear warfare, especially artillery-fired tactical nukes. The T-72 perfectly reflected their seriousness, featuring a comprehensive air filtration system, overpressure generation system and radiation sensors paired with automatic tank sealing mechanisms. A radiation lining shielded the occupants from neutrons from gamma radiation.
The GO-27 sensor and automatic sealing system is responsible for detecting nuclear and chemical particles and for initiating the lockdown protocol, which sealed every gap and port exposing the interior of the tank to the outside environment and also activate the air filtration system.

Climate control is handled by the FVU filtration and ventilation system.
PKUZ-1A Digitized Protection Suite
The PKUZ-1A was introduced relatively recently as a way to improve the reaction time of the protection systems while simultaneously upgrading the quality of the interior ventilation and climate control systems for the comfort of the occupants.
NAKIDKA
Nakidka is a type of multi-wavelength infrared suppressant camouflage developed in 1971. Contrary to popular belief, the Soviet concept of warfare was centered around "deep battle" (rather than Zerg rushing), which greatly depended on "maskirovka" - the art of masking. Implementation of "maskirovka" includes decoys, stealthy operations, concealment and surprise attacks. Nakidka plays an important role in this. It is a textile "dress" for the tank, which can neutralize the tank's IR signature (except at its exhaust outlet) and reduce its radar cross-section in addition to presenting a totally non-reflective camouflaged surface, thus drastically reducing the tank's likelihood of being detected in the visual and non-visual spectrums.
Nakidka is resistant to napalm and is unaffected by machine gun fire, though it is possible to destroy it with high-explosives. Still, the point of Nakidka is to prevent the tank from being spotted in the first place. It holds up fine against indiscriminate area weapons. A full suit of Nakidka only adds several dozens of kilograms to the tank's overall weight.
ESCAPE HATCH
An important survivability feature of the T-72 is the inclusion of a floor escape hatch. The (rather small) hatch is located directly behind the driver's seat, and therefore most easily accessible by him. The gunner and commander can get to the hatch as well, but they have to be very, very flexible in order to do so unless the turret is traversed to the rear. Nevertheless, it is indispensable in certain situations, allowing crew members to escape the tank if it is flipped over, or if the engine stalls and cannot be revived quickly enough underwater. The hatch is strong enough that it does not compromise the integrity of the hull against a 6kg to 10kg anti-tank blast mine detonated under the tracks.
 |
| Note how the hatch has additional armour |


The hatch is way too small to let anyone wearing winter clothes, and more rotund tankers will obviously find it impossible to exit through it. The hatch is fully air-tight, and drops out to open. The hatch is as thick as the rest of the hull floor, and is held in very, very firmly in place by four locks.
NBC PROTECTION SUITE
Soviet designers were very conscious of the dangers of nuclear warfare, especially artillery-fired tactical nukes. The T-72 perfectly reflected their seriousness, featuring a comprehensive air filtration system, overpressure generation system and radiation sensors paired with automatic tank sealing mechanisms. A radiation lining shielded the occupants from neutrons from gamma radiation.
The GO-27 sensor and automatic sealing system is responsible for detecting nuclear and chemical particles and for initiating the lockdown protocol, which sealed every gap and port exposing the interior of the tank to the outside environment and also activate the air filtration system.

Climate control is handled by the FVU filtration and ventilation system.
PKUZ-1A Digitized Protection Suite
The PKUZ-1A was introduced relatively recently as a way to improve the reaction time of the protection systems while simultaneously upgrading the quality of the interior ventilation and climate control systems for the comfort of the occupants.
ANTI-RADIATION CLADDING AND LINER
Anti-radiation
measures have been among the top priorities regarding crew protection,
no less important than solid armour itself, given the nuclear
environment that the T-72 was expected to thrive in. In accordance with
this requirement, the T-72 has had an interior anti-radiation lining
since the very beginning. All interior surfaces are furnished with this
lining, which is 20mm thick.

The liner is composed of borated polyethylene - a type of high-density
polyethylene infused with boron - woven into fibers and made into sheets, which are then laminated and molded to fit around the curves of the tank using a heat gun, and then topped off with some sort of resin for weather protection. Boron is known to be extremely
effective at capturing neutrons thanks to its large absorption cross
section, making it suitable for use as radiation shielding. The fibrous construction of the sheets and the lamination process also makes it a suitable spall liner not dissimilar to early flak vests that used woven nylon plates.
The
1983 model of the T-72A received anti-radiation cladding all around the
occupied regions of the turret. It is 50mm thick in most places, including the turret cladding, most of the turret's interior, the side hull exterior, the hull's interior and most of the hatches. The lining for the driver's hatch is 20mm thick. T-72Bs received this cladding almost immediately after
introduction, and are never seen without it.

20mm cladding on the turret exterior

The rear of
the turret is almost completely covered with the anti-radiation
cladding
The commander's hatch is liberally cladded with the cladding, and so is the gunner's hatch.

And the stub ejection port is obscenely covered both inside and outside with the anti-rad layer:

The stub ejection hatch is itself already around 20mm thick, or 28mm when inclined at 45 degrees
The lining and cladding not only function as neutron absorbers, but
they perform admirably as a form of spall liner as well. According to Swedish trials of purchased
ex-East German T-72M1s, it was concluded that the anti-radiation liner
was perfectly capable of absorbing secondary fragments of penetrating
cumulative jets, not only spall.
Spall liners, depending on their efficacy, may reduce the spray cone
angle of secondary fragments from a HEAT warhead by up to 50% or more if armour is
greatly overmatched on the basis of their presence alone, and it is possible reduce secondary fragments by up to 80% or even to
absorb all secondary fragments if the armour is not significantly overmatched. The T-72's lining and cladding should have good performance due
to its substantial thickness both inside and outside. In fact, this feature has helped to saved lives in at least one incident:

In this instance, the T-72 was hit in the flank by an RPG attack which also blew off a part of the port side storage bins. The crew survived and the tank only suffered from a minor puncture wound thanks to the spaced armour effect provided by the bins in tandem with the extensive anti-radiation cladding and lining of the T-72
The presence of the lining is a huge factor in the preservation of the carousel ammunition in case of armour perforation, especially from the side.
But that's not all, due to
boron's large surface area-volume ratio, it does quite well at absorbing
blast waves, thus mitigating the effects of blast damage.
FIREFIGHTING
To prevent the spreading of internal fires in the engine and crew compartments, the 3ETs11-2 quick-acting firefighting system was installed. There are 12 TD-1 thermal sensors strategically placed in the engine compartment and crew compartment. The fire fighting system reacts regionally when a rise of temperature to 150°C is detected in the crew compartment or engine compartment. The reaction time for both the crew compartment and engine compartment is painfully slow at 10 seconds, meaning that it takes 10 seconds between detecting a rise in temperature to actually deploying the fire extinguishers. This is an anti-false alarm measure. Alternatively, the driver can manually activate the fire extinguishers wired to the automatic firefighting system from a red control panel to his right. There is also an additional manual fire extinguisher to the driver's left foot.


Two handheld OU-2 carbon dioxide fire extinguishers are also provided to supplement the automatic fire extinguisher system. If the TD-1 fire detectors fail to respond (usually in the case of small flames), then these will be the only firefighting tools available to the crew, if the driver opts not to manually activate the extinguishers connected to the 3ETs11-2 system.

ENTRENCHMENT DOZER BLADE

An a
self-entrenchment blade is provided at the lower front hull of the tank.
It is secured by two rotating latches, which need only to be turned
with a wrench by a crew member for the dozer blade to be usable.
Needless to say, it is an invaluable tool for self-fortification,
allowing the tank to create a hull-defilade when natural cover is
unavailable, or even augment existing cover with additional barriers.

Bolted

Unbolted
With the dozer blade, the T-72 can create a soil
barrier in front of itself from even ground in about 20 minutes or
more, much less if on uneven ground, but depending on meteorological conditions. On snowed-over terrain, a
snowbank may be created in as little as 5 minutes to help conceal the tank.
STORAGE
The T-72 is furnished with a plethora of containers intended for the storage of various things. The most glaringly obvious ones are the two large bins located around the rear arc of the turret. These are used for storing the crews' personal effects as well and other accessories.

Rearmost 3-part bin

Bin hinged out to clear the engine access panel below

The second storage bin to the rear right side of the turret


There is also bank of 4 storage bins on the port side of the hull, directly above the tracks.


These port side storage bins are usually used to store maintenance equipment and spare parts.

Anti-radiation
measures have been among the top priorities regarding crew protection,
no less important than solid armour itself, given the nuclear
environment that the T-72 was expected to thrive in. In accordance with
this requirement, the T-72 has had an interior anti-radiation lining
since the very beginning. All interior surfaces are furnished with this
lining, which is 20mm thick.

The liner is composed of borated polyethylene - a type of high-density polyethylene infused with boron - woven into fibers and made into sheets, which are then laminated and molded to fit around the curves of the tank using a heat gun, and then topped off with some sort of resin for weather protection. Boron is known to be extremely effective at capturing neutrons thanks to its large absorption cross section, making it suitable for use as radiation shielding. The fibrous construction of the sheets and the lamination process also makes it a suitable spall liner not dissimilar to early flak vests that used woven nylon plates.
The 1983 model of the T-72A received anti-radiation cladding all around the occupied regions of the turret. It is 50mm thick in most places, including the turret cladding, most of the turret's interior, the side hull exterior, the hull's interior and most of the hatches. The lining for the driver's hatch is 20mm thick. T-72Bs received this cladding almost immediately after introduction, and are never seen without it.
 |
| 20mm cladding on the turret exterior |
 |
| The rear of the turret is almost completely covered with the anti-radiation cladding |

And the stub ejection port is obscenely covered both inside and outside with the anti-rad layer:
 |
| The stub ejection hatch is itself already around 20mm thick, or 28mm when inclined at 45 degrees |
The lining and cladding not only function as neutron absorbers, but they perform admirably as a form of spall liner as well. According to Swedish trials of purchased ex-East German T-72M1s, it was concluded that the anti-radiation liner was perfectly capable of absorbing secondary fragments of penetrating cumulative jets, not only spall. Spall liners, depending on their efficacy, may reduce the spray cone angle of secondary fragments from a HEAT warhead by up to 50% or more if armour is greatly overmatched on the basis of their presence alone, and it is possible reduce secondary fragments by up to 80% or even to absorb all secondary fragments if the armour is not significantly overmatched. The T-72's lining and cladding should have good performance due to its substantial thickness both inside and outside. In fact, this feature has helped to saved lives in at least one incident:
 |
| In this instance, the T-72 was hit in the flank by an RPG attack which also blew off a part of the port side storage bins. The crew survived and the tank only suffered from a minor puncture wound thanks to the spaced armour effect provided by the bins in tandem with the extensive anti-radiation cladding and lining of the T-72 |
But that's not all, due to boron's large surface area-volume ratio, it does quite well at absorbing blast waves, thus mitigating the effects of blast damage.
FIREFIGHTING
To prevent the spreading of internal fires in the engine and crew compartments, the 3ETs11-2 quick-acting firefighting system was installed. There are 12 TD-1 thermal sensors strategically placed in the engine compartment and crew compartment. The fire fighting system reacts regionally when a rise of temperature to 150°C is detected in the crew compartment or engine compartment. The reaction time for both the crew compartment and engine compartment is painfully slow at 10 seconds, meaning that it takes 10 seconds between detecting a rise in temperature to actually deploying the fire extinguishers. This is an anti-false alarm measure. Alternatively, the driver can manually activate the fire extinguishers wired to the automatic firefighting system from a red control panel to his right. There is also an additional manual fire extinguisher to the driver's left foot.


Two handheld OU-2 carbon dioxide fire extinguishers are also provided to supplement the automatic fire extinguisher system. If the TD-1 fire detectors fail to respond (usually in the case of small flames), then these will be the only firefighting tools available to the crew, if the driver opts not to manually activate the extinguishers connected to the 3ETs11-2 system.

ENTRENCHMENT DOZER BLADE

An a self-entrenchment blade is provided at the lower front hull of the tank. It is secured by two rotating latches, which need only to be turned with a wrench by a crew member for the dozer blade to be usable. Needless to say, it is an invaluable tool for self-fortification, allowing the tank to create a hull-defilade when natural cover is unavailable, or even augment existing cover with additional barriers.
 |
| Bolted |
 |
| Unbolted |
STORAGE
The T-72 is furnished with a plethora of containers intended for the storage of various things. The most glaringly obvious ones are the two large bins located around the rear arc of the turret. These are used for storing the crews' personal effects as well and other accessories.
 |
| Rearmost 3-part bin |
 |
| Bin hinged out to clear the engine access panel below |
 |
| The second storage bin to the rear right side of the turret |


There is also bank of 4 storage bins on the port side of the hull, directly above the tracks.


These port side storage bins are usually used to store maintenance equipment and spare parts.

MOBILITY
 The T-72 followed the T-64 in breaking the mold on the standards of mobility in the face of the need to compromise between the "Big Three"; Firepower, Protection and Mobility. The T-72 had the world's most powerful gun, world's best armour, and was also among the world's fastest tanks at the time. Its on and off road performance rivaled the speed-centric but paper-thin Leopard 1 and AMX-30, outmatched the heavily armoured tottering Chieftain and Challenger tanks and greatly outpaced the sluggish and all-around underperformer M60 series, all while weighing and costing less than any of them.
The T-72's superior engine power and light weight meant that it could not only traverse difficult terrain, but that it could safely cross low-capacity bridges and make good use of the thousands of tactical bridge layers in Soviet army service, even including the ones derived from the then-already-antiquated T-54.
Swedish trials of T-72M1s and MTLBs in Northern Norrland between 1992 and 1994 yielded very positive results. The T-72s in question displayed good performance over snow as deep as 0.8m, though it still failed at times to reliably traverse frozen ice banks, though it can be argued that that was because of the inexperience of the Swedish test drivers. Still, it managed to pull off a few impressive feats such as leaping an 8m gap by slamming into a 1.5 meter-tall snow bank:


Keep in mind, the T-72M1 is only equipped with the baseline V-46-6 engine.
ENGINES
The T-72 has been host
to several engines over the years, starting with the V-46, evolving
into the V-84, and finally the V-92. All of the T-72 engines to date are V-12 4-stroke diesel multifuels. They are able to consume
gasoline (A-66 and A-72), diesel and jet fuel (T-1, TS-1 and T-2). The
driver can set what type of fuel the engine will run on by simply setting a
dial.
The main method of starting the engine is via an electric starter. In
emergency situations or in exceptionally cold weather, the engine can be
started with the tank of compressed air located left of the driver's
feet, or even perhaps in the "old fashioned way" by towing. It takes around 20 minutes to start the engine in extremely cold weather, which is much longer than the 3 minutes needed by the GTD-1000T gas turbine engine used on the T-80, but diesel piston engines have their own advantages.

Air canister for compressed air starting system
The V-46 engine and its derivatives are exceptionally reliable, more so than some foreign rivals such as the modern day Perkins CV12 that powers the Challenger 2, or the infamously bad Leyland L60 that drives the Chieftain tank, widely considered the premier NATO tank of the 60's and 70's.
Piston engines offer several crucial advantages over gas turbine engines, but as with all things, several disadvantages as well. For one, piston engines are invariably more economical in typical combat scenarios. This meant that the T-72 could be shrunk down to its present size and still be able to travel further and fight longer than a contemporary with a gas turbine engine could with the same load of fuel. On the negative side, piston engines can never attain the same low speed performance as a gas turbine, though some modern examples do come close.
On the negative side, piston engines burn much less cleanly than gas turbines. Discrete unburnt particles of fuel with lots of heat energy are usually expelled along with the hot air of the exhaust, in contrast to the very hot but very clean gasses expelled from a turbine engine. For some very smoky engines, this can create a telling heat signature that can be detected miles away, if the rest of the tank were somehow invisible. More modern piston engines can burn quite cleanly, but never to the level of a gas turbine, and while this may be a disadvantage, it may also prove to be quite the opposite in some cases.
Unlike a piston engine, most gas turbine engines cannot safely generate a smokescreen by injecting fuel into the outlet for fear of a potentially explosive result. Also, while a piston engine may create more noticeable emissions, a gas turbine will literally burn anything behind its outlet. In fact, there was one notable incident where an Abrams tank was set afire by a comrade tank towing it.

Apparently, the driver's hatch was accidentally left open, and the exhaust gasses were so hot (a Honeywell brochure states that the temperature is as high as 499°C) that they set the plastic and rubber furniture and wiring on fire, which spread throughout the tank. It isn't so difficult to imagine that the gas turbine engines on the T-80 and Abrams, for example, could even be a potential fire hazard while traveling across dry vegetation, and if either of them idled for just a few seconds on one spot, patches of that area would themselves glow white in the sights of a thermal camera. This is particularly apparent during the winter, when high contrast can be easily created on snowed-over ground to create a visible thermal footprint. Indeed, gas turbines are so hot that it is impossible for a soldier to follow behind. Doing so could result in 2nd degree burns within a few seconds, and 3rd degree burns in the seconds thereafter. Cooling the expelled hot air is done on most tanks utilizing gas turbines, but these are only marginally effective at best.
And finally, gas turbine engines not only spew hot air, but they do it at high speeds. This air can potentially kick up dust in very dry weather, even while the tank is stationary.
V-46-4 / V-46-6
 The
V-46 liquid-cooled engine is the baseline engine for the T-72 series,
first appearing on the T-72 Ural and then the T-72A. It traces its roots
to the V-2 which once powered the legendary T-34. True to its
remarkable origin, it has a remarkable power density, far above
its competitors such as the; MB 837, which powered the Leopard 1 series, AVDS-1790-2A,
which powered the M60 tank series, and even the "lightweight"
opposed-piston Leyland L60 series, which powered the Chieftain tank.
When compared: AVDS-1790-2A - 0.324, MB 837 - 0.426, Leyland L60 - 0.535, V-46 - 0.795, the V-46 comes out on top. Overall, the V-46 and all its descendants are unquestionably robust, dependable engines in every way. A disadvantage of this engine is the amount of smoke it produces, which may expose its position to enemies equipped with thermal imagers.
The
V-46 liquid-cooled engine is the baseline engine for the T-72 series,
first appearing on the T-72 Ural and then the T-72A. It traces its roots
to the V-2 which once powered the legendary T-34. True to its
remarkable origin, it has a remarkable power density, far above
its competitors such as the; MB 837, which powered the Leopard 1 series, AVDS-1790-2A,
which powered the M60 tank series, and even the "lightweight"
opposed-piston Leyland L60 series, which powered the Chieftain tank.
When compared: AVDS-1790-2A - 0.324, MB 837 - 0.426, Leyland L60 - 0.535, V-46 - 0.795, the V-46 comes out on top. Overall, the V-46 and all its descendants are unquestionably robust, dependable engines in every way. A disadvantage of this engine is the amount of smoke it produces, which may expose its position to enemies equipped with thermal imagers.
Output: 780 hp
Rated speed: 2000 rpm
Idle speed: 800 rpm
Fuel Consumption: 1 g / 245 kWh or 1 g / 180hp.h
Torque back up: 9% ... 18%
Weight: 980 kg
T-72 Ural and T-72A power to weight ratio: 18.1 hp/ton
The exhaust port for this engine is characteristically long and narrow. It has very rudimentary sheet steel cooling vanes on top.

With this engine, the T-72 Ural and T-72A both have a top speed of 60km/h on asphalt, and sets an average speed of 35 to 40km/h on dirt roads.
The V-46-4 is the variant which the T-72 Ural uses, while the V-46-6 with slight modifications to the placement of oil containers is used in the T-72A.
V-84-1 / V-84MS
 The V-84 supercharged engine differs from its predecessor
mainly with an increase in output, paired with an insignificant weight
gain. The engine has a centrifugal gear-driven supercharger. The increased power offsets the T-72B's added weight, allowing it to remain as nimble as its predecessors. This engine is much less smoky than the V-46 because the higher oxygen levels in the combustion chamber allowed all of the fuel particles to be consumed, producing more energy, but due to the increased energy of combustion, the exhaust gasses expelled from the engine is considerably hotter than that from the V-46 engines.
The V-84 supercharged engine differs from its predecessor
mainly with an increase in output, paired with an insignificant weight
gain. The engine has a centrifugal gear-driven supercharger. The increased power offsets the T-72B's added weight, allowing it to remain as nimble as its predecessors. This engine is much less smoky than the V-46 because the higher oxygen levels in the combustion chamber allowed all of the fuel particles to be consumed, producing more energy, but due to the increased energy of combustion, the exhaust gasses expelled from the engine is considerably hotter than that from the V-46 engines.
Output: 840 hp
Rated speed: 2000 rpm
Idle speed: 800 rpm
Fuel Consumption: 247 g/kWh or 182 g/hph
Torque back up: 6% ... 18%
Weight: 1020 kg
T-72B, T-72B1, T-72BA power to weight ratio: 18.87 hp/ton
T-72B3 power to weight ratio: 18.2 hp/ton
The exhaust port for the V-84 is identical to the V-46's.
Like previous variants, the T-72B has a top speed of 60km/h on asphalt, and an average speed of 35 to 40km/h on dirt roads. This remains mostly unchanged even with the burdensome Kontakt-5 installed. Most T-72B3s are equipped with this engine.
V-92SF
 The V-92SF turbocharged
multifuel engine is an outstanding piece of machinery, boasting a very
impressive power density of 1.02 hp/kg combined with high standards of reliability. In fact, the output to weight ratio is superior one of its
more high-profile contemporaries; the (massive) German V-12 turbocharged diesel MB-873 Ka501, which powers the Leopard 2 series of MBTs. In
a somewhat ironic comparison, the British CV-12-1000 TCA produced by
Perkins for the Czech T-72M4CZ has an output of 1000 hp, but
weighs a just a hair under a ton more at 2000kg because of attached accessories.
The V-92SF turbocharged
multifuel engine is an outstanding piece of machinery, boasting a very
impressive power density of 1.02 hp/kg combined with high standards of reliability. In fact, the output to weight ratio is superior one of its
more high-profile contemporaries; the (massive) German V-12 turbocharged diesel MB-873 Ka501, which powers the Leopard 2 series of MBTs. In
a somewhat ironic comparison, the British CV-12-1000 TCA produced by
Perkins for the Czech T-72M4CZ has an output of 1000 hp, but
weighs a just a hair under a ton more at 2000kg because of attached accessories.
The increased torque reserve greatly improves driving characteristics
across rough terrain and the fuel
efficiency has been substantially increased, boosting the T-72's already
excellent fuel economy to a new high. The engine is virtually smokeless.
Output: 1130 hp
Rated speed: 2000 rpm
Idle speed: 800 rpm
Fuel Consumption: 215 g/kWh or 158 g/hph
Torque back up: 25% ... 30%
Weight: 1100 kg
T-72B4 power to weight ratio: 21.73 hp/ton
Variants outfitted with the V-92SF can be identified by the heavily modified exhaust unit, now much fatter and with much more extensive cooling vanes.


The cooling vanes comprise only half of the exhaust cooling system. The vanes help keep the exhaust outlet itself cool (or at least, as cool as you'd expect for the exhaust outlet of a 1130 hp engine), acting as radiators. There are port holes in the exhaust pipe, which has another external pipe wrapped around it. Air is forced through the vanes and into the external pipe by a pressure differential caused by the high velocity of the exhaust gasses - exactly the same in concept to a Bunsen burner - and the air enters the exhaust stream, thus lowering its temperature to a certain extent.
The use of the V-92SF on the T-72B4 boosts its top speed to a blistering 75 km/h on paved roads and allows it to cruise cross-country at a speed of up to 60 km/h on dirt roads. This elevates the T-72B3's mobility to the level of the T-80U or the M1A2 Abrams speed-wise, and gives it parity cross country despite the use of a gas turbine engine on the latter.
The MS-1 cyclone air filter used with
all of the V-series is adequate for most environments. It requires a filter change once every 300km traveled under extremely dusty conditions.
The T-72's engine deck is taken up by the engine access panel, the engine's air intake, radiator/air intake and the cooling system air outlet. All of them except the engine air intake have armoured covers to protect them from bullets and shrapnel coming from above.

Left and right sides. Engine access panel up front, radiator/air intakes behind it (with armoured covers), and cooling system air outlet behind that (again with armoured covers)
The engine can be easily removed with the help of a 1-ton crane, which can be found at even the most modest depots. In the field, engine replacements are done with the help of engineering vehicles.

Engine access panel hinged open.
However, the T-72's engine is not integrated as part of a powerpack, like on the Leopard 2. Powerpacks are far more convenient to replace, and they nullify any additional effort needed to replace the transmission assembly. It could take more than an hour to replace both the engine and transmission, compared with only about 35 minutes or less for more modern vehicles, like the Leopard 2.

Air intake for V-46 engine, tucked away discreetly behind the turret

Modified air intake for V-84 engine
The liquid cooling system is of a convection type. It works with water and air, used to cool hot coolant oil that is pumped around the engine. The coolant oil first runs up to the radiator unit, where it is cooled by water flowing in a labyrinth of aluminium fins with turbulators, which is itself cooled by flowing air being sucked in by an engine-driven fan at the rear of the engine compartment. The unwanted hot air is pulled into the fan and ejected out of the rearmost outlet in an upwards direction.

The biggest drawback of this system is that dust particles in the air from driving at high speed may be sucked up by the high velocity of the ejected air, thus creating a distinctive "rooster tail" dust cloud behind the tank. It is possible for an observant enemy to detect and distinguish a T-72 from long distances through this method, as if the dust kicked up by the tracks wasn't enough.
All reports indicate that this system is quite limited - sufficient for European climates at best. It was designed to work with no loss in efficiency at an ambient temperature of up to 25° C, but the engine will begin to experience marginal reductions in performance at temperatures exceeding that. Overheating becomes a major issue in ambient temperatures of up to 50° C, which is sometimes recorded at the Thar desert in India. At temperatures above 45° C, the engine will begin to suffer huge reductions in performance (up to 33% loss of power). At such temperatures, the tank must be stopped after travelling 25km to prevent excessive engine wear. The simplest solution, as practiced by most tank crews, is to remove the armoured covers, which helps to improve air intake volume to improve cooling capacity.
Apparently, the V-92 engine series and its accompanying modifications have partially solved the overheating issue. Specific details are not known to the author, but it could only either be an increase in the centrifugal fan's power, or a simple modification of the water flow channels in the radiator, as Indian T-72s and T-90Ss have.

Radiator cover removed, exposing the protective louvers within

Cooling system air outlet. Armoured covers for it are removed, but not for the radiator in front of it

Engine compartment with cooling pack and engine access panel removed. Note the crossbar to hinge both of the aforementioned accessories. Also note the centrifugal fan at the bottom left corner. It is directly powered by the engine, and thus increases or decreases its speed in accordance with the engine's requirements. It is strong enough to throw water out of the engine compartment like a blowhole even while idling. In front of the engine is a large fuel tank, separated from the crew compartment by an armoured bulkhead.
As you can see, the engine compartment is quite hollow. 40% of its volume is empty space for air flow, and the outer armoured plate of the cooling fan outlet plus the partition between it and the engine compartment can act as spaced armour to defend the engine from rear autocannon attacks, particularly from aircraft.

Centrifugal fan
Maintaining or replacing the cooling pack is quite simple, since the entire unit can be hinged open.

Cooler pack hinged open
The louvers that protect the radiator inlet, cooling fan outlet and engine air intake can all be shut or opened with the press of a button from the driver's station. Closing these louvers can help protect from attacks coming in various forms, from molotov cocktails to autocannon shells raining from the skies. With the louvers closed and the armoured cover on, the radiator and engine access panel, the largest and most obvious parts of engine deck, can in fact become immune to hits from various aircraft cannonfire from low angles of attack. Examples include 20x110mm AP-I rounds from A-1 Skyraiders, the USAF's main ground attack plane in the early-mid stages of the Cold War, or 20x102mm AP-I rounds fired from AH-1 Cobras and in many fixed wing aircraft such as the F-4 Phantom and F-16, which may be used ad hoc for the close air support role, or 30x113mm AP-I rounds fired from modern-day AH-64 Apaches, or even 30x173mm AP-I shells fired from the mythical GAU-8 on an A-10.

The photo above shows the engine access panel and armoured cover hinged open. Note the spaced armour arrangement. Note the thickness. Since ground attack aircraft and attack helicopters almost never fly at high altitudes to deliver cannon attacks, the armour is more than enough to deflect hits from all manner of cannon fire. A-10 pilots are trained to approach targets at an angle of attack of around 3°. Adding 20-odd degrees won't change much.
The T-72 uses a hydraulically assisted mechanical syncromesh transmission with dual planetary gearboxes and dual final drives. There are seven forward gears and one reverse gear. The brakes are of a disk type, hydraulically operated. The T-72 turns on a false pivot, meaning that to turn the tank on the spot, one of the two the tracks are locked in place while the other drives the tank around it. This system of neutral steering is mechanically simple, but vastly inferior to a pivot-type steering system where one of the tracks is run at the desired speed while the other is run slighy slower in the opposite direction. Besides being slower, false pivot steering creates a huge amount of friction and places more strain on the inactive track, leading to a quicker gradual weakening of the track and a slightly shorter lifespan.
A little-known fact is that with the mud guards on, it is perfectly true that the T-72 can only climb vertical obstacles measuring around 0.85m in height, but when they are removed, the T-72 can scale obstacles at least as tall as 1.2m (already taller than the tracks) or much more. The GIF below shows the tank literally climbing straight up a concrete wall by digging its tracks in.

(From 1992-1994 Swedish trials in Northern Norrland). Video credit goes to Ren Hanxue from the Swedish Tank Archives blog.
AUXILIARY POWER UNIT
The T-72 can mount an APU, but only the command variants have one. The T-72AK and
T-72BK were both equipped with an AB-1 petrol generator, producing 1kW.
SUSPENSION

The T-72 uses full-length torsion bar suspension. Each wheel has its own torsion bar, which runs across the hull floor and to the other end of the hull. The front two torsion bar-wheel hub interfaces have reinforced bolts, since the T-72 is slightly front heavy and so they will bear the brunt of the tank's weight during forward movement, especially across pot-holed ground.
There are six 750mm aluminium alloy roadwheels with 3 return rollers per each
side. The roadwheels are die-cast, with thick rubberized rims. The wheels weigh 180kg each. The T-72 Ural used an 8-spoked wheel design (pictured), but all subsequent models used a 6-spoked wheel.
The first, second and sixth roadwheel on both sides are augmented with hydraulic shock absorbers. Like with the reinforced interfaces, the front two shock absorbers are needed to dampen the tank's movement dynamics across rough terrain, while the rearmost shock absorber is intended for assisting recuperation after driving through dips and bumps. This is necessitated by the tank's nose heaviness and forward momentum, which puts great strain on the front two roadwheels, particularly when driving cross-country.


The T-72 first came with single-pin RMSh tracks measuring 580mm in width. These tracks have rubber bushings that help reduce vibrations and thus, reduce wear and tear as well as noise levels (though still relatively high). A full set weighs just over 1700 kg.


Old drive sprocket
Newer UMSh dual-pin tracks are available, again measuring 580mm. Usage of the newer tracks
requires modified drive sprockets to be installed beforehand. Thus, only the newer modifications of the T-72 have this installed, like the T-72B2 and B3, though some T-72BAs have it as well. The main attraction of this track is the ability to install asphalt-friendly rubber pads. These tracks are less noisy as well. An entire set weighs just a hair under 1800kg.


New tracks and new drive sprocket

Rubber pads installed (Photo credit: Vitaly Kuzmin)
There is a simple mud scraper bolted on to the hull rear to prevent loss of traction from excess soil, especially sticky mud.


Removing rubber pads on T-90
Throughout the T-72's evolution, it has "fattened up" somewhat, gaining
the most weight in the T-72B upgrade. While the T-72 Ural and T-72A both
weighed 41 and 41.5 tons respectively, the T-72B tipped the scales at
44.5 tons. The T-72BM weighs 46 tons thanks to its Kontakt-5 package, and Kontakt-1 adds around 1.2 tons.
The T-72 Ural and T-72A exerted 0.83kg/sq.cm of ground pressure, while
the T-72B, being heavier, put in 0.898kg/sq.cm of pressure. Compared to
its immediate foreign counterparts, the T-72 had little to no advantage
in soft terrain, despite being a great deal lighter than all of its
adversaries. Against the Chieftain, Leopard 1 and M60A1 of its era, the
T-72 Ural and T-72A fared slightly better in this respect, but the T-72B
was neither better nor worse off than its more modern challengers like
the Leopard 2, Challenger 1, M60A3 and the M1 Abrams. The weight
discrepancy doesn't manifest in this regard, but it suddenly becomes
apparent when we consider the infrastructure of Eastern Europe at the
time, especially the bridges - both permanent and temporary ones - that a
huge advantage lays in the fact that the T-72 remains light enough to
cross many of the more modest bridges and be compatible with the weight
limit of the old MTU-55 bridge layers and TMM truck-based bridge layers,
both of which were and still are present in huge numbers.
If the T-72 were to be trapped in swamps, bogs or in extremely deep snow, it may escape with the help of the eponymous log.

By
tying the log to track pins on both right and left tracks as
illustrated below, the tracks will pull the log under the roadwheels,
thus forcing that section of the track to rise above the mud while
simultaneously giving the track something more solid to drive over. This
allows the tank to get out of the hairiest situations.


WATER OBSTACLES
The T-72, like all post-war Soviet tanks, has exemplary water crossing
capabilities. Safe fording depths are usually cited to be 1.2m, but water obstacles measuring up to 1.8m deep may be forded
for short distances if necessary. Doing so will require the air intakes
to be shut off, since the water level would be above the hull. With
the installation of the proprietary OPVT snorkel, fording up to a depth of
5m is possible. Pre-fording
preparations are necessary in order to do so, requiring the edges of all
hatches and the openings of various equipments and periscopes to be coated with a thick
resinous waterproofing paste beforehand, as the water pressure at such
depths is simply too much for rubber seals to handle.

The driver must then reset the fuel pump which doubles as a bilge pump. It is located to his lower left side.
The snorkel "breathes" for all three occupants. It is installed on the
gunner's hatch, through a circular porthole, visible in this picture:

Because the hatch can be simply swung open, installing the snorkel is not difficult. The snorkel comes with two floating markers to indicate the tank's position underwater to help rescue teams locate the tank if it has stopped underwater.


Preparing for underwater driving in an exercise
Also, the exhaust port must be replaced with a special valve bank to prevent water from entering into the exhaust manifolds.

T-72s equipped with the V-92S2 or V-92SF engines must use different valve units.
Crew members are each given a closed-circuit IP-5 rebreather for emergency use. It comprises a watertight, form fitting gas mask, a chemical respirator chamber containing potassium superoxide (KO2), and a flotation collar. The rebreather uses the chemical reaction between potassium superoxide and carbon dioxide, activated by water from the user's breath reduce the former two to oxygen and potassium carbonate. The freshly produced oxygen gas is mixed into the previously exhaled breath to replenish its oxygen concentration for rebreathing. The crew usually puts the IP-5 on before entering water as a precautionary measure.

IP-5
ROAD ENDURANCE
All T-72s have a total internal fuel capacity of 705 liters, spread across
several fuel cells excluding the ubiquitous fuel drums to the rear. Two tanks are located on the forward
hull on either side of the driver. Another conformal fuel tank is located directly behind the right frontal fuel tank. It also performs as a shell rack, and so does the conformal fuel tank directly behind the autoloader, which holds 12 propellant charges. 495 liters of fuel is stored in another five conformal fuel cells are located externally on the starboard side fender. The total fuel capacity is 1200 liters.

The driver-mechanic is able to shut off and isolate individual fuel tanks from his station. Isolated fuel tanks will be disconnected from both the fuel pump and the fuel return lines, so the fuel within the tank will be left to sit. This can be beneficial in some circumstances, such as when there is an imminent threat of an internal fire spreading. By shutting off all of the internal fuel tanks, the fuel will not leak out as energetically, or maybe even stop leaking entirely, depending on the specific location of the damage to the tanks. It is also possible for the driver to shut off all internal fuel tanks, and rely on external fuel only if the situation allows it. This creates the possibility of filling the internal fuel tanks with water, and since the majority of the volatile propellant charges are stowed in conformal fuel tanks, they can become ad hoc wet stowage racks for increased safety.

The two externally mounted auxiliary fuel drums each have a 200-liter capacity. These connect directly to the fuel
system, and both can be disconnected by the driver at the same time by the push of a button.

The auxiliary fuel tank holders are hinged, and may be folded flush to the hull rear.
The T-72 Ural can travel 480km on internal fuel alone, or 700km with
external fuel tanks. Thanks to improvements in fuel efficiency on the
T-72B3, it can travel 550km on internal fuel alone, or 800km with
external fuel tanks despite having the same fuel capacity. As with all automobiles, fuel efficiency decreases while driving cross-country. The amount of engine power needed increases as the harshness of the terrain increases, and so does fuel consumption.
Because of the T-72's relatively large fuel capacity and high fuel efficiency, refueling the T-72 isn't even necessary for short continuous operations (lasting no more than 3 days), and this greatly eases the logistical burden on the frontlines.
DRIVER MECHANIC'S STATION
The driver's station is arguably the least comfortable in the T-72. He has approximately 80cm of shoulder space, but not much leg room.
Because of this, the driver must sit in an 'L' position and hunch slightly in order to operate the steering
levers, step on the pedals and look through the periscope at the same
time. Because of the steep sloping of the glacis, tall drivers must draw their knees up to midriff level and curl into an almost fetal position in order to operate the all of the controls. Lanky-legged drivers must never allow their knees to come in contact with the glacis wall as a safety measure, for the possibility of losing them if the tank was hit there by a tank shell. Because of this, combined with concerns over general comfort, drivers of T-72s must never be taller than 5'7", or 170cm. Fortunately, Soviet states were never in short supply of genetically-inclined short people.


The driver is provided with a single forward-facing TNPO-168V periscope to facilitate driving. It is
a very wide periscope (wider than the driver's head) with a binocular field of view of 38
degrees, and a total field of view of 138 degrees. The periscope provides 31 degrees of vision vertically - 15 below the horizontal axis and 16 above (roughly equivalent to vision range of human eye). Like all the other
periscopes on the T-72, the TNPO-168V is heated through the RTC heater system.

View through the TNPO-168V
When not in use, the TNPO-168V periscope is stowed away in its aluminium tin and kept in one of the turret stowage bins.


For night time driving, the driver is provided with a TVNE-4B passive-active binocular periscope. It is typically kept in its aluminium box and stowed away by the driver until necessary.


It can be directly inserted into the periscope slot without any modifications. Because of its binocular design, it has a horizontal field of view of 36 degrees and a vertical field of view of 33 degrees. It has a 60m view range in the active mode using the hull's single small IR headlight only (it may also pick up infrared light from the turret's three IR spotlights), or 120m in the passive mode under lighting conditions no darker than 0.005 lux (moonless, starlit night). It has 1x magnification.
Because of the mediocre viewing range provided by the periscope, the driver cannot drive very fast and he is usually directed by the commander at night.
There is also an accessory windshield that may be attached to the outside of the hatch. It appears to be intended to protect the driver from shrapnel and small shell fragments while driving with his head out of the hatch, typically when in convoys. It also shields the driver's eyes from dust kicked up by the leading tank in front.


The driver enters
through a pill-shaped 600mm-wide hatch. Two TNPA-65A viewing prisms are embedded in it, one looking in the 10 o'clock and the
other in the 1 o'clock direction. Looking through them requires the driver to look upwards. This layout is generally far less convenient than the more commonly encountered bank of three viewing prisms found on the T-80 and Abrams as well as most others. But at least the TNPA-65A periscopes are very narrow, almost slit-like. It would be very hard to hit or damage them with machine gun fire, unlike with bank layouts. The TNPA-65A periscopes are meant to check the corners of the tank only. They are far too limited for driving during combat.


As mentioned before, the TNPA-65A periscope provides 14 degrees of binocular vision horizontally, and only 6 degrees of vertical vision.

The driver's hatch itself is 20mm thick. The rubber seals make them completely watertight down till a depth of around 1 or 2 (relative to the height of the hatch, not the turret roof). Unfortunately, the seals on the TNPO-168V periscope are not nearly as dependable. Being mostly watertight, the tank can ford streams as deep as 1.2m or deeper without the danger of excessive water ingress.
Steering the tank requires the use of two hydraulically assisted tillers, which are located on
either side of the knees of the driver. Though the tiller steering system can be considered one of
the more antiquated aspects of the T-72, it's worth noting that many of
its rivals like the AMX-30, Chieftain and Challenger used the same
system as well. However, most main battle tanks had already grown out of
tillers and progressed into steering wheels even by the 1960s, like the M60 and Leopard 1
did. The Leclerc and
Leopard 2 both use steering wheels and the Abrams tank uses motorcycle
handlebars. The only exception is the Challenger 2, which (shockingly)
still retains the same tiller system.
The driver's throne is rather modest, but quite homely. It can be adjusted for height in order to accommodate persons of a wider range of height. When raised to its fullest, the driver is able to peek out of the hatch and drive with his full range of vision.

Like the commander and gunner, the driver's "air conditioning" comes in the form of a small vulcanized rubber fan.

All of the driving-related indicator gauges are placed on a board to the driver's left. Their placement isn't exactly convenient, but looking at them while driving (in any tank) isn't even necessary anyway.

Behind
is the left front hull fuel tank. The fire extinguishers for the hull's
automated firefighting system is located underneath it.
Over at his left foot there is a rather rudimentary GPK-59 gyroscopic compass for directional navigation. It is particularly useful when driving underwater when nobody in the tank has any scenery to refer to for a sense of direction. The use of gyrocompasses can perhaps be labeled as a rudimentary form of an Inertial Navigation System (INS), advanced versions of which are often present in modern combat vehicles due to their independence from outside input contrary to a GPS-based navigation system. Sadly, the T-72 has not received either in any of its iterations.


Surprising thought it may seem, the designers of the T-72 have paid more attention to crew survival than many would believe. The driver is very (relatively) well off when it comes to quick escapes. Unlike with rivals like the Leopard 2A5 and M1A1 Abrams, the driver's hatch will never be obstructed overhead by the turret when the turret is oriented in any direction except directly forward or to the side. In addition to that, the driver in a T-72 can exit through the turret while it is oriented in a 90° forward arc, unlike the Abrams, where the driver can only exit through the turret if the turret is oriented to the side or rear. Traversing the turret takes precious time, exposes the vulnerable rear of the turret, and most importantly, the turret would require power to traverse, or an operational motor unit. If that were to be damaged, or the power supply terminated, coupled with all other factors cumulatively, then more often than not, the driver will be sealed shut in a burning tank; a rather morbid proposition.

Stuck

Stuck

The cutout in the "wedge" applique armour shown here is for the driver to stick his head out of. He cannot exit the tank unless the turret is traversed to the side.


DRIVING LIGHTS

The T-72 has a single F-127 IR headlight and a single F-125 white light headlight.


F-127 IR headlight
When coupled with the TVNE-4B, the IR headlight gives it a viewing distance of a measly 60m by itself - just enough for some self sufficiency with traversing obstacles, but not nearly enough to plot routes for long distance navigation. A greater viewing range is definitely possible if the turret's numerous IR spotlights are activated. Regardless, the driver relies primarily on the commander and his TKN-3 sight in the passive mode for navigation.
The IR filter cap may be removed to revert the IR headlight into a regular driving light.
For convoy driving, the F-126 headlight/blackout light may be used. Blackout lights function by directing light forwards and downwards through small slits, minimizing the amount of light being transmitted off in other directions. This is to minimize the possibility of being seen, especially from afar. Because blackout lights only illuminate very small areas in front of the vehicle, the driver can't really see any further than a few meters. Depending on them for navigation is completely out of the question.


F-126 White Light headlight
Considering how unuseful it is, it's quite understandable that there is only one F-126 headlight, on the left side of the tip of the upper glacis.
There is an F-127 marker light mounted on the turret rear. It displays double digits indicating the vehicle's numerical position in a convoy.


There is a GST-49K marker light at the front of the tank. Its function is to show the position of the tank behind the leading tank in a convoy.

According to Steven Zaloga, a single T-72M cost $1,200,000 in 1992, or $1,800,000 with spare parts and ammunition (but he does not specify how long these spare parts and ammunition are supposed to last). The T-72B3 modernization costs $800,000 per overhaul in 2014, hiking up to $1,000,000 in late 2015.
REFERENCES
http://www.tank-net.com/forums/index.php?showtopic=14200&page=192
http://btvt.narod.ru/4/t-72.htm
http://topwar.ru/31292-sovetskie-bops-dlya-orudiy-semeystva-2a46.html
http://www.zavod9.com/?pid=10106
http://www.kotsch88.de/l_t-72.htm
http://u-96.livejournal.com/1638297.html?thread=31413145
http://ofbindia.gov.in/products/data/ammunition/lc/25.htm
http://www.niistali.ru/security/2010-07-05-08-58-15?start=1
http://www.wk2ammo.com/showthread.php?7666-125mm-BK-14M-HEAT-for-2A46-125mm-smooth-bore-gun-Russia
http://btvt.narod.ru/raznoe/dz_2014/dz_2014.htm
http://chtz-uraltrac.com/articles/categories/37.php
http://www.optics-nj.cz/en/tanks.html
http://www.niistali.ru/en/about-nii-stali/major-milestones.php
http://www.yarz.ru/prod_r168-5un2ee.html
http://www.rbs.ru/vttv/99/firms/kotplast/e-index.htm
http://www.geo-army.ge/index.php?option=com_content&view=article&id=372%3A2012-04-26-09-32-02&catid=51%3A2012-03-25-05-57-06&lang=ka
http://www.photopribor.ck.ua/en/products/defense/equipment_for_armored_vehicles_control_systems/1k13_sighting_and_guidance_device/
https://www.youtube.com/watch?v=jU_-DntBBIQ
http://www.kotsch88.de/m_125_mm_d-81.htm
http://www.coeindia.com/products.php#head_lights
http://bulcomersks.com/index.php/ct-menu-item-4/ct-menu-item-12/50-ammunition-components/fuzes/514-fuze-v-429e
http://morozovkmdb.com/eng/body/t72msavan15.php
http://catalog.use.kiev.ua/index.php?page=catalog&view=category&cat_id=38
http://www.sklep.militariaanhol.pl/en/spare-parts/171-temperature-sensor-td-1.html
http://en.npoelm.ru/products-eng/specialproducts-eng/raduga-eng/td-1-eng/
http://www.excaliburarmy.com/en/t-72-parts?from=0#fotky
http://andrei-bt.livejournal.com/170864.html
Bibliography
T-72 Main Battle Tank 1974-93 by Steven Zaloga, Peter Sarson
MOBILITY
The T-72 followed the T-64 in breaking the mold on the standards of mobility in the face of the need to compromise between the "Big Three"; Firepower, Protection and Mobility. The T-72 had the world's most powerful gun, world's best armour, and was also among the world's fastest tanks at the time. Its on and off road performance rivaled the speed-centric but paper-thin Leopard 1 and AMX-30, outmatched the heavily armoured tottering Chieftain and Challenger tanks and greatly outpaced the sluggish and all-around underperformer M60 series, all while weighing and costing less than any of them.
The T-72's superior engine power and light weight meant that it could not only traverse difficult terrain, but that it could safely cross low-capacity bridges and make good use of the thousands of tactical bridge layers in Soviet army service, even including the ones derived from the then-already-antiquated T-54.
Swedish trials of T-72M1s and MTLBs in Northern Norrland between 1992 and 1994 yielded very positive results. The T-72s in question displayed good performance over snow as deep as 0.8m, though it still failed at times to reliably traverse frozen ice banks, though it can be argued that that was because of the inexperience of the Swedish test drivers. Still, it managed to pull off a few impressive feats such as leaping an 8m gap by slamming into a 1.5 meter-tall snow bank:
Keep in mind, the T-72M1 is only equipped with the baseline V-46-6 engine.
ENGINES
The T-72 has been host
to several engines over the years, starting with the V-46, evolving
into the V-84, and finally the V-92. All of the T-72 engines to date are V-12 4-stroke diesel multifuels. They are able to consume
gasoline (A-66 and A-72), diesel and jet fuel (T-1, TS-1 and T-2). The
driver can set what type of fuel the engine will run on by simply setting a
dial.
The main method of starting the engine is via an electric starter. In
emergency situations or in exceptionally cold weather, the engine can be
started with the tank of compressed air located left of the driver's
feet, or even perhaps in the "old fashioned way" by towing. It takes around 20 minutes to start the engine in extremely cold weather, which is much longer than the 3 minutes needed by the GTD-1000T gas turbine engine used on the T-80, but diesel piston engines have their own advantages.
Air canister for compressed air starting system
The V-46 engine and its derivatives are exceptionally reliable, more so than some foreign rivals such as the modern day Perkins CV12 that powers the Challenger 2, or the infamously bad Leyland L60 that drives the Chieftain tank, widely considered the premier NATO tank of the 60's and 70's.
Piston engines offer several crucial advantages over gas turbine engines, but as with all things, several disadvantages as well. For one, piston engines are invariably more economical in typical combat scenarios. This meant that the T-72 could be shrunk down to its present size and still be able to travel further and fight longer than a contemporary with a gas turbine engine could with the same load of fuel. On the negative side, piston engines can never attain the same low speed performance as a gas turbine, though some modern examples do come close.
On the negative side, piston engines burn much less cleanly than gas turbines. Discrete unburnt particles of fuel with lots of heat energy are usually expelled along with the hot air of the exhaust, in contrast to the very hot but very clean gasses expelled from a turbine engine. For some very smoky engines, this can create a telling heat signature that can be detected miles away, if the rest of the tank were somehow invisible. More modern piston engines can burn quite cleanly, but never to the level of a gas turbine, and while this may be a disadvantage, it may also prove to be quite the opposite in some cases.
Unlike a piston engine, most gas turbine engines cannot safely generate a smokescreen by injecting fuel into the outlet for fear of a potentially explosive result. Also, while a piston engine may create more noticeable emissions, a gas turbine will literally burn anything behind its outlet. In fact, there was one notable incident where an Abrams tank was set afire by a comrade tank towing it.
Apparently, the driver's hatch was accidentally left open, and the exhaust gasses were so hot (a Honeywell brochure states that the temperature is as high as 499°C) that they set the plastic and rubber furniture and wiring on fire, which spread throughout the tank. It isn't so difficult to imagine that the gas turbine engines on the T-80 and Abrams, for example, could even be a potential fire hazard while traveling across dry vegetation, and if either of them idled for just a few seconds on one spot, patches of that area would themselves glow white in the sights of a thermal camera. This is particularly apparent during the winter, when high contrast can be easily created on snowed-over ground to create a visible thermal footprint. Indeed, gas turbines are so hot that it is impossible for a soldier to follow behind. Doing so could result in 2nd degree burns within a few seconds, and 3rd degree burns in the seconds thereafter. Cooling the expelled hot air is done on most tanks utilizing gas turbines, but these are only marginally effective at best.
And finally, gas turbine engines not only spew hot air, but they do it at high speeds. This air can potentially kick up dust in very dry weather, even while the tank is stationary.
V-46-4 / V-46-6
The
V-46 liquid-cooled engine is the baseline engine for the T-72 series,
first appearing on the T-72 Ural and then the T-72A. It traces its roots
to the V-2 which once powered the legendary T-34. True to its
remarkable origin, it has a remarkable power density, far above
its competitors such as the; MB 837, which powered the Leopard 1 series, AVDS-1790-2A,
which powered the M60 tank series, and even the "lightweight"
opposed-piston Leyland L60 series, which powered the Chieftain tank.
When compared: AVDS-1790-2A - 0.324, MB 837 - 0.426, Leyland L60 - 0.535, V-46 - 0.795, the V-46 comes out on top. Overall, the V-46 and all its descendants are unquestionably robust, dependable engines in every way. A disadvantage of this engine is the amount of smoke it produces, which may expose its position to enemies equipped with thermal imagers.
Output: 780 hp
Rated speed: 2000 rpm
Idle speed: 800 rpm
Fuel Consumption: 1 g / 245 kWh or 1 g / 180hp.h
Torque back up: 9% ... 18%
Weight: 980 kg
T-72 Ural and T-72A power to weight ratio: 18.1 hp/ton
The exhaust port for this engine is characteristically long and narrow. It has very rudimentary sheet steel cooling vanes on top.
With this engine, the T-72 Ural and T-72A both have a top speed of 60km/h on asphalt, and sets an average speed of 35 to 40km/h on dirt roads.
The V-46-4 is the variant which the T-72 Ural uses, while the V-46-6 with slight modifications to the placement of oil containers is used in the T-72A.
V-84-1 / V-84MS
The V-84 supercharged engine differs from its predecessor
mainly with an increase in output, paired with an insignificant weight
gain. The engine has a centrifugal gear-driven supercharger. The increased power offsets the T-72B's added weight, allowing it to remain as nimble as its predecessors. This engine is much less smoky than the V-46 because the higher oxygen levels in the combustion chamber allowed all of the fuel particles to be consumed, producing more energy, but due to the increased energy of combustion, the exhaust gasses expelled from the engine is considerably hotter than that from the V-46 engines.
Output: 840 hp
Rated speed: 2000 rpm
Idle speed: 800 rpm
Fuel Consumption: 247 g/kWh or 182 g/hph
Torque back up: 6% ... 18%
Weight: 1020 kg
T-72B, T-72B1, T-72BA power to weight ratio: 18.87 hp/ton
T-72B3 power to weight ratio: 18.2 hp/ton
The exhaust port for the V-84 is identical to the V-46's.
Like previous variants, the T-72B has a top speed of 60km/h on asphalt, and an average speed of 35 to 40km/h on dirt roads. This remains mostly unchanged even with the burdensome Kontakt-5 installed. Most T-72B3s are equipped with this engine.
V-92SF
The V-92SF turbocharged
multifuel engine is an outstanding piece of machinery, boasting a very
impressive power density of 1.02 hp/kg combined with high standards of reliability. In fact, the output to weight ratio is superior one of its
more high-profile contemporaries; the (massive) German V-12 turbocharged diesel MB-873 Ka501, which powers the Leopard 2 series of MBTs. In
a somewhat ironic comparison, the British CV-12-1000 TCA produced by
Perkins for the Czech T-72M4CZ has an output of 1000 hp, but
weighs a just a hair under a ton more at 2000kg because of attached accessories.
The increased torque reserve greatly improves driving characteristics
across rough terrain and the fuel
efficiency has been substantially increased, boosting the T-72's already
excellent fuel economy to a new high. The engine is virtually smokeless.
Output: 1130 hp
Rated speed: 2000 rpm
Idle speed: 800 rpm
Fuel Consumption: 215 g/kWh or 158 g/hph
Torque back up: 25% ... 30%
Weight: 1100 kg
T-72B4 power to weight ratio: 21.73 hp/ton
Variants outfitted with the V-92SF can be identified by the heavily modified exhaust unit, now much fatter and with much more extensive cooling vanes.
The cooling vanes comprise only half of the exhaust cooling system. The vanes help keep the exhaust outlet itself cool (or at least, as cool as you'd expect for the exhaust outlet of a 1130 hp engine), acting as radiators. There are port holes in the exhaust pipe, which has another external pipe wrapped around it. Air is forced through the vanes and into the external pipe by a pressure differential caused by the high velocity of the exhaust gasses - exactly the same in concept to a Bunsen burner - and the air enters the exhaust stream, thus lowering its temperature to a certain extent.
The use of the V-92SF on the T-72B4 boosts its top speed to a blistering 75 km/h on paved roads and allows it to cruise cross-country at a speed of up to 60 km/h on dirt roads. This elevates the T-72B3's mobility to the level of the T-80U or the M1A2 Abrams speed-wise, and gives it parity cross country despite the use of a gas turbine engine on the latter.
The MS-1 cyclone air filter used with
all of the V-series is adequate for most environments. It requires a filter change once every 300km traveled under extremely dusty conditions.
The T-72's engine deck is taken up by the engine access panel, the engine's air intake, radiator/air intake and the cooling system air outlet. All of them except the engine air intake have armoured covers to protect them from bullets and shrapnel coming from above.
Left and right sides. Engine access panel up front, radiator/air intakes behind it (with armoured covers), and cooling system air outlet behind that (again with armoured covers)
The engine can be easily removed with the help of a 1-ton crane, which can be found at even the most modest depots. In the field, engine replacements are done with the help of engineering vehicles.
Engine access panel hinged open.
However, the T-72's engine is not integrated as part of a powerpack, like on the Leopard 2. Powerpacks are far more convenient to replace, and they nullify any additional effort needed to replace the transmission assembly. It could take more than an hour to replace both the engine and transmission, compared with only about 35 minutes or less for more modern vehicles, like the Leopard 2.
Air intake for V-46 engine, tucked away discreetly behind the turret
Modified air intake for V-84 engine
The liquid cooling system is of a convection type. It works with water and air, used to cool hot coolant oil that is pumped around the engine. The coolant oil first runs up to the radiator unit, where it is cooled by water flowing in a labyrinth of aluminium fins with turbulators, which is itself cooled by flowing air being sucked in by an engine-driven fan at the rear of the engine compartment. The unwanted hot air is pulled into the fan and ejected out of the rearmost outlet in an upwards direction.
The biggest drawback of this system is that dust particles in the air from driving at high speed may be sucked up by the high velocity of the ejected air, thus creating a distinctive "rooster tail" dust cloud behind the tank. It is possible for an observant enemy to detect and distinguish a T-72 from long distances through this method, as if the dust kicked up by the tracks wasn't enough.
All reports indicate that this system is quite limited - sufficient for European climates at best. It was designed to work with no loss in efficiency at an ambient temperature of up to 25° C, but the engine will begin to experience marginal reductions in performance at temperatures exceeding that. Overheating becomes a major issue in ambient temperatures of up to 50° C, which is sometimes recorded at the Thar desert in India. At temperatures above 45° C, the engine will begin to suffer huge reductions in performance (up to 33% loss of power). At such temperatures, the tank must be stopped after travelling 25km to prevent excessive engine wear. The simplest solution, as practiced by most tank crews, is to remove the armoured covers, which helps to improve air intake volume to improve cooling capacity.
Apparently, the V-92 engine series and its accompanying modifications have partially solved the overheating issue. Specific details are not known to the author, but it could only either be an increase in the centrifugal fan's power, or a simple modification of the water flow channels in the radiator, as Indian T-72s and T-90Ss have.
Radiator cover removed, exposing the protective louvers within
Cooling system air outlet. Armoured covers for it are removed, but not for the radiator in front of it
Engine compartment with cooling pack and engine access panel removed. Note the crossbar to hinge both of the aforementioned accessories. Also note the centrifugal fan at the bottom left corner. It is directly powered by the engine, and thus increases or decreases its speed in accordance with the engine's requirements. It is strong enough to throw water out of the engine compartment like a blowhole even while idling. In front of the engine is a large fuel tank, separated from the crew compartment by an armoured bulkhead.
As you can see, the engine compartment is quite hollow. 40% of its volume is empty space for air flow, and the outer armoured plate of the cooling fan outlet plus the partition between it and the engine compartment can act as spaced armour to defend the engine from rear autocannon attacks, particularly from aircraft.
Centrifugal fan
Maintaining or replacing the cooling pack is quite simple, since the entire unit can be hinged open.
Cooler pack hinged open
The louvers that protect the radiator inlet, cooling fan outlet and engine air intake can all be shut or opened with the press of a button from the driver's station. Closing these louvers can help protect from attacks coming in various forms, from molotov cocktails to autocannon shells raining from the skies. With the louvers closed and the armoured cover on, the radiator and engine access panel, the largest and most obvious parts of engine deck, can in fact become immune to hits from various aircraft cannonfire from low angles of attack. Examples include 20x110mm AP-I rounds from A-1 Skyraiders, the USAF's main ground attack plane in the early-mid stages of the Cold War, or 20x102mm AP-I rounds fired from AH-1 Cobras and in many fixed wing aircraft such as the F-4 Phantom and F-16, which may be used ad hoc for the close air support role, or 30x113mm AP-I rounds fired from modern-day AH-64 Apaches, or even 30x173mm AP-I shells fired from the mythical GAU-8 on an A-10.
The photo above shows the engine access panel and armoured cover hinged open. Note the spaced armour arrangement. Note the thickness. Since ground attack aircraft and attack helicopters almost never fly at high altitudes to deliver cannon attacks, the armour is more than enough to deflect hits from all manner of cannon fire. A-10 pilots are trained to approach targets at an angle of attack of around 3°. Adding 20-odd degrees won't change much.
The T-72 uses a hydraulically assisted mechanical syncromesh transmission with dual planetary gearboxes and dual final drives. There are seven forward gears and one reverse gear. The brakes are of a disk type, hydraulically operated. The T-72 turns on a false pivot, meaning that to turn the tank on the spot, one of the two the tracks are locked in place while the other drives the tank around it. This system of neutral steering is mechanically simple, but vastly inferior to a pivot-type steering system where one of the tracks is run at the desired speed while the other is run slighy slower in the opposite direction. Besides being slower, false pivot steering creates a huge amount of friction and places more strain on the inactive track, leading to a quicker gradual weakening of the track and a slightly shorter lifespan.
A little-known fact is that with the mud guards on, it is perfectly true that the T-72 can only climb vertical obstacles measuring around 0.85m in height, but when they are removed, the T-72 can scale obstacles at least as tall as 1.2m (already taller than the tracks) or much more. The GIF below shows the tank literally climbing straight up a concrete wall by digging its tracks in.
(From 1992-1994 Swedish trials in Northern Norrland). Video credit goes to Ren Hanxue from the Swedish Tank Archives blog.
AUXILIARY POWER UNIT
The T-72 can mount an APU, but only the command variants have one. The T-72AK and
T-72BK were both equipped with an AB-1 petrol generator, producing 1kW.
SUSPENSION
The T-72 uses full-length torsion bar suspension. Each wheel has its own torsion bar, which runs across the hull floor and to the other end of the hull. The front two torsion bar-wheel hub interfaces have reinforced bolts, since the T-72 is slightly front heavy and so they will bear the brunt of the tank's weight during forward movement, especially across pot-holed ground.
There are six 750mm aluminium alloy roadwheels with 3 return rollers per each
side. The roadwheels are die-cast, with thick rubberized rims. The wheels weigh 180kg each. The T-72 Ural used an 8-spoked wheel design (pictured), but all subsequent models used a 6-spoked wheel.
The first, second and sixth roadwheel on both sides are augmented with hydraulic shock absorbers. Like with the reinforced interfaces, the front two shock absorbers are needed to dampen the tank's movement dynamics across rough terrain, while the rearmost shock absorber is intended for assisting recuperation after driving through dips and bumps. This is necessitated by the tank's nose heaviness and forward momentum, which puts great strain on the front two roadwheels, particularly when driving cross-country.
The T-72 first came with single-pin RMSh tracks measuring 580mm in width. These tracks have rubber bushings that help reduce vibrations and thus, reduce wear and tear as well as noise levels (though still relatively high). A full set weighs just over 1700 kg.
Old drive sprocket
Newer UMSh dual-pin tracks are available, again measuring 580mm. Usage of the newer tracks
requires modified drive sprockets to be installed beforehand. Thus, only the newer modifications of the T-72 have this installed, like the T-72B2 and B3, though some T-72BAs have it as well. The main attraction of this track is the ability to install asphalt-friendly rubber pads. These tracks are less noisy as well. An entire set weighs just a hair under 1800kg.
New tracks and new drive sprocket
Rubber pads installed (Photo credit: Vitaly Kuzmin)
There is a simple mud scraper bolted on to the hull rear to prevent loss of traction from excess soil, especially sticky mud.
Removing rubber pads on T-90
Throughout the T-72's evolution, it has "fattened up" somewhat, gaining
the most weight in the T-72B upgrade. While the T-72 Ural and T-72A both
weighed 41 and 41.5 tons respectively, the T-72B tipped the scales at
44.5 tons. The T-72BM weighs 46 tons thanks to its Kontakt-5 package, and Kontakt-1 adds around 1.2 tons.
The T-72 Ural and T-72A exerted 0.83kg/sq.cm of ground pressure, while
the T-72B, being heavier, put in 0.898kg/sq.cm of pressure. Compared to
its immediate foreign counterparts, the T-72 had little to no advantage
in soft terrain, despite being a great deal lighter than all of its
adversaries. Against the Chieftain, Leopard 1 and M60A1 of its era, the
T-72 Ural and T-72A fared slightly better in this respect, but the T-72B
was neither better nor worse off than its more modern challengers like
the Leopard 2, Challenger 1, M60A3 and the M1 Abrams. The weight
discrepancy doesn't manifest in this regard, but it suddenly becomes
apparent when we consider the infrastructure of Eastern Europe at the
time, especially the bridges - both permanent and temporary ones - that a
huge advantage lays in the fact that the T-72 remains light enough to
cross many of the more modest bridges and be compatible with the weight
limit of the old MTU-55 bridge layers and TMM truck-based bridge layers,
both of which were and still are present in huge numbers.
If the T-72 were to be trapped in swamps, bogs or in extremely deep snow, it may escape with the help of the eponymous log.
By
tying the log to track pins on both right and left tracks as
illustrated below, the tracks will pull the log under the roadwheels,
thus forcing that section of the track to rise above the mud while
simultaneously giving the track something more solid to drive over. This
allows the tank to get out of the hairiest situations.
WATER OBSTACLES
The T-72, like all post-war Soviet tanks, has exemplary water crossing
capabilities. Safe fording depths are usually cited to be 1.2m, but water obstacles measuring up to 1.8m deep may be forded
for short distances if necessary. Doing so will require the air intakes
to be shut off, since the water level would be above the hull. With
the installation of the proprietary OPVT snorkel, fording up to a depth of
5m is possible. Pre-fording
preparations are necessary in order to do so, requiring the edges of all
hatches and the openings of various equipments and periscopes to be coated with a thick
resinous waterproofing paste beforehand, as the water pressure at such
depths is simply too much for rubber seals to handle.
The driver must then reset the fuel pump which doubles as a bilge pump. It is located to his lower left side.
The snorkel "breathes" for all three occupants. It is installed on the
gunner's hatch, through a circular porthole, visible in this picture:
Because the hatch can be simply swung open, installing the snorkel is not difficult. The snorkel comes with two floating markers to indicate the tank's position underwater to help rescue teams locate the tank if it has stopped underwater.
Preparing for underwater driving in an exercise
Also, the exhaust port must be replaced with a special valve bank to prevent water from entering into the exhaust manifolds.
T-72s equipped with the V-92S2 or V-92SF engines must use different valve units.
Crew members are each given a closed-circuit IP-5 rebreather for emergency use. It comprises a watertight, form fitting gas mask, a chemical respirator chamber containing potassium superoxide (KO2), and a flotation collar. The rebreather uses the chemical reaction between potassium superoxide and carbon dioxide, activated by water from the user's breath reduce the former two to oxygen and potassium carbonate. The freshly produced oxygen gas is mixed into the previously exhaled breath to replenish its oxygen concentration for rebreathing. The crew usually puts the IP-5 on before entering water as a precautionary measure.
IP-5
ROAD ENDURANCE
All T-72s have a total internal fuel capacity of 705 liters, spread across
several fuel cells excluding the ubiquitous fuel drums to the rear. Two tanks are located on the forward
hull on either side of the driver. Another conformal fuel tank is located directly behind the right frontal fuel tank. It also performs as a shell rack, and so does the conformal fuel tank directly behind the autoloader, which holds 12 propellant charges. 495 liters of fuel is stored in another five conformal fuel cells are located externally on the starboard side fender. The total fuel capacity is 1200 liters.
The driver-mechanic is able to shut off and isolate individual fuel tanks from his station. Isolated fuel tanks will be disconnected from both the fuel pump and the fuel return lines, so the fuel within the tank will be left to sit. This can be beneficial in some circumstances, such as when there is an imminent threat of an internal fire spreading. By shutting off all of the internal fuel tanks, the fuel will not leak out as energetically, or maybe even stop leaking entirely, depending on the specific location of the damage to the tanks. It is also possible for the driver to shut off all internal fuel tanks, and rely on external fuel only if the situation allows it. This creates the possibility of filling the internal fuel tanks with water, and since the majority of the volatile propellant charges are stowed in conformal fuel tanks, they can become ad hoc wet stowage racks for increased safety.
The two externally mounted auxiliary fuel drums each have a 200-liter capacity. These connect directly to the fuel
system, and both can be disconnected by the driver at the same time by the push of a button.
The auxiliary fuel tank holders are hinged, and may be folded flush to the hull rear.
The T-72 Ural can travel 480km on internal fuel alone, or 700km with
external fuel tanks. Thanks to improvements in fuel efficiency on the
T-72B3, it can travel 550km on internal fuel alone, or 800km with
external fuel tanks despite having the same fuel capacity. As with all automobiles, fuel efficiency decreases while driving cross-country. The amount of engine power needed increases as the harshness of the terrain increases, and so does fuel consumption.
Because of the T-72's relatively large fuel capacity and high fuel efficiency, refueling the T-72 isn't even necessary for short continuous operations (lasting no more than 3 days), and this greatly eases the logistical burden on the frontlines.
DRIVER MECHANIC'S STATION
The driver's station is arguably the least comfortable in the T-72. He has approximately 80cm of shoulder space, but not much leg room.
Because of this, the driver must sit in an 'L' position and hunch slightly in order to operate the steering
levers, step on the pedals and look through the periscope at the same
time. Because of the steep sloping of the glacis, tall drivers must draw their knees up to midriff level and curl into an almost fetal position in order to operate the all of the controls. Lanky-legged drivers must never allow their knees to come in contact with the glacis wall as a safety measure, for the possibility of losing them if the tank was hit there by a tank shell. Because of this, combined with concerns over general comfort, drivers of T-72s must never be taller than 5'7", or 170cm. Fortunately, Soviet states were never in short supply of genetically-inclined short people.
The driver is provided with a single forward-facing TNPO-168V periscope to facilitate driving. It is
a very wide periscope (wider than the driver's head) with a binocular field of view of 38
degrees, and a total field of view of 138 degrees. The periscope provides 31 degrees of vision vertically - 15 below the horizontal axis and 16 above (roughly equivalent to vision range of human eye). Like all the other
periscopes on the T-72, the TNPO-168V is heated through the RTC heater system.
View through the TNPO-168V
When not in use, the TNPO-168V periscope is stowed away in its aluminium tin and kept in one of the turret stowage bins.
For night time driving, the driver is provided with a TVNE-4B passive-active binocular periscope. It is typically kept in its aluminium box and stowed away by the driver until necessary.
It can be directly inserted into the periscope slot without any modifications. Because of its binocular design, it has a horizontal field of view of 36 degrees and a vertical field of view of 33 degrees. It has a 60m view range in the active mode using the hull's single small IR headlight only (it may also pick up infrared light from the turret's three IR spotlights), or 120m in the passive mode under lighting conditions no darker than 0.005 lux (moonless, starlit night). It has 1x magnification.
Because of the mediocre viewing range provided by the periscope, the driver cannot drive very fast and he is usually directed by the commander at night.
There is also an accessory windshield that may be attached to the outside of the hatch. It appears to be intended to protect the driver from shrapnel and small shell fragments while driving with his head out of the hatch, typically when in convoys. It also shields the driver's eyes from dust kicked up by the leading tank in front.
The driver enters
through a pill-shaped 600mm-wide hatch. Two TNPA-65A viewing prisms are embedded in it, one looking in the 10 o'clock and the
other in the 1 o'clock direction. Looking through them requires the driver to look upwards. This layout is generally far less convenient than the more commonly encountered bank of three viewing prisms found on the T-80 and Abrams as well as most others. But at least the TNPA-65A periscopes are very narrow, almost slit-like. It would be very hard to hit or damage them with machine gun fire, unlike with bank layouts. The TNPA-65A periscopes are meant to check the corners of the tank only. They are far too limited for driving during combat.
As mentioned before, the TNPA-65A periscope provides 14 degrees of binocular vision horizontally, and only 6 degrees of vertical vision.
The driver's hatch itself is 20mm thick. The rubber seals make them completely watertight down till a depth of around 1 or 2 (relative to the height of the hatch, not the turret roof). Unfortunately, the seals on the TNPO-168V periscope are not nearly as dependable. Being mostly watertight, the tank can ford streams as deep as 1.2m or deeper without the danger of excessive water ingress.
Steering the tank requires the use of two hydraulically assisted tillers, which are located on
either side of the knees of the driver. Though the tiller steering system can be considered one of
the more antiquated aspects of the T-72, it's worth noting that many of
its rivals like the AMX-30, Chieftain and Challenger used the same
system as well. However, most main battle tanks had already grown out of
tillers and progressed into steering wheels even by the 1960s, like the M60 and Leopard 1
did. The Leclerc and
Leopard 2 both use steering wheels and the Abrams tank uses motorcycle
handlebars. The only exception is the Challenger 2, which (shockingly)
still retains the same tiller system.
The driver's throne is rather modest, but quite homely. It can be adjusted for height in order to accommodate persons of a wider range of height. When raised to its fullest, the driver is able to peek out of the hatch and drive with his full range of vision.
Like the commander and gunner, the driver's "air conditioning" comes in the form of a small vulcanized rubber fan.
All of the driving-related indicator gauges are placed on a board to the driver's left. Their placement isn't exactly convenient, but looking at them while driving (in any tank) isn't even necessary anyway.
Behind
is the left front hull fuel tank. The fire extinguishers for the hull's
automated firefighting system is located underneath it.
Over at his left foot there is a rather rudimentary GPK-59 gyroscopic compass for directional navigation. It is particularly useful when driving underwater when nobody in the tank has any scenery to refer to for a sense of direction. The use of gyrocompasses can perhaps be labeled as a rudimentary form of an Inertial Navigation System (INS), advanced versions of which are often present in modern combat vehicles due to their independence from outside input contrary to a GPS-based navigation system. Sadly, the T-72 has not received either in any of its iterations.
Surprising thought it may seem, the designers of the T-72 have paid more attention to crew survival than many would believe. The driver is very (relatively) well off when it comes to quick escapes. Unlike with rivals like the Leopard 2A5 and M1A1 Abrams, the driver's hatch will never be obstructed overhead by the turret when the turret is oriented in any direction except directly forward or to the side. In addition to that, the driver in a T-72 can exit through the turret while it is oriented in a 90° forward arc, unlike the Abrams, where the driver can only exit through the turret if the turret is oriented to the side or rear. Traversing the turret takes precious time, exposes the vulnerable rear of the turret, and most importantly, the turret would require power to traverse, or an operational motor unit. If that were to be damaged, or the power supply terminated, coupled with all other factors cumulatively, then more often than not, the driver will be sealed shut in a burning tank; a rather morbid proposition.
Stuck
Stuck
The cutout in the "wedge" applique armour shown here is for the driver to stick his head out of. He cannot exit the tank unless the turret is traversed to the side.
DRIVING LIGHTS
The T-72 has a single F-127 IR headlight and a single F-125 white light headlight.
F-127 IR headlight
When coupled with the TVNE-4B, the IR headlight gives it a viewing distance of a measly 60m by itself - just enough for some self sufficiency with traversing obstacles, but not nearly enough to plot routes for long distance navigation. A greater viewing range is definitely possible if the turret's numerous IR spotlights are activated. Regardless, the driver relies primarily on the commander and his TKN-3 sight in the passive mode for navigation.
The IR filter cap may be removed to revert the IR headlight into a regular driving light.
For convoy driving, the F-126 headlight/blackout light may be used. Blackout lights function by directing light forwards and downwards through small slits, minimizing the amount of light being transmitted off in other directions. This is to minimize the possibility of being seen, especially from afar. Because blackout lights only illuminate very small areas in front of the vehicle, the driver can't really see any further than a few meters. Depending on them for navigation is completely out of the question.
F-126 White Light headlight
Considering how unuseful it is, it's quite understandable that there is only one F-126 headlight, on the left side of the tip of the upper glacis.
There is an F-127 marker light mounted on the turret rear. It displays double digits indicating the vehicle's numerical position in a convoy.
There is a GST-49K marker light at the front of the tank. Its function is to show the position of the tank behind the leading tank in a convoy.
According to Steven Zaloga, a single T-72M cost $1,200,000 in 1992, or $1,800,000 with spare parts and ammunition (but he does not specify how long these spare parts and ammunition are supposed to last). The T-72B3 modernization costs $800,000 per overhaul in 2014, hiking up to $1,000,000 in late 2015.
REFERENCES
http://www.tank-net.com/forums/index.php?showtopic=14200&page=192
http://btvt.narod.ru/4/t-72.htm
http://topwar.ru/31292-sovetskie-bops-dlya-orudiy-semeystva-2a46.html
http://www.zavod9.com/?pid=10106
http://www.kotsch88.de/l_t-72.htm
http://u-96.livejournal.com/1638297.html?thread=31413145
http://ofbindia.gov.in/products/data/ammunition/lc/25.htm
http://www.niistali.ru/security/2010-07-05-08-58-15?start=1
http://www.wk2ammo.com/showthread.php?7666-125mm-BK-14M-HEAT-for-2A46-125mm-smooth-bore-gun-Russia
http://btvt.narod.ru/raznoe/dz_2014/dz_2014.htm
http://chtz-uraltrac.com/articles/categories/37.php
http://www.optics-nj.cz/en/tanks.html
http://www.niistali.ru/en/about-nii-stali/major-milestones.php
http://www.yarz.ru/prod_r168-5un2ee.html
http://www.rbs.ru/vttv/99/firms/kotplast/e-index.htm
http://www.geo-army.ge/index.php?option=com_content&view=article&id=372%3A2012-04-26-09-32-02&catid=51%3A2012-03-25-05-57-06&lang=ka
http://www.photopribor.ck.ua/en/products/defense/equipment_for_armored_vehicles_control_systems/1k13_sighting_and_guidance_device/
https://www.youtube.com/watch?v=jU_-DntBBIQ
http://www.kotsch88.de/m_125_mm_d-81.htm
http://www.coeindia.com/products.php#head_lights
http://bulcomersks.com/index.php/ct-menu-item-4/ct-menu-item-12/50-ammunition-components/fuzes/514-fuze-v-429e
http://morozovkmdb.com/eng/body/t72msavan15.php
http://catalog.use.kiev.ua/index.php?page=catalog&view=category&cat_id=38
http://www.sklep.militariaanhol.pl/en/spare-parts/171-temperature-sensor-td-1.html
http://en.npoelm.ru/products-eng/specialproducts-eng/raduga-eng/td-1-eng/
http://www.excaliburarmy.com/en/t-72-parts?from=0#fotky
http://andrei-bt.livejournal.com/170864.html
Bibliography
T-72 Main Battle Tank 1974-93 by Steven Zaloga, Peter Sarson
MOBILITY

The T-72's superior engine power and light weight meant that it could not only traverse difficult terrain, but that it could safely cross low-capacity bridges and make good use of the thousands of tactical bridge layers in Soviet army service, even including the ones derived from the then-already-antiquated T-54.
Swedish trials of T-72M1s and MTLBs in Northern Norrland between 1992 and 1994 yielded very positive results. The T-72s in question displayed good performance over snow as deep as 0.8m, though it still failed at times to reliably traverse frozen ice banks, though it can be argued that that was because of the inexperience of the Swedish test drivers. Still, it managed to pull off a few impressive feats such as leaping an 8m gap by slamming into a 1.5 meter-tall snow bank:


Keep in mind, the T-72M1 is only equipped with the baseline V-46-6 engine.
ENGINES
The T-72 has been host to several engines over the years, starting with the V-46, evolving into the V-84, and finally the V-92. All of the T-72 engines to date are V-12 4-stroke diesel multifuels. They are able to consume gasoline (A-66 and A-72), diesel and jet fuel (T-1, TS-1 and T-2). The driver can set what type of fuel the engine will run on by simply setting a dial.
The main method of starting the engine is via an electric starter. In emergency situations or in exceptionally cold weather, the engine can be started with the tank of compressed air located left of the driver's feet, or even perhaps in the "old fashioned way" by towing. It takes around 20 minutes to start the engine in extremely cold weather, which is much longer than the 3 minutes needed by the GTD-1000T gas turbine engine used on the T-80, but diesel piston engines have their own advantages.
 |
| Air canister for compressed air starting system |
The V-46 engine and its derivatives are exceptionally reliable, more so than some foreign rivals such as the modern day Perkins CV12 that powers the Challenger 2, or the infamously bad Leyland L60 that drives the Chieftain tank, widely considered the premier NATO tank of the 60's and 70's.
Piston engines offer several crucial advantages over gas turbine engines, but as with all things, several disadvantages as well. For one, piston engines are invariably more economical in typical combat scenarios. This meant that the T-72 could be shrunk down to its present size and still be able to travel further and fight longer than a contemporary with a gas turbine engine could with the same load of fuel. On the negative side, piston engines can never attain the same low speed performance as a gas turbine, though some modern examples do come close.
On the negative side, piston engines burn much less cleanly than gas turbines. Discrete unburnt particles of fuel with lots of heat energy are usually expelled along with the hot air of the exhaust, in contrast to the very hot but very clean gasses expelled from a turbine engine. For some very smoky engines, this can create a telling heat signature that can be detected miles away, if the rest of the tank were somehow invisible. More modern piston engines can burn quite cleanly, but never to the level of a gas turbine, and while this may be a disadvantage, it may also prove to be quite the opposite in some cases.
Unlike a piston engine, most gas turbine engines cannot safely generate a smokescreen by injecting fuel into the outlet for fear of a potentially explosive result. Also, while a piston engine may create more noticeable emissions, a gas turbine will literally burn anything behind its outlet. In fact, there was one notable incident where an Abrams tank was set afire by a comrade tank towing it.

Apparently, the driver's hatch was accidentally left open, and the exhaust gasses were so hot (a Honeywell brochure states that the temperature is as high as 499°C) that they set the plastic and rubber furniture and wiring on fire, which spread throughout the tank. It isn't so difficult to imagine that the gas turbine engines on the T-80 and Abrams, for example, could even be a potential fire hazard while traveling across dry vegetation, and if either of them idled for just a few seconds on one spot, patches of that area would themselves glow white in the sights of a thermal camera. This is particularly apparent during the winter, when high contrast can be easily created on snowed-over ground to create a visible thermal footprint. Indeed, gas turbines are so hot that it is impossible for a soldier to follow behind. Doing so could result in 2nd degree burns within a few seconds, and 3rd degree burns in the seconds thereafter. Cooling the expelled hot air is done on most tanks utilizing gas turbines, but these are only marginally effective at best.
And finally, gas turbine engines not only spew hot air, but they do it at high speeds. This air can potentially kick up dust in very dry weather, even while the tank is stationary.
V-46-4 / V-46-6
Output: 780 hp
Rated speed: 2000 rpm
Idle speed: 800 rpm
Fuel Consumption: 1 g / 245 kWh or 1 g / 180hp.h
Torque back up: 9% ... 18%
Weight: 980 kg
T-72 Ural and T-72A power to weight ratio: 18.1 hp/ton
The exhaust port for this engine is characteristically long and narrow. It has very rudimentary sheet steel cooling vanes on top.

With this engine, the T-72 Ural and T-72A both have a top speed of 60km/h on asphalt, and sets an average speed of 35 to 40km/h on dirt roads.
The V-46-4 is the variant which the T-72 Ural uses, while the V-46-6 with slight modifications to the placement of oil containers is used in the T-72A.
V-84-1 / V-84MS
Output: 840 hp
Rated speed: 2000 rpm
Idle speed: 800 rpm
Fuel Consumption: 247 g/kWh or 182 g/hph
Torque back up: 6% ... 18%
Weight: 1020 kg
T-72B, T-72B1, T-72BA power to weight ratio: 18.87 hp/ton
T-72B3 power to weight ratio: 18.2 hp/ton
The exhaust port for the V-84 is identical to the V-46's.
Like previous variants, the T-72B has a top speed of 60km/h on asphalt, and an average speed of 35 to 40km/h on dirt roads. This remains mostly unchanged even with the burdensome Kontakt-5 installed. Most T-72B3s are equipped with this engine.
V-92SF
The increased torque reserve greatly improves driving characteristics across rough terrain and the fuel efficiency has been substantially increased, boosting the T-72's already excellent fuel economy to a new high. The engine is virtually smokeless.
Output: 1130 hp
Rated speed: 2000 rpm
Idle speed: 800 rpm
Fuel Consumption: 215 g/kWh or 158 g/hph
Torque back up: 25% ... 30%
Weight: 1100 kg
T-72B4 power to weight ratio: 21.73 hp/ton
Variants outfitted with the V-92SF can be identified by the heavily modified exhaust unit, now much fatter and with much more extensive cooling vanes.

The use of the V-92SF on the T-72B4 boosts its top speed to a blistering 75 km/h on paved roads and allows it to cruise cross-country at a speed of up to 60 km/h on dirt roads. This elevates the T-72B3's mobility to the level of the T-80U or the M1A2 Abrams speed-wise, and gives it parity cross country despite the use of a gas turbine engine on the latter.
The MS-1 cyclone air filter used with all of the V-series is adequate for most environments. It requires a filter change once every 300km traveled under extremely dusty conditions.
The T-72's engine deck is taken up by the engine access panel, the engine's air intake, radiator/air intake and the cooling system air outlet. All of them except the engine air intake have armoured covers to protect them from bullets and shrapnel coming from above.
 |
| Left and right sides. Engine access panel up front, radiator/air intakes behind it (with armoured covers), and cooling system air outlet behind that (again with armoured covers) |
 |
| Engine access panel hinged open. |
 |
| Air intake for V-46 engine, tucked away discreetly behind the turret |
 |
| Modified air intake for V-84 engine |
The liquid cooling system is of a convection type. It works with water and air, used to cool hot coolant oil that is pumped around the engine. The coolant oil first runs up to the radiator unit, where it is cooled by water flowing in a labyrinth of aluminium fins with turbulators, which is itself cooled by flowing air being sucked in by an engine-driven fan at the rear of the engine compartment. The unwanted hot air is pulled into the fan and ejected out of the rearmost outlet in an upwards direction.

The biggest drawback of this system is that dust particles in the air from driving at high speed may be sucked up by the high velocity of the ejected air, thus creating a distinctive "rooster tail" dust cloud behind the tank. It is possible for an observant enemy to detect and distinguish a T-72 from long distances through this method, as if the dust kicked up by the tracks wasn't enough.
All reports indicate that this system is quite limited - sufficient for European climates at best. It was designed to work with no loss in efficiency at an ambient temperature of up to 25° C, but the engine will begin to experience marginal reductions in performance at temperatures exceeding that. Overheating becomes a major issue in ambient temperatures of up to 50° C, which is sometimes recorded at the Thar desert in India. At temperatures above 45° C, the engine will begin to suffer huge reductions in performance (up to 33% loss of power). At such temperatures, the tank must be stopped after travelling 25km to prevent excessive engine wear. The simplest solution, as practiced by most tank crews, is to remove the armoured covers, which helps to improve air intake volume to improve cooling capacity.
Apparently, the V-92 engine series and its accompanying modifications have partially solved the overheating issue. Specific details are not known to the author, but it could only either be an increase in the centrifugal fan's power, or a simple modification of the water flow channels in the radiator, as Indian T-72s and T-90Ss have.
 | |
|
 |
| Cooling system air outlet. Armoured covers for it are removed, but not for the radiator in front of it |
 |
| Engine compartment with cooling pack and engine access panel removed. Note the crossbar to hinge both of the aforementioned accessories. Also note the centrifugal fan at the bottom left corner. It is directly powered by the engine, and thus increases or decreases its speed in accordance with the engine's requirements. It is strong enough to throw water out of the engine compartment like a blowhole even while idling. In front of the engine is a large fuel tank, separated from the crew compartment by an armoured bulkhead. |
 |
| Centrifugal fan |
Maintaining or replacing the cooling pack is quite simple, since the entire unit can be hinged open.
 |
| Cooler pack hinged open |

The photo above shows the engine access panel and armoured cover hinged open. Note the spaced armour arrangement. Note the thickness. Since ground attack aircraft and attack helicopters almost never fly at high altitudes to deliver cannon attacks, the armour is more than enough to deflect hits from all manner of cannon fire. A-10 pilots are trained to approach targets at an angle of attack of around 3°. Adding 20-odd degrees won't change much.
The T-72 uses a hydraulically assisted mechanical syncromesh transmission with dual planetary gearboxes and dual final drives. There are seven forward gears and one reverse gear. The brakes are of a disk type, hydraulically operated. The T-72 turns on a false pivot, meaning that to turn the tank on the spot, one of the two the tracks are locked in place while the other drives the tank around it. This system of neutral steering is mechanically simple, but vastly inferior to a pivot-type steering system where one of the tracks is run at the desired speed while the other is run slighy slower in the opposite direction. Besides being slower, false pivot steering creates a huge amount of friction and places more strain on the inactive track, leading to a quicker gradual weakening of the track and a slightly shorter lifespan.
A little-known fact is that with the mud guards on, it is perfectly true that the T-72 can only climb vertical obstacles measuring around 0.85m in height, but when they are removed, the T-72 can scale obstacles at least as tall as 1.2m (already taller than the tracks) or much more. The GIF below shows the tank literally climbing straight up a concrete wall by digging its tracks in.

AUXILIARY POWER UNIT
The T-72 can mount an APU, but only the command variants have one. The T-72AK and T-72BK were both equipped with an AB-1 petrol generator, producing 1kW.SUSPENSION

The T-72 uses full-length torsion bar suspension. Each wheel has its own torsion bar, which runs across the hull floor and to the other end of the hull. The front two torsion bar-wheel hub interfaces have reinforced bolts, since the T-72 is slightly front heavy and so they will bear the brunt of the tank's weight during forward movement, especially across pot-holed ground.
There are six 750mm aluminium alloy roadwheels with 3 return rollers per each side. The roadwheels are die-cast, with thick rubberized rims. The wheels weigh 180kg each. The T-72 Ural used an 8-spoked wheel design (pictured), but all subsequent models used a 6-spoked wheel.
The first, second and sixth roadwheel on both sides are augmented with hydraulic shock absorbers. Like with the reinforced interfaces, the front two shock absorbers are needed to dampen the tank's movement dynamics across rough terrain, while the rearmost shock absorber is intended for assisting recuperation after driving through dips and bumps. This is necessitated by the tank's nose heaviness and forward momentum, which puts great strain on the front two roadwheels, particularly when driving cross-country.


The T-72 first came with single-pin RMSh tracks measuring 580mm in width. These tracks have rubber bushings that help reduce vibrations and thus, reduce wear and tear as well as noise levels (though still relatively high). A full set weighs just over 1700 kg.

 |
| Old drive sprocket |

| ||
 |
| Rubber pads installed (Photo credit: Vitaly Kuzmin) |

 |
| Removing rubber pads on T-90 |
The T-72 Ural and T-72A exerted 0.83kg/sq.cm of ground pressure, while the T-72B, being heavier, put in 0.898kg/sq.cm of pressure. Compared to its immediate foreign counterparts, the T-72 had little to no advantage in soft terrain, despite being a great deal lighter than all of its adversaries. Against the Chieftain, Leopard 1 and M60A1 of its era, the T-72 Ural and T-72A fared slightly better in this respect, but the T-72B was neither better nor worse off than its more modern challengers like the Leopard 2, Challenger 1, M60A3 and the M1 Abrams. The weight discrepancy doesn't manifest in this regard, but it suddenly becomes apparent when we consider the infrastructure of Eastern Europe at the time, especially the bridges - both permanent and temporary ones - that a huge advantage lays in the fact that the T-72 remains light enough to cross many of the more modest bridges and be compatible with the weight limit of the old MTU-55 bridge layers and TMM truck-based bridge layers, both of which were and still are present in huge numbers.
If the T-72 were to be trapped in swamps, bogs or in extremely deep snow, it may escape with the help of the eponymous log.

By tying the log to track pins on both right and left tracks as illustrated below, the tracks will pull the log under the roadwheels, thus forcing that section of the track to rise above the mud while simultaneously giving the track something more solid to drive over. This allows the tank to get out of the hairiest situations.


WATER OBSTACLES
The T-72, like all post-war Soviet tanks, has exemplary water crossing capabilities. Safe fording depths are usually cited to be 1.2m, but water obstacles measuring up to 1.8m deep may be forded for short distances if necessary. Doing so will require the air intakes to be shut off, since the water level would be above the hull. With the installation of the proprietary OPVT snorkel, fording up to a depth of 5m is possible. Pre-fording preparations are necessary in order to do so, requiring the edges of all hatches and the openings of various equipments and periscopes to be coated with a thick resinous waterproofing paste beforehand, as the water pressure at such depths is simply too much for rubber seals to handle.
The driver must then reset the fuel pump which doubles as a bilge pump. It is located to his lower left side.
The snorkel "breathes" for all three occupants. It is installed on the gunner's hatch, through a circular porthole, visible in this picture:

Because the hatch can be simply swung open, installing the snorkel is not difficult. The snorkel comes with two floating markers to indicate the tank's position underwater to help rescue teams locate the tank if it has stopped underwater.
 |
| Preparing for underwater driving in an exercise |
Also, the exhaust port must be replaced with a special valve bank to prevent water from entering into the exhaust manifolds.

T-72s equipped with the V-92S2 or V-92SF engines must use different valve units.
Crew members are each given a closed-circuit IP-5 rebreather for emergency use. It comprises a watertight, form fitting gas mask, a chemical respirator chamber containing potassium superoxide (KO2), and a flotation collar. The rebreather uses the chemical reaction between potassium superoxide and carbon dioxide, activated by water from the user's breath reduce the former two to oxygen and potassium carbonate. The freshly produced oxygen gas is mixed into the previously exhaled breath to replenish its oxygen concentration for rebreathing. The crew usually puts the IP-5 on before entering water as a precautionary measure.
 |
| IP-5 |
ROAD ENDURANCE
All T-72s have a total internal fuel capacity of 705 liters, spread across several fuel cells excluding the ubiquitous fuel drums to the rear. Two tanks are located on the forward hull on either side of the driver. Another conformal fuel tank is located directly behind the right frontal fuel tank. It also performs as a shell rack, and so does the conformal fuel tank directly behind the autoloader, which holds 12 propellant charges. 495 liters of fuel is stored in another five conformal fuel cells are located externally on the starboard side fender. The total fuel capacity is 1200 liters.
The driver-mechanic is able to shut off and isolate individual fuel tanks from his station. Isolated fuel tanks will be disconnected from both the fuel pump and the fuel return lines, so the fuel within the tank will be left to sit. This can be beneficial in some circumstances, such as when there is an imminent threat of an internal fire spreading. By shutting off all of the internal fuel tanks, the fuel will not leak out as energetically, or maybe even stop leaking entirely, depending on the specific location of the damage to the tanks. It is also possible for the driver to shut off all internal fuel tanks, and rely on external fuel only if the situation allows it. This creates the possibility of filling the internal fuel tanks with water, and since the majority of the volatile propellant charges are stowed in conformal fuel tanks, they can become ad hoc wet stowage racks for increased safety.

The two externally mounted auxiliary fuel drums each have a 200-liter capacity. These connect directly to the fuel system, and both can be disconnected by the driver at the same time by the push of a button.

The auxiliary fuel tank holders are hinged, and may be folded flush to the hull rear.
The T-72 Ural can travel 480km on internal fuel alone, or 700km with external fuel tanks. Thanks to improvements in fuel efficiency on the T-72B3, it can travel 550km on internal fuel alone, or 800km with external fuel tanks despite having the same fuel capacity. As with all automobiles, fuel efficiency decreases while driving cross-country. The amount of engine power needed increases as the harshness of the terrain increases, and so does fuel consumption.
Because of the T-72's relatively large fuel capacity and high fuel efficiency, refueling the T-72 isn't even necessary for short continuous operations (lasting no more than 3 days), and this greatly eases the logistical burden on the frontlines.
DRIVER MECHANIC'S STATION

The driver is provided with a single forward-facing TNPO-168V periscope to facilitate driving. It is a very wide periscope (wider than the driver's head) with a binocular field of view of 38 degrees, and a total field of view of 138 degrees. The periscope provides 31 degrees of vision vertically - 15 below the horizontal axis and 16 above (roughly equivalent to vision range of human eye). Like all the other periscopes on the T-72, the TNPO-168V is heated through the RTC heater system.
 |
| View through the TNPO-168V |
  |
For night time driving, the driver is provided with a TVNE-4B passive-active binocular periscope. It is typically kept in its aluminium box and stowed away by the driver until necessary.


It can be directly inserted into the periscope slot without any modifications. Because of its binocular design, it has a horizontal field of view of 36 degrees and a vertical field of view of 33 degrees. It has a 60m view range in the active mode using the hull's single small IR headlight only (it may also pick up infrared light from the turret's three IR spotlights), or 120m in the passive mode under lighting conditions no darker than 0.005 lux (moonless, starlit night). It has 1x magnification.
Because of the mediocre viewing range provided by the periscope, the driver cannot drive very fast and he is usually directed by the commander at night.
There is also an accessory windshield that may be attached to the outside of the hatch. It appears to be intended to protect the driver from shrapnel and small shell fragments while driving with his head out of the hatch, typically when in convoys. It also shields the driver's eyes from dust kicked up by the leading tank in front.


The driver enters through a pill-shaped 600mm-wide hatch. Two TNPA-65A viewing prisms are embedded in it, one looking in the 10 o'clock and the other in the 1 o'clock direction. Looking through them requires the driver to look upwards. This layout is generally far less convenient than the more commonly encountered bank of three viewing prisms found on the T-80 and Abrams as well as most others. But at least the TNPA-65A periscopes are very narrow, almost slit-like. It would be very hard to hit or damage them with machine gun fire, unlike with bank layouts. The TNPA-65A periscopes are meant to check the corners of the tank only. They are far too limited for driving during combat.
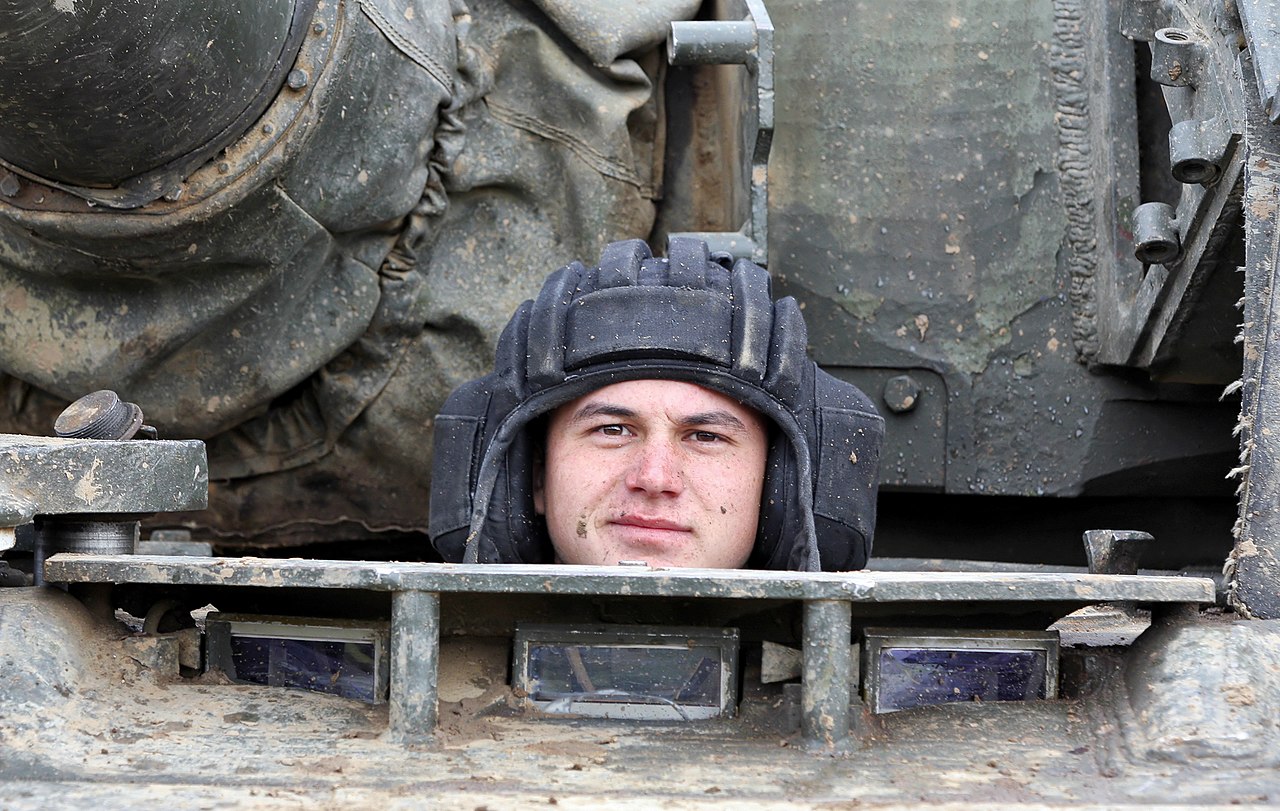
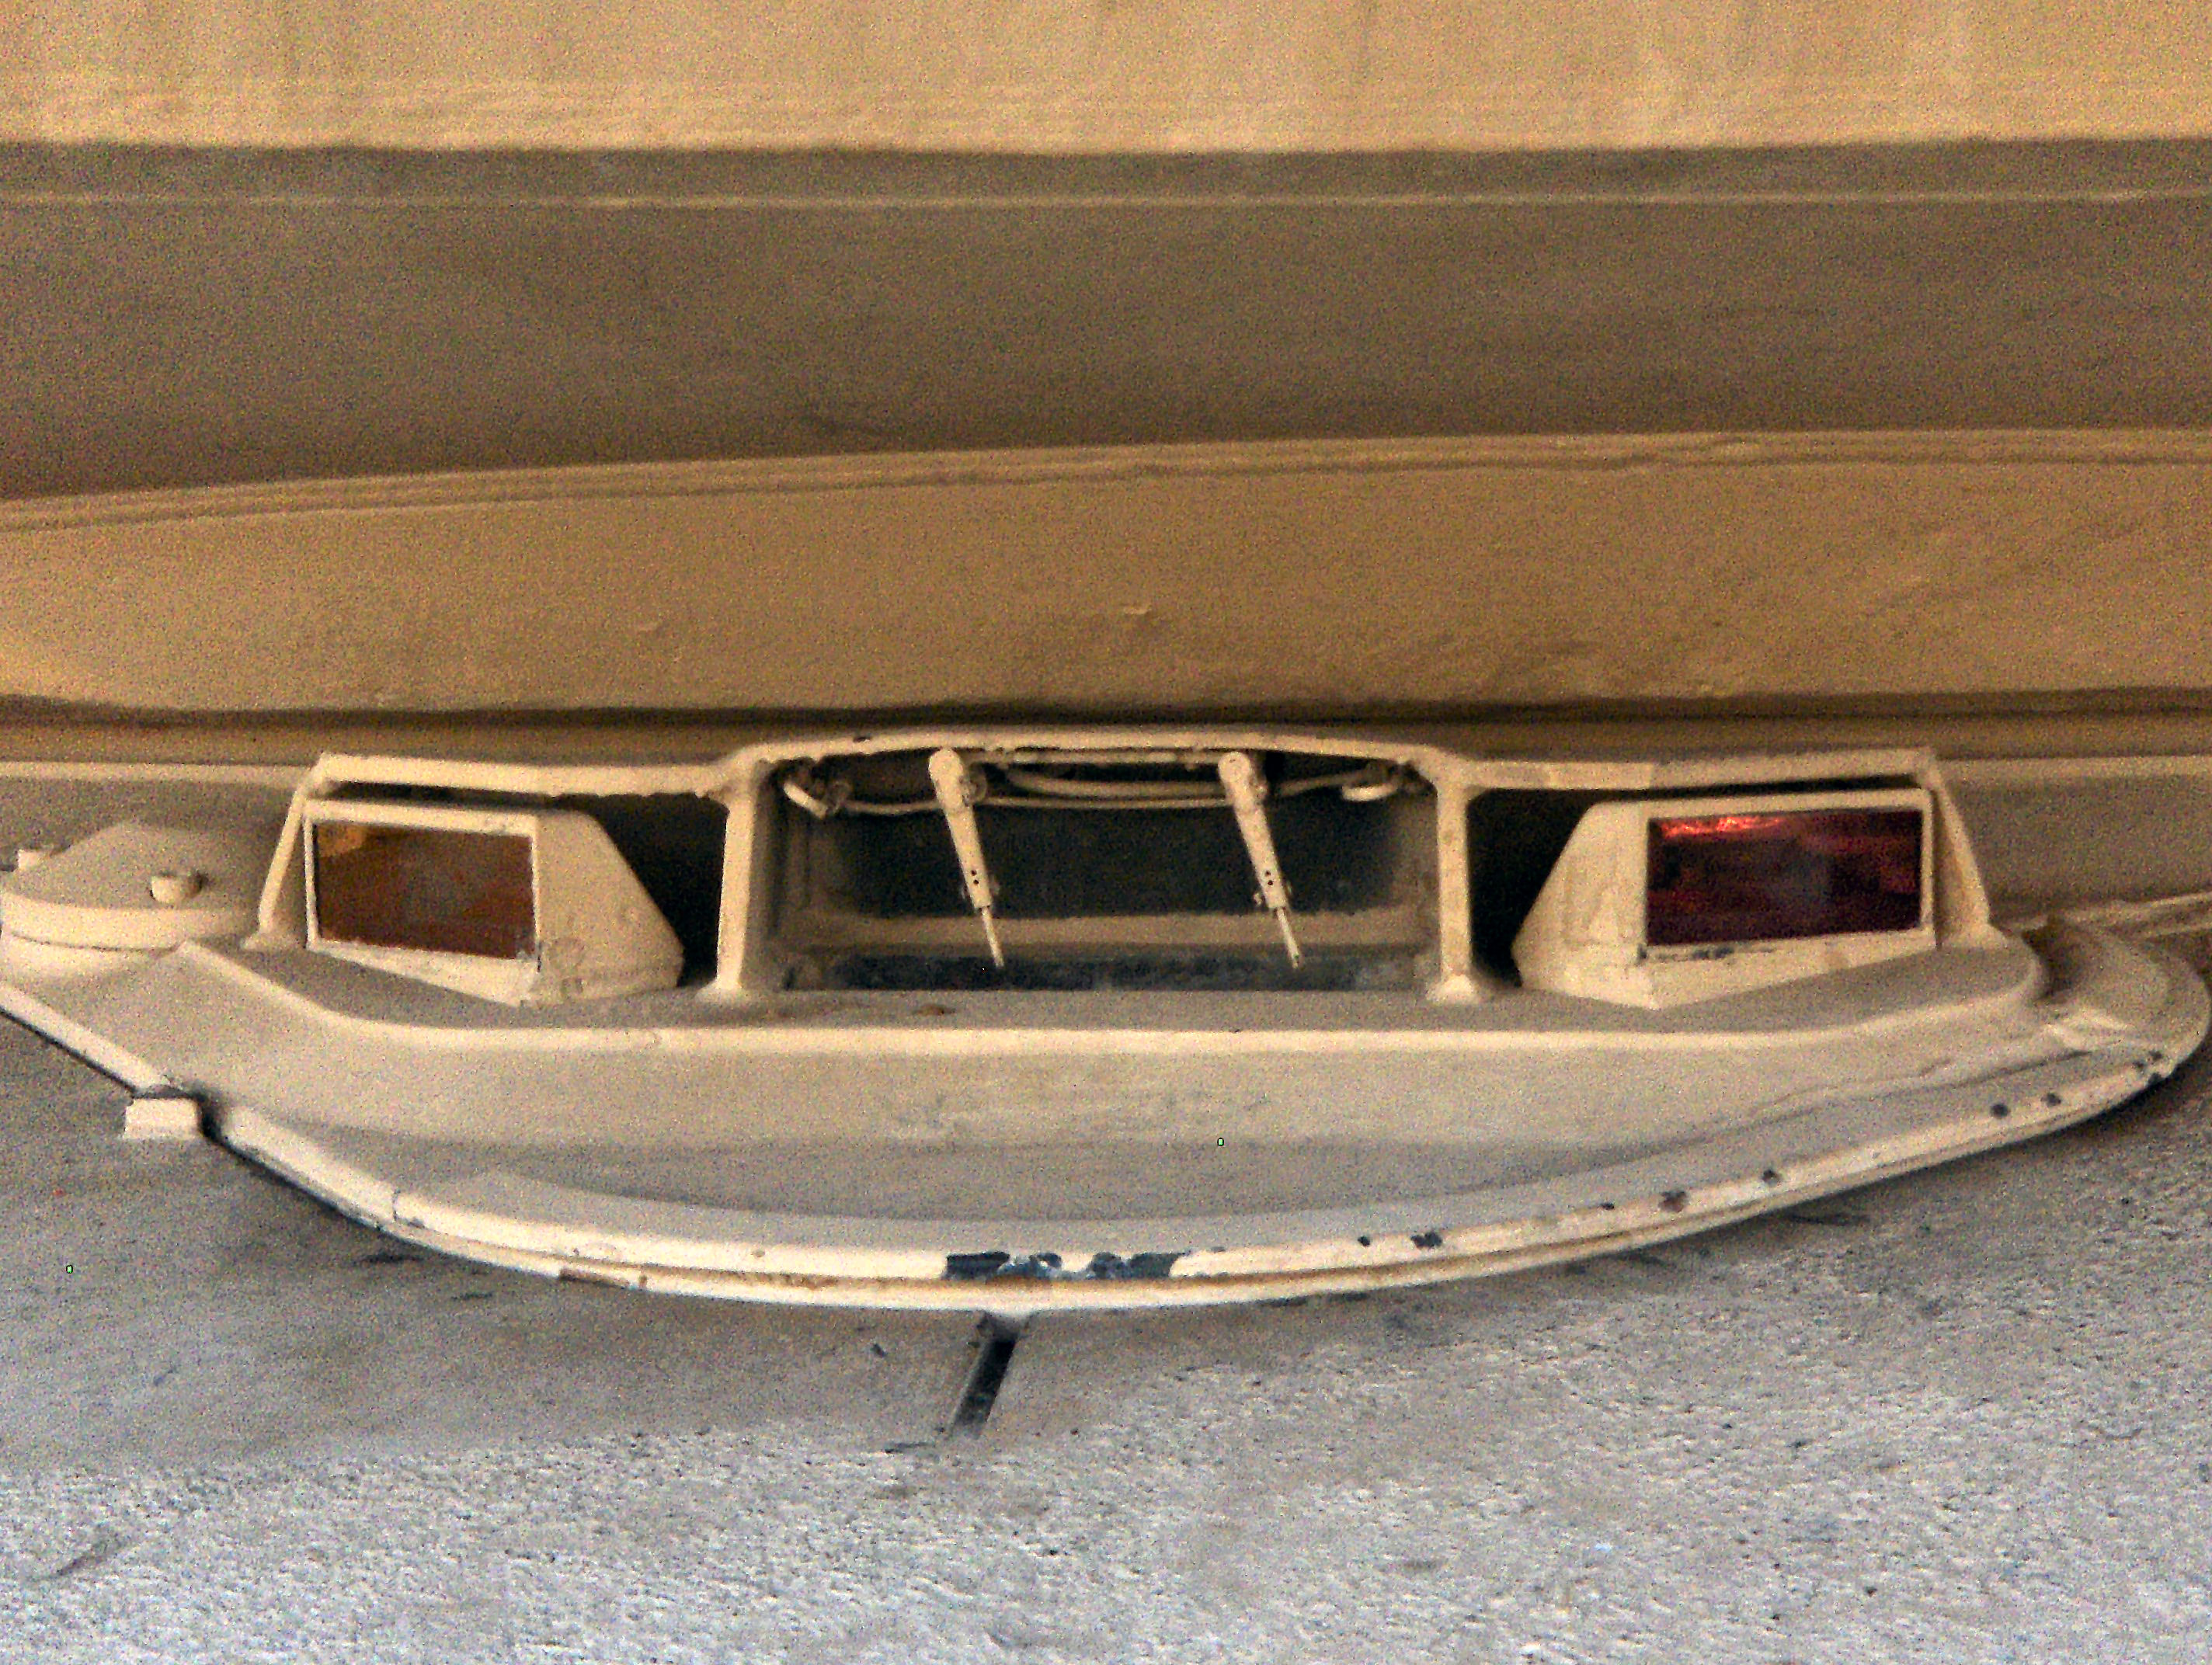


The driver's hatch itself is 20mm thick. The rubber seals make them completely watertight down till a depth of around 1 or 2 (relative to the height of the hatch, not the turret roof). Unfortunately, the seals on the TNPO-168V periscope are not nearly as dependable. Being mostly watertight, the tank can ford streams as deep as 1.2m or deeper without the danger of excessive water ingress.
Steering the tank requires the use of two hydraulically assisted tillers, which are located on either side of the knees of the driver. Though the tiller steering system can be considered one of the more antiquated aspects of the T-72, it's worth noting that many of its rivals like the AMX-30, Chieftain and Challenger used the same system as well. However, most main battle tanks had already grown out of tillers and progressed into steering wheels even by the 1960s, like the M60 and Leopard 1 did. The Leclerc and Leopard 2 both use steering wheels and the Abrams tank uses motorcycle handlebars. The only exception is the Challenger 2, which (shockingly) still retains the same tiller system.
The driver's throne is rather modest, but quite homely. It can be adjusted for height in order to accommodate persons of a wider range of height. When raised to its fullest, the driver is able to peek out of the hatch and drive with his full range of vision.

Like the commander and gunner, the driver's "air conditioning" comes in the form of a small vulcanized rubber fan.

All of the driving-related indicator gauges are placed on a board to the driver's left. Their placement isn't exactly convenient, but looking at them while driving (in any tank) isn't even necessary anyway.

Behind is the left front hull fuel tank. The fire extinguishers for the hull's automated firefighting system is located underneath it.
Over at his left foot there is a rather rudimentary GPK-59 gyroscopic compass for directional navigation. It is particularly useful when driving underwater when nobody in the tank has any scenery to refer to for a sense of direction. The use of gyrocompasses can perhaps be labeled as a rudimentary form of an Inertial Navigation System (INS), advanced versions of which are often present in modern combat vehicles due to their independence from outside input contrary to a GPS-based navigation system. Sadly, the T-72 has not received either in any of its iterations.


Surprising thought it may seem, the designers of the T-72 have paid more attention to crew survival than many would believe. The driver is very (relatively) well off when it comes to quick escapes. Unlike with rivals like the Leopard 2A5 and M1A1 Abrams, the driver's hatch will never be obstructed overhead by the turret when the turret is oriented in any direction except directly forward or to the side. In addition to that, the driver in a T-72 can exit through the turret while it is oriented in a 90° forward arc, unlike the Abrams, where the driver can only exit through the turret if the turret is oriented to the side or rear. Traversing the turret takes precious time, exposes the vulnerable rear of the turret, and most importantly, the turret would require power to traverse, or an operational motor unit. If that were to be damaged, or the power supply terminated, coupled with all other factors cumulatively, then more often than not, the driver will be sealed shut in a burning tank; a rather morbid proposition.
 |
| Stuck |
 |
| Stuck |
| The cutout in the "wedge" applique armour shown here is for the driver to stick his head out of. He cannot exit the tank unless the turret is traversed to the side. |


DRIVING LIGHTS

The T-72 has a single F-127 IR headlight and a single F-125 white light headlight.
  |
| F-127 IR headlight |
The IR filter cap may be removed to revert the IR headlight into a regular driving light.
For convoy driving, the F-126 headlight/blackout light may be used. Blackout lights function by directing light forwards and downwards through small slits, minimizing the amount of light being transmitted off in other directions. This is to minimize the possibility of being seen, especially from afar. Because blackout lights only illuminate very small areas in front of the vehicle, the driver can't really see any further than a few meters. Depending on them for navigation is completely out of the question.
  |
| F-126 White Light headlight |
Considering how unuseful it is, it's quite understandable that there is only one F-126 headlight, on the left side of the tip of the upper glacis.
There is an F-127 marker light mounted on the turret rear. It displays double digits indicating the vehicle's numerical position in a convoy.


There is a GST-49K marker light at the front of the tank. Its function is to show the position of the tank behind the leading tank in a convoy.

REFERENCES
http://www.tank-net.com/forums/index.php?showtopic=14200&page=192
http://btvt.narod.ru/4/t-72.htm
http://topwar.ru/31292-sovetskie-bops-dlya-orudiy-semeystva-2a46.html
http://www.zavod9.com/?pid=10106
http://www.kotsch88.de/l_t-72.htm
http://u-96.livejournal.com/1638297.html?thread=31413145
http://ofbindia.gov.in/products/data/ammunition/lc/25.htm
http://www.niistali.ru/security/2010-07-05-08-58-15?start=1
http://www.wk2ammo.com/showthread.php?7666-125mm-BK-14M-HEAT-for-2A46-125mm-smooth-bore-gun-Russia
http://btvt.narod.ru/raznoe/dz_2014/dz_2014.htm
http://chtz-uraltrac.com/articles/categories/37.php
http://www.optics-nj.cz/en/tanks.html
http://www.niistali.ru/en/about-nii-stali/major-milestones.php
http://www.yarz.ru/prod_r168-5un2ee.html
http://www.rbs.ru/vttv/99/firms/kotplast/e-index.htm
http://www.geo-army.ge/index.php?option=com_content&view=article&id=372%3A2012-04-26-09-32-02&catid=51%3A2012-03-25-05-57-06&lang=ka
http://www.photopribor.ck.ua/en/products/defense/equipment_for_armored_vehicles_control_systems/1k13_sighting_and_guidance_device/
https://www.youtube.com/watch?v=jU_-DntBBIQ
http://www.kotsch88.de/m_125_mm_d-81.htm
http://www.coeindia.com/products.php#head_lights
http://bulcomersks.com/index.php/ct-menu-item-4/ct-menu-item-12/50-ammunition-components/fuzes/514-fuze-v-429e
http://morozovkmdb.com/eng/body/t72msavan15.php
http://catalog.use.kiev.ua/index.php?page=catalog&view=category&cat_id=38
http://www.sklep.militariaanhol.pl/en/spare-parts/171-temperature-sensor-td-1.html
http://en.npoelm.ru/products-eng/specialproducts-eng/raduga-eng/td-1-eng/
http://www.excaliburarmy.com/en/t-72-parts?from=0#fotky
http://andrei-bt.livejournal.com/170864.html
Bibliography
T-72 Main Battle Tank 1974-93 by Steven Zaloga, Peter Sarson
Excellent article. It makes me wonder what the Russians have in the T-14.
ReplyDeletePlease notify me if there are any errors in the article. I've been very busy for the past few months, so I haven't really had the time to proofread the article before I posted it. I am constantly updating, but I don't think I've gotten rid of half of the mistakes in there.
DeleteI have checked everything so far but have not seen anything wrong yet.
DeleteI just did a brief writeup on the T-14 you may find of interest: http://www.battleswarmblog.com/?p=24451
ReplyDeleteHello Tiles,
ReplyDeleteI am asking something that has been on my mind for a while but constantly forget to ask. On the section regarding the T-72B's armor protection on the first image of the destroyed T-72 where do I exactly look to see the spaced armor array?
Secondly on the section regarding how Soviet Bulging Armor on the two images comparing Forward and Backward moving plates seems mixed up. I think your description is good but it seems to conflict with the labeled images. Are the images wrong or are your descriptions wrong?
BTW I hope your search for someone to take over the blog goes well. :)
Hi!
DeleteWell, let's just say that the "ramp" that the burned-out chassis is on isn't really a ramp. Notice the thing at the guy holding the RPG's feet - that's the front hull armour ripped right off from an ammo explosion. Notice the idler wheel socket.
No, that's how the research papers I've read describe them. Backwards means moving in a direction opposing the cumulative jet, meaning accelerating towards it. Forwards means accelerating in the same direction as the cumulative jet. It is viewed from the cumulative jet's perspective.
Thanks. But even that's not going that well. I've got one guy who seems willing, but I always forget to chat him up. I've got an even bigger workload now, and this blog project is very, very low on my priority list. However, having seen the overwhelmingly positive feedback from readers, I try to update my existing articles as often as I can, and maybe add a few paragraphs to the ones that are still on-the-way. I've got 18 article drafts, and most of them are half-finished. Maybe in September I'll binge upload 5 or 6 of them :)
Ah. It all makes sense now. My bad. :(
DeleteYour work is excellent and I wish you well. We will be waiting patiently for more.
This comment has been removed by the author.
ReplyDeleteDid Algeria modernize its T-72s to the T-72M1M standard?
ReplyDeleteAs far as I know, they did not. Algeria did receive a number of Relikt kits (some 44 going off of memory), some of which have been fitted to in-service T-72M1's.
DeleteHope this answers your question.
This is a fantastic article. You should write a book!
ReplyDeleteThis comment has been removed by a blog administrator.
ReplyDeleteGood article but I couldn't help feeling that there was some bias towards the t72 in this article. Where are the pictures of the burn out t72s, the section on the weaknesses versus the strengths of the vehicle etc.? I feel like the problematic nature of the ammunition placement deserves more coverage here
ReplyDeleteI agree that there is bias, but maybe we should call it "positive bias"? Do the facts not corroborate the position which I have adopted in describing the tank? The ammunition placement, in my opinion, is no better and no worse than what many other tanks have, and I have been very consistent on this point for a long time. I hereby quote myself from one of the many, many debates I've had over this issue: "
Delete"If an M1 Abrams had its front turret armour penetrated with a significant overmatch, the penetrator would continue onwards and penetrate the bustle blast door and hit the ammunition. We get ammo deflagration, and a hole in the bustle to vent it all into the crew compartment. Let us also not forget the rather less well protected container in the hull, which lacks a blow-off feature, and is usually kept stocked full of ammo (according to the testimonies of tank veterans of ODS, OIF, etc). So we see, a frontal armour perforation with significant overmatch will result in catastrophic destruction. BUT... How likely is it that you could defeat the front turret armour so handily as so produce such a result? Nearly nil, unless we have 2016 technology to match up to the 1992 technology of the M1A2.
Do you not agree that this is directly analogous to the situation for the T-72? As long as the frontal hull armour remains unpenetrated, the ammunition will never be at risk of detonation, and for a period of more than a decade, the T-64 and T-72 (they had identical hull armour for the better part of their existence) were as immune to 105mm APDS as the M1A2's turret is immune to all anti-tank weapons of the present. Very, very immune. I recall the case of the Greek Leopard 2A5 that sustained 30 hits to its front turret from DM53 APFSDS rounds fired from its own cannon, with only 27 armour perforations. As long as the frontal armour holds up, the issue of ammo detonation is irrelevant." -cont.
-cont. "'Ah,' you say, 'but the distance between the frontal turret armour and the blast doors at the bustle may well be considered an extra layer of defence as spaced armour!'. True enough. However, that's still a form of armour, and so the anti-spitting-flames-into the-crew-compartment mechanism remains solely reliant on the ability of the *armour protection* to prevent ammunition from reaching the ammunition.
DeleteThe validity of the protection offered by separated ammunition with blow off panels in the event of a side hit is indisputable. However, it is not as clear cut as that. A hit to the side of the turret that enters the crew compartment kills the crew. A hit to the bustle area of the side turret detonates the ammuition, but spares the crew. Knowing this, your average RPG-wielder would obviously aim for the center of the turret profile, which is invariably the natural point of aim for any assailant anyway, be they a tank, a plane or a helicopter - they'd aim for center mass, and a hit to the center of the turrets of both the T-72 and Abrams will result in the death of the denizens within. A hit to the hull produces the same effect for both tanks, which is catastrophic destruction. Neither have blow-off ammo compartmentalization in the hull. The point is that the T-72 doesn't have bustle ammunition, and only has hull ammunition, whereas the Abrams has both, so the chances of losing all of its ammunition in a single stroke is twice higher, while its survivability in the event of a hull penetration is not higher (if we assume that penetration begets ammo detonation with 100% consistency).
As to the question of storing ammunition in recesses in the fuel tanks is not a straightforward one. Fuel burns, any idiot could tell you that. However, unless burnt in open air or in a closed container but in the presence of oxygen, fuel could actually extinguish fires. If an RPG round detonated against the sideskirt and had enough residual penetration to defeat the side armour, continued into the fuel cells, and hit the ammunition, the fuel would rush into the hole made in the propellant charge or warhead. The fuel that starts burning due to air rushing in from the hole in the side armour would also leak out from the side armour and burn outside the tank. In short, this is wet stowage. Of course, this only works if there wasn't much residual penetration to speak of, but then, if there was that much energy post penetration, ammo ignition via burning fuel would not happen, simply because the ammunition would detonate admirably without the help of flaming diesel anyway."