「この記事が気に入ったらいいね」をブログに設置する方法
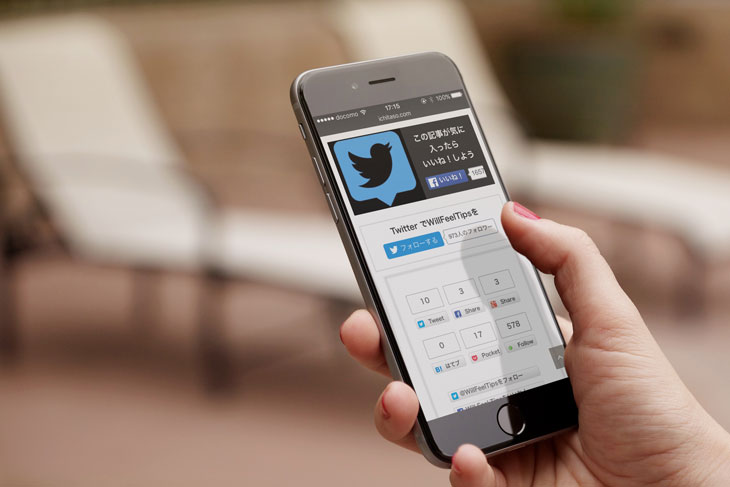
記事の最後にFacebookページヘのいいね!やTwitterのフォローボタンを表示させる「この記事が気に入ったらいいね」をブログに設置する方法を紹介します。
作者のまなしばさんによると、これを設置したことによって1ヶ月100いいねくらい増えたとのこと。
ブログをやっている方にとっては是非取り入れて、活用したいですね!
FacebookページやTwitterからの流入が、ブロガーにとっても大切な流入元となっていますよね。 そんなFacebookページのいいねやTwitterをフォローし...
こちらが原案の方法なんですが、WordPressの場合プラグインで簡単に設置できます。
「この記事が気に入ったらいいね」をWordPressに設置する方法
WordPressのプラグイン→新規追加→プラグインの検索で「Like me if you like this article」とコピペして検索すると出てきます。
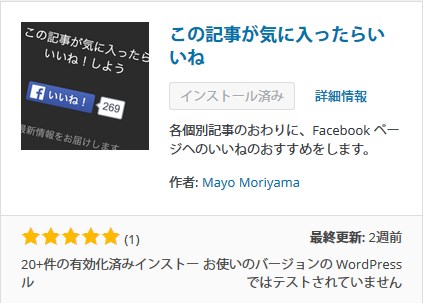
1.インストールして有効化しましょう。
2.FacebookページとTwitterアカウントの設定
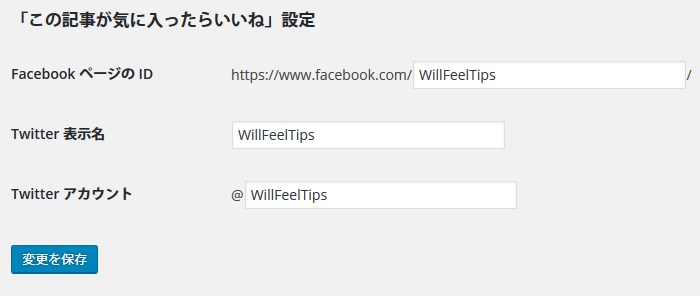
設定→表示設定の下に入力欄があるので、入力→変更を保存して下さい。
これで完了です。簡単ですね!ただ、デフォルトだとTwitterのフォロワー数が表示されていないので、お好みで表示させてください。
プラグインの編集で「Like me if you like this article」を選択
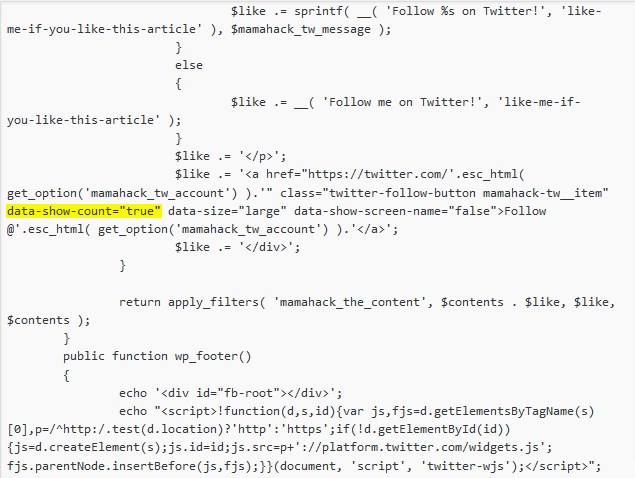
「data-show-count」の値をfalseからtrueにすると表示されます。
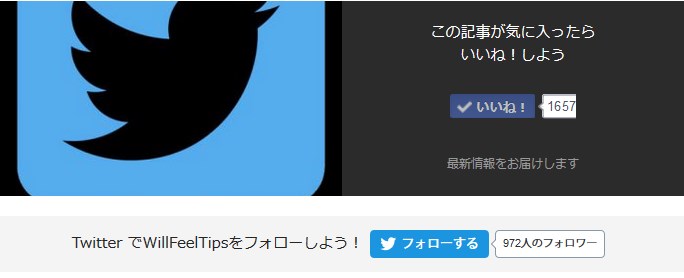
こんな感じでアイキャッチ画像と共に表示されます。
果たして、減り続けるいいね!数は増えるのか。
Bloggerでの設置方法
これだけだと詰まらないので、Bloggerで設置できるか試してみました。
1.テンプレートのHTMLの編集をします。
事前に「バックアップ/復元」でバックアップを取っておいて下さい。
下の方にスクロールしていくと「<b:includable id='post' var='post'>」という箇所があるかと思いますので、その部分を探して下さい。
テーマによっては名前が違うかもしれません。
そこを展開すると「<data:post.body/>」というタグがあるので、その下辺りに設置します。
2.設置するコード
<b:includable id='post' var='post'>
----------------------------------------------------
<data:post.body/>
<div style='clear: both;'> <!-- clear for photos floats -->
<!-- 記事がよかったらいいね ここから -->
<b:if cond='data:blog.pageType == "item"'>
<!-- 記事がよかったらいいねPC -->
<div class="p-entry__push">
<div class="p-entry__pushThumb"><img expr:src='data:blog.postImageUrl' width="75%" style="margin: 3px 0px 0px 3px; display: block;"/></div>
<div class="p-entry__pushLike">
<p>この記事が気に入ったら
<br/>いいね!しよう
</p>
<div class="p-entry__pushButton">
<div class="fb-like" data-href="https://www.facebook.com/WillFeelTips" data-layout="button_count" data-action="like" data-show-faces="false" data-share="false"></div>
</div>
<p class="p-entry__note">最新情報をお届けします</p>
</div>
</div>
<div class="p-entry__tw-follow">
<div class="p-entry__tw-follow__cont">
<p class="p-entry__tw-follow__item">TwitterでWillFeelTipsをフォローしよう!</p>
<span style="vertical-align: -9px;"><a href="https://twitter.com/WillFeelTips" class="twitter-follow-button p-entry__tw-follow__item" data-show-count="false" data-size="large" data-show-screen-name="false"></a></span>
<script>!function(d,s,id){var js,fjs=d.getElementsByTagName(s)[0],p=/^http:/.test(d.location)?'http':'https';if(!d.getElementById(id)){js=d.createElement(s);js.id=id;js.src=p+'://platform.twitter.com/widgets.js';fjs.parentNode.insertBefore(js,fjs);}}(document, 'script', 'twitter-wjs');</script>
</div>
</div><style>
/* 記事がよかったらいいねPC */
.p-entry__push {
margin-bottom: 20px;
display: table;
table-layout: fix;
width: 100%;
background-color: #2b2b2b;
color: #fff;
}
.p-entry__pushThumb {
display: table-cell;
min-width: 240px;
background-position: center;
background-size:cover;
}
.p-entry__pushLike {
display: table-cell;
padding: 20px;
text-align: center;
vertical-align: middle;
line-height: 1.4;
font-size: 18px;
}
.p-entry__pushButton {
margin-top: 15px;
display: inline-block;
width: 200px;
height: 40px;
line-height: 40px;
-webkit-transform: scale(1.2);
-ms-transform: scale(1.2);
transform: scale(1.2);
}
.p-entry__pushButtonLike {
line-height: 1;
}
.p-entry__note {
margin-top: 15px;
font-size: 12px;
color: #999;
}
.p-entry__tw-follow {
margin-bottom: 10px;
background: #f4f4f4;
width: 100%;
padding: 15px 0;
}
.p-entry__tw-follow__cont {
text-align: center;
font-size: 15px;
color: #252525;
}
.p-entry__tw-follow__item {
display: inline-block;
vertical-align: middle;
margin: 0 15px;
}
</style>
</b:if>
<!-- 記事がよかったらいいね ここまで -->3.HTMLの「WillFeelTips」という箇所を自分のIDに変更して下さい
4.Facebookいいね!ボタンを設置していない場合は、下記コードも追加して下さい
<div id="fb-root"></div>
<script>(function(d, s, id) {
  var js, fjs = d.getElementsByTagName(s)[0];
  if (d.getElementById(id)) return;
  js = d.createElement(s); js.id = id;
  js.src = "//connect.facebook.net/ja_JP/sdk.js#xfbml=1&version=v2.6;
  fjs.parentNode.insertBefore(js, fjs);
}(document, 'script', 'facebook-jssdk'));</script>参考:いいね!ボタン - ソーシャルプラグイン
以上でPC向けの設置は完了です。
Bloggerの場合、サムネイル画像を出力する方法が、「expr:src='data:blog.postImageUrl'」でしか取得できなかったため、imgタグで表示しています。そのため、位置ずれが発生するかと思うので、CSSでうまく調整して下さい。
モバイル向けの設定
はじめに、モバイルテンプレートをカスタムにする必要があります。
こちらは、わかりづらいですが、「<b:widget id='HTML7' locked='false' mobile='yes' title='' type='HTML' version='1' visible='true'>」こんな表記のものが一番下の方にあります。「HTML7」という表記はおそらく異なるので「mobile='yes'」を参考に探して下さい。
<b:widget id='HTML7' locked='false' mobile='yes' title='' type='HTML' version='1' visible='true'>
<b:includable id='main'>
<!-- only display title if it's non-empty -->
<b:if cond='data:title != ""'>
<p class='title'><data:title/></p>
</b:if>
<div class='widget-content'>
<data:content/>
<!-- 記事がよかったらいいね ここから -->
<b:if cond='data:blog.pageType == "item"'>
<b:if cond='data:blog.isMobile'>
<div class='p-shareButton p-asideList p-shareButton-bottom'>
<div class='p-shareButton__cont'>
<div class='p-shareButton__a-cont'>
<div class='p-shareButton__a-cont__img'><center><img expr:src='data:blog.postImageUrl' style='margin: 3px 0px 0px 3px; display: block;' width='80%'/></center></div>
<div class='p-shareButton__a-cont__btn'>
<p>この記事が気に入ったらいいね!しよう</p>
<div class='p-shareButton__fb-cont p-shareButton__fb'>
<div class='fb-like' data-action='like' data-href='https://www.facebook.com/WillFeelTips' data-layout='button_count' data-share='false' data-show-faces='false'/>
<span class='p-shareButton__fb-unable'/>
</div>
</div>
</div>
</div>
<div class='p-asideFollowUs__twitter'>
<div class='p-asideFollowUs__twitter__cont'>
<p class='p-asideFollowUs__twitter__item'>TwitterでWillFeelTipsを</p>
<span style='vertical-align: -9px;'><a class='twitter-follow-button p-asideFollowUs__twitter__item' data-show-count='false' data-show-screen-name='false' data-size='large' href='https://twitter.com/WillFeelTips'/></span>
<script>!function(d,s,id){var js,fjs=d.getElementsByTagName(s)[0],p=/^http:/.test(d.location)?'http':'https';if(!d.getElementById(id)){js=d.createElement(s);js.id=id;js.src=p+'://platform.twitter.com/widgets.js';fjs.parentNode.insertBefore(js,fjs);}}(document, 'script', 'twitter-wjs');</script>
</div>
</div>
</div><style>
/* 記事がよかったらいいねスマホ */
.p-shareButton-bottom {
padding-bottom: 15px;
overflow: hidden;
}
.p-shareButton__buttons {
font-weight: 700;
color: #fff;
font-size: 13px;
text-align: center;
}
.p-shareButton__buttons>li {
padding-left: 3px;
padding-right: 4px;
}
.p-shareButton__buttons .c-btn {
padding: 8px 0;
border-radius: 2px;
}
.p-shareButton__buttons .c-ico {
display: block;
margin: auto auto 5px;
}
.p-shareButton__fb {
-webkit-transform: scale(1.2);
-ms-transform: scale(1.2);
transform: scale(1.2);
width: 115px;
}
.p-shareButton__fb-cont {
position: relative;
width: 108px;
margin: 0 auto;
}
.p-shareButton__fb-unable {
position: absolute;
top: 0;
left: 0;
width: 20px;
height: 20px;
}
.p-shareButton__cont {
margin: 15px 0 0;
}
.p-shareButton__a-cont {
background: #2e2e2e;
display: table;
width: 100%;
}
.p-shareButton__a-cont__img {
min-width: 130px;
-webkit-background-size: cover;
background-size: cover;
background-repeat: no-repeat;
background-position: center;
}
.p-shareButton__a-cont__btn {
padding: 12px;
text-align: center;
}
.p-shareButton__a-cont__btn p {
font-size: 12px;
color: #fff;
font-weight: 700;
padding: 5px 0 15px;
line-height: 1.4;
margin-bottom: 0px;
}
.p-asideFollowUs__twitter {
background-color: #e6e6e6;
border: 2px solid #e6e6e6;
margin-top: 15px;
padding: 12px 0;
}
.p-asideFollowUs__twitter__cont {
text-align: center;
font-size: 13px;
color: #252525;
font-weight: 700;
}
.p-asideFollowUs__twitter__item {
display: inline-block;
vertical-align: middle;
margin: 0 2px;
}
</style>
</b:if>
</b:if>
<!-- 記事がよかったらいいねここまで -->※同じくHTMLの「WillFeelTips」という箇所を自分のIDに変更して下さい。
以上で完成です!
ちなみに、アイキャッチ画像を設定していない場合、なにも表示されないようになります。
<b:if cond='data:blog.postImageUrl'>
<img expr:src='data:blog.postImageUrl'/>
<b:else/>
<img src='代替画像URL'/>
</b:if>
このような感じで、代替の画像を用意しておくといいでしょう。
はてなブログでの設置方法
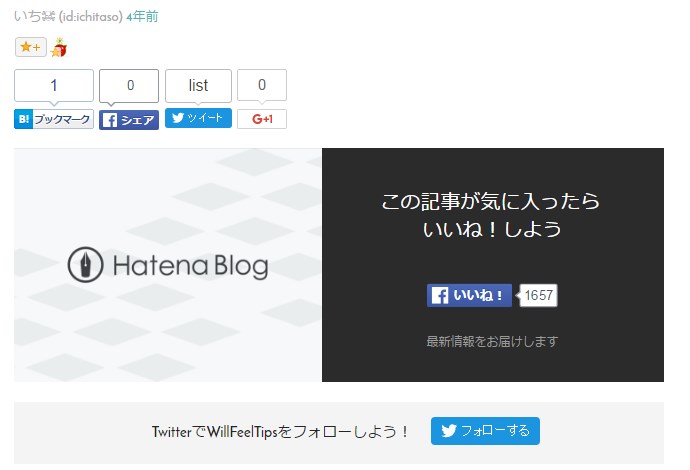
はてなブログでは、アイキャッチ画像の取得方法がわからないため、ブログのイメージ画像を用意しておくといいかと思います。今回は、はてなブログのデフォルトのものを使っています。
管理→デザイン→カスタマイズ→サイドバー→モジュールを追加→HTMLに以下のscriptを記述
1.デザイン→カスタマイズ→記事→記事下を選択
<div class="p-entry__push">
  <div class="p-entry__pushThumb" style="background-image: url('https://blog.st-hatena.com/images/theme/og-image-1500.png')"></div>
  <div class="p-entry__pushLike">
    <p>この記事が気に入ったら
      <br>いいね!しよう
    </p>
    <div class="p-entry__pushButton">
      <div class="fb-like" data-href="https://www.facebook.com/WillFeelTips" data-layout="button_count" data-action="like" data-show-faces="false" data-share="false"></div>
    </div>
    <p class="p-entry__note">最新情報をお届けします</p>
  </div>
</div>
<div class="p-entry__tw-follow">
  <div class="p-entry__tw-follow__cont">
    <p class="p-entry__tw-follow__item">TwitterでWillFeelTipsをフォローしよう!</p>
    <span style="vertical-align: -9px;"><a href="https://twitter.com/WillFeelTips" class="twitter-follow-button p-entry__tw-follow__item" data-show-count="false" data-size="large" data-show-screen-name="false">Follow @WillFeelTips</a></span>
  </div>
</div>
<style>
/* 記事がよかったらいいねPC */
.p-entry__push {
margin-bottom: 20px;
display: table;
table-layout: fix;
width: 100%;
background-color: #2b2b2b;
color: #fff;
}
.p-entry__pushThumb {
display: table-cell;
min-width: 240px;
background-position: center;
background-size: cover;
}
.p-entry__pushLike {
display: table-cell;
padding: 20px;
text-align: center;
vertical-align: middle;
line-height: 1.4;
font-size: 20px;
}
.p-entry__pushButton {
margin-top: 15px;
display: inline-block;
width: 200px;
height: 40px;
line-height: 40px;
-webkit-transform: scale(1.2);
-ms-transform: scale(1.2);
transform: scale(1.2);
}
.p-entry__pushButtonLike {
line-height: 1;
}
.p-entry__note {
margin-top: 15px;
font-size: 12px;
color: #999;
}
.p-entry__tw-follow {
margin-bottom: 10px;
background: #f4f4f4;
width: 100%;
padding: 15px 0;
}
.p-entry__tw-follow__cont {
text-align: center;
font-size: 15px;
color: #252525;
}
.p-entry__tw-follow__item {
display: inline-block;
vertical-align: middle;
margin: 0 15px;
}
</style>2.HTMLの「WillFeelTips」という箇所を自分のIDに変更して下さい
3.表示する画像を変更する
<div class="p-entry__pushThumb" style="background-image: url('https://blog.st-hatena.com/images/theme/og-image-1500.png')"></div>ここの「url('https://blog.st-hatena.com/images/theme/og-image-1500.png')」これをお好みの画像URLへ変更して下さい。
4.変更を保存する
これでPC向けの設定は完了です。
スマートフォン向けは、はてなブログProじゃないと設定できないので試していません。
単純に同様の方法でコピペすればOKかと思います。
問題はアイキャッチ画像の設定ができないというところですが、jQueryでog:imageから読み込んで書き換え等試しましたが出来ませんでした。
もし設定方法がわかる方がいらっしゃいましたら、コメントなどで教えて頂けると幸いです。
<div class="p-shareButton__a-cont__img" style="background-image: url('<$ArticleFirstImage$>')"></div>「<$ArticleFirstImage$>」これでファーストイメージを取得できるようです。
以上、「この記事が気に入ったらいいね」をブログに設置する方法でした!
最新情報をお届けします
Twitter でWillFeelTipsをフォローしよう!
Follow @WillFeelTips関連記事
-
Bloggerでモバイル閲覧時のスワイプによるページ切り替えを無効にする
Google Bloggerでモバイルテンプレートを有効にすると、閲覧しやすいよ ...
-
無料で広告無し!WordPressも設置できるレンタルサーバー『wkey.me』
通常レンタルサーバーとなると、一ヶ月いくらなど有料となりますが、今回紹介するサー ...
-
Blogに彩りを持たせるレコメンドリンクの設置 - zenback , LinkWithin , Outbrain
ブログを書くものとしては、一つ一つのエントリーが自分の創作物であり、愛情を持って ...
-
冬季限定!ブログに雪を降らせるScript「SnowParticle」を設置しました
[PHOTO:BRANIMIR JAREDIC - summers gone I ...
-
Blogger カスタマイズ Tipsまとめ
Google Bloggerを始めてからカスタマイズした内容を、備忘録と情報共有 ...