OS X YosemiteのHypervisor.frameworkを利用したxhyveでUbuntu Desktopを起動し、VNCで接続してみました。詳細は以下から。
Michael Steilさんが公開した"xhyve"はYosemiteで採用されたHypervisorフレームワークを使用して、OS X上で仮想環境を構築できるハイパーバイザーで既にCoreOSやboot2dockerなどを動かすスクリプトも公開されています。
pagetable@pagetable
xhyve – Lightweight Virtualization on OS X Based on bhyve http://t.co/7Ei2E4s4oJ
2015/06/10 14:10:16
先週時間がなく放置していましたが、Michael Steilさんが公開した"xhyve"のチュートリアルにはUbuntu Desktopを起動し、VNCをインストールすればグラフィックカードを持たないxhyveでもVirtualBox風な環境が構築できるということで試してみました、流れは以下の通り。
- xhyveをclone, make
- Ubuntu用の仮想ディスク(hdd.img)とRAMディスク(initrd)を作成
- Ubuntuをテキストモードでインストール
- インストール後openssh-server, xubuntu-desktop, vnc4serverをapt-get
- vnc4serverを起動しOS Xからvncでアクセス
- Ubuntu Desktopを起動(startxfce4)
1.xhyveのclone&make
xhyveはいつもどおり適当なディレクトリにGitHubからcloneしてmake。(*xhyveのシステム要件はOS X 10.10.3 Yosemiteが動くIntel EPTに対応した2010年以降のMacになっています)
cd ~/Desktop
git clone https://github.com/mist64/xhyve
cd xhyve
make
2.Ubuntu用の仮想ディスク作成
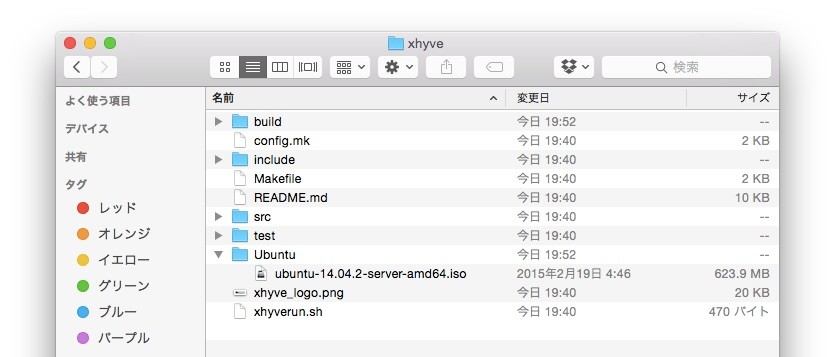
xhyveはBIOSやEFI Bootをサポートしていないのでイメージファイルからkernelとinitrdを取り出します。まずxhyveディレクトリ内にUbuntuディレクトリを作成し"Ubuntu Server"をダウンロード(*"Ubuntu Desktop"はテキストインストールモードをサポートしていないので"Ubuntu Server"が必要です)
Running Ubuntu on xhyve
You can also install a more complete Linux distribution on xhyve. The tricky bit is that xhyve doesn’t come with a BIOS or EFI booter, so it is necessary to extract the kernel and initrd from the Linux image and pass them to xhyve manually.
[mist64/xhyve - GitHub]
OS Xはisoのハイブリッドファイルシステムを認識しないのでkernelとinitrdはddでtmpファイルを作成し、hdiutilコマンドでattach(マウント)してコピーし、最後にUbuntuをインストールする仮想ディスク 8GBをddで作成すれば準備完了です。
mkdir Ubuntu
cd Ubuntu
curl -O http://releases.ubuntu.com/14.04.2/ubuntu-14.04.2-server-amd64.iso
dd if=/dev/zero bs=2k count=1 of=/tmp/tmp.iso
dd if=ubuntu-14.04.2-server-amd64.iso bs=2k skip=1 >> /tmp/tmp.iso
hdiutil attach /tmp/tmp.iso
cp /Volumes/Ubuntu-Server\ 14/install/vmlinuz .
cp /Volumes/Ubuntu-Server\ 14/install/initrd.gz .
dd if=/dev/zero of=hdd.img bs=1g count=8
3.Ubuntuをテキストモードでインストール
仮想マシンの設定が終わったら、以下のrunスクリプトを"xhyverun_ubuntu_install.sh"でxhyveディレクトリに保存、IMG_CDオプションのUbuntuのバージョンはダウンロードしたものと合わせておいて下さい。
#!/bin/sh
KERNEL="ubuntu/vmlinuz"
INITRD="ubuntu/initrd.gz"
CMDLINE="earlyprintk=serial console=ttyS0 acpi=off"
MEM="-m 1G"
#SMP="-c 2"
NET="-s 2:0,virtio-net"
IMG_CD="-s 3,ahci-cd,ubuntu/ubuntu-14.04.2-server-amd64.iso"
IMG_HDD="-s 4,virtio-blk,ubuntu/hdd.img"
PCI_DEV="-s 0:0,hostbridge -s 31,lpc"
LPC_DEV="-l com1,stdio"
build/xhyve $MEM $SMP $PCI_DEV $LPC_DEV $NET $IMG_CD $IMG_HDD -f kexec,$KERNEL,$INITRD,"$CMDLINE"
後はrootで実行すればUbuntuがテキストインストールモードで実行されます。
sudo ./xhyverun_ubuntu_install.sh
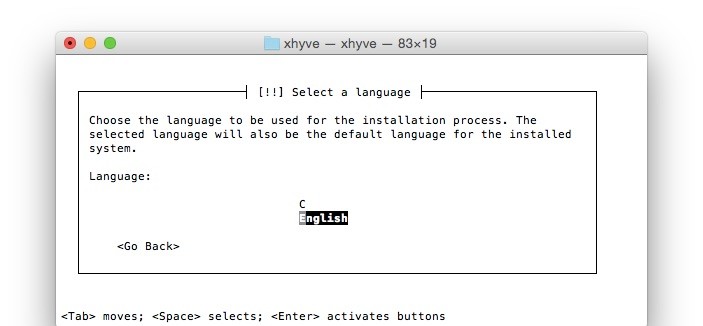
Ubuntuのインストールは長いので割愛します。ほとんどのデフォルトでOKですが、"Install the GRUB boot loader to the master boot record"では"Yes"を選択して下さい。
- Select a language ▶English
- Select a location ▶United States
- Configure the network ▶ubuntu
- Set up users and passwords ▶ユーザー名とパスワードを設定
- Set up users and passwordsのEncrypt your home directory? ▶No
- Configure the clock ▶Yes
- Partition disks ▶Guided - use entire disk
- Partition disksのSelect disk to partition ▶Virtual disk 1 (vda)
- Partition disksのWrite the changes to disks ▶Yes
- Configure the package managerのHTTP proxy information ▶入力しないでContinue
- Configuring tasksel ▶No automatic update
- Software selection ▶Continue
- Install the GRUB boot loader an a hard disk ▶Yes
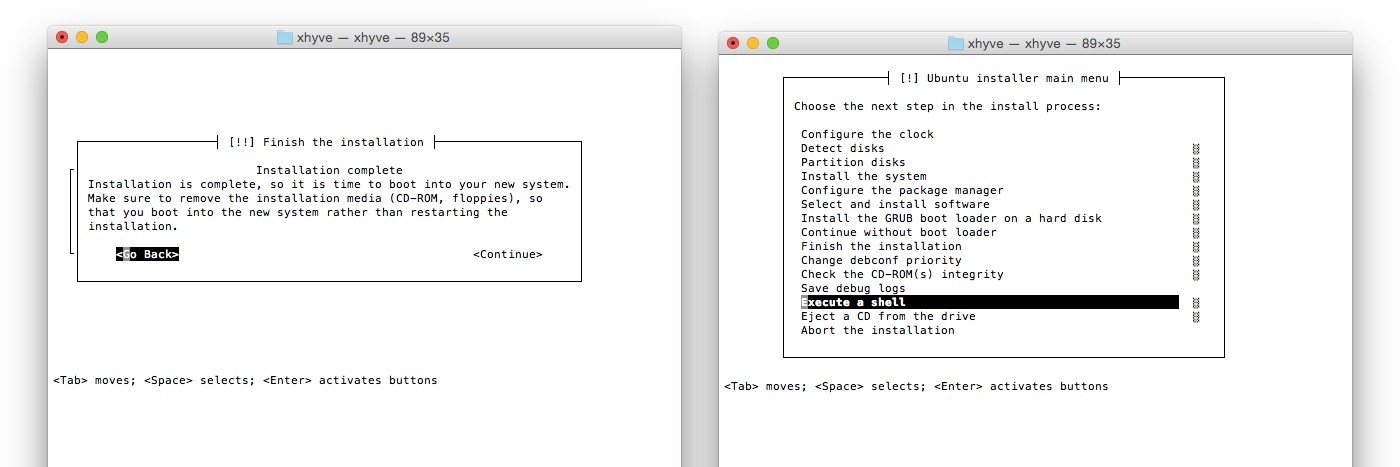
- Finish the installationのIs the system clock set to UTC? ▶Yes
- Finish the installationのInstallation complete ▶Go Back
At the very end, on the “Installation complete” screen, select “Go back” and “Execute a shell”, so you can copy the installed kernel and initrd to the Mac side. In the VM, type this:
[xhyve – Lightweight Virtualization on OS X Based on bhyve - pagetable.com]
最後の"Installation complete"スクリーンでは"Go back"から"Execute a shell"を選択し、"Continue"でシェルを起動します。
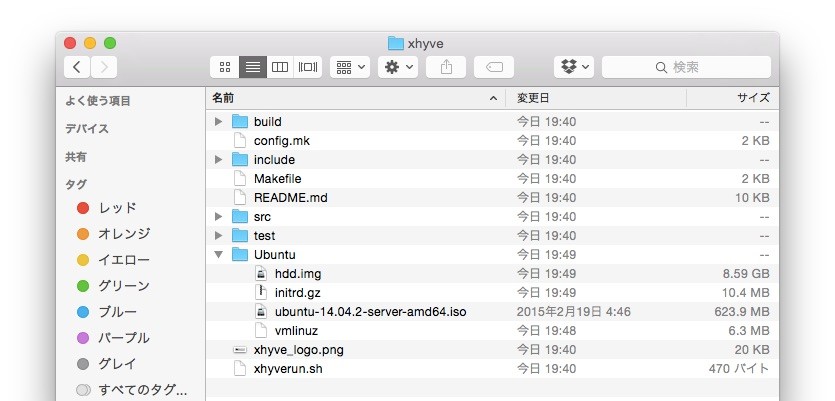
Ubuntuのインストールが終わったkernelとinitrd(bootディレクトリ)をMac側にコピーします。Mac側からUbuntuのIPアドレスを調べるすべがないので、Ubuntu側でifconfigを実行しIPメモったらMacでもう一つターミナルを起動し、ncコマンドでファイルを受け取ります。
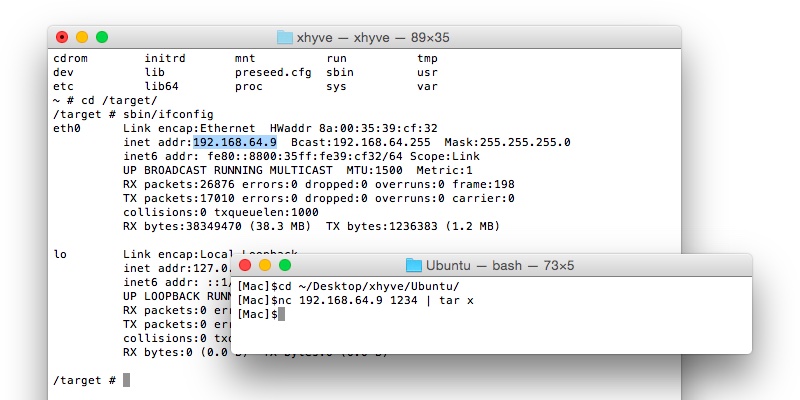
*Ubuntu側cd /target sbin/ifconfig tar c boot | nc -l -p 1234
*Mac側
cd ~/Desktop/xhyve/Ubuntu/
$ nc 192.168.XXX.XXX 1234 | tar x
これでUbuntuインストールプロセスは終了で、Ubuntu側で"exit"を入力し"Finish the installation"で"Yes"を選択しUbuntuを一旦終了して下さい。
4.Ubuntuを起動しapt-get
インストールが終わったら先ほどコピーしたbootディレクトリの仮想ディスクを使用してUbuntuを起動します。

以下のrunスクリプトを"xhyverun_ubuntu.sh"という名前でxhyveディレクトリに保存し、rootで実行。スクリプトのkernelとinitrdはbootディレクトリ内のバージョンに合わせておいて下さい。
#!/bin/sh
KERNEL="ubuntu/boot/vmlinuz-3.16.0-30-generic"
INITRD="ubuntu/boot/initrd.img-3.16.0-30-generic"
CMDLINE="earlyprintk=serial console=ttyS0 acpi=off root=/dev/vda1 ro"
MEM="-m 1G"
#SMP="-c 2"
NET="-s 2:0,virtio-net"
IMG_HDD="-s 4,virtio-blk,ubuntu/hdd.img"
PCI_DEV="-s 0:0,hostbridge -s 31,lpc"
LPC_DEV="-l com1,stdio"
build/xhyve $MEM $SMP $PCI_DEV $LPC_DEV $NET $IMG_CD $IMG_HDD -f kexec,$KERNEL,$INITRD,"$CMDLINE"
sudo ./xhyverun_ubuntu.sh
設定したユーザー名とパスワードでログインしたらapt-getで"openssh-server", "xubuntu-desktop","vnc4server"をインストール。インストールが終了したらvnc4serverコマンドで"1024x768"の解像度のVNCを起動。
sudo apt-get install openssh-server xubuntu-desktop vnc4server
vnc4server :0 -geometry 1024x768
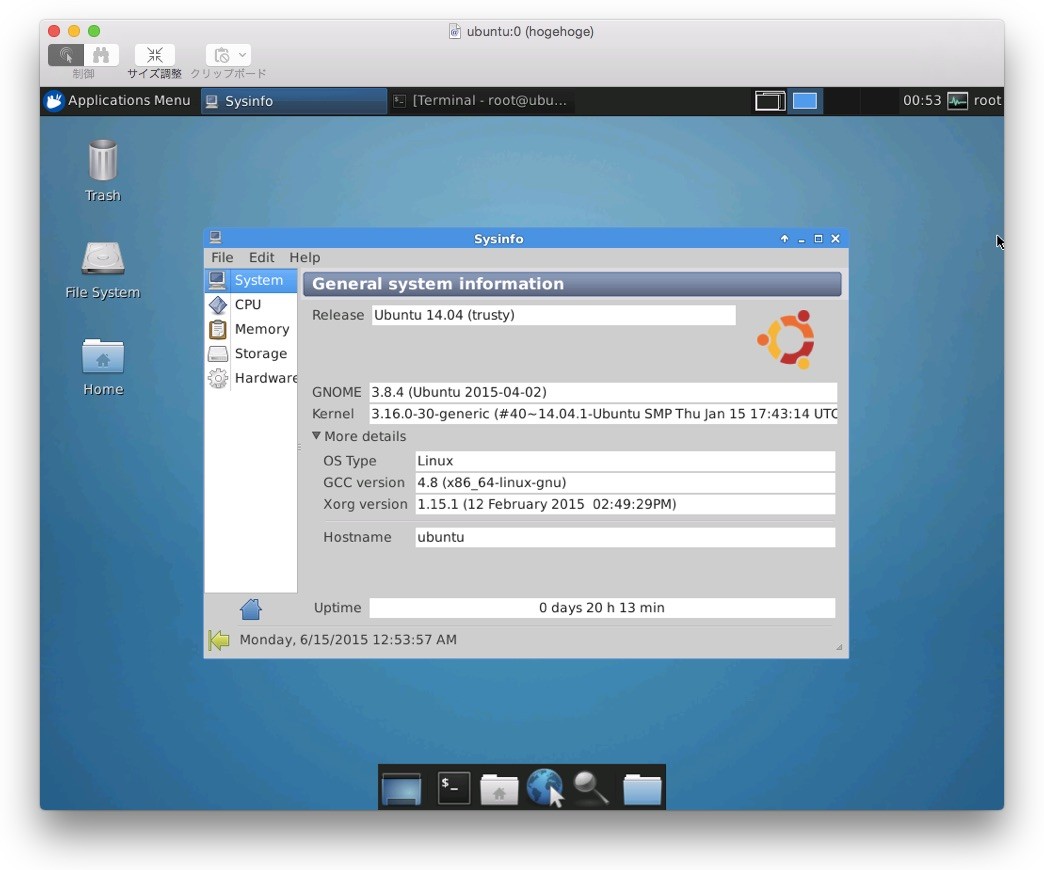
5.Ubuntu Desktopを起動(startxfce4)
Mac側でFinderを選択し[Command + K]で「サーバへ接続」ダイアログを出し、サーバーアドレスに"vnc://ubuntu.local"を入力してUbuntuにアクセスすればUbuntu Desktopが表示されるはずです。

Ubuntu DesktopにはXfceも同梱されているので、startxfce4コマンドで起動すれば見慣れたUbuntuの画面が表示されるはずです。
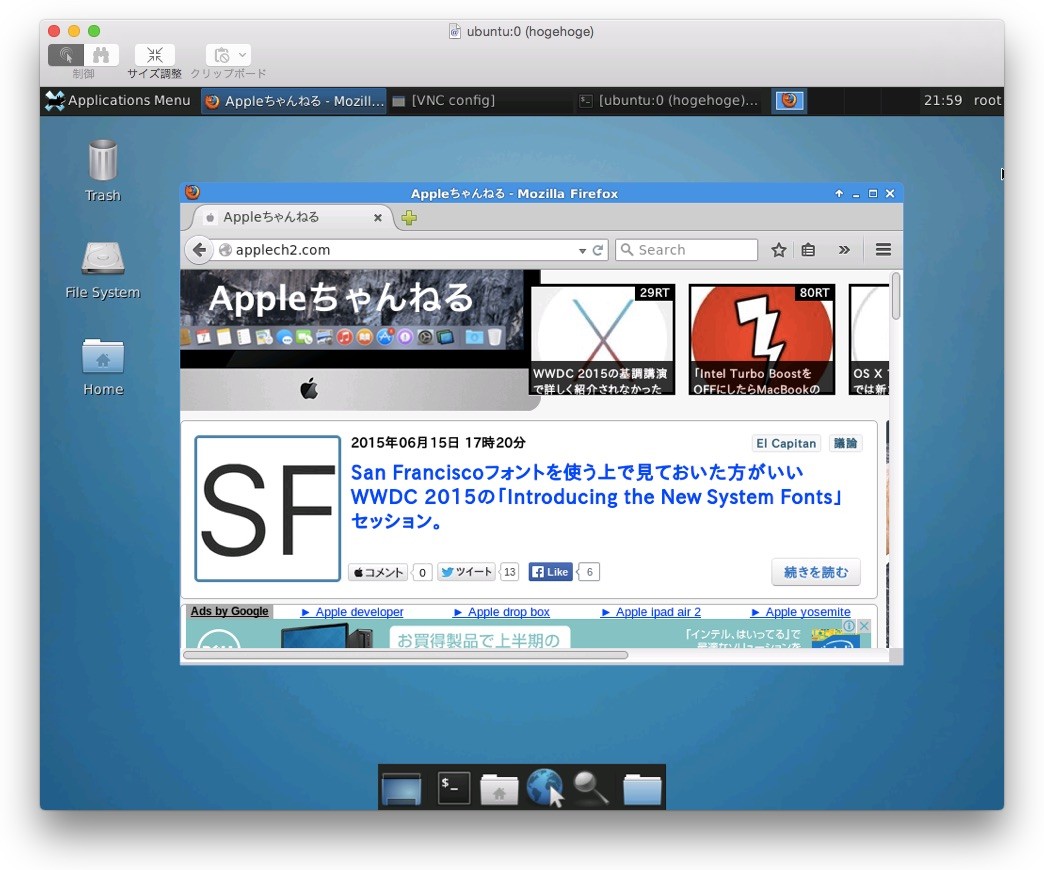
sudo startxfce4
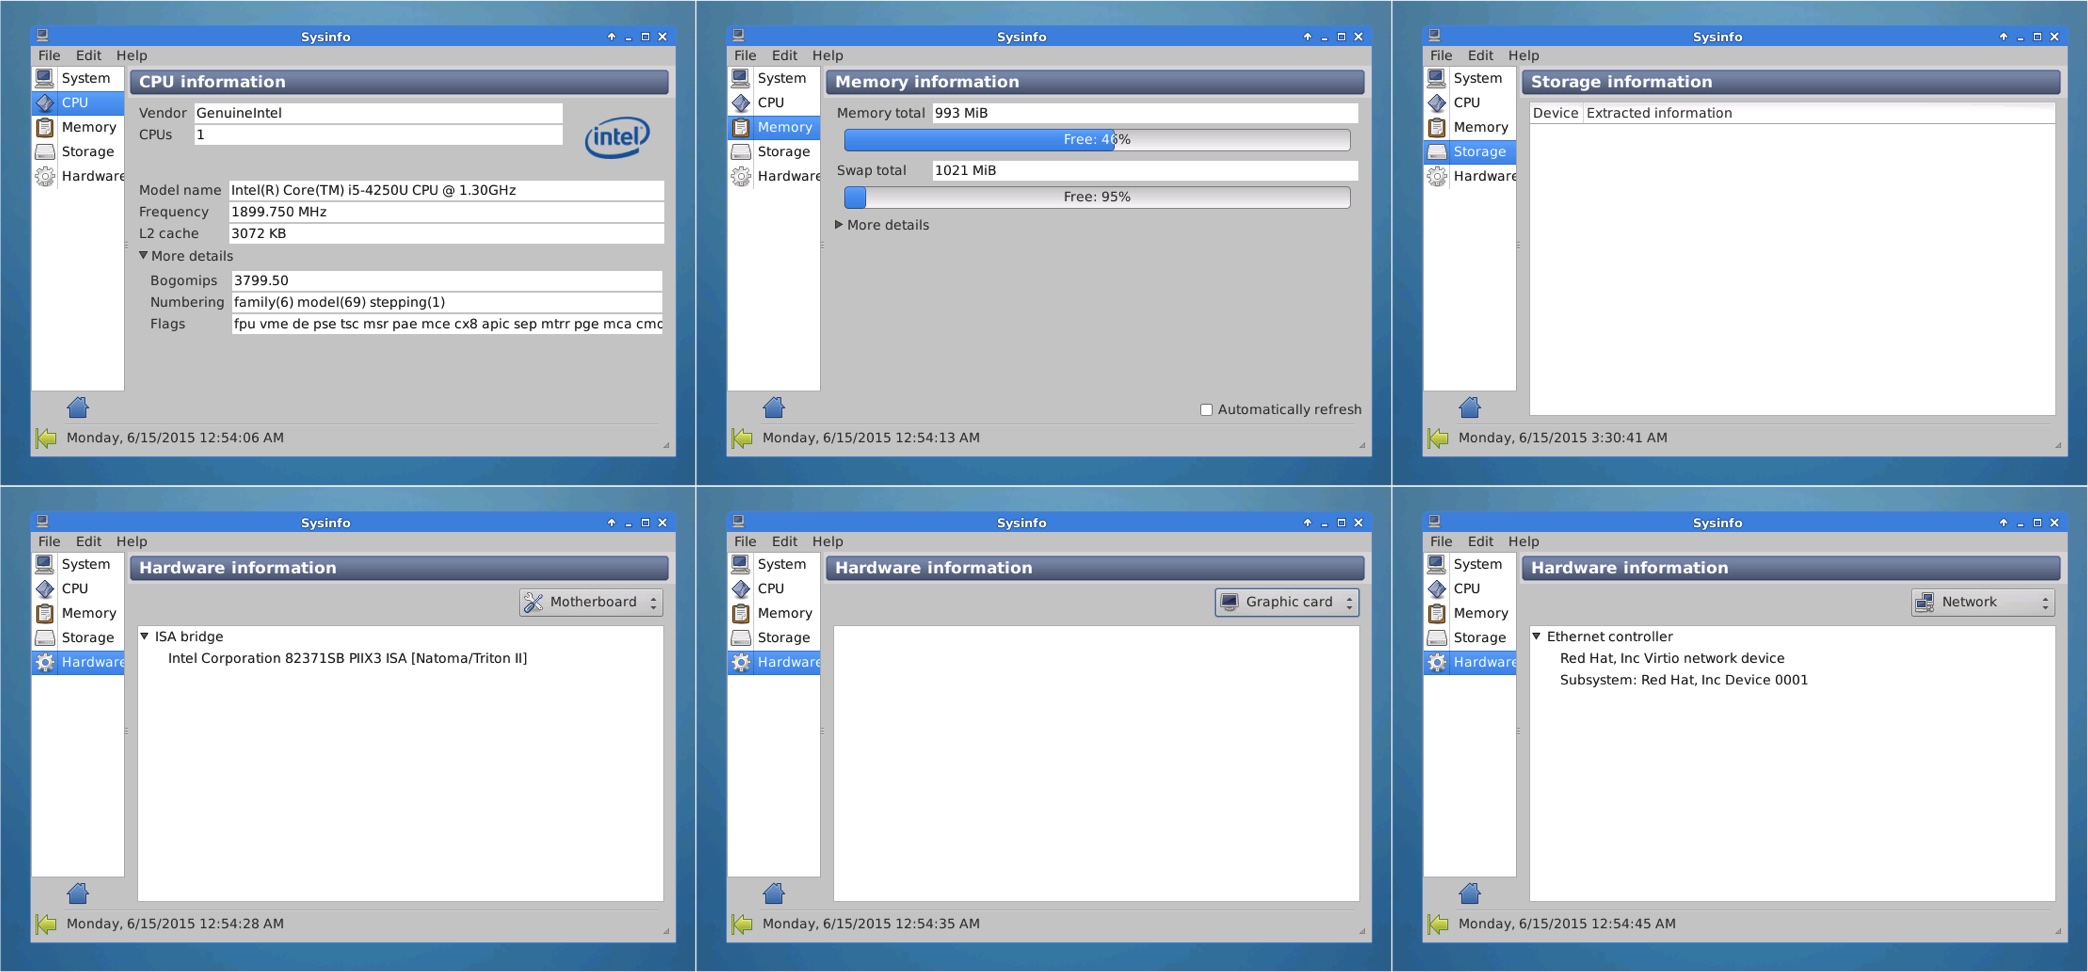
作成された仮想マシンはrunスクリプトのオプション通り、1CPU, 1GB Memoryで仮想ネットワークが繋がっているという最低限の環境ですが、boot2docker[1,2]などちょっとした開発環境や実験環境を作成するには便利です。
Ubuntuの他にもFedoraやCentOSの起動にも成功したというコメントを頂いたので、興味のある方は関連リンクからxhyveのGitHubへどうぞ。(*xhyveの読み方はxhyveがbhyve【ビヘイブ】ベースということで【エックス ヘイブ】と発音している方が多いようです)
関連リンク:
コメントを書き込む