Learn how to make realistic alien-looking water with this photoshop tutorial
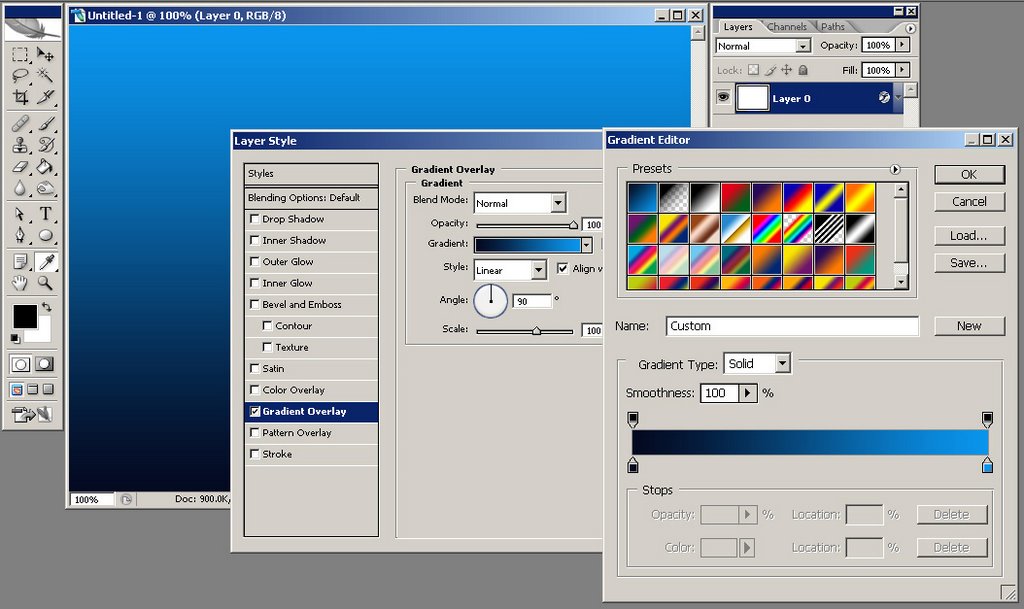
Again a Photoshop tutorial that may seem long, but it's only very detailed and very well explained. Open a new document, mine is 640x480 px. Double click the background layer in order to make it a normal layer. Set your foreground color to #050d24 and background to #0a96ee.Now double click your layer in order to bring up the Layer Style options. From the options available choose Gradient Overlay and from the Gradient picker choose Foreground to Background (it's the first one available). Make sure the darker color is on the bottom of the image and the brighter color is in the top of the image.
 Create a new layer above the current layer, fill it with black and then aplly a Difference Clouds filter on it (go to Filter > Render > Difference Clouds). Your image should look similar to this:
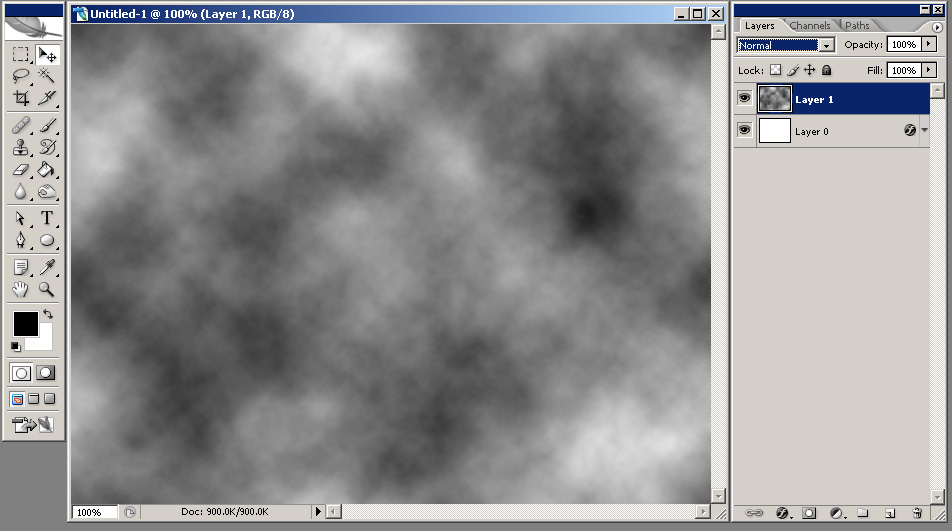 Now set the blending mode of the layer to Soft Light and the Opacity to 35%. You should have something similar to this:
 Create a new layer above the current layer, again fill it with black and then aplly a Difference Clouds filter on it then apply a Plastic Wrap filter with default settings (from Filter > Artistic > Platic Wrap). Your image should look similar to this:
 Now aplly the Free Transform command (Edit > Free Transform or CTRL+T) and transform your layer until you have something like in the image below (note: while you free transform your layer you can hold ALT, CTRL or ALT+CTRL+SHIFT for different options):
 Make a selection similar to what I have in the image below (the selection should cover the margins of the layer) and then go to Select > Feather (or ALT+CTRL+D on your keyboard) and enter a Radius of 40 px:
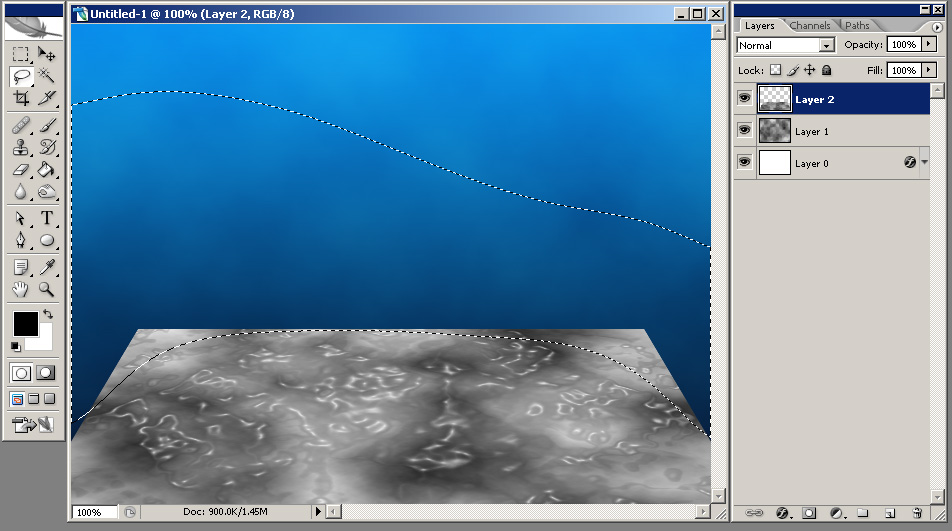 Press delete a few times and if necessary use the Eraser Tool with a Airbrush Soft Round brush of 200-300 px in order to obtain smoother margins. You should have something similar to this:
 Set the blending mode of the layer to Color Dodge and your image should look like this:
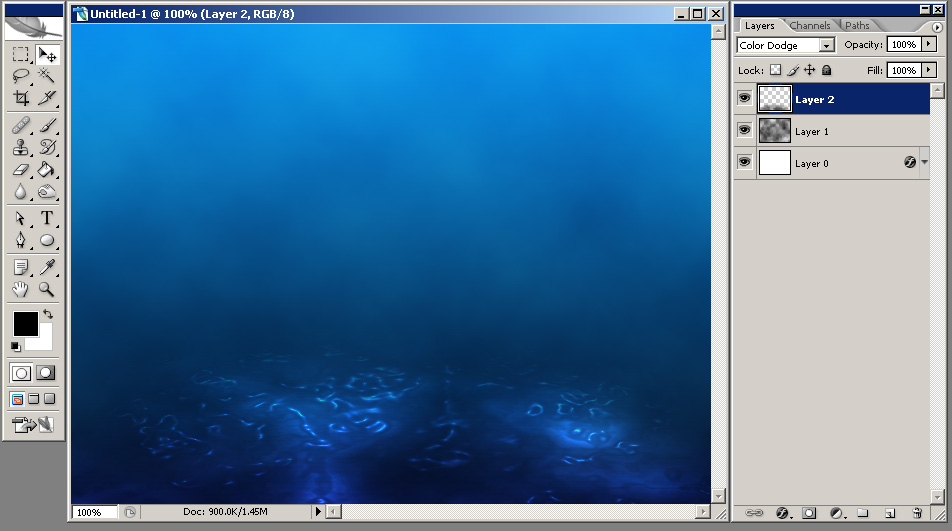 Now duplicate the top layer (go to Layer > Duplicate Layer or in the Layers Palette drag the top Layer over the Create New Layer icon) then go to Edit > Free Transform and with your Transform Controls active right click anywhere on the image and choose Flip Vertical then hit the Enter key. Move this new created layer on the top of your document and set it's blending mode to Soft Light. You should have something similar to this:
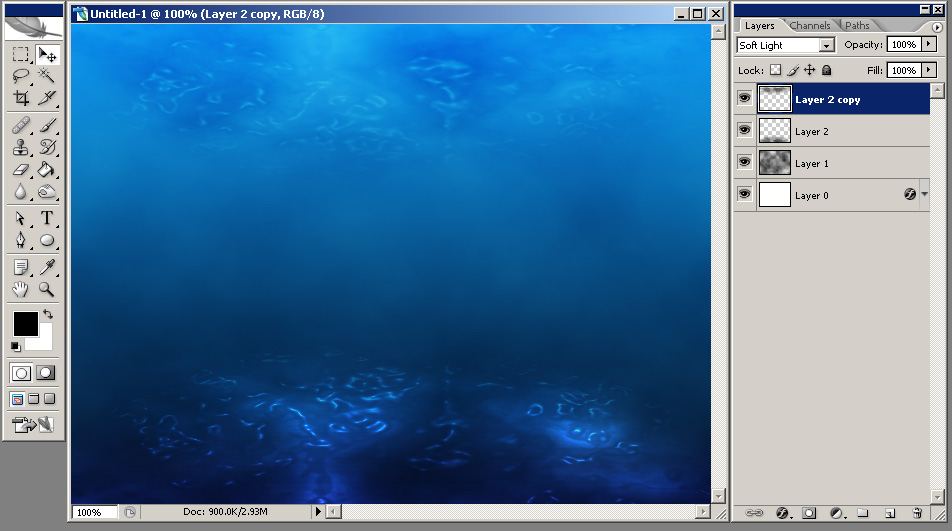 Using the Polygonal Lasso Tool make a selection like you see I've done in the image below:
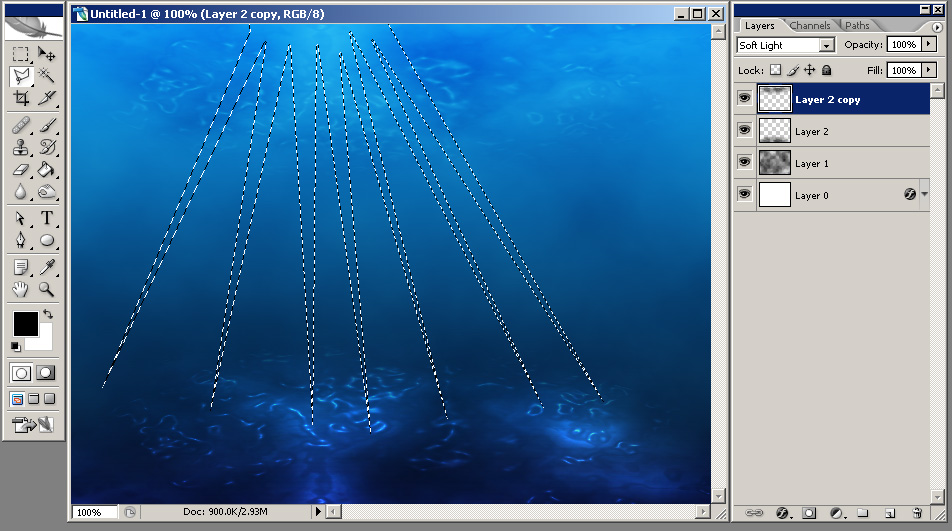 Go to Select > Feather (or ALT+CTRL+D on your keyboard) select a radius of 10 px, create a new layer above all layers and fill this selection with white:
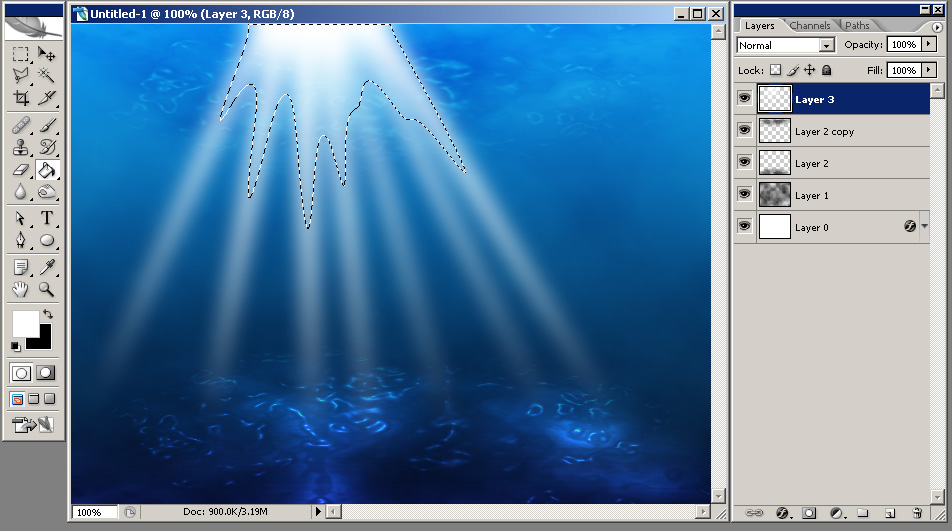 Set the layer's blending mode to Soft Light and the Opacity to 30% and your image should look like this:
 Using your Lasso Tool make a selection like you see I've done in the image below, go to Select > Feather and insert a Radius of 25px and then press delete a few times:
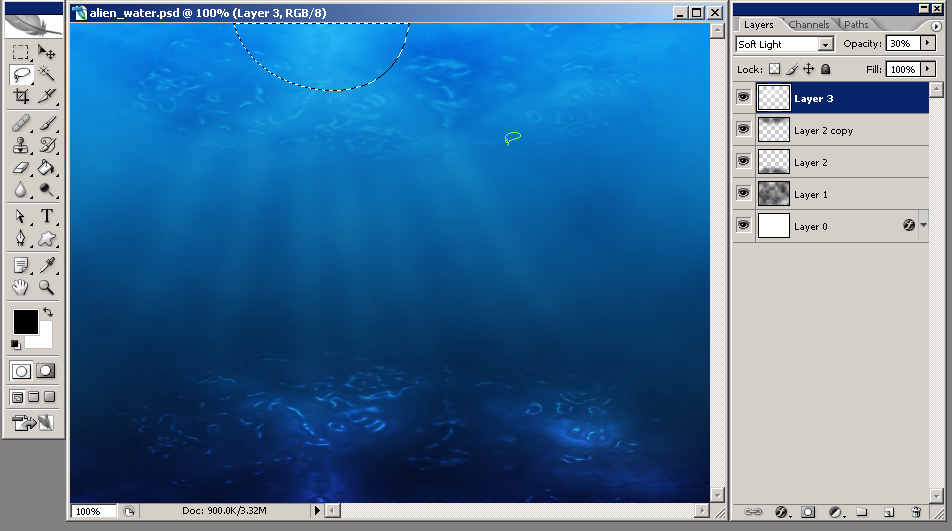 Create a new layer above all the layers in your document, fill it with black then go to Filter > Noise > Add Noise and set the Amount to 50-55%, Distribution to Gaussian and check Monochromatic:
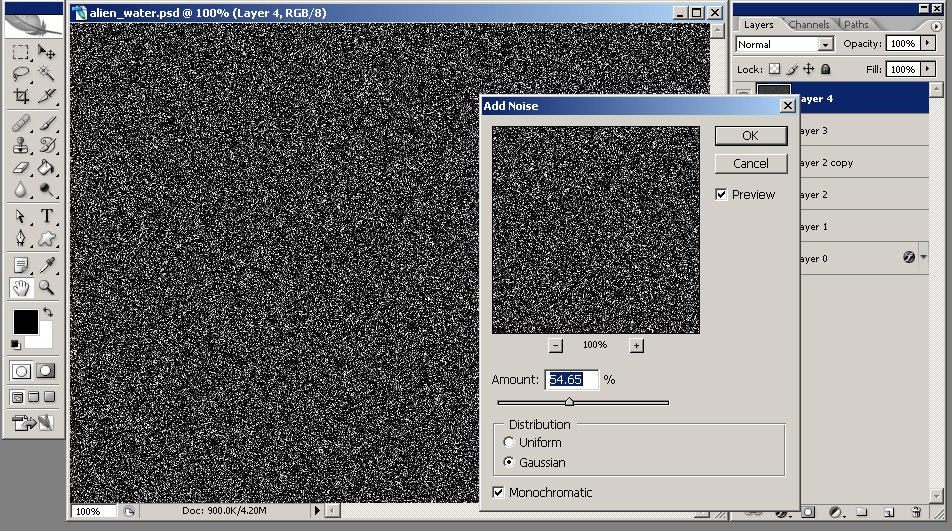 Now go to Filter > Blur > Radiul Blur and set the Amount to 100, Blue method to Zoom, Quality to Best and Blur Center to somewhere in the upper-left of your image. You should have something similar to this:
 Set the layer's blending mode to Soft Light and the Opacity to 35%. Make a selection like you see I've done in the image below:
 Go to Select > Feather (or ALT+CTRL+D on your keyboard) select a radius of 35 px and press delete a few times and there you have it:
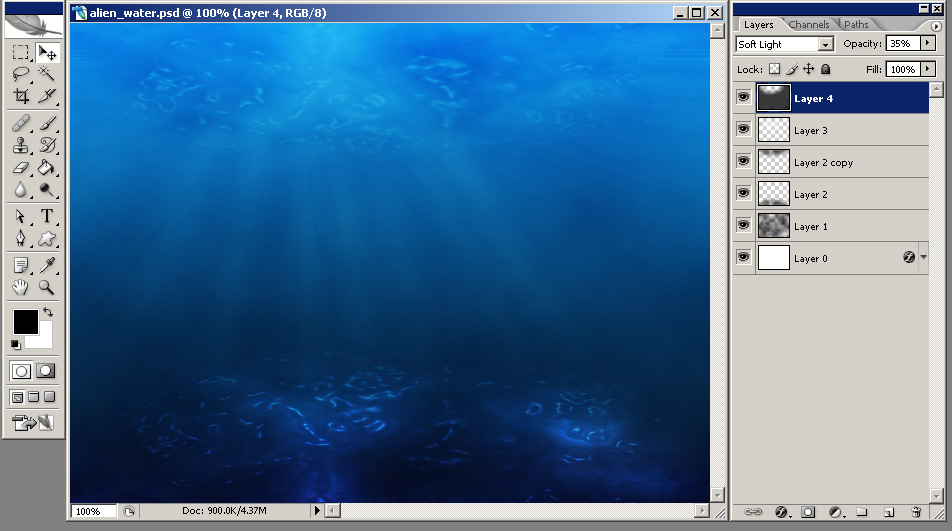 Of course, you can continue and add details to your image, I've added an alien ship, some rocks, fishes and air bubbles, but you can just use your imagination. That's it for now, I hope you enjoyed this new Photoshop tutorial. Stay tuned because soon I will show you how to do the image below:
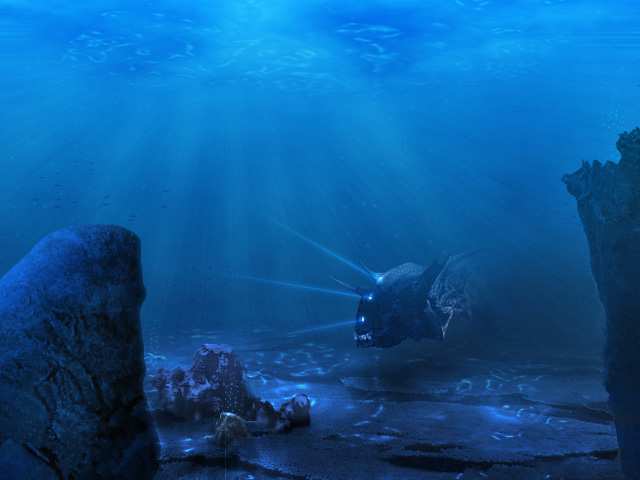 If you want to see how the rocks in this image were made, please click here.
I will be back with many more, until then check out some of my other photoshop tutorials:
30 comments:
yo B.... this image looks very very good.... and when u think this is only photoshop.... u rock
dude nice.... how did u make the rocks?
Man ive seen Some Pretty Nice Photoshop Things But Yours Are Just Pure Amazing. When Are You Going To Show Us How You Did The Rocks And That Alien Ship. Wow!
heyy i guess it is my lucky day! ur blog rocks! am a graphic designner too n i adore photshop. lovd ur tutorials.. i read all them today.. yeah ALL!! ;) kool... update plsss i so love it!
Thanks alot to all of you!
My next tutorial will be the underwater rocks tutorial since you asked for it.
yea the rocks are pretty sweet
Nice work easy and the results were superb but how did you do the rocks?
your work is great man.
eagerly awaiting for the rock tutorial
need to see how you did the sea floor
Really fab work !
Great tutorial, this helped me in a graphic of the week contest. Much love man.
I cant wait for ya to make the tut on makin the alien ship thingy thing! This tut rox!!
you have amazing tutorials, keep them coming!!!
The best tutorial for the best picture, you explained things really nice and make some more new tutorials!
I have to say, of every thing I have ever seen on photoshop, everything I have done, this surpasses it. When I first saw this I said no. No way, but sure enough it is. Your work is the best I have ever seen. Good job! ^__^
Great tutorial! Loved every minute of it!
Nice tutorial... how about a tutorial on the ship ??
plzz I need to know how... ^^
it's been way past a year. haven't seen the ship tut out :(
A great tutorial! Thanks!
Thank you for this tutorial. I posted the link to it on my blog and hopefully you can get more people to your site. Your stuff is amazing. I used it in my story for part of the pictures and put a link to it. Thank you once again.
Lisa :-)
What you said is I thought of .Here is some of new battery fpr your laptop.
Gr8 tutorial. Thanks. If u don't mind me asking how did u make that ship?
Its was very Nice Tutorial........Really Love it
Nice tut, BUT how do I make the artistic plastic wrap? After I fill layer with black and difference cloud it, I can not choose "artistic" from the filter menu (cant click on it) Can anyone PLEASE help me? Thanks!
woh..u so great..i love this effect,pretty nice!thx
Today is the gold für wow second day of 2009 ,world of warcraft gold it also a mesos special for me .cheap wow gold Because i have cheap maplestory mesos a chance to go to an english speech of LiYang and crazy to learn english follow him . He is a firendly,kindly person who make me feel good.wow gold kaufen What‘s more ,maple story mesos he very confidence .And he make me sure what he can do i also can do,as long as i make a determination and force myself to do it every second,Crazy just like him .wow geld I learn one setence from his book ever :maple story items If you want to succeed always force yourself to do more .I can't agree more with him .wow gold farmen To be honest ,when i was a littel girl i already fall in love with english.But what a pity i am poor in english ,Maple Story Account and it make me feel frustrating .So i want to give up many times ,but i can't as i still love it .So i tell mysefl :if you think you can you can wow leveling,and all your maple story power leveling hard work will pay off.wow power leveling Today i am very happy i can listien this wonderful speech of LiYang. I reap a great benifits from him .maple story money As he say :i am the best ,and every one can do it . world of warcraft power leveling Yes,i belive i can do it if i crazy as he buy archlord gold.Now i want to say :i will never give up.
welcome to the wow power leveling cheap Wow gold service site, buy cheap wow gold,wow gold,world of warcraft power leveling buy wow gold
good post
simply amazing., its really simple to do coz of the step by step directions. thanks man!
Hi,
your tutorial is very good.
I'm beginner of Photoshop, but I was able to realize the backcloth under water.
Instead, the rock is too difficult for me ,but I will tray again! :-)
Post a Comment