手順
- Identity & Access Management でロール作成
- ELB のログ出力設定
- Amazon Elasticsearch Service 作成
- AWS Lambda 設定
- Amazon Elasticsearch で確認
- Kibana 表示
参考 URL
http://qiita.com/toshihirock/items/e530f3cb6dcf545601c9
http://dev.classmethod.jp/cloud/aws/elb-accesslog-to-elasticsearch/
http://kenzo0107.hatenablog.com/entry/2015/10/08/113110
Identity & Access Management でロール作成
ロール名の設定

適宜ロール名を入力。
ロールタイプの選択

AWS Lambda を選択。
ポリシーのアタッチ

以下にチェックを入れ、ロールを作成する。
- AmazonS3ReadOnlyAccess
- AmazonESFullAccess
ELB のログ出力設定
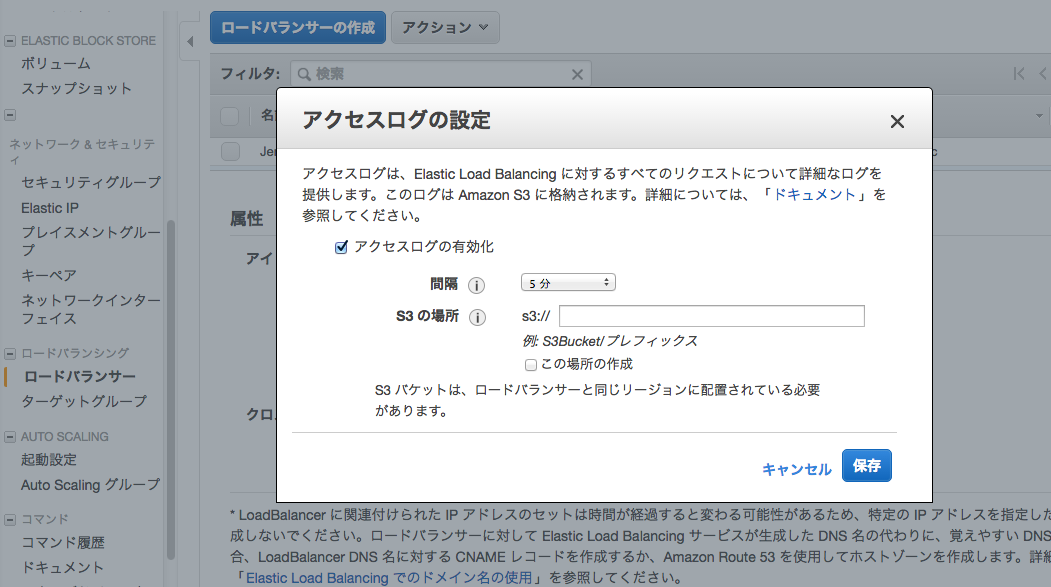
ELB の設定画面で、ログを取得したいロードバランサーを選択し、アクセスログの設定を以下のように適宜入力する。
アクセスログの有効化: チェック
間隔: 5分
S3の場所: 適宜
この場所の作成: チェック
Amazon Elasticsearch Service 作成
ドメイン作成
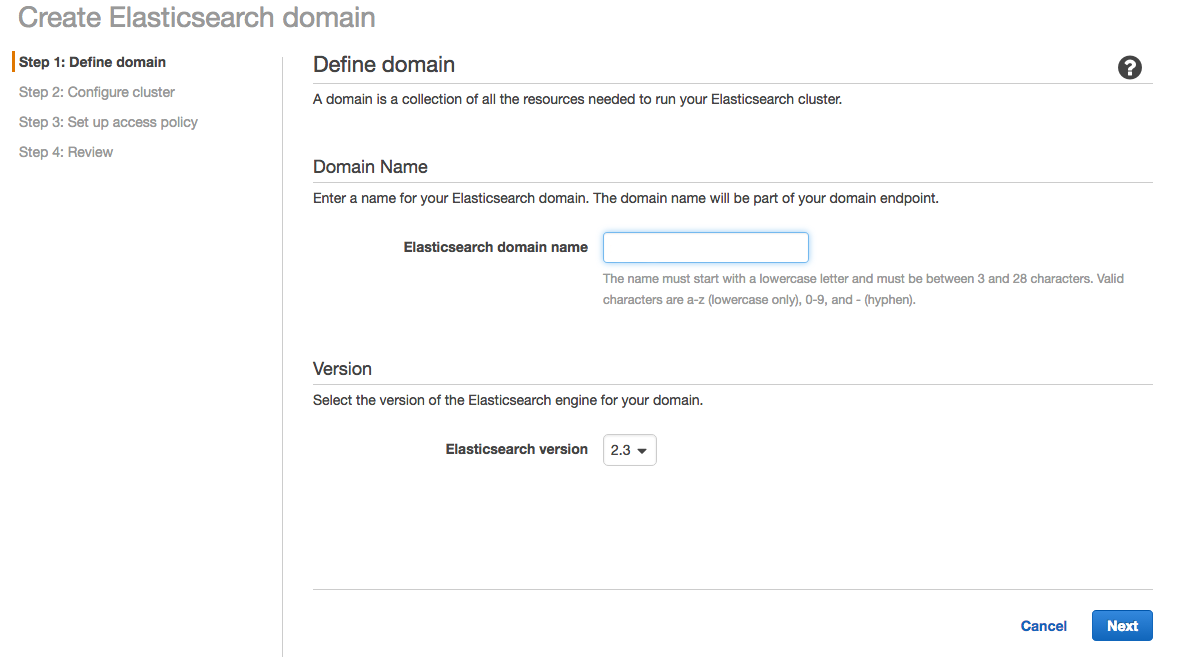
ドメイン名を適宜入力。

インスタンスタイプは、とりあえず t2.micro ではじめてみる。

t2.micro の場合は、ストレージタイプは EBS 。
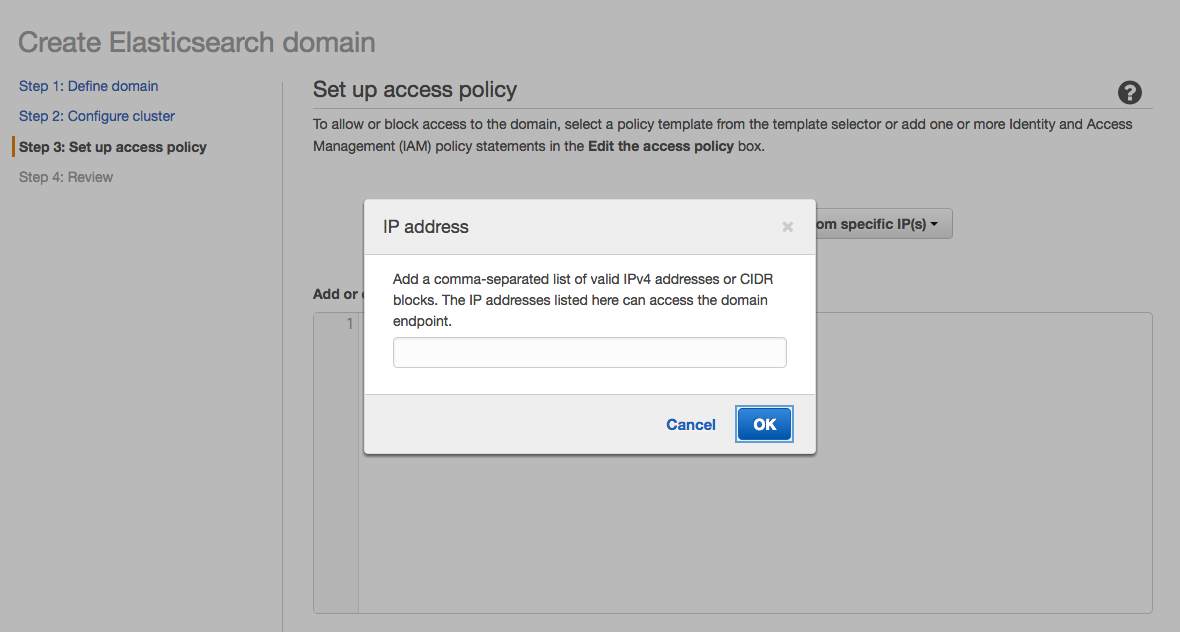
アクセスポリシーは、とりあえず自分の IP にし作成してみる。
インスタンスが Activate になるまで、ひたすら待つ。
(CloudFront のときほどではないが、ちょっと時間がかかる。)
AWS Lambda 設定
Lambda のコード作成
Amazon 公式のリポジトリから s3 から Elasticsearch へ登録するコードを取得
$ mkdir ~/Desktop/s3_lambda_es
$ cd ~/Desktop/s3_lambda_es
$ git clone https://github.com/awslabs/amazon-elasticsearch-lambda-samples.git
Lambda プロジェクト作成
$ mkdir elb-auth-log
$ cd elb-auth-log
$ cp ../amazon-elasticsearch-lambda-samples/src/s3_lambda_es.js index.js
ライブラリインストール
$ npm install aws-sdk byline elb-log-parser
index.js 編集
$ vim index.js
- var parse = require('clf-parser');
+ var parse = require('elb-log-parser');

- endpoint: 'my-search-endpoint.amazonaws.com',
+ endpoint: 'search-auth-es-s62imvjldcoewomubtlsriupoy.ap-northeast-1.es.amazonaws.com',

- region: 'my-region',
+ region: 'ap-northeast-1',

- doctype: 'apache',
+ doctype: 'elb',
ZIP で圧縮
$ zip -r es-elb-log.zip index.js node_modules
AWS Lambda Funcion 作成
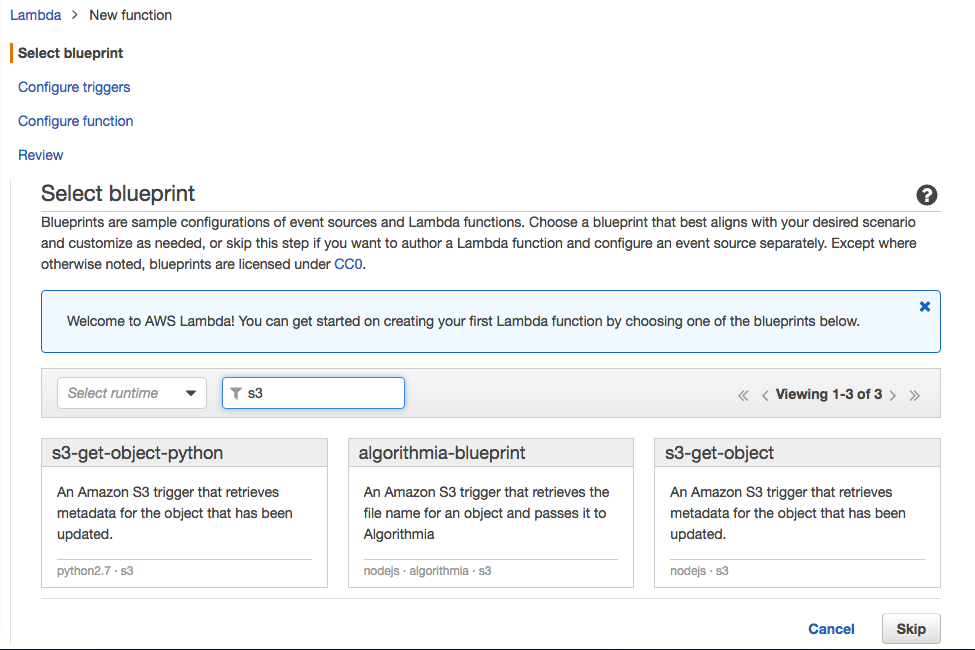
s3-get-object を選択。
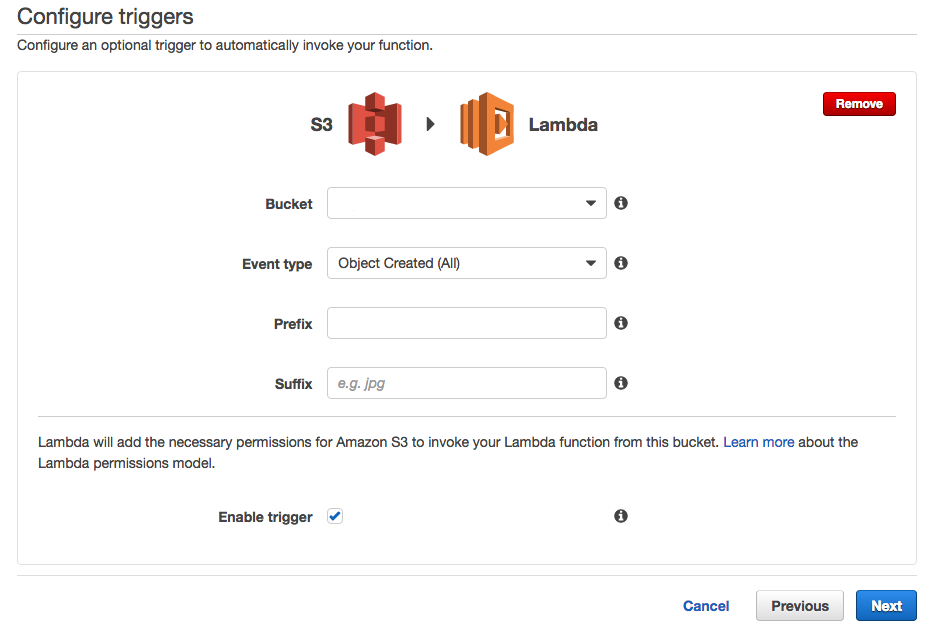
Bucket: バケットを指定
Event type: Object Created (All)
Prefix: 適宜
Suffix: なし

Enable trigger: チェック入れる
Configure function
Name: ファンクション名

Code entry type: Upload a .ZIP file

Function package: es-elb-log.zip

Role: Choose an existing role

Role name: 上記で作成したロール名
Advanced settings
Timeout: 3 min
Amazon Elasticsearch で確認
Elasticsearchのヘルスチェック
ターミナルで curl を実行
$ curl -XGET search-xxxxxxxxxxxxxxxxxxxxxxxxx.ap-northeast-1.es.amazonaws.com ← ここは作成した Elasticsearch のエンドポイント
以下のような json が返ってくればOK。
{
  "name" : "xxxx",
  "cluster_name" : "xxxxxxxx:xxxxx",
  "version" : {
    "number" : "2.3.2",
    "build_hash" : "0944b4bae2d0f7a126e92b6133caf1651ae316cc",
    "build_timestamp" : "2016-05-20T07:46:04Z",
    "build_snapshot" : false,
    "lucene_version" : "5.5.0"
  },
  "tagline" : "You Know, for Search"
}
インデックス一覧
$ curl -XGET search-xxxxxxxxxxxxxxxxxxxxxxxxx.ap-northeast-1.es.amazonaws.com/_aliases?pretty
以下のような json が返ってくればOK。
{
  "logs" : {
    "aliases" : { }
  }
}
インデックスのマッピング一覧
$ curl -XGET search-xxxxxxxxxxxxxxxxxxxxxxxxx.ap-northeast-1.es.amazonaws.com/_mapping?pretty
以下のような json が返ってくればOK。
{
  "logs" : {
    "mappings" : {
      "elb" : {
        "properties" : {
          "backend" : {
            "type" : "string"
          },
          "backend_port" : {
            "type" : "string"
          },
          "backend_processing_time" : {
            "type" : "string"
          },
          "backend_status_code" : {
            "type" : "string"
          },
          "client" : {
            "type" : "string"
          },
          "client_port" : {
            "type" : "string"
          },
          "elb" : {
            "type" : "string"
          },
          "elb_status_code" : {
            "type" : "string"
          },
          "received_bytes" : {
            "type" : "string"
          },
          "request" : {
            "type" : "string"
          },
          "request_http_version" : {
            "type" : "string"
          },
          "request_method" : {
            "type" : "string"
          },
          "request_processing_time" : {
            "type" : "string"
          },
          "request_uri" : {
            "type" : "string"
          },
          "request_uri_host" : {
            "type" : "string"
          },
          "request_uri_path" : {
            "type" : "string"
          },
          "request_uri_port" : {
            "type" : "string"
          },
          "request_uri_scheme" : {
            "type" : "string"
          },
          "response_processing_time" : {
            "type" : "string"
          },
          "sent_bytes" : {
            "type" : "string"
          },
          "ssl_cipher" : {
            "type" : "string"
          },
          "ssl_protocol" : {
            "type" : "string"
          },
          "timestamp" : {
            "type" : "date",
            "format" : "strict_date_optional_time||epoch_millis"
          },
          "user_agent" : {
            "type" : "string"
          }
        }
      }
    }
  }
}
kibana 表示
URL
https://search-xxxxxxxxxxxxxxxxxxxxxxxxx.ap-northeast-1.es.amazonaws.com/_plugin/kibana/

Settings
Index contains time-based events: チェック入れる
Use event times to create index names: チェックしない

Index name or pattern: logs
以下のように表示されます。

以上です。